Modular Blocks Quilt
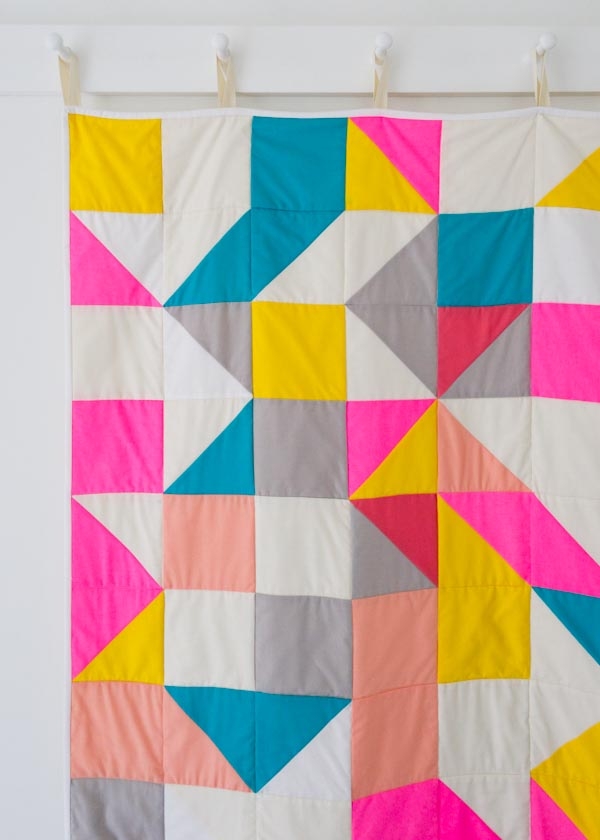
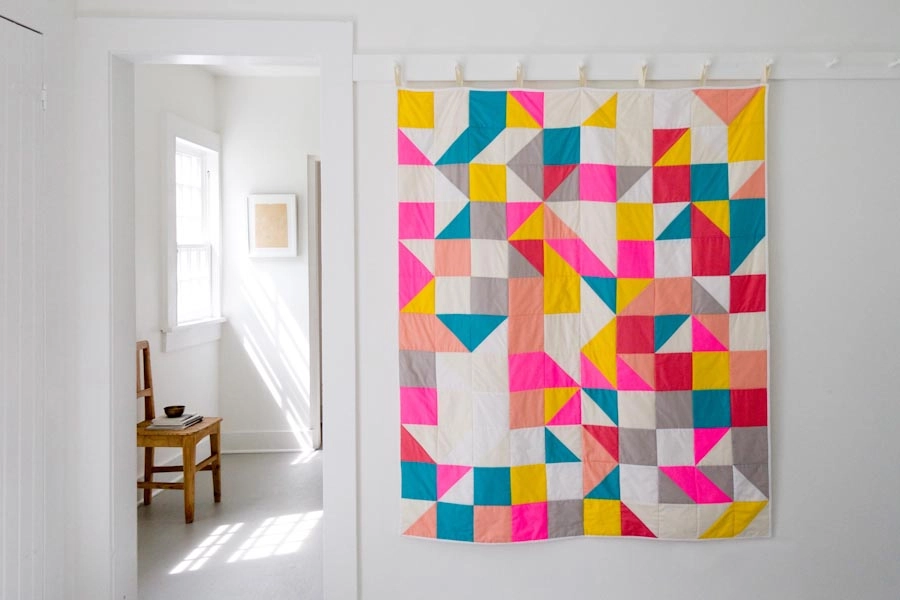
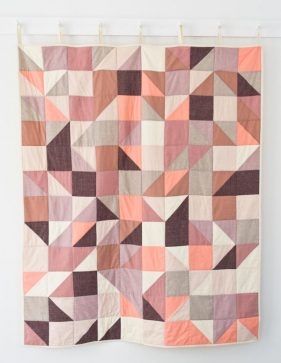
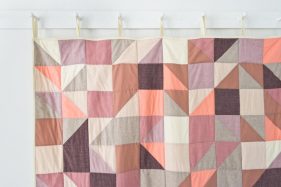
This Modular Blocks Quilt is the direct descendent of last year’s Modular Felt Coasters. It occurred to me then, when I saw all of those Coasters lying out together, that I would definitely have to create a quilt with the same easy-going assembly and playful spirit.

Our resulting Modular Blocks Quilt makes for some truly exciting sewing: a systematic construction method combined with a keep-you-guessing layout. And just like the Coasters, you can sew up this project in a weekend and have a great time doing it. Pick up our Modular Blocks Quilt Bundle to get started! – Molly

Update: New Fabric
February 8, 2016
We created a version of this quilt with a new materials bundle! To see more photos check out our Modular Blocks Quilt in Orchid post and to pick up a new bundle click here!
Materials

To sew your own Modular Blocks Quilt, you will need…
- Backing Fabric: 1 3/4 yards of Moda’s Muslin (90-inch, 200-count) in White
- Binding Strip Fabric: 1 yard of Robert Kaufman’s Kona Cotton in White
- 3/4 yard of Robert Kaufman’s Kona Cotton in Bone
- 1/2 yard of Robert Kaufman’s Kona Cotton in Citrus
- 1/2 yard of Robert Kaufman’s Kona Cotton in Ash
- 1/2 yard of Robert Kaufman’s Kona Cotton in Breakers
- 1/2 yard of Michael Miller’s Neon Solids in Pink
- 1/2 yard of Robert Kaufman’s Kona Cotton in Melon
- 1/2 yard of Robert Kaufman’s Kona Cotton in Peach
- Two spools of Gutermann’s 100% cotton thread in color 1040 (a 110-yard spool and a 274-yard spool)
- A Natural Request Dream batting, size Twin
- (Please Note: The original fabrics used in this quilt have been discontinued but our Spectrum Cotton makes a fabulous substitution! To browse our entire line of fabric, click here!)
You will also need…
- Quilter’s Curved Safety Pins
- Purl Soho’s Rotary Cutting Tool Kit
- A hera marker
Size
50 inches wide X 60 inches long
Notes
Prewash and iron all of the fabrics (but not the batting) before beginning.
All seam allowances are ¼ inch unless otherwise noted.
Pattern
Cut

If you’re new to rotary cutting, please refer to our Rotary Cutting Tutorial before you start.
From the Backing Fabric cut…
- A 56 X 66-inch rectangle. This is the Backing.
From the Binding Strip Fabric cut…
- Six 2 1/4-inch strips from selvage to selvage and then trim off the selvages. These are the Binding Strips; put them aside for now.
- Seven 5 ½-inch squares
- Eight 5 7/8-inch squares
From the Kona Cotton in Bone cut…
- Twelve 5 ½-inch squares
- Eleven 5 7/8-inch squares
From all other fabrics cut …
- Seven 5 ½-inch squares
- Eight 5 7/8-inch squares
Piece the Half Square Triangles
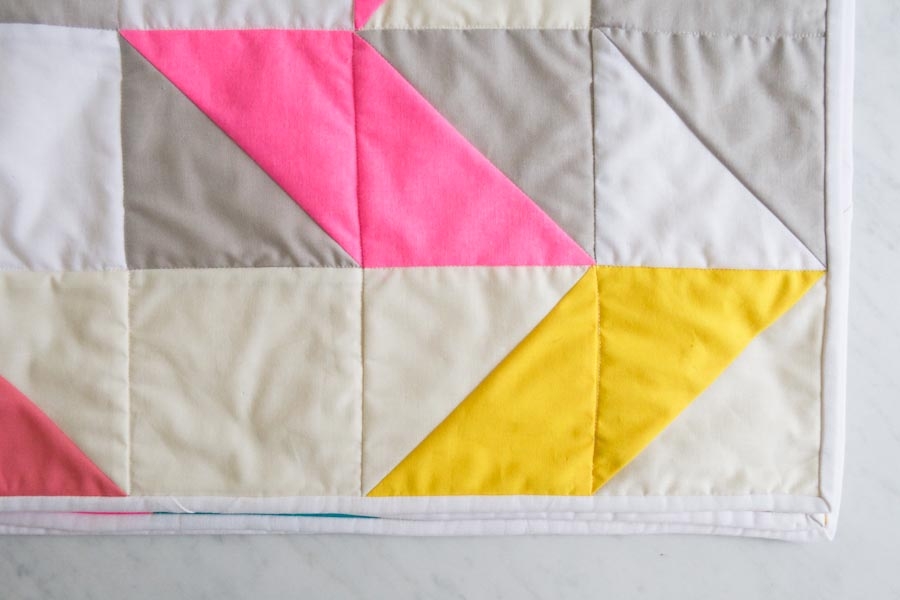
All of the 5 7/8-inch squares will be pieced into half square triangles, a very basic quilt block that consists of a square made up of two equally sized right triangles.
For this quilt you will make 67 half square triangles, so rather than sewing them one pair at a time, it’s a good idea to chain piece them. Here’s how…

Pick out two 5 7/8-inch squares of different colors. On one of the squares, mark a diagonal line from one corner to another using the hera marker. This is the Diagonal Mark. Align one square on top of the other, and pin them together along the Diagonal Mark.
Do this for all of the 5 7/8-inch squares, making sure that each square is pinned to one of a different color.

Using your machine’s ¼-inch foot, first sew across a piece of scrap fabric (aka “the lead fabric”), then without lifting the presser foot or cutting the thread, place a pair of pinned pieces in front of the presser foot and ¼ inch to the left of the Diagonal Mark. Sew these two pinned pieces together ¼ inch from the Diagonal Mark. At the end of that seam, place the next pair of pieces in front of the presser foot, and repeat the process. (Between the two pairs, you can expect a short length of stitches that don’t go into any fabric at all.)

After you have sewn all of the pairs together this way, remove the long chain of pieces from the machine and sew down the opposite side of the Diagonal Mark. Start with a lead fabric, and then move on to the last pair you sewed in the previous step but now sewing in the opposite direction. You will again be sewing the pieces 1/4 inch to the left of the Diagonal Mark. Chain piece all of the squares together in this manner.

Carefully snip the threads between each piece. Discard the two lead fabrics.
Using your rotary cutter, cut along the Diagonal Mark of each pair. This will yield two triangle-shaped pieces from each pair of squares.

Open these pieces so that they form a 5 1/2-inch square, and press the seam allowances towards the darker fabric.
These are your Half Square Triangle Blocks.
Piece the Top
Notes:
- In all of the following steps, pin the pieces right sides together.
- When you pin multiple squares together, pay special attention to lining up the middle seams and the corners exactly with one another.
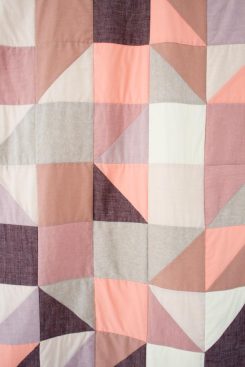
- The only rule is that you shouldn’t place a plain square adjacent to another plain square of the same color. Other than that, you really can place any square with any other square, in any orientation.
- The beauty of this quilt is in its randomness, so try not to overthink the layout!
1 X 2 Square Units
Gather all of your cut squares, both the Half Square Triangles and the plain 5 ½-inch squares.
Randomly make 60 pairs of squares, aligning one square on top of the other to form a pair (see Notes, above). You will have eight squares left over, put them away for another purpose.
With right sides together, pin across one side of the pair of squares.
Chain piece along these 60 pinned edges and then snip the threads between each piece.
Open the two pieces, and press the seam allowances towards the darker fabric.

You now have sixty 1 X 2 Square Units. (Three of these units are shown above, just to demonstrate how different they each can look!)
2 X 2 Square Units
Pin each 1 X 2 Square Unit to another 1 X 2 Unit across one of the longer sides.
Chain piece along these 30 pinned edges and then snip the threads between each piece.
Open the two pieces, and press the seam allowances towards the darker fabric.

You now have thirty 2 X 2 Square Units.
2 X 4 Square Units
Put aside six of the 2 X 2 Square Units. (You will use them later in the “Create Horizontal Rows” section.)
Pin each of the 24 remaining 2 X 2 Square Units into pairs, across one side.
Chain piece these 12 pinned edges and then snip the threads between each piece.
Open the two pieces, and press the seam allowances towards the darker fabric.
You now have twelve 2 X 4 Square Units.
2 X 8 Square Units
Pin all of the 2 X 4 Square Units into pairs, across one of their shorter sides.
Chain piece these six pinned edges and then snip the threads between each piece.
Open the two pieces and press the seam allowances towards the darker fabric.
You now have six 2 X 8 Square Units.
Create Horizontal Rows
Pin each of the six 2 X 2 Square Units that you put aside to a short edge of a 2 x 8 Square unit.
Chain piece these six pinned edges and then snip the threads between each piece.
Open the two pieces and press the seam allowances towards the darker fabric.
You now have six 2 X 10 Square Units. These are the Horizontal Rows.
Piece the Horizontal Rows
Pick out which two Horizontal Rows you want to be at the top. These are Rows 1 and 2. Pin the top long edge of Row 2 to the bottom long edge of Row 1.
Sew these Rows together and press the seam allowance towards Row 2.
Pick out Row 3 and pin its top long edge to the bottom long edge of Row 2. Sew these Rows together and press the seam allowance towards Row 3.
Sew all of the Horizontal rows together in this manner. When you are done you will have your finished quilt top. It will be 10 squares wide and 12 squares tall. Press it flat.
Baste
Baste the quilt to prepare it for quilting. If you’ve never done this, please check out our tutorial. (When you make the quilt sandwich, you will have to trim down the batting after you lay it on top of the Backing and before you place the quilt top on it.)
Quilt
You can quilt in any pattern you like, as long as there are quilting stitches no less than 8 inches apart. We chose to “stitch in the ditch” for our quilt, sewing along the grid of the 5-inch squares. To quilt by machine, use your machine’s walking foot and sew right beside the seam on the side without the seam allowances pressed under it. Quilt all the vertical and horizontal straight seams. Here’s how…
Start by sewing along a middle seam line, ending a couple of inches into the batting. Cut the thread and then sew in the reverse direction along the next seam to the right. Repeat this process, reversing direction for each seam to the right. Then, do the same thing along all the seam lines on the left side of the center line, reversing direction as you sew each line. And finally, repeat for the all seam lines perpendicular to the ones you just sewed.
Once you’ve finished quilting, trim the batting and backing to match up with the top.
Bind
Use the Binding Strips you cut from Fabric B to bind the Quilt with double fold binding. For instructions on how to do this, please check out our Making Double Fold Binding and Sewing on Double Fold Binding tutorials!





Where do I get that sewing machine foot like you have in the picture? I like that better than the 1/4″ foot I have.
Hi Anny-
Here is a link to my 1/4 inch foot. But it’s made specifically for a Viking Huskqvarna machine so it might not work for you…
http://www.shopjoya.com/p-25235-quilters-14-piecing-foot-for-husqvarna-vikings.aspx?gclid=CI607u-Nn8cCFc4XHwodVJoEuQ#.VcjohhNViko
Thanks for getting in touch!
Molly
I have been looking for a contemporary baby quilt for my daughter’s first girl. This is exactly what I wanted. I have lots and lots of Kona Cotton – so here I go!
Thanks,
I have a foot similar to the one Molly used. I got it from the sewing machine store inside my local JoAnn etc. store. Mine is for a Singer machine. It doesn’t have the lines all the way back on the foot, just in front of the needle location. I love that it has the 1/8″ foot/toe and the 1/4″ foot/toe all in the same foot.
Hi! The red color in the kit and the tutorial doesn’t seem as vibrant as the red in the sewn quilt in your picture. Are they the same red or did you change it?
Hi Amy-
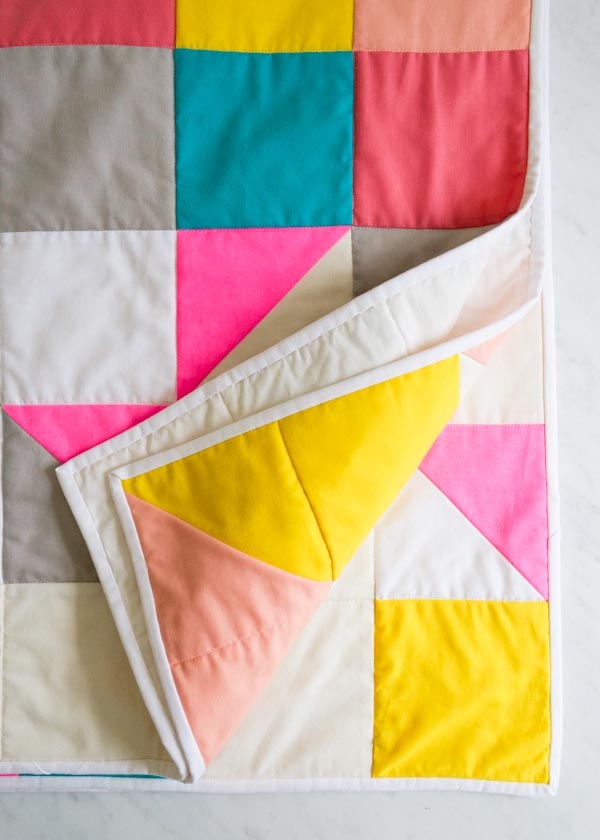
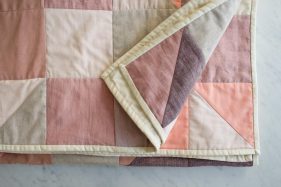
They are the same fabrics, it’s just a photo editing issue. We try to get each photo to be as true to life as possible but sometimes certain colors pop more in certain photos. I would say the close up picture of the folded quilt is the most true to life.
Thanks for getting in touch and please let us know if you have any more questions!
Best-
Molly
Hi Amy, I really love this quilt and its inspired me to make my first attempt at quilting.
I would really like to make this into a quilt for my sofa and was wondering if i could use a fleece or some other snuggly fabric to back it rather than the muslin?
Many thanks
Jo
Hi Jo-
You can back this using any almost any fabric you like! I would stick to a woven fabric, I think cotton flannel would work beautifully. Here’s a link to some that we like: https://www.purlsoho.com/purl/products/item/9570-Robert-Kaufman-Shetland-Flannel
To make it more fluffy you could also use wool batting: https://www.purlsoho.com/purl/products/item/2264-Quilters-Dream-Dream-Wool
Please let us know if you have any more questions!
Best-
Molly
Hi Molly,
Beautiful project. Wondering about your technique for the loops to hang the quilt.
thanks!
Hi Ivy-
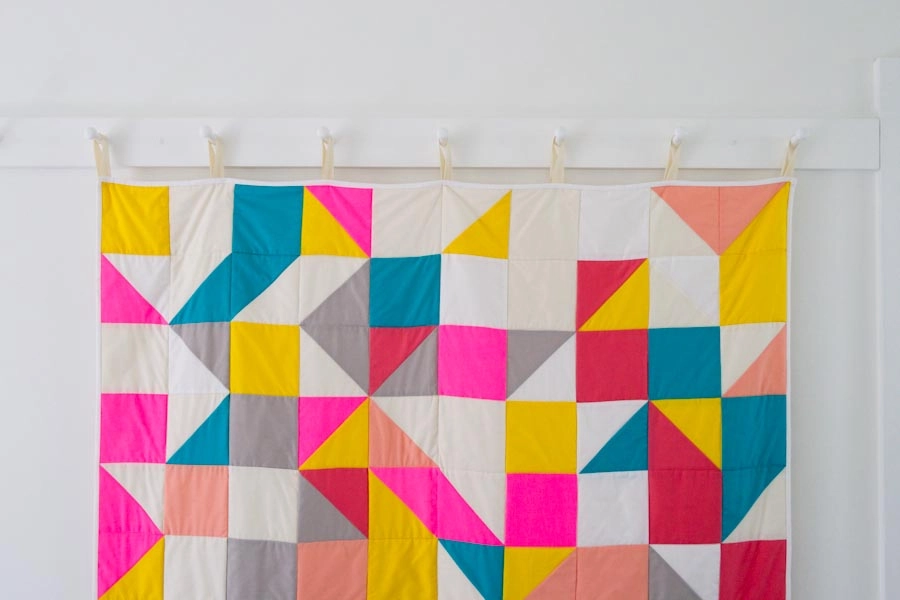
We use loops of 20mm Cotton Twill tape, pinned to the back of the quilt. But you could easily hand sew them on (just to the backing fabric) for a more sturdier solution, although that’s not the most long lasting or proper way to do it. If you’d like to hang it with a more permanent method you might want to check out this video that I found: http://www.marthastewart.com/914439/hanging-quilt-artwork
Thank you for getting in touch and please let us know if you have any more questions!
Best-
Molly
Thank you so much!
I love this design! Is there a way to alter the pattern to fit a full size bed? Adding extra rows wouldn’t be hard, but would I need to sew two pieces of muslin together for the backing?
Hi Emily-
Yes, it should be easy! Just cut more squares and use a larger piece of muslin for the backing. This muslin also comes in a 120″ width here: https://www.purlsoho.com/purl/products/item/2356-Moda-Moda-Muslin-120-200-Count
Please let us know if you have any more questions!
Best-
Molly
I’m having trouble with Kona solids because it’s so hard to tell the right side from the wrong side of the fabric. Do you mark them with chalk or have a trick to keep from mixing them up while chain-stitching? I can spot where some of mine are backwards and don’t have the same smooth sheen.
Hi Joan-
The Kona Cotton doesn’t really have a right or wrong side, especially after you wash it. We include right side/ wrong side instructions for anyone using printed fabric. With that said, if you can tell the difference between the sides of the Kona Cotton I would recommend using an erasable fabric marker and marking all of the pieces in question on their right side before you start sewing. Here’s a link to my favorite erasable marker: https://www.purlsoho.com/purl/products/item/3470-Clover-Chaco-Pen-with-Eraser
Please let us know if you have any more questions!
Best-
Molly
I made this quilt and found the HST squares didn’t match up to the solid block squares. I think the math is possible wrong. I think to make sure all the squares end up being 5.5 before sewing it together the HST squares need to be cut to 6 3/8″ not 5 7/8″ squares. But I could be mistaken. I am new to quilting.
HI Kate-
I’m so sorry that your blocks didn’t measure up correctly. The math here is correct but I’d love to help you figure out what went wrong. Was your seam allowance in the “Piece the Half Square Triangles” a bit larger than 1/4-inch perhaps? Or maybe you accidentally sewed some of the 5 1/2-inch squares into HSTs? (I have done this so many times!) Please let me know if you need any more help getting to the bottom of the issue!
Best-
Molly
Such a lovely quilt! I think I’m going to attempt to make my first ever quilt using this pattern!
Just a quick question though, I can’t see what ended up happening to those 8 leftover squares. Am I just mis-reading/miscalculating?
Cheers xx
Hi Victoria-
Nothing happened to them, they are just left over. You can use them for anything you like- a pillow, sachets,or a doll quilt!
Thanks for getting in touch and please let us know if you have any more questions!
Best-
Molly
or maybe some coasters! just think of the possibilities!
thanks for clearing that up xx
What a lovely pattern! I would like to make one for a baby and hand quilt it. Do you have any suggestions for hand quilting designs that would work with this pattern, other than stitch in the ditch?
Hi Suzy-
How lovely! I think this would look nice with any linear quilting pattern, such as a grid or diamonds. And if you need a refresher on hand quilting please check out our tutorial here: https://www.purlsoho.com/create/2012/02/23/hand-quilting/
Thanks for getting in touch!
Molly
I’m in love with this quilt design! Is there a way to alter the pattern to fit a crib instead? I’m not sure how many squares and if I’m using Natural Dream Batting (crib size) should it be a thin or mid loft thickness? I’m thinking of swapping out the hot pink with a green/turquoise colour – hope that doesn’t detract from the overall design – making it for a baby boy 🙂 Thank you!
Hi Ellen-
You can certainly make this in a crib size, or any size you like. It’s easy to size up and down. We usually recommend the thinnest loft because otherwise it can get a bit stiff. Your color swap sounds great. 36 X 44 is a fairly standard size for a crib blanket. To make one this size you’ll need 99 total finished squares (9 squares wide X 11 squares tall.)
I hope this helps, please let us know if you have any more questions!
Molly
i too want to make this for a baby (crib size) and am trying to figure out amounts to buy of each color. if the squares are 5″ each (finished) wouldn’t a 9 square x 11 square quilt be 45″ x55″? (this is not a snarky question, i’m just trying to make sure i’m reading everything right!). would 7 squares (35″) x 9 squares (45″) be a bit closer to crib size? or am i way off here? (it’s happened before….). or should i just suck it up and buy the proper amounts and piece it until i get the size i want? (this is probably the answer, ha!)
Hi Aisling,
Thanks for writing in! I believe you are correct – after piecing each square will measure 5″, so 7 squares by 9 squares may be closer to what you have in mind. If you do buy the full yardage to be safe, I’m sure you could use the extra fabric to piece some coordinating cushions or add some interest to the backing!
Best of luck and happy quilting!
Julianna
I love this quilt and want to make is using the batting I already have, which is for a queen (90×108). What is the size the batting for this needs to be cut? I’m also hoping to use the leftover batting for a different project (even if I have to piece it together.
Thanks!
Hi Jackie- Cut your batting to be a few inches larger than the top on each side. So for this measurement I think 96 X 114 would be good. Also make sure that the backing piece is a couple of inches larger than the batting. However, I find it easiest to not cut the batting before I make the quilt sandwich. Instead I lay down the backing fabric first, then lay down the uncut batting, and the top. Then I cut the batting so that it’s sticking out a couple of inches beyond the top but still within the backing. I hope this makes sense! Good luck with the project!
Molly
Thank you! I just finished my quilt and love how it turned out. I wound up adding two more rows to the bottom to make it a little longer but other than that followed your directions to a tee. I’m hooked on quilting now!
Hello, what does the back of the quilt look like? If you wanted to actually quilt it after sewing it all together, is that still possible?
Hi Kelly-
The back of the quilt is just a solid white piece of fabric. And yes, we recommend quilting it. Please let me know if you have any more questions!
Molly
Hi I am looking for a queen size dimensions. I was wondering if you would be able to help me with it. Or there should be dimensions option for the size within the website.
Hi KO,
Thanks for writing in! We have only sized this pattern for the measurements included (50×60 inches) but you can easily add more rows to increase the size. Most Queen sized quilts range from 60×80 to 102×108. The middle ground for these measurements is 90×95. For a quilt of this size you will need 3-4 times the amount of each fabric.
I hope that this helps!
Cassy
Hi,
Where can I get a walking foot for a Brother machine? I’m having a hard time finding one online that I feel confident is the right foot called for and will fit my machine. Is it possible to quilt without the walking foot?
Also, the eight squares that were put aside at the beginning – are they needed for the quilt later on? Or was the instruction “put them away for another purpose” meant to say put them away for another future project? I’m at the basting step and want to make sure I didn’t miss using those eight squares!
Thank you!
Rose
Hi Rose,
Thanks for writing in! Finding a walking foot can sometimes be a challenge but Brother does sell a walking foot and I would suggest checking out their website where they may sell it directly or you could always try Amazon! A walking foot is used here because it evenly feeds multiple layers of fabric through the machine. As opposed to a standard foot, the walking foot grabs the top layer of fabric at the same time as the feed dogs grab the bottom fabric. If you try quilting with a regular presser foot, you may well end up with puckers in your quilt.
The 8 additional squares are not used in this quilt and you can use them for another quilt or an alternate project!
I hope that this helps!
Cassy
I was wondering if you can wash the finished quilt? This is the first one I’ve ever made so I don’t really know how this works.
Hi Sarah,
Thanks for writing in! Yes, this quilt is completely washable! We do recommend prewashing all of your fabrics before cutting, which will prevent shrinking and color bleeding in the final quilt, but all the fabrics and batting are safe to machine wash and dry.
Best of luck with your first quilt!
Julianna
Love this quilt, I’m working on it right now! I was wondering if you could clarify the chain-piece instructions. It states “For this quilt you will make 67 half square triangles”. However, there are 67 of the 5-7/8″ squares, and chain-piecing requires making pairs of squares. So you would have 33 pairs = 66 half-square triangles, not 67. What do you do with the 67th square? Am I missing something?
Thanks very much!
Hi Donna,
Great question! Although our cutting layout makes the most of your fabric, it does result in 8 extra squares. I would simply set this 67th square aside for another use, or cut it down to another 5 1/2 inch square to use along with the other extra squares in another project.
Happy quilting!
Julianna
Six years later, and this quilt is still drawing new admirers~~AND makers, I hope (me!). I immediately fell in love~~~INSTANTLY~~with the color palette for the 2nd version. Can’t wait to get to my stash and see what, if any, I’ve got that I can use. LOVE LOVE LOVE. Thank you, so very much!!!!
Hey! I am very excited to get to work on this quilt. I cannot source the Michael Miller Neon Solids Pink fabric. Is there a good dupe for it? Thanks!
Hi Meg,
Thanks for reaching out! Unfortunately, the original fabric we used for this pattern has been discontinued. However, we recommend using our Spectrum Cotton in its place! We don’t have a shade of pink that is quite the same but there are a few options that could work!
I hope this helps, happy crafting!
Gianna
Hi Molly! I love love love this quilt! You don’t happen to sell your quilts anywhere do you? I would love to purchase this one! I love it so much! Do you have an etsy?
Hi Kevin!
Thank you for your question! While we do not have our finished quilts for sale, we encourage you to make your own, and you can find everything you need to make this quilt in the “Materials” section of this pattern.
I apologize for the inconvenience, and please feel free to let us know if you have any other questions!
All the best,
Margaret