Elfin Hats for Adults
This week’s snowfall in New York City may not have been historic, but in the early hours of Tuesday morning it did have us all behaving like little hibernal elves, sneaking around the empty streets, hoping to disturb neither the silence nor the pristine, powdery snow.
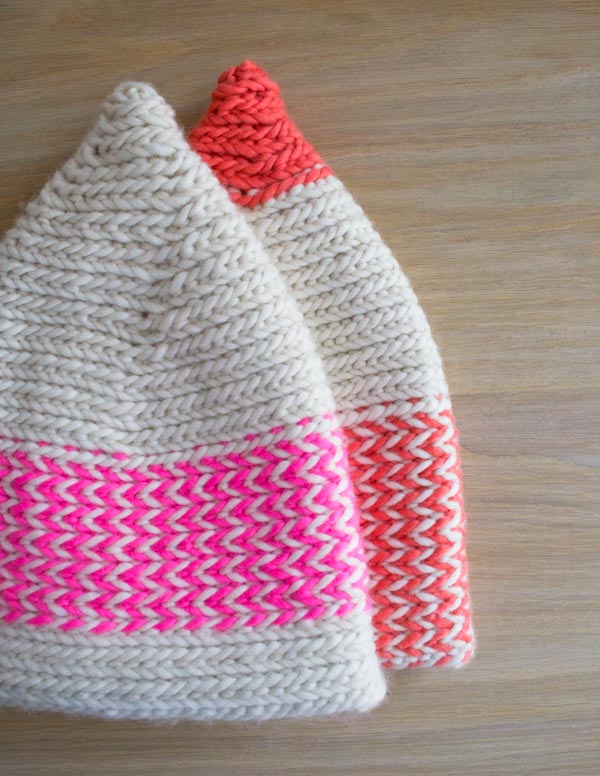
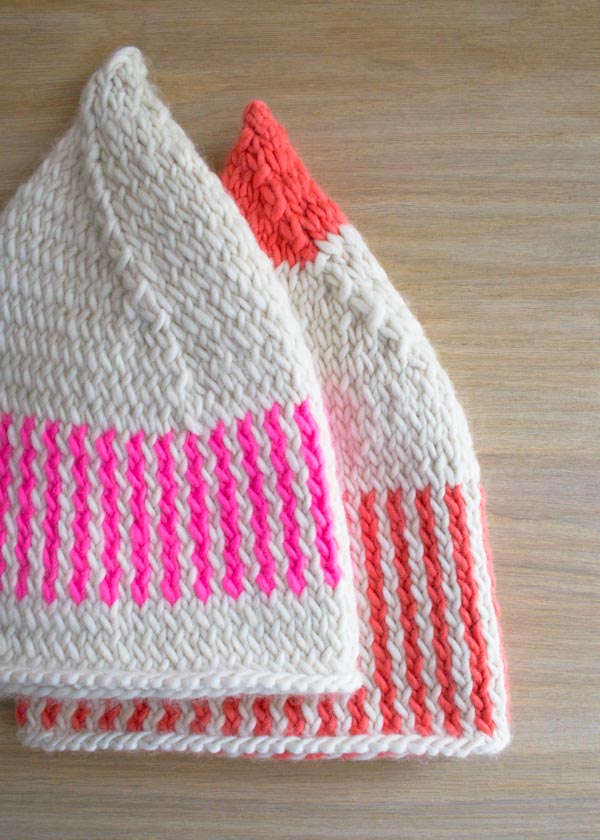
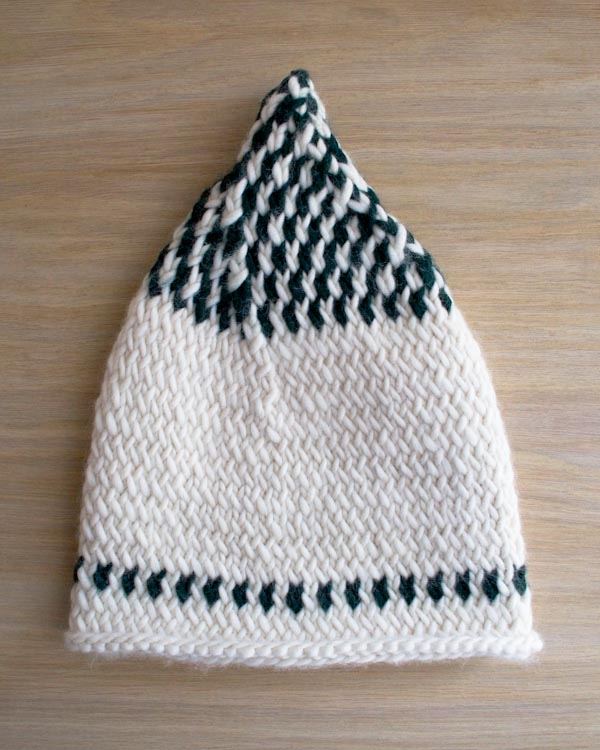
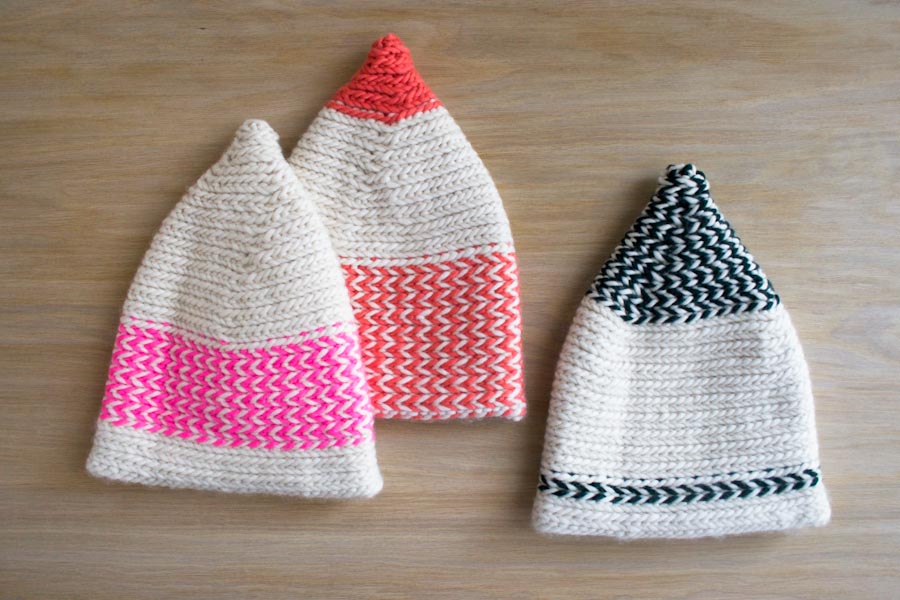
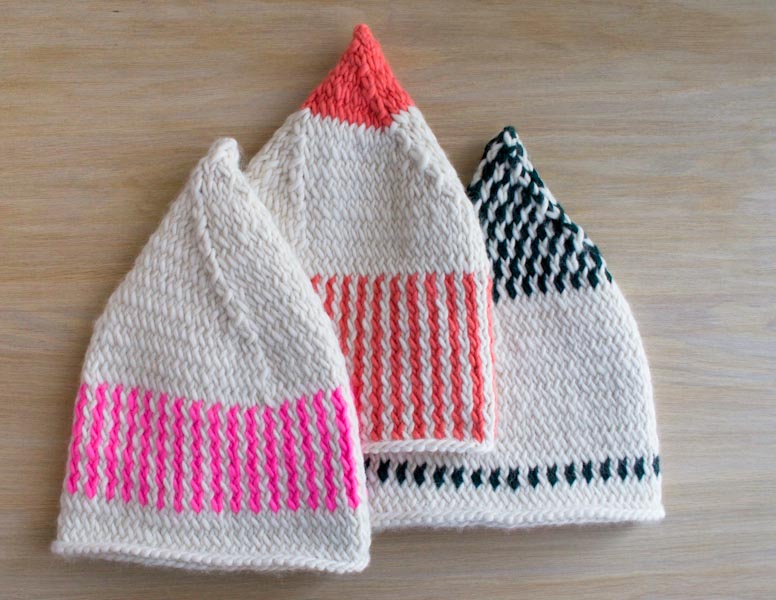
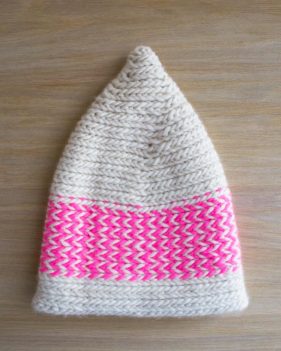
If only we’d all had Elfin Hats to don! All winter explorations are made more magical with this cute and whimsical, soft and lofty hat, knit up in a Purl Soho’s most cuddly yarn, Super Soft Merino.
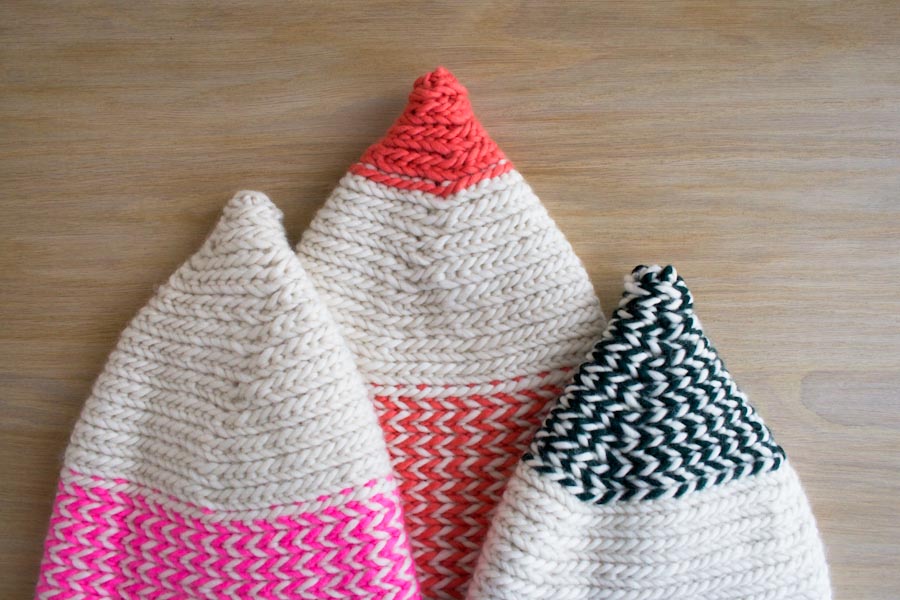
Whether it’s three feet of snow or three little inches, it’s fun to be an elf! -Laura
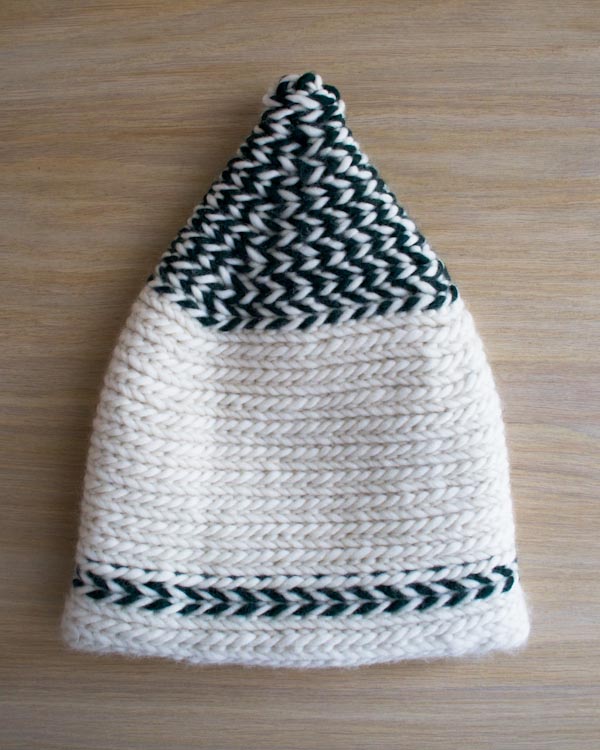
PS: As we know, elves come in all sizes, so don’t forget about the original Elfin Hats, sized for babies, toddlers, and kids!
Designed by Purl Soho designer, Laura Ferguson.
Share your progress and connect with the community by tagging your pics with #PurlSoho, #PurlSohoBusyHands, #PurlSohoElfinHats, and #PurlSohoSuperSoftMerino. We can’t wait to see what you make!
Materials
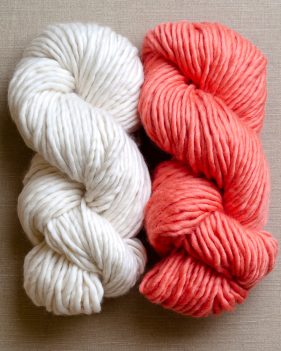
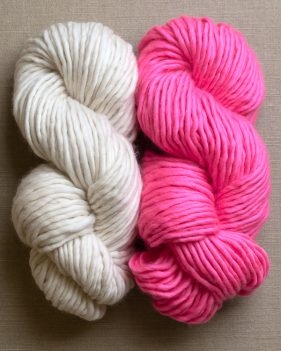
- Main Color (MC): 1 skein of Purl Soho’s Super Soft Merino, 100% merino. Each skein is 87 yards/ 100 grams; approximately 80 yards required. I used the color Heirloom White.
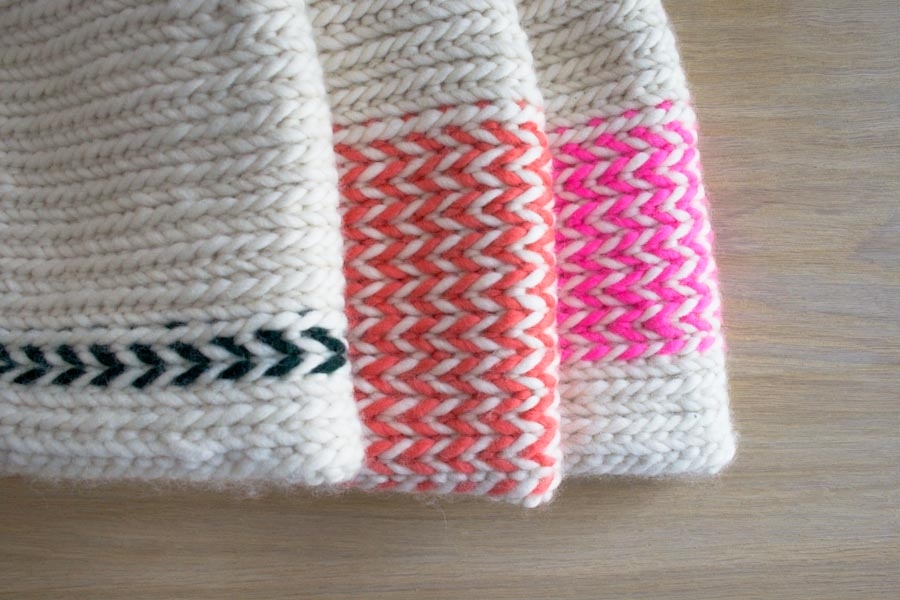
- Contrast Color (CC): 1 skein of Super Soft Merino; approximately 20 yards required. I used the colors Pink Grapefruit, Black Green and Super Pink.
- US 11 (8 mm), 16-inch circular needle
- A set of US 11 double pointed needles
- 3 stitch markers, including one unique
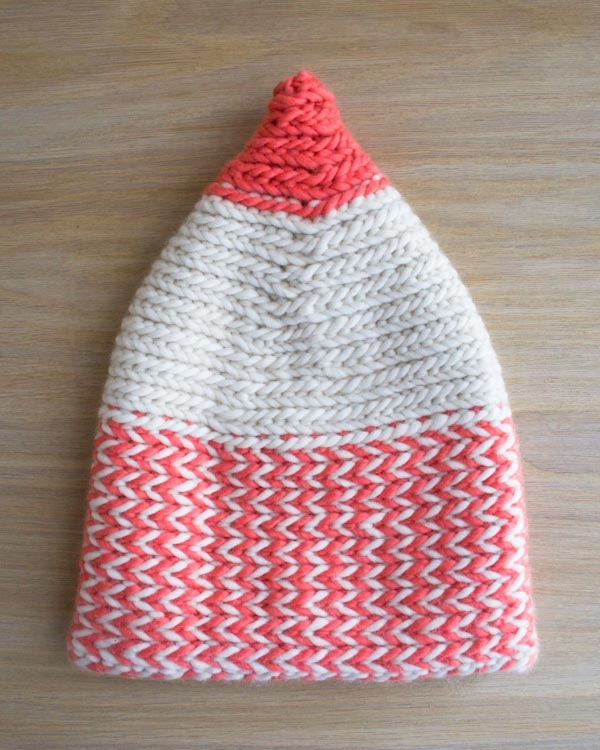
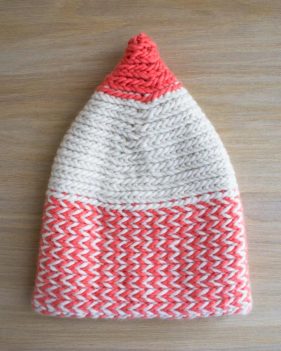
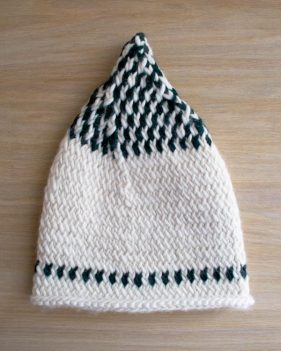
PINK GRAPEFRUIT HAT
- MC: 1 skein of Super Soft Merino in the color Heirloom White
- CC: 1 skein of Super Soft Merino in the color Pink Grapefruit
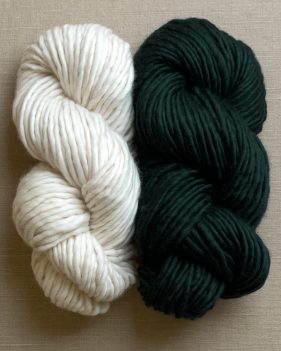
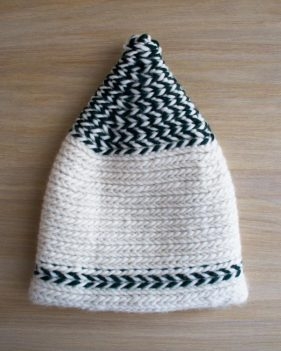
BLACK GREEN HAT
- MC: 1 skein of Super Soft Merino in the color Heirloom White
- CC: 1 skein of Super Soft Merino in the color Black Green
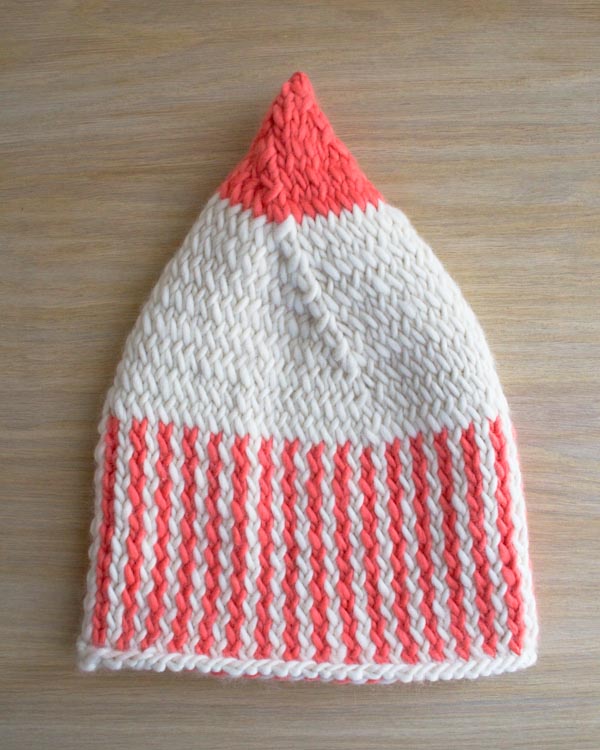
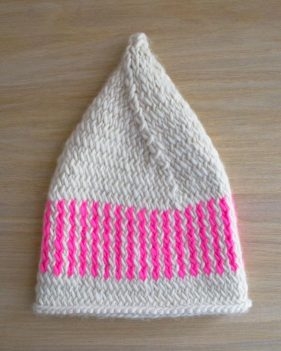
SUPER PINK HAT
- MC: 1 skein of Super Soft Merino in the color Heirloom White
- CC: 1 skein of Super Soft Merino in the color Super Pink
Gauge
12 stitches = 4 inches in stockinette stitch
14 stitches = 4 inches in stitch pattern
Size
Adult Small/Medium; to fit head circumference of 19 to 23 inches
- Finished Circumference: 18 3/4 inches
- Finished Height: 12 1/2 inches
Notes
Pattern Notes
- This pattern is adapted from the original Elfin Hats pattern, sized for babies, toddlers and kids.
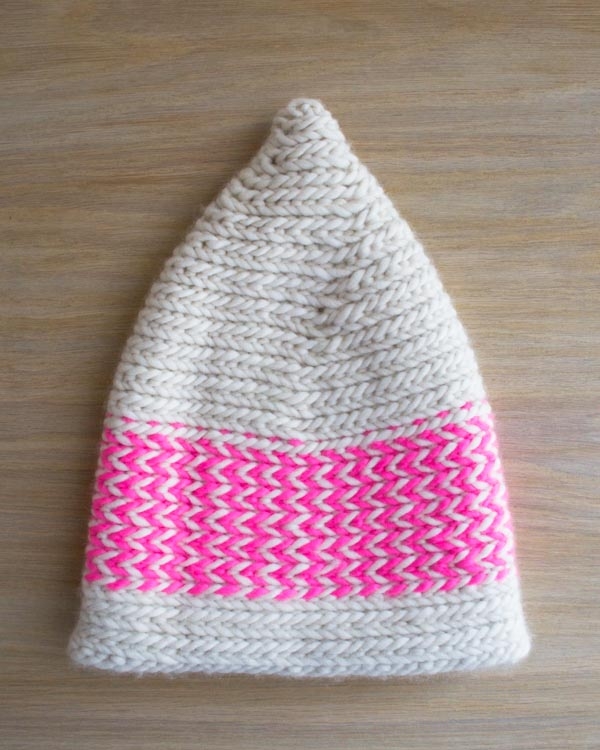
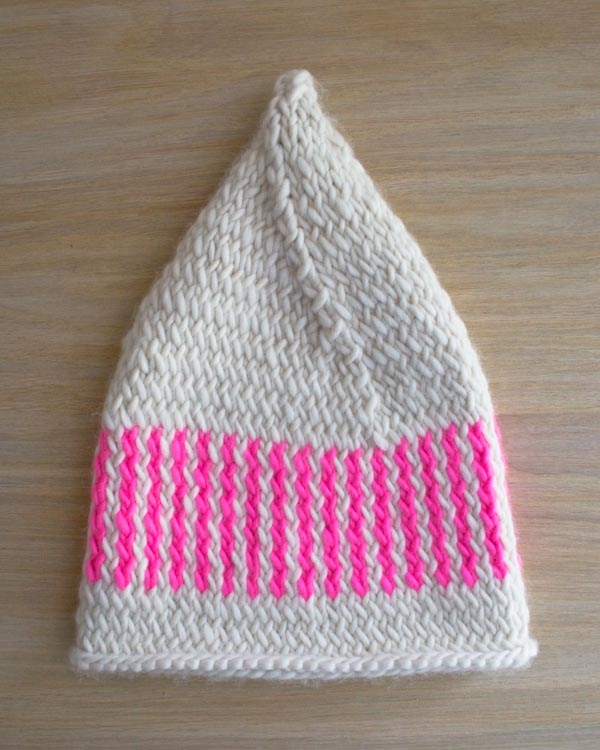
- These hats are worked up with the knit side facing out, but the finished hat can be worn with either the knit or the purl side facing out.
- When the pattern requires you to use two strands of the same color, you can either roll the skein into two equal-size balls and pull from both balls at once, or you can pull one strand from the inside of the ball and one strand from the outside. If you don’t have a swift and ball winder to wind a center-pull ball, never fear, you can do it by hand! Click here for a great video that shows you how!
Twined Knitting How-Tos
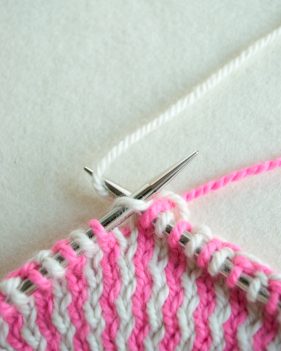
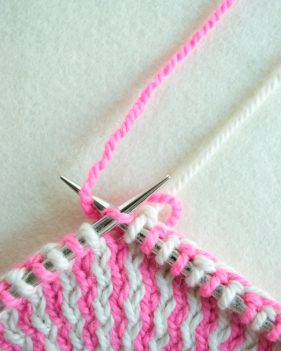
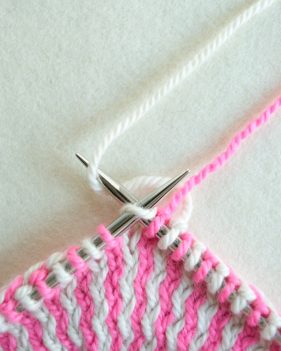
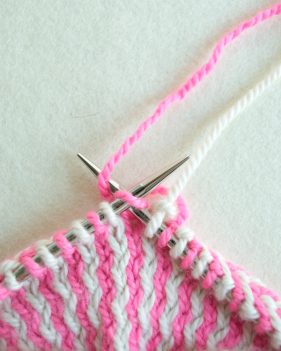
This pattern uses a technique called Twined Knitting. Twined Knitting is a method of working two strands of yarn at a time, alternating strands every stitch and, between each stitch, twisting the strands around each other. The result is a dense, warm and very beautiful fabric. Please note that the following photos were borrowed from the original Elfin Hats pattern, which uses a different yarn.
You can twine the strands by either twisting the working yarn over the other or by twisting the working yarn under the other. In this pattern, you are instructed to do both: “twisting over” and “twisting under”.
TO TWIST OVER…
Step 1 (pictured left): Carry the right-hand (working) strand of yarn over the left-hand (non-working) strand and knit the next stitch.
Step 2 (pictured right): Repeat Step 1 with the new right-hand (working) strand.
Continue to work with alternating strands of yarn, carrying each working yarn over the non-working yarn between each stitch.
TO TWIST UNDER…
Step 1 (pictured left): Carry the right-hand (working) strand of yarn under the left-hand (non-working) strand and knit the next stitch.
Step 2 (pictured right): Repeat Step 1 with the new right-hand (working) strand.
Continue to work with alternating strands of yarn, carrying each working yarn under the non-working yarn between each stitch.
Twined Knitting Notes
While working a round of twined knitting, the two strands of yarn begin to coil around one another. That’s okay, because in this pattern each round of twisting over is immediately followed by a round of twisting under, which uncoils the strands.
Pattern
NOTE: The instructions below correspond to the following hats: Grapefruit Pink (Black Green, Super Pink)
Body of Hat
With the MC, cast 66 stitches onto the circular needles. We used a basic Long Tail Cast On.
Place marker and join for working in the round, being careful to not twist the stitches.
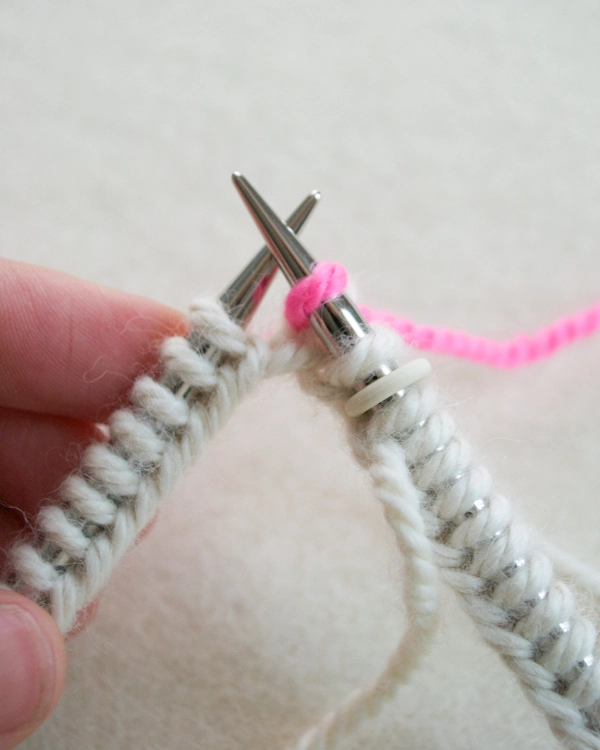
NOTE: When you join for working in the round, work the first stitch of the first round with the yarn from the cast on, then join the second strand to work the second stitch. The second strand for each of the hats is CC (MC, MC). In other words the Grapefruit Pink hat begins with alternating strands of the MC and CC, and the Black Green and Super Pink hats begin with alternating strands of just the MC. (Please note, the above photo is taken from the original Elfin Hat pattern, which uses a different yarn.)
Round 1: Knit round twisting over.
Round 2: Knit round twisting under.
Repeat Rounds 1 and 2 until piece measures 5 1/2 (1 1/4, 2) inches from cast on edge, ending with Round 2.
Cut CC (1 MC strand, 1 MC strand).
Join strand of MC (CC, CC).
FOR BLACK GREEN HAT ONLY
Repeat Rounds 1 and 2 one time.
Cut – (CC, -).
Join strand of – (MC, -).
Repeat Rounds 1 and 2 until piece measures – (5 1/2, -) inches from cast on edge, ending with Round 2.
FOR SUPER PINK HAT ONLY
Repeat Rounds 1 and 2 until piece measures – (-, 5 1/2) inches from cast on edge, ending with Round 2.
Cut – (-, CC).
Join strand of – (-, MC).
Shape Crown
NOTE: Change to double pointed needles when necessary.
Round 1: While twisting over, [k22, place marker] two times, knit to end of round.
Round 2 (decrease round): While twisting under, [ssk, knit to marker, slip marker] three times. [3 stitches decreased]
Round 3: Knit round twisting over.
Round 4: Knit round twisting under.
Round 5 (decrease round): While twisting over, [k2tog, knit to marker, slip marker] three times. [3 stitches decreased]
Round 6: Knit round twisting under.
Repeat Rounds 5 and 6 one more time. [57 (57, 57) stitches]
Repeat Rounds 5 and 2 four (-, 9) more time(s). [33 (-, 3) stitches]
FOR Pink GRAPEFRUIT HAT ONLY
Cut both strands of MC (-, -).
Join two strands of CC (-, -).
Repeat Rounds 5 and 2 five (-, -) more times. [3 (-, -) stitches]
FOR BLACK GREEN HAT ONLY
Cut a strand of – (MC, -).
Join a strand of – (CC, -).
Repeat Rounds 5 and 2 – (9, -) more times. [- (3, -) stitches]
Finish
Cut both strands and thread them onto a tapestry needle. Draw the needle through the remaining stitches and pull taut.
Weave in the ends and block as desired.
Wear knit-side-out or knit-side-in, elf’s choice!








THANK YOU for making an adult size!! I loved this pattern for the kiddies
I’m so glad you created adult sizes. This is one of my favorite Purl Bee patterns and I really wanted one for myself. Thank you!
I love these hats (newborn, kids, and now adults!) I’d also love to see them modeled on an actual person so we can see how they look. Thanks!
Me too! I’d love to see how you’d like them to fit. 🙂
You can check out the pattern on Ravelry – there are many examples of the kid version of the hat.
These hats are adorable, I would LoVe to see this in a crochet version. I’m a huge fan of all your designs but I don’t knit, please can you do more of your gorgeous crochet designs? Pretty please from Jo in the UK! X
So cute! I wish you’d model more of your stuff on an actual person!
I agree I want to see how the pattern looks on a person. It can make or break it for me.
Hi Jackie,
Thanks for the suggestion! I just took a quick look at the project on Ravelry and there are lots of pictures there of the hat on people! I would suggest checking out peoples’ projects there to get a better idea!
I hope that this helps!
Cassy
Huh, kind of gives it a latvian braid effect. Love that texture for the twisted knitting though, this is the first time I’ve seen it.
Is there a way download the pattern or is it necessary to cut & paste?
Thanks!
Hi Kate!
We have a print feature on the blog now!
If you are on a desktop, the print button is on the right hand side. On a phone or tablet, you’ll need to scroll down to just below the comments.
When you click on the print feature, you can click “remove photos” if you would like, and you can create a pdf as well!
Happy Knitting!
Thomas
I made the child-sized version and it was a big hit. So glad you made a larger size pattern. Can’t wait to get started.
This is too good for words. YES.
It is adorable.I love all your design. I shall knit when I get home.thanks
Are there two sizes given in this pattern: Small/Medium? And if so, do we cast on 66 stitches for both? I am confused by the ( )’s and the -‘s at the end of the patter in the decrease and to what they are referring: the sizes or the different colored/styles of hats. As always, thank you for yet another beautiful project!
Hi John.
Thanks for writing in.
There is just one adult size.
Typically parentheses are used to describe what to do for different sizes. In this pattern, the number and instructions in the parentheses are describing how to do the different colorwork designs.
If there is a dash (-) for the pattern you are working, simply skip that line of pattern.
Please let me know if you have any questions!!
Laura
Dear pearlbee,
this is sooooo cute!I live in northern Germany and saw the pictures of the snow masses in NYC on tv. Although we do not have any snow here right now, I will knit elfin hats for my little one and me 🙂 Thank you so much! Sibylle
I am making a child size elfin hat. Love this jump into twined knitting! I’m curious how you handle the switch from twist under to twist over. The reverse side with the zig zag doesn’t zig zag correctly at the transition.
Hi Erika.
Thanks for writing in.
Glad you’re liking twined knitting.
You’re right about the zig zags… It didn’t bother me that the pattern is interrupted so I didn’t investigate ways to alter it. What’s kind of cool is that after a few rounds you’ll start to see, right at that join, the stepped zig zags make a single column of diamond shapes. Sorry to not have a more of a solution to offer up.
I do hope you enjoy the pattern.
Laura
ADORABLE!!love! Thank you so much 🙂
We love this hat but reside in the UK. Do you have a supplier of this wool here? Ann & Lucy
Hi Ann and Lucy-
We don’t have a supplier in the UK however we do ship to the UK all the time! Here is a link to our international shipping info:
https://www.purlsoho.com/purl/shop/shipping
Thanks very much for getting in touch!
Molly
Beautiful hats in beautiful colour matching. Lovely pattern . Thanks for the details.
To anyone looking for more photos of this project-
We have posted a photo of the hats being worn on Instagram. You can check it out here: http://instagram.com/p/yr7WSaDhZu/?modal=true
when you are decreasing do you use BOTH strands for the new stitch?
If not, and you have two colors going, which color do you use? Not always as simple as alternating cause sometimes two colors in row after the decrease….
Hi Kathleen.
Thanks for writing in.
I did not use both strands for the decrease. I just use the strand furthest to the right.
I never stop alternating strands. And as it seems you may have already noticed, this will interrupt the vertical stripes. I like the new pattern that’s created and that’s why I just continue to alternate, regardless of the decrease.
I hope this helps.
Laura
The hats are fantastic. I love all the colors & sizes. Thanks a lot.
Love the pattern! What kind of cast-on was used to keep it from rolling. I used a long tail cast-on and have a rolled edge…
Hi Alford.
Glad you wrote in.
I used a long tail cast on.
It did roll at first, but once I finished and blocked the hat, the stitches relaxed and the roll became much much more subtle. I have to admit, it never completely flattened, but it did flatten out enough for my liking.
Hope this helps.
Laura
I really love this pattern! But I’m having trouble getting into a knitting flow with it. The twisting is very stop and go for me. What knitting style do you find works best with the twisting method? I’m usually a Continental style knitter.
Hi Sinda.
I am an English style knitter. I believe the technique translates for Continental style though. It is definitely not a quick technique. I wasn’t whipping these hats out at the same rate I would have if working in plain old stockinette. I hope you hang in there though, all that work create a really interesting (and warm) fabric!
Calling all Purl Bee Readers/Commenters…
Do any of you Continental knitters have any tips for Sinda!?!
Sinda, I’m glad you wrote in. I hope our community here can help out. Let me know if you have any questions.
Laura
Hi, I’m from Australia and my mother in law thinks she can’t understand this pattern because the US and Aus are different patterns? It doesn’t make much sense to me. I really want this beanie!! haha
Can anyone please help me?
Hi Carly.
Thanks for the interest in the pattern!
I know that US and Aus needle sizes are different. In Australia, people go by the metric measurement. There’s a great chart on Wikipedia laying out the differences http://en.wikipedia.org/wiki/Knitting_needle
As for the actual pattern writing. I was not aware that there was a different pattern language in Australia. I know we have lots of Australian readers! Hopefully someone can help us out?!?
Sorry to not be of more assistance. Encourage your mom to try to make the hat though. We’re always here to help along the way!!!
Thanks for writing in.
Laura
hi
i’ve never heard of this technique and am excited to get started! what i’m unsure about: it says that i need knitting needles and circular needles. from the pattern instruction i understand that i start with the 66 with the circular needles, right? there is no mentioning of the two-pointed needles after that…? can you please clarify? i would appreciate it thanks!
Hi Nicoletta.
Thanks for writing in!
You start the project on a 16-inch circular needle. Once you start decreasing stitches to shape the crown of the hat, you switch to double pointed needles. You do this because eventually, when decreasing, you will no longer have enough stitches to stretch around the 16 inches of the circular needle.
Please let us know if you have any questions!
Laura
Hi, I am so eager to start this project!
I am now on the third round. I found that the fabric started to roll up. The purl side is the same as the pictures (like a <) but the knit side is just plain stockinette. I followed the steps to twist over and under alternatively. Do you have any solution on this? Thanks!
Hi, Jamie!
Thanks for writing in! You are not doing anything wrong, the purl side should look like sideways v’s and the knit side like stockinette, you can see it really well here https://www.purlsoho.com/create/2014/12/08/elfin-hats/ under the “Materials” section.
Blocking your hat once your finished will tame the rolling.
Again, thank you for your question and if you have further questions, please let us know!
Happy knitting,
Kumeko
Hello,
I’m planning on making three hats and I’m wondering if you think I will need all 3 skeins in Heirloom White for the MC or will 2 suffice? Thanks.
-John
Hi John,
Thanks for writing in! This stitch pattern is fun and I hope you’ll enjoy it. This hat takes up almost the whole scan of the MC so you’ll need three skeins for three hats. Best of luck on the project!
-Adam
I would like to knit this hat in baby size, but using fingering weight yarn. Do yo think I can follow the adult instructions for the beginning and then adapt length ?
Thank you!
Hi Amelie,
Thank you for writing in! I would first do a swatch in the round of the twisted stitch in fingering weight and then multiply your stitches per inch by your desired circumference for the hat. Unfortunately I can’t know off the top of my head if this will work without a stitch per inch count. Let us know how the swatch comes out and we can further help you!
Best,
Adam
I made this hat last year & my daughter loves it. Can you recommend a cowl pattern to make with thus yarn? She is opposed to scarf’s! Thanks for your help!
Hi Karen,
Thanks for writing in! We are so glad to hear that your daughter loved the hat! To make a matching cowl, I would suggest the Garter Gaiter. It is also made out of Super Soft Merino and it is super squishy and comfortable!
Happy knitting!
Cassy
I’m curious how you would make a rib or cuff so that it doesn’t roll??
I should add that I am ok with the roll when it’s worn “right side” out, but when it’s zig zag side out it rolls under.
Hello, Erica!
Thank you so much for your question! When we first made this hat the edge did roll, but once we finished and blocked the hat, the stitches relaxed and the roll became much much more subtle. We have to admit, it never completely flattened, but it did flatten out enough for our liking.
Please let us know if you have further questions! And again, thank you for writing in!
Best,
Kumeko
I just made this pattern in a baby size and I love! I just can’t wait for my friend to see it.
I was wondering if it would be possible to make a headband with that pattern, I just adore the two-coloured Vs. Do you think I could follow the pattern from the bottom of the hat and just cast-off when I’ve reached the desired size? Would it be too tight around the head? Do you think it would roll too much?
Thank you for all the great free patterns, you guys are my go to site anytime I want to knit something!
Hi Marie,
Thanks for writing in! You certainly could use the brim section as a head band. I would suggest measuring the recipient’s head around where the headband would sit and ensure that the measurement does not exceed 23 inches. Then you should be good to go!
Best,
Cassy
I love your posts! I really want to make this hat for my son in-law who has a large cranium. How do I make a larger size?
Hello Claire,
Thank you for reaching out! Unfortunately this particular pattern is pretty tricky to alter and we don’t currently have a larger adult size designed, but I will certainly pass along your suggestion!
Warmly,
Marilla
Dears,
is there any video tutorial for how to make these stitches? I cannot figure it out just by pictures and description. The hat is great and I think this is just something right for my daughter. But until I see the video I am stuck… Thanks in advance for your kind help!
Maria
Hi Maria,
Thanks for writing in. Unfortunately we don’t have the resources at the moment to do a video tutorial of this technique; however, we will keep your request in mind for the future, and you may find some helpful videos by searching for Twined Knitting on Youtube!
Best,
Julianna
Dears,
is there any video tutorial for how to make these stitches? I cannot figure it out just by pictures and description. The hat is great and I think this is just something right for my daughter. Do I get it right, that even if working one color I still use two strands? But until I see the video I am stuck… Thanks in advance for your kind help!
-Maria
Hello Maria,
Thank you for your questions! We do not have a video Tutorial for this stitch, is there a particular part that is tripping you up? You are correct, to create this stitch you will always have two strands of yarn, even if they are the same color.
I hope this helps and let us know if we can answer any more questions!
-Marilla
Hi, i would like to knit an Elfin Hat all in one colour – will one skein be enough? Thank you
Hello Kailey,
Thank you for reaching out! These hats require about 95 yards, so you will be slightly short with one skein of yarn.
Happy knitting!
-Marilla
I’m excited to make this project and learn some new skills! If I were planning to make this as a gift for someone I know with an “adult size large” head, how might I adjust the pattern to accommodate? Thank you!!
Hi Claire,
Thanks for reaching out! This hat has quite a bit of stretch to it, this hat will actually stretch to fit a head circumference of 19 to 23 inches! So if you can get access to the measurements you may actually be good to go without making any adjustments! If not, then you can simply cast on an even number of stitches, just be sure that the total number is divisible by 3 so that the crown shaping instructions will still work.
I hope this helps and please let me know if you have any more questions!
Gianna
Thank you! My husband’s head circumference is larger than 23-inches, so I’m going to cast on 72 stitches.
Hello! I have pattern clarification questions for the pink grapefruit hat. After finishing the initial section with the main color and contrasting color, you cut the contrasting color and join a new strand of the main color, now working with two strands of the main color. Do you have a way you recommend doing this so that there isn’t an ugly knot?
After the strands are joined and you’re working with 2 strands of the main color, do you do any additional rows before going into the “shaping” section or do you just go straight into shaping? (Hopefully the way I phrased that makes sense – join the yarn strands and then immediately start the shaping rows or if there’s something I’m missing in the instructions).
Thank you!!
Hi Claire,
Thanks for reaching out! Yes, we actually have a great tutorial demonstrating the best way to join a new color (we never use knots!) You can find that tutorial here: Adding a Ball of Yarn
After you join the new color you will then move directly on to the SHAPING section!
I hope this helps and please let me know if you have any additional questions!
Gianna
Hi,
With the long tail tubular cast on would I start it with 2 straight needles or a circular needle? Directions I looked at suggested starting with straight needles. I want to learn this technique but I couldn’t get started with. I did a regular cast on but it is curling up and I want to try again on the second hat to prevent that. The pattern doesn’t seem to take much yarn but it a nicer weight than knitting with a single yarn.
Hi Belinda,
Thanks for writing in! You can absolutely use a long tail tubular cast on with circular needles as well as straight needles. I’d recommend just using one end of the circular needles and disregarding the other end like it’s one very long straight needle to help you mimic what’s on screen.
The beginning of this project is probably going to curl up for a bit regardless of what cast on you use though because this stitch has a natural tendency to curl in general. The long tail tubular cast on will only help with the elasticity at the bottom and is better suited for ribbing. Since there isn’t any ribbing in this pattern I think you’re going to have more luck using a regular long tail cast on for now. If you’re concerned about the tightness around the brim at all, you can cast on with a larger needle size than suggested and then continue the rest of the pattern with the originally recommended size.
I hope that helps! Please let us know if you have any other questions.
All the best,
Zha Zha
Hi! I made the original adult hat pattern and am now working on the black green one. After I finish the portion with MC MC and move on to shaping, at what point do I join the CC? I just finished the 5.5 inch bottom portion and am not sure what to do next. Thank you!
Hi Claire!
Thank you for commenting! You will join the CC for the Black Green Hat about a quarter of the way into shaping the point of the hat, where the pattern says “For Black Green hat Only” under Shaping. With the CC attached, you will repeat rounds 5 and 2 nine more times until you have 3 stitches left.
I hope this helps, and happy knitting!
All the best,
Margaret