

Gem Gloves

Because there was a time when ladies didn’t leave the house without them, gloves have always suggested to me the elegance of horse-drawn carriages, drawing rooms and balls. I have long imagined knitting a fine pair of gloves that would be as appropriate for that life as this one.

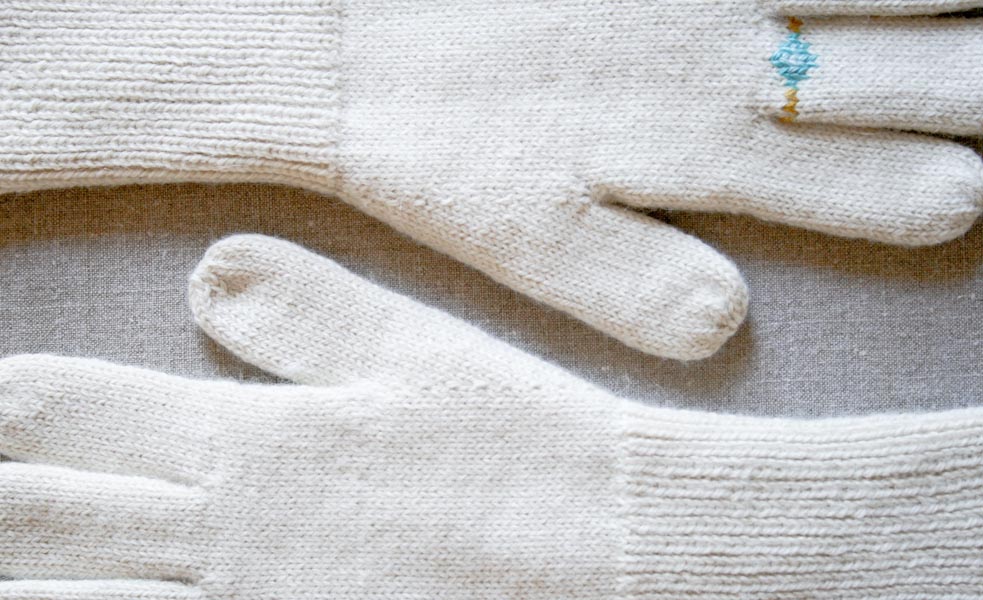
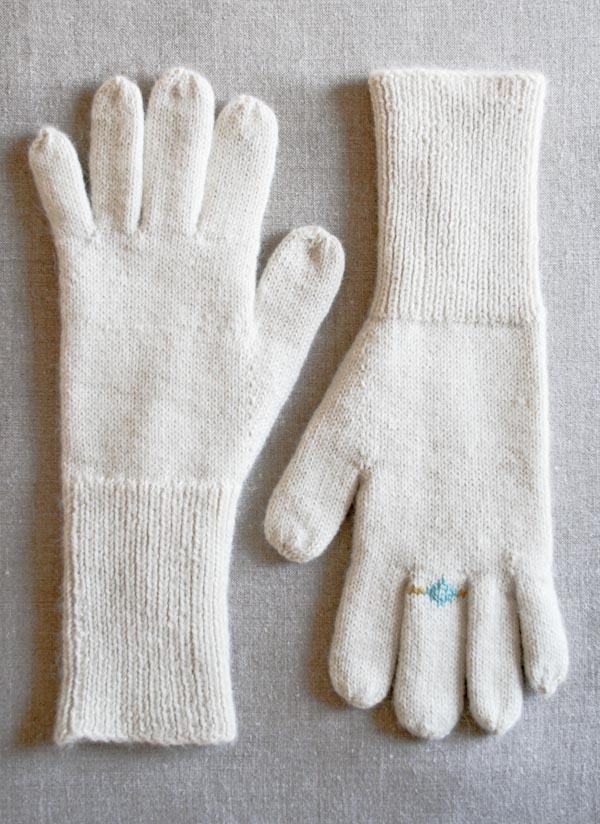
A simple cuff that can be worn long or folded, a thumb gusset and fingers that fit your own, the result is a classic pair of gloves. Perhaps they’re the sort that could have been worn by the tragic Lily Bart or even by Edith Wharton herself.

To knit for such a heroines, I chose Blue Sky’s Royal Alpaca. One hundred percent of the finest alpaca around, this yarn is as soft, light and warm as cashmere and as gorgeous as anything. It truly is fit for a lady, and for the rest of us too!

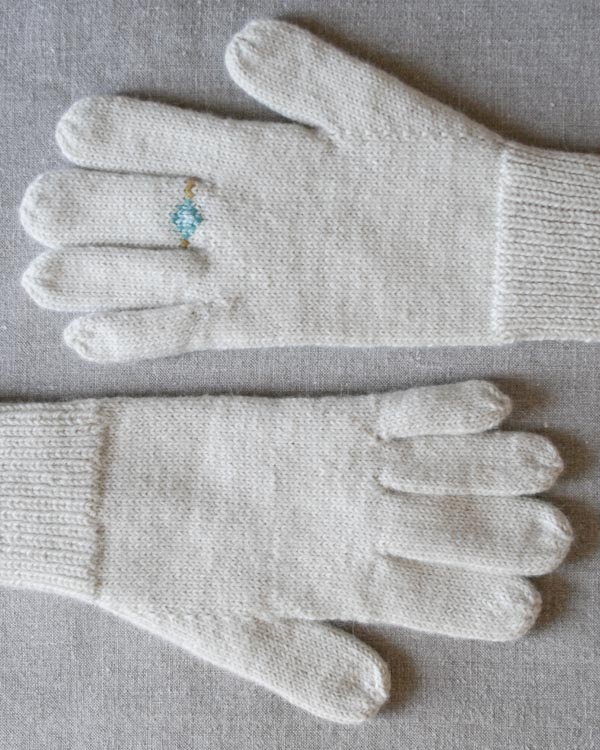
Since, like turn-of-the-century Washington Square, whopping sapphires mostly just reside in my imagination, I stitched my own pretty jewel onto one finger. An impressive gem, but a simple embellishment, this little touch really makes me feel like my dance card is full! -Whitney

UPDATE: NOW IN CYGNET + THE OPTION FOR FINGERLESS GLOVES, TOO!
SEPTEMBER 2023

Knitting our Very Classic Gloves is uniquely gratifying because they’re made in our incredibly beautiful Cygnet. Completely undyed, Cygnet is a mix of 70% white cashmere and 30% baby alpaca, whose range of natural shades contribute all the color to this yarn, giving each hue an earthy complexity and a gentle beauty. Exceptionally soft and naturally beautiful, cast on with Cygnet and enjoy this deeply satisfying knit!
Designed by Purl Soho designer, Whitney Van Nes.
Share your progress and connect with the community by tagging your pics with #PurlSoho, #PurlSohoBusyHands, and #PurlSohoGemGloves. We can’t wait to see what you make!
Materials
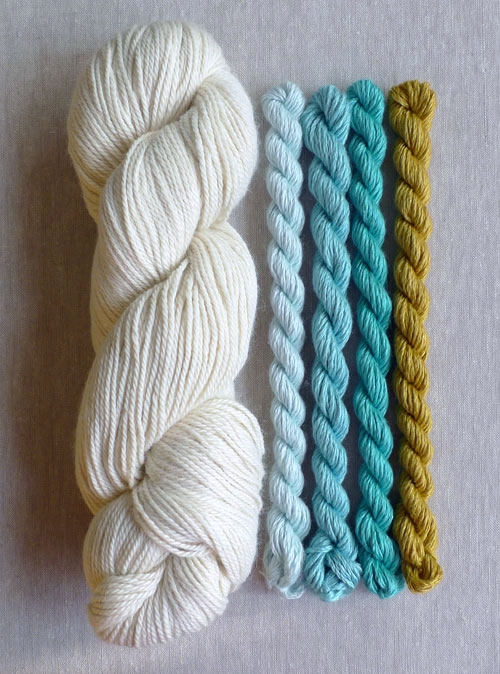
- 1 skein of Blue Sky’s Royal Alpaca, 100% Royal Alapaca. Each skein is 288 yards/ 100 grams; approximately 288 yards required. This color is Alabaster.
- 4 skeins of Brown Paper Package’s Trio, 50% wool and 50% silk. These colors, from the left, are Beryl, Aquamaine, Turquoise, and Mustard. (Please Note: Trio is currently discontinued. For pretty duplicate stitch alternatives, we recommend bright and lovely Posy!)
- A set of US 2 (3 mm) double pointed needles
- A small stitch holder (optional)
Gauge
34 stitches = 4 inches in stockinette
Finished Size
- Circumference of Palm: 6¾ inches (stretching to 8 inches), to fit most women
- Length: custom measurements, adjustments given in pattern
Pattern
Cuff
Cast 64 stitches onto three double pointed needles. We used a basic Long Tail Cast On.
Join for working the round, being careful to not twist your stitches.
Round 1: *K1, p1, repeat from * to end of round.
Repeat Round 1 until piece measures 4 1/2 inches from the cast on edge.
Gusset
Round 1: *K6, k2tog, repeat from * to end of round. (56 stitches)
Round 2: Knit.
Round 3: K27, place a marker, make 1 right, k2, make 1 left, place a marker, knit to end of round. (58 stitches)
Rounds 4 and 5: Knit.
Round 6: Knit to first marker, slip marker, make 1 right, knit to next marker, make 1 left, slip marker, knit to end of round. (2 stitches increased)
*Repeat Round 4-6 seven more times. (74 stitches total, 20 stitches between the markers)
Knit 1 round.

Next Round: Knit to first marker, remove marker, slip next 20 stitches onto a stitch holder or scrap yarn, remove next marker…

…then, with the wrong side facing you, cable cast on 4 stitches.

Now with the right side facing you, join to left side of thumb gusset and continue to knit to the end of the round. (58 stitches)

Knit evenly until glove fits to the base of your pinky.
Pinky
Dividing Round: K6, slip next 46 stitches onto scrap yarn. (6 stitches remain to the end of the round, with 12 total working stitches.)

Next Round: With the wrong side facing you, cable cast on 3 stitches. (15 working stitches)

Distribute the 15 stitches evenly onto three double pointed needles, making sure the working yarn remains accessible at the end of a needle.
With right side facing you, join for working in the round.
Knit evenly until Pinky reaches to right below the tip of your actual pinky finger. Make sure when you try on the glove that the base of the pinky is snug inside the crook between your pinky and your ring finger.
Next Round: *K1, k2tog, repeat from * to end of round. (10 stitches)
Next Round: *K2tog, repeat from * to end of round. (5 stitches)
Cut the yarn and thread it through the remaining stitches.

Ring Finger
Cut the scrap yarn that is holding the remaining stitches, and carefully slip 6 stitches from each end of the stitches onto two double pointed needles. (6 stitches on each needle, 12 stitches total)
Retie the scrap yarn.

Hold the glove so that the Pinky is on the right and the thumb hole is on the left, and join yarn, leaving a 10-inch tail.
Knit 6 stiches from the front needle.
With the wrong side facing you, cable cast on 3 stitches. Slip those 3 stitches to another double pointed needle.

With the right side facing you, use the same needle to knit 3 stitches from the back needle.

With another double pointed needle, knit the last 3 stitches and then pick up 3 stitches from the base of the Pinky.

Join for working in the round. (18 stitches)
Knit evenly until the Ring Finger fits to right below the tip of your actual ring finger.
Next Round: *K1, k2tog, repeat from * to end of round. (12 stitches)
Next Round: *K2tog, repeat from * to end of round. (6 stitches)
Cut the yarn and thread it through the remaining stitches.
Middle Finger
Cut the scrap yarn, and slip 8 stitches from each end of the remaining stitches onto 2 double pointed needles. (8 stitches on each needle, 16 stitches total)
Retie the scrap yarn.
Hold the glove so that the Pinky and Ring Finger are on the right and the thumb hole is on the left, and join yarn, leaving a 10-inch tail.
Knit 8 stiches from the front needle.

With the wrong side facing you, cable cast on 3 stitches. Slip those 3 stitches to another double pointed needle.
With the right side facing you, use the same needle to knit 4 stitches from the back needle.
With another double pointed needle, knit the last 4 stitches and then pick up 3 stitches from the base of the Ring Finger.
Join for working in the round. (22 stitches)
Knit evenly until the Middle Finger fits to right below the tip of your actual middle finger.
Next Round: *K1, k2tog, repeat from * to last stitch, k1. (15 stitches)
Next Round: *K2tog, repeat from * to last stitch, k1. (8 stitches)
Cut the yarn and thread it through the remaining stitches.
Index Finger
Cut the scrap yarn and slip the remaining 18 stitches onto 2 double pointed needles, 9 stitches each.
Remove the scrap yarn.
Hold the glove so that the Pinky, Ring and Middle Fingers are on the right and the thumb hole is on the left, and join yarn, leaving a 10-inch tail.
Knit 7 stiches from the front needle.
With another double pointed needle, knit remaining 2 stitches from front needle and use same needle to knit 5 stitches from back needle.
With another double pointed needle, knit remaining 4 stitches and pick up 3 stitches from the base of the Middle Finger.
Join for working in the round. (21 stitches)
Knit evenly until the Index Finger fits to right below the tip of your actual index finger.
Next Round: *K1, k2tog, repeat from * to end of round. (14 stitches)
Next Round: *K2tog, repeat from * to end of round. (7 stitches)
Cut the yarn and thread it through the remaining stitches.
Thumb
Slip the 20 stitches on hold for the thumb onto 2 double pointed needles, 10 stitches each.
Hold the glove so that the fingers are on the right, and join yarn, leaving a 10-inch tail.
Knit 8 stiches from the front needle.
With another double pointed needle, knit remaining 2 stitches from front needle and use same needle to knit 6 stitches from back needle.
With another double pointed needle, knit remaining 4 stitches and pick up 3 stitches from the base of the Thumb.
Join for working in the round. (23 stitches)
Knit evenly until the Thumb fits to right below the tip of your actual thumb.
Next Round: *K1, k2tog, repeat from * to last 2 stitches, k2. (16 stitches)
Next Round: *K2tog, repeat from * to end of round. (8 stitches)
Cut the yarn and thread it through the remaining stitches.
Finishing
Weave in the cast on tail and the tails at the ends of each finger. Then use the tails at the bases of the fingers to carefully sew up the gapes and holes.
Make another identical glove.
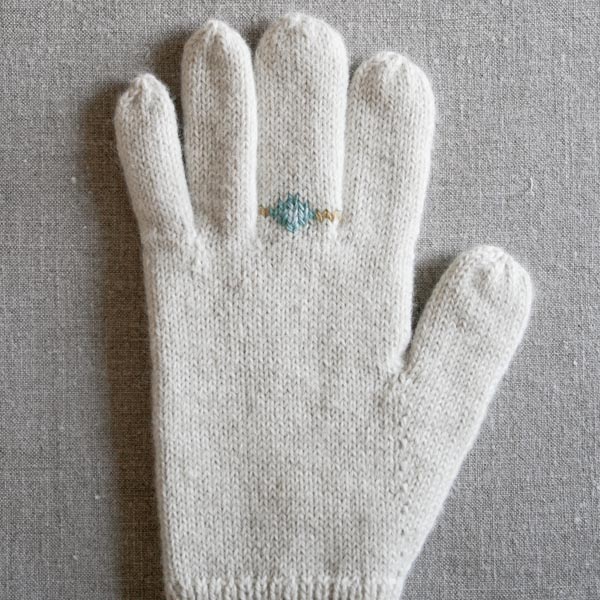
The Gem
If you’re using Trio thread, separate out one two-plied strand of each color.
Centering the gem on whichever finger you’d like, use this chart to duplicate stitch your ring into place (if you picked a finger other than the Middle Finger, the number of stitches required to make the band reach around the finger will vary, but the concept will remain the same.) :

And here’s how mine looked each step of the way!


Weave in these ends, block your gloves, and you’re done!


My good friend is getting married next October, with the ring on her ring finger these would make such a cute gift! Great pattern!
Could I use #3 needles for this project? Would I have to get a different weight of yarn or adjust the pattern? Or would it be too confusing, and I should just get some #2 needles?
Thanks!
Josephine
I love these gloves! So elegant and warm since they're knit with Alpaca yarn. Just one thing I'd like to add: most people's littlest finger starts lower than their other fingers so it's best to knit a couple of rows before knitting the ring finger. This keeps the baby finger from fitting too loosely in the glove. I've just gotten my Royal Alpaca in the mail and I'm off now to wind and begin knitting these pretty gloves.
bonitos guantes espero que me salga bien
Thank you for a great pattern and wonderful tutorial!
Thanks for this pattern-they look great, I will definitely make them!
It's so hard to find online patterns for gloves that actually have fingers on them (:
So Elegant !Its reminds me of Audrey Hepburn,she always wore Cashmere.
Thank you for the Pattern.I can't wait to stitch them
I’m going to try this
I love these. And oh so cute! Thanks for the pattern and tutorial. Can’t wait to try them.
Thank you for this wonderfully written and illustrated pattern! It’s now my go-to glove pattern. 🙂
How can I save the gloves patern on my ipad
Hi Louisa,
Thank you for the comment! If you look to the right of the pattern you will find a icon to print the pattern. Once you click on that you will be prompted to print the pattern, but if you can also download the pattern to your iPad by clicking the PDF icon.
I hope that clarifies things!
Happy Knitting!
Jake
Although I love this pattern, I’m finding it to look rather large as I’m knitting it. I wear a size 7 1/2 in a glove. After completing the ribbing /cuff, it fits rather loose. I’m using a size 2 needle and am knitting tighter than I normally would. Can I adjust this pattern easily to make it smaller? I looked at other knitters on Ravelry who made these gloves and a couple of people also thought them to be on the larger size. Not sure what to do at this point, as the yarn is expensive and I don’t want to not use it. Any help/ideas would be great.
Hi Nancy-
If you’re getting the correct gauge, your glove will measure 6 3/4 inches around the palm. If you’re feeling like this is too big, you might want to go down a needle size or two. This will tighten the gauge and make the overall finished size of your gloves smaller!
Thanks for your question and please let us know if you have any more!
Whitney
For the ring finger, I think the instructions are backwards after the cable cast on. It should say knit 3 from the front needle, not the back needle.
Hi Amy,
Thanks for writing us! Though the picture above this instruction shows the pinky on the left, please be sure to flip the glove around as mentioned in the pattern so that the pinky is on the right and the thumb gusset is on the left. After doing this, you will knit from your six stitches on the front needle and then cable cast on, etc. I hope this helps!
Best,
Adam
Love love this pattern. The yarns don’t seem to be available any longer. Could you please recommend substitute yarns? Thank you.
Hi Kristy,
Thank you so much for the kind words and for writing in! I think these gloves would be lovely in either Posy or Woolfolk Tynd for the main color, and Koigu KPM Needlepoint Yarn for the accent colors.
Happy knitting!
Julianna
Bravo pour ces photos très claires ! MERCI !
(Very clear pictures , thanks)