Your basket is empty.
Continue Shopping
Essential Knit Tee
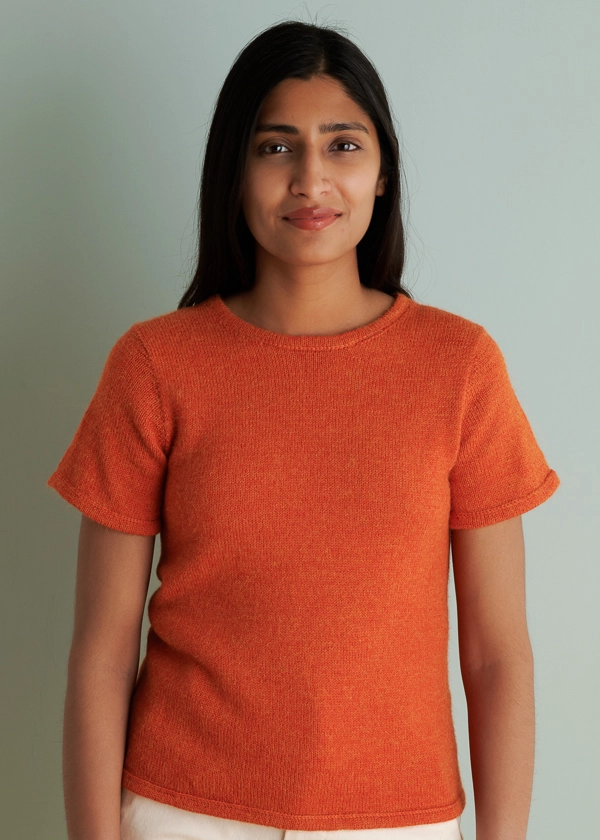
Quiet beauty and thoughtful design make our Essential Knit Tee pattern an instant classic! It has a classic, minimalist shape, while crochet-chain details at the folded hems add just the right elevated touch. Choose from two light and lovable yarns to suit your season and style: plant-based Oleander, cool and breathable even at the height of summer, or softly glowing Quartz, sumptuous and cozy for cooler weather.
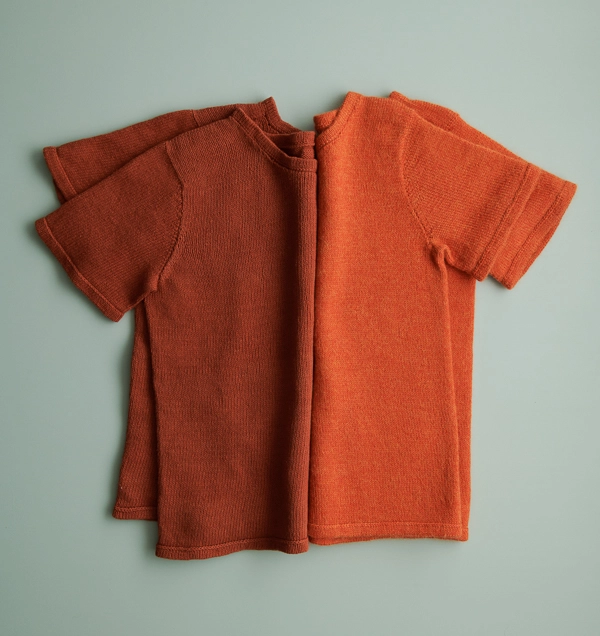
You knit this tee from the bottom up, all in one piece and all in stockinette, working in the round until you get to the armholes, where you’ll divide to work the front and back separately. You seam the shoulders to finish the body, then pick up stitches to knit the sleeves, shaping the sleeve caps with short rows. You’ll find plenty of simple knitting to enjoy, alongside judicious shaping to create a polished finish.
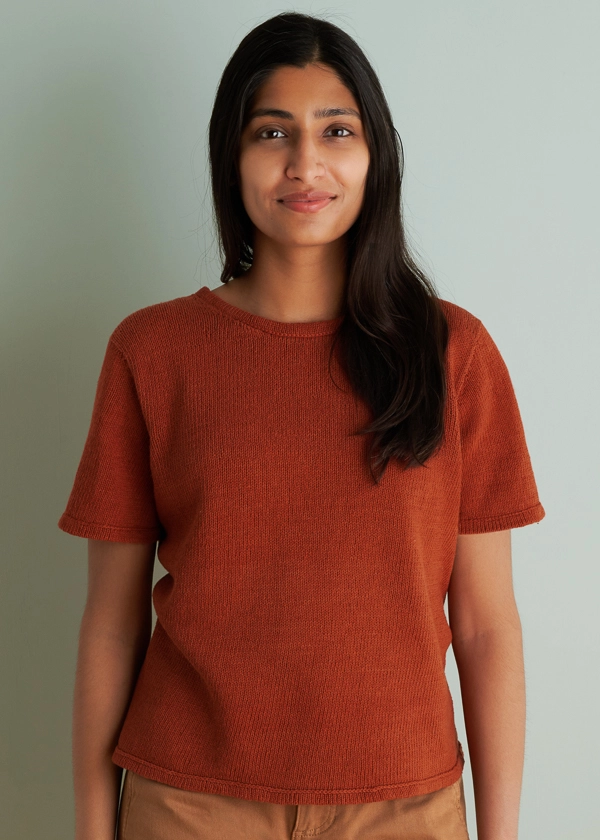
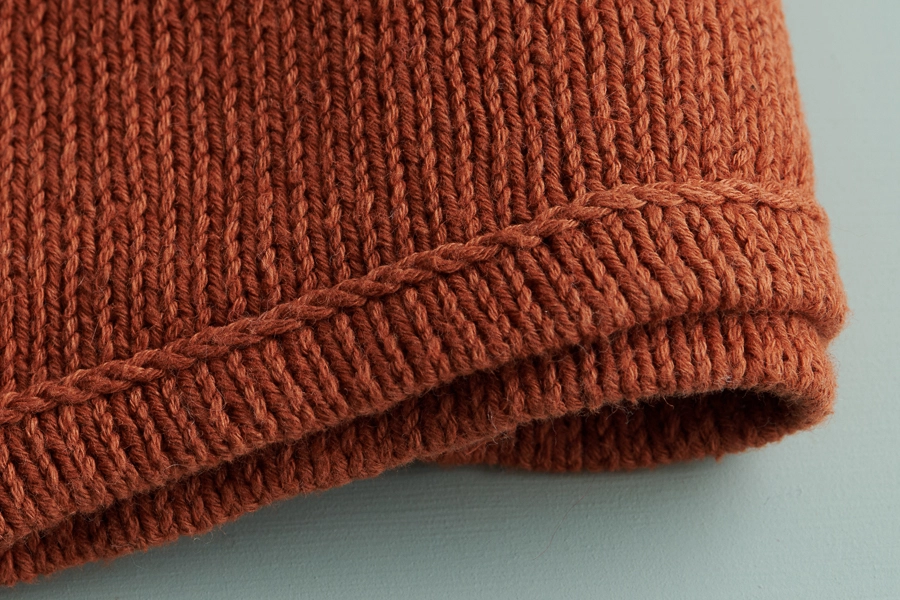
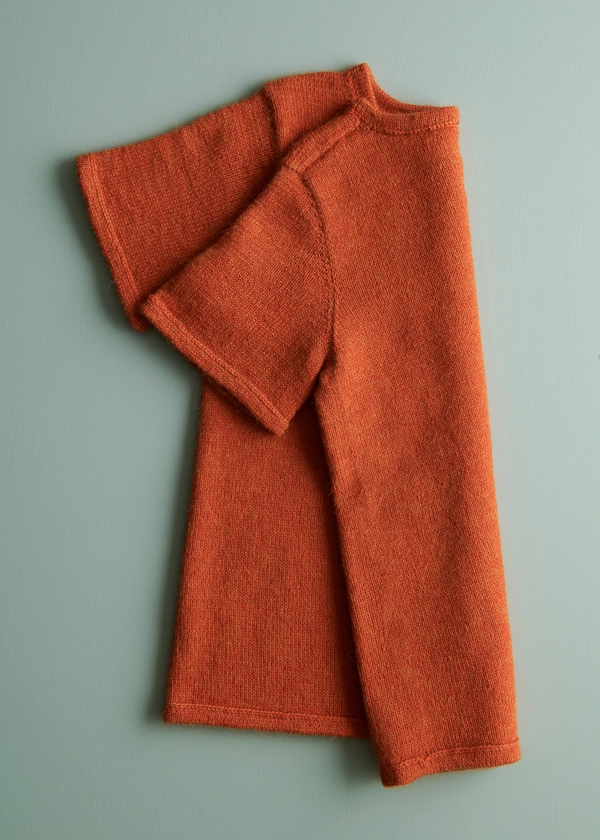
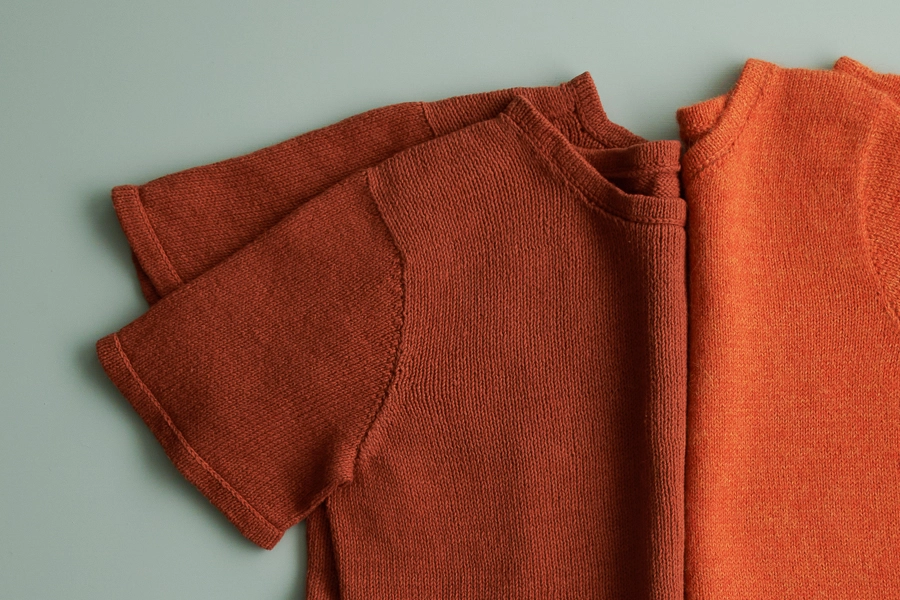
The detail that takes this tee from basic to essential is the folded knit hems at every edge, each trimmed with crochet chains. You’ll work these elegant hems two different ways: first, as a modified provisional cast on at the bottom hem, and then later, for the cuffs and neckline, as a bind off worked from live or picked-up stitches. Both situations are supported by crystal clear video tutorials, so you can learn something new and knit with confidence!
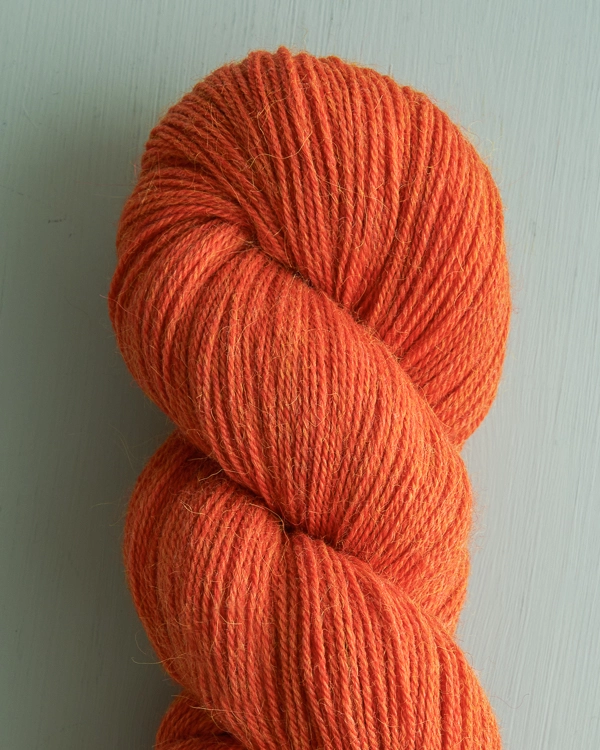
You have two very different fingering-weight yarn options for your Essential Knit Tee, each bringing its own beauty and personality. Quartz, shown above in Autumn Oak, is a wonderfully soft mix of supple merino wool and lustrous suri alpaca, a very special fiber which adds a subtle halo to the fabric. Quartz comes in 25 incredible colors, each glowing with nature’s energy!
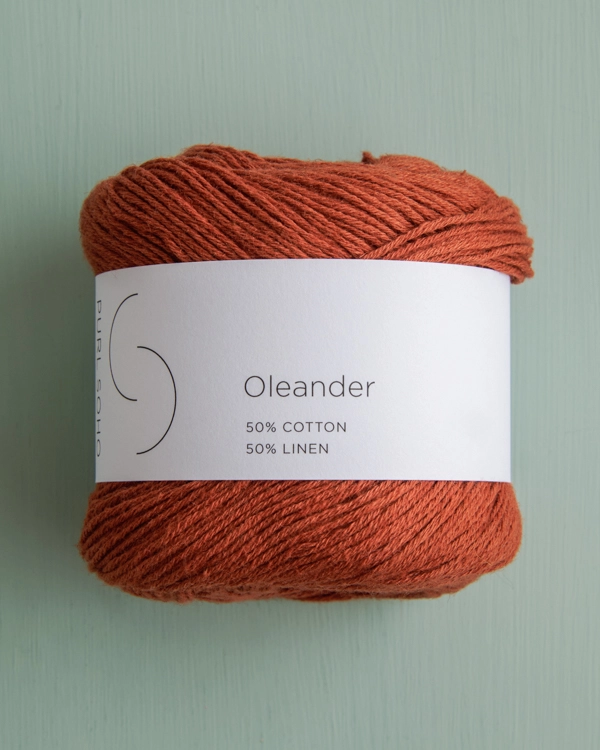
Made for sunshine, Oleander is a light-as-a-breeze mix of linen and cotton, available in 15 colors inspired by the warm, earthy tones of Mediterranean landscapes, all with an appealing matte finish. Naturally humectant linen keeps you cool, while cotton brings super touchable softness, and best of all, your Essential Knit Tee in Oleander will be conveniently machine wash- and dry-able, growing softer and more lovely with every wear.
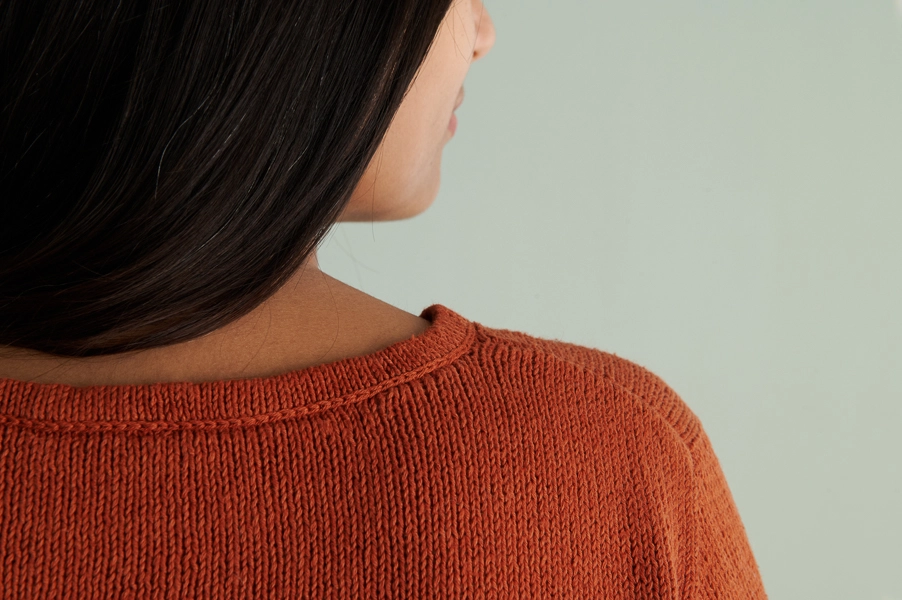
Whether knit in Quartz or Oleander, your Essential Knit Tee will span multiple seasons, have incredible drape, and look absolutely beautiful… A sure-to-be essential!
Yarn lovers, if you adore the yarn used in this project, you’ll love exploring all of our other yarn collections! Discover over 55 thoughtfully designed yarns in nearly every natural fiber and in every spectacular color you can imagine. Only available here at Purl Soho’s online yarn store, where every skein is created with care and your creativity in mind!
Pattern designed and written by Purl Soho designer, Gaby Bush.
Share your progress and connect with the community by tagging your pics with #PurlSoho. We can’t wait to see what you make!
Want to print this pattern? On desktop, find the “print” icon in the right margin, and on mobile, scroll to the end of the pattern for it. Use the on-screen instructions to remove anything you don’t want to print!
Materials
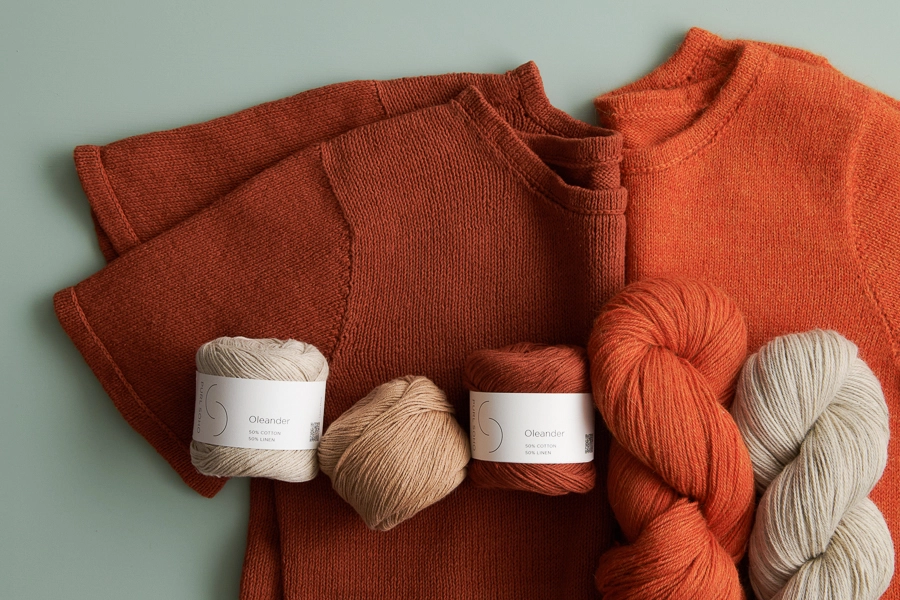
For the Oleander version…
- 6 (6, 7, 8, 9) (10, 11, 12, 12) balls of Purl Soho’s Oleander, 50% cotton and 50% linen. Each ball of this fingering-weight yarn is 205 yards/ 50 grams; approximately 1065 (1215, 1385, 1575, 1740) (1885, 2085, 2270, 2455) yards required. We used the color Burnt Sienna.
- US 1.5 (2.75 mm), 32- or 40-inch circular knitting needles, depending on size you are making
- US 1.5, 16-inch circular needles
Or for the Quartz version…
- 3 (3, 4, 4, 4) (5, 5, 5, 6) skeins of Purl Soho’s Quartz, 65% merino wool and 35% suri alpaca. Each skein of this fingering-weight yarn is 420 yards/ 100 grams; approximately 1020 (1130, 1280, 1455, 1590) (1710, 1865, 2015, 2180) yards required. We used the color Autumn Oak.
- US 2 (3 mm), 32- or 40-inch circular knitting needles, depending on size you are making
- US 2, 16-inch circular needles
You will also need…
- A US C (2.75 mm) crochet hook
- Removable stitch markers, including one unique
- Stitch holders
- Several yards of smooth fingering-weight scrap yarn
- An Essential Knit Tee PDF
GAUGE
32 stitches and 39 rounds = 4 inches in stockinette stitch
SIZES
NOTE: For help picking a size, please check out our Understanding Ease + Selecting Your Size Tutorial!
32 (36, 40, 44, 48) (52, 56, 60, 64)
To fit actual chest circumference of 30–34 (34–38, 38–42, 42–46, 46–50) (50–54, 54–58, 58–62, 62–66) inches, with -2 to 2 inches of ease
- Finished Chest Circumference: 32 (36, 40, 44, 48) (52, 56, 60, 64) inches
- Finished Length from Top of Shoulder to Bottom Edge: 22¾ (23¼, 24, 24½, 24¾) (25, 25½, 26, 26½) inches
- Finished Sleeve Length from Underarm to Cuff: 3½ (3½, 3½, 3¾, 3¾) (3¾, 4, 4, 4) inches
Sample: The Oleander version is size 36, worn with 2 inches of positive ease, and the Quartz version is size 32, worn with 2 inches of negative ease.
LEARN ABOUT OLEANDER, QUARTZ + ALL OUR BEAUTIFUL YARNS
Pick from two of our favorite fingering-weight yarns for our Essential Knit Tee pattern: Oleander, the ultimate warm-weather yarn made in Italy from 50% Turkish cotton and 50% Belgian linen; or Quartz, a wonderful mix of 65% merino wool and 35% suri alpaca that is lustrous, radiant, and sumptuously soft.
More Knitting Patterns
- Be sure to explore our collections of (mostly free!) Oleander knitting patterns and Quartz knitting patterns!
More Fingering-Weight Yarns
- Shop our entire collection of fingering-weight yarns (What does fingering-weight yarn mean, really? Our guide to fingering-weight yarn will answer your questions and more!)
- If you want to use a different yarn, be sure to take the time to get the correct gauge. Need help? Check our All About Gauge Tutorial and our Yarn Substitution article for lots of helpful information.
More Yarns With Similar Fibers
- Shop cotton yarn (What helps cotton keep its cool? Learn all about this soft, natural fiber in our guide to cotton yarn!)
- Shop linen yarn
- Shop plant-based yarn
- Shop machine-washable yarn
- Shop merino wool yarn
- Shop suri alpaca yarn
Looking for more inspiration? Explore all of our knitting patterns (including tons of free knitting patterns) and knitting tutorials, buy one of our many knitting kits and yarn bundles, and shop for beautiful yarn. We have over 55 gorgeous natural fiber yarns in 1,000s of magnificent colors, designed to bring integrity, beauty, and joy to your next knitting project and only available at Purl Soho!




I really appreciate Purl SoHo’s collaboration with designers who make classic and simple designs.
I’m wondering if this pattern is gender neutral or would I have to modify it for a man?
Hi Keith,
I’m so happy that this pattern has caught your eye! All of our patterns are designed to be worn by people of any gender, but some may fit different body types better than others. I’d recommend taking a look at the measurements listed under SIZES to get a sense of how it fits. If you’d like advice on making any specific modifications, just let me know what you want to change, and I can absolutely help out!
All the best,
Lili
Gorgeous and classic! I want to make one of each, and one in Cattail Silk as well 🤭
Thank you 🙂 Cattail Silk would be a great choice for this pattern!
All the best,
Lili
Would this work in Santolina?
Hi Vinceza,
Thank you for asking! You can definitely use Santolina for this pattern! Since it’s a fingering weight, you can just follow the pattern as is. We just recommend making a quick gauge swatch to make sure you are able to match the same tension as the pattern.
Happy knitting!
Gavriella
Hi!
I’m sure it is me but I have a question about the pattern.
When sewing up the shoulders, the pattern says that the front will be longer than the back but during the preliminary finishing, you will fold the front shoulders over and sew them to the back shoulders and then the front and back will be the same length. Do I fold where I feel I need to or is there a specific length to fold them to? During the preliminary finishing section, I don’t see a notation about folding over the fronts.
Thank you!
Hi Mattie,
Great question! You won’t be folding the fabric at all but instead lining the right front shoulder to the right back and then the same for the left side with the wrong sides facing out. This ensures you are seaming each shoulder to the correct front and back pieces. I hope I understood your question correctly but please let us know if you have any other questions!
All the best,
Gavriella
Hello! love this basic tee pattern. I’m thinking of knitting it up as a striped tee. I don’t anticipate any special difficulties matching up the stripes on the seams for front and back…but wanted to ask if there are other considerations I should think about, particularly with this pattern’s construction, that might not be ideal for a stripe sequence? Would the spacing of the stripes (like a traditional vs. bretton stripe) matter?
Thank you!
Hi Rebecca!
Stripes would look wonderful on this tee! The only thing I would keep in mind is to keep track of how you want to work your short rows when planning out your stripes. Other than that you are good to go!
Happy knitting!
Gavriella
I am working the sleeves on this pattern and don’t understand why the instructions say, “knit stitch without working wrap”. I tried this and I don’t like the bumps so ripped it out. I wonder if I am not understanding the meaning of this instruction. Please advise.
Hi Sally,
Thank you for writing in although we are sorry to hear you are running into issues here. Could you please send a photo of your project to [email protected] so we can have a deeper look? We’ll be able to better visualize what’s going on that way!
All the best,
Gavriella
In the pattern there is a note related to the provisional cast on that says to follow the video tutorial up to 2:13. However, the linked video (https://www.purlsoho.com/create/provisional-cast-on-video/) is only 1:57. Can you clarify this instruction?
Hi John!
Thanks a bunch for reaching out with your question. The full video linked should give you some great tips for the provisional cast-on. We’re going to update the pattern to include that info…really appreciate you letting us know!
Feel free to get in touch if you have any other questions. Hope you have a fantastic time knitting your Essential Knit Tee!
Cheers!
Hills
I’d like to make this kind of tee, but would like to adapt it so it has a longer 3/4” sleeve. Any suggestions or more suitable patterns in a summertime lightweight top?
Hi Lil!
Thanks so much for writing in with your question, I’m so excited to hear you’re interested in the Essential Knit Tee! I’m happy to help you find the right pattern for your perfect summertime lightweight top.
Have you considered the Top-Down Circular Yoke Pullover? It’s adaptable for sleeve length and lightweight…we’ve knit it in a bunch of different fibers (including, specifically, a Summer Shirt version)
There’s also the Simple Tee, while it doesn’t feature 3/4 length sleeves, it would be easily adaptable to knitting the sleeves a bit longer, and I’d recommend picking up an extra skein.
I hope this helps! Please feel free to reach out with any other questions you might have!
Happy knitting!
Hills
The pattern uses a gauge of 32 stitches for 4” on size 3.25mm needles – my swatch gives me 25 stitches. I have reduced my needle size down to 2.5mm and am now getting a gauge of 29 stitches for 4”. Do I go down to 2.25mm needles, and why is there such a discrepancy?
Hi Roberta!
Thanks so much for writing in with your question. I’m happy to help!
I totally understand your hesitation! It is totally possible to need to go down multiple needle sizes in order to achieve gauge. Everyone has their own gauge and sometimes that means you may need to adjust your needle size (even by multiple sizes) to achieve the intended gauge. It is normal and so long as you achieve gauge, you should be good to go! Sometimes it may also depend on whether you’ve substituted the yarn suggested in the pattern.
I hope this helps! Please feel free to reach out with any other questions you might have!
Happy knitting!
Hills
Thanks Hills,
I’m using Oleander as suggested, which is why I was so confused by the gauge discrepancy. Am using the 2.25mm needles, so hopefully it should be ok!
Hi Roberta!
Thanks for your reply! If you run into further trouble, please feel free to send an email to [email protected] with a photo of your swatch (and a ruler). We would be happy to take a look!
Happy knitting!
Hills
Hi there.
Quick question:
I am shaping the right front in the smallest size. Pattern says “Working in stockinette stitch, repeat decrease row 1 every other row, 3 times”. To clarify, do I decrease on every other RS row 3 times OR do I decrease every other total row (which would include both RS and WS rows) 3 times? Thank you.
Hi Courtney,
Thank you so much for your fantastic question. I totally understand that sometimes the style of patterns can be a little tricky to translate, and I’m happy to help!
You’ll be decreasing (using Decrease Row 1) every other row, on the right side only, three times. Every other row should be a right-side row. If you’re still running into trouble here, I’d suggest scheduling a 1-on-1 Help session. We would love to work through this together and get you back on track for relaxing knitting!
I hope this helps, and please feel free to reach back out with any other questions!
Happy knitting,
Hills
I would like to use a contrast color for the crochet chain detail. Do I simply start using the contrast color when following the instructions for the knit hem at the bottom and knit hem with crochet chain bind off? Or is there more to it than that?
Hi Susan,
This sounds like a lovely accent to the Essential Knit Tee!
It sounds like you’re on the right track! Your description is spot on. I would just be mindful of weaving in your ends into the contrast color to camouflage it.
I hope this helps, and please feel free to reach out with any other questions you might have!
Happy crafting!
Hills
I am at the divide front and back – making a small so I have 256 sts. The instructions say BO 11, k 117 and place these stiches onto stich holders.. for front. BO 11 and k to end… 117 sts for back. Then comes armhole shaping. Seems like there is a BO 11 missing before shaping armhole?
edit: I am having difficulty understanding the divide front and back. Following the directions for BO 11 and k117 for front, is there another BO 11 when I get to the wrong side of the front? (Because there are 128 sts for size small for each side, the stitch count is correct but from there on, it can’t be right because there are 11 sts few if there is a BO, which there has to be). Thanks!!
Hi Ann,
Thanks so much for reaching out! I’m happy to help clarify those directions for dividing the Front and Back of your tee.
You’re on the right track, I think we just need to clear up where the bind offs take place for each sleeve. Since your beginning of round marker is right behind the right sleeve, the first “bind off 11” in the “Division Round” is for the right sleeve, and the second “bind off 11” in that round is for the left sleeve. The armhole shaping on the Back takes place at the right sleeve, while the armhole shaping for the Front takes place at the left sleeve. These sets of 11 bound-off stitches in the Division Round will be used for seaming around the armpit at the end of your project.
I hope this helps make more sense of the “Divide Front + Back” section! If you have any other questions, please don’t hesitate to reach back out.
Kindly,
Sam
Hi,
I’m used to sewing, so forgive me if this is basic. Should I assume that the hip circumference is the same as the bust circumference for this pattern? My hip measurement puts me in a larger size than my bust measurement.
Thanks!
Hi Liz,
Thank you so much for reaching out about the Essential Knit Tee, and welcome to knitting! We’re so glad to have you here with us, and I’m happy to help you select your size!
I actually have a similar dilemma! I do sometimes size up to match the larger circumference, particularly if the pattern is fitted through the hips. Sometimes, selecting a pattern with extra ease is the best way to go, and this one is shaped with a little extra ease. Sadly, it’s beyond the scope of our resources to personalize the pattern, but you might enjoy reading about the maths for modifications in Kate Atherley’s Math for Knitters. You might also enjoy reading more about selecting your size in our article, “Understanding Ease + Selecting Your Size.”
I hope this helps! Please feel free to reach back out anytime with other questions.
Happy knitting,
Hills