Emblem Scarf
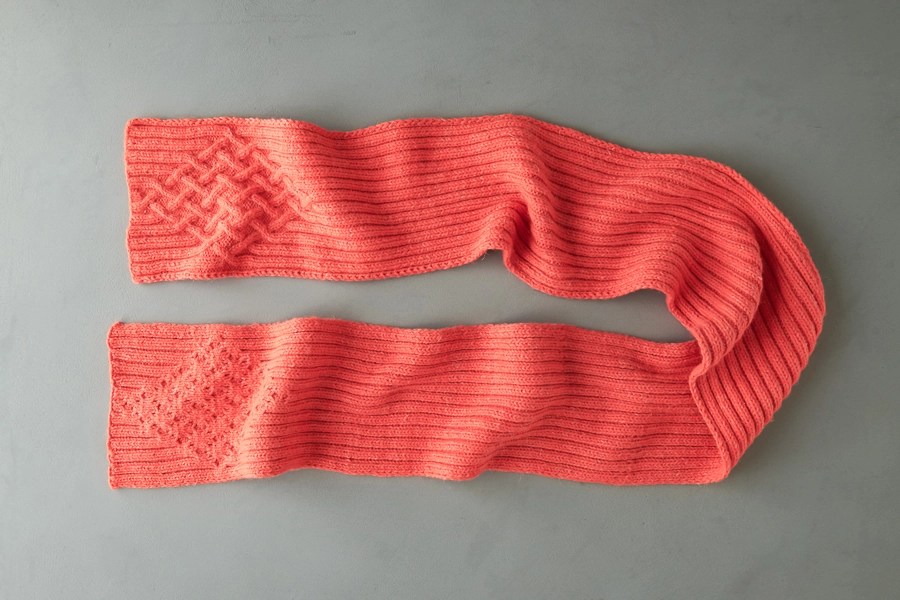
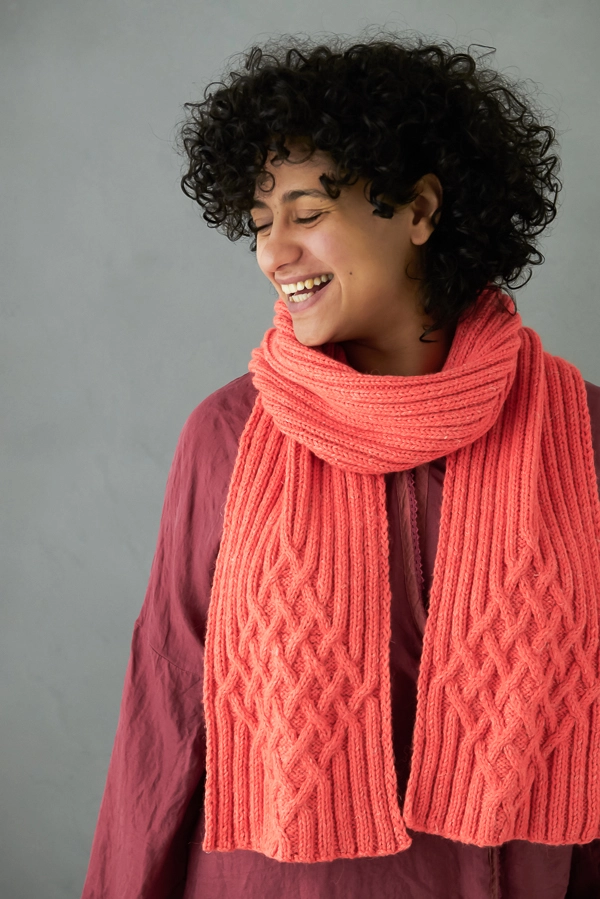
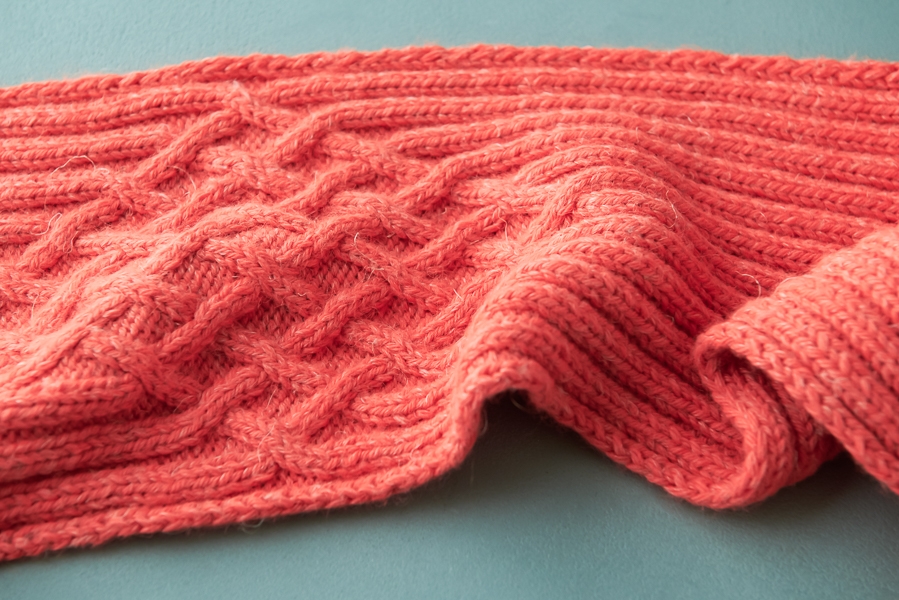
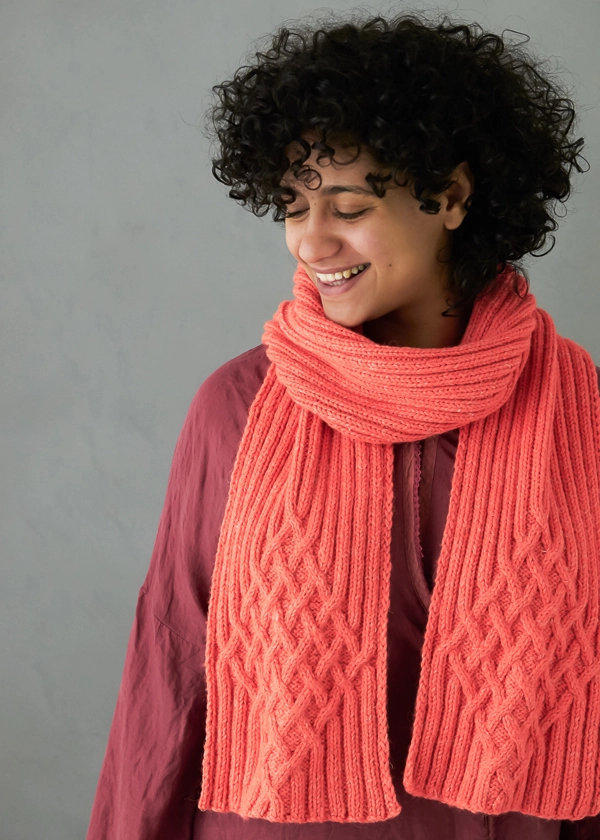
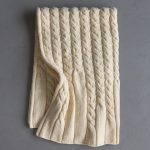
A cable motif commands just the right amount of attention while you’re knitting and admiration while you’re wearing. Our Emblem Scarf delivers both with a splash of classic cablework that lands in an eye-stopping place!
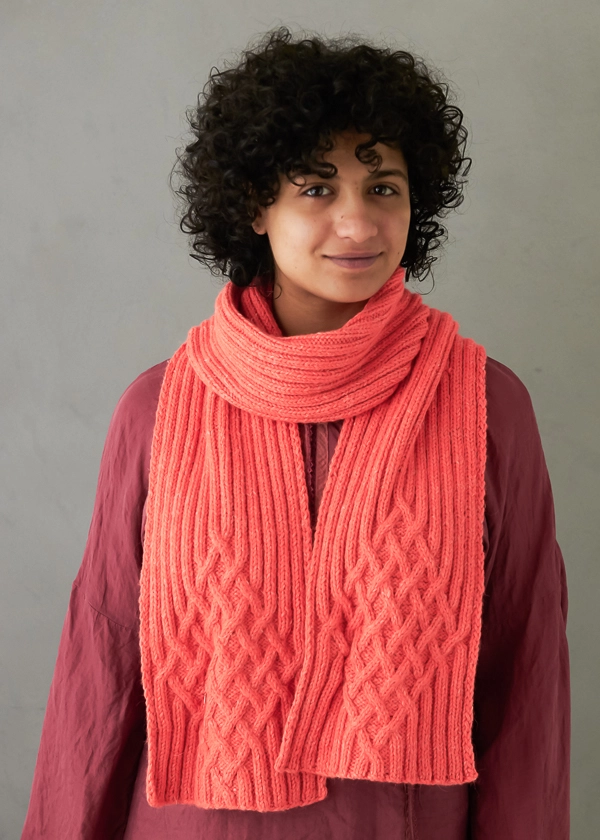
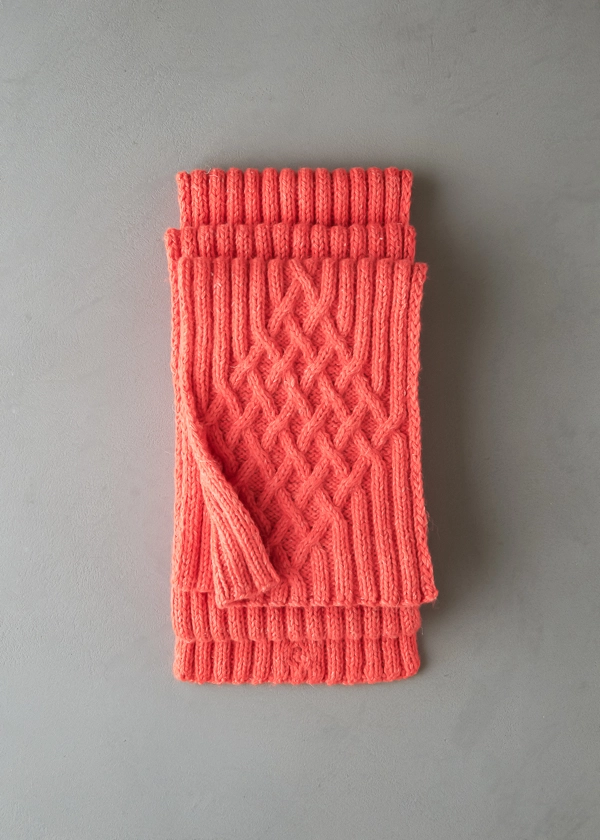
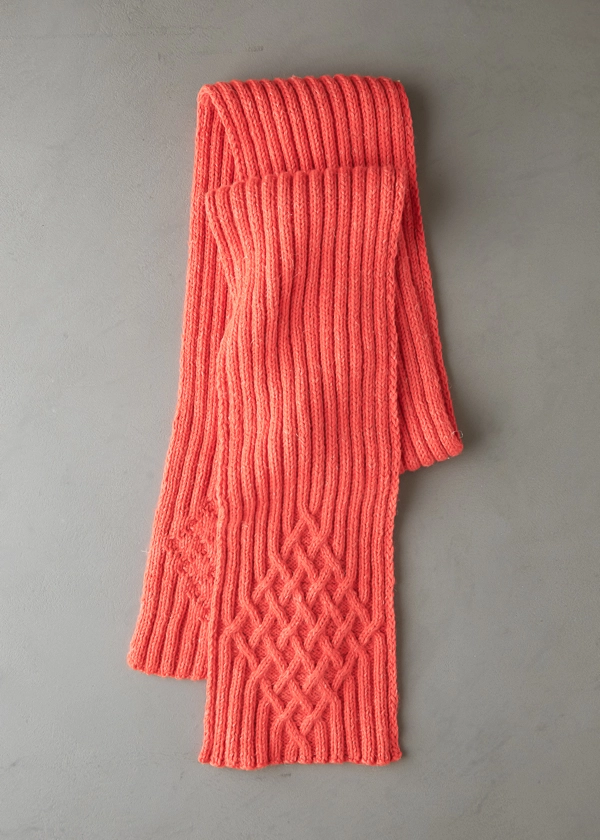
A big diamond of ribbed cables at the scarf’s very tips breaks the pattern to somehow suggest both a city grid and a garden trellis. Knit up in our Linen Quill Worsted, the yarn tells a similar urban-but-rural story: a blend of fine highland wool, alpaca and linen that’s as practical and durable as it is beautiful!
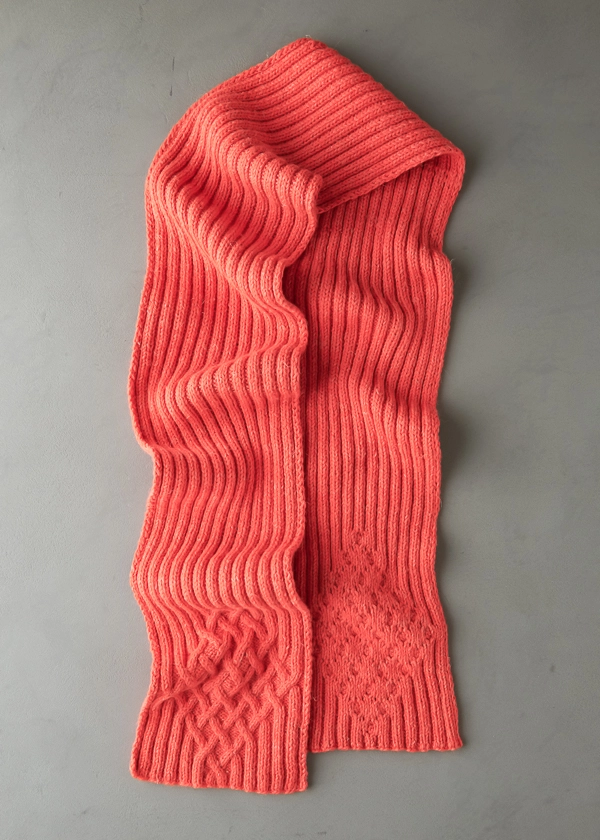
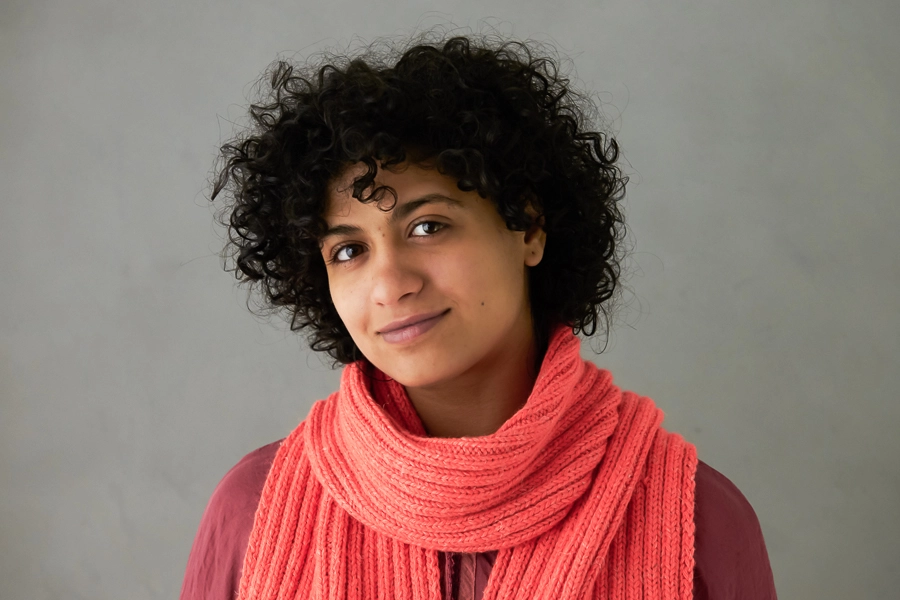
The colors range from moody Kettle Black to sweet Crocus Bud, 28 shades, in all put every kind of cable on the table. Here we used a kick of Super Orange, so zesty you can almost taste it, with ribs you want to squeeze!
UPDATE: A BEAUTIFUL BLANKET IN KNITTING YARN
FEBRUARY 2023
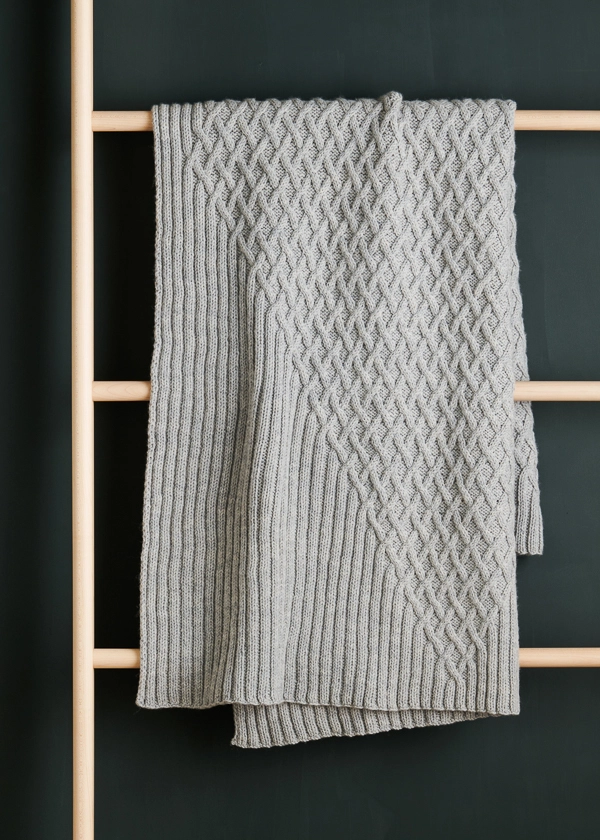
With the same striking diamond pattern as the scarf, our Emblem Blanket has all the beauty and style of a classic cabled knit, but with a dramatic scale that gives this project a geometric, modern feel. Simple ribbing melts seamlessly into the cabled diamonds within diamonds (within diamonds!), and our 100% merino Knitting Yarn, with its spectacular stitch definition, pleasant toothiness, and springy feel, is the perfect choice for all these captivating cables!
Designed by Purl Soho designer, Jake Canton. Click here to see even more of Jake’s designs!
Share your progress + connect with the community by tagging your pics with #PurlSoho, #PurlSohoBusyHands, #PurlSohoEmblemScarf, and #PurlSohoLinenQuillWorsted. We can’t wait to see what you make!
Materials
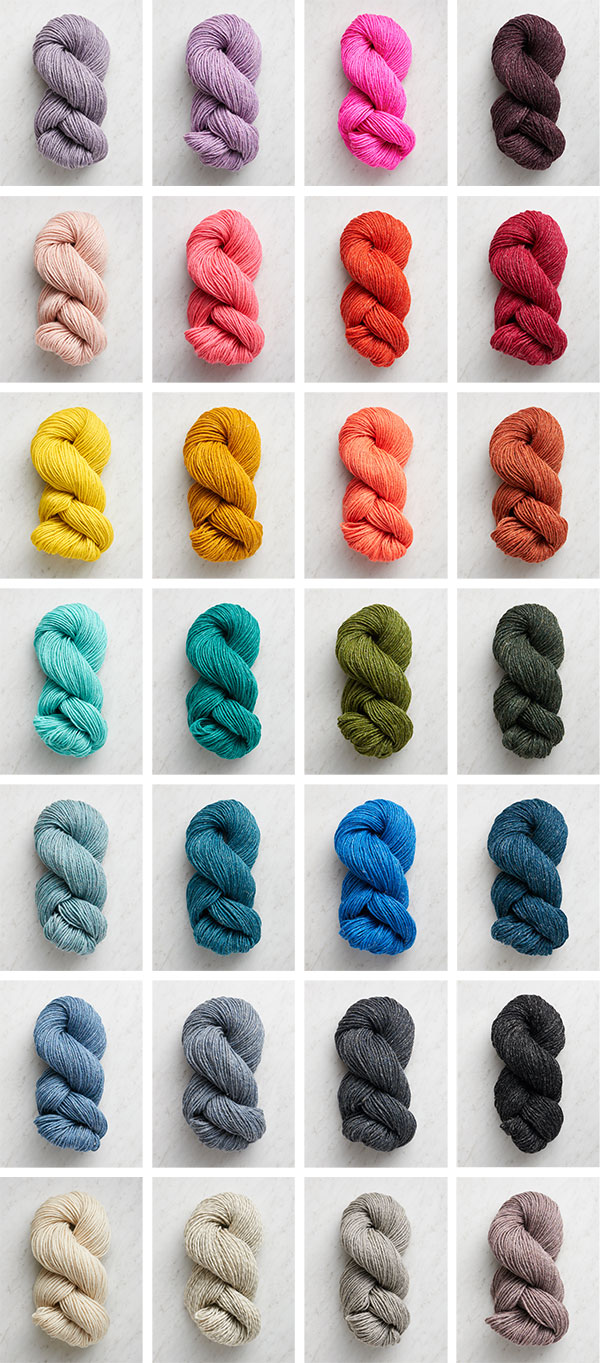
- 4 skeins of Purl Soho’s Linen Quill Worsted, 50% fine highland wool, 35% alpaca, and 15% linen. Each skein is 164 yards; approximately 540 yards required. We used the color Super Orange. (NOTE: We no longer offer Linen Quill Worsted, but choose from one of our other worsted weight yarns.)
- US 7 (4.5 mm) circular or straight needles
- Cable stitch holder
Gauge
26 stitches and 24 rows = 4 inches in 2 x 2 rib, stretch blocked
Size
Finished Dimensions: 8¼ inches wide x 68 inches long
Notes
Selvage Slip Stitches
At selvages, slip all slip stitches purlwise with yarn in front.
Cables
NOTE: When slipping cable stitches, slip stitches purlwise with yarn in back.
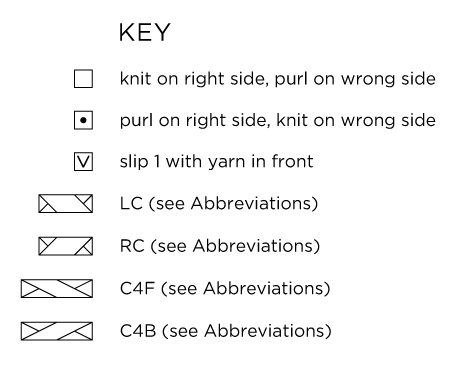
Left Cross (LC): Slip 2 stitches onto cable stitch holder and hold in front of work, p1, then k2 from cable stitch holder.
Right Cross (RC): Slip 1 stitch onto cable stitch holder and hold in back of work, k2, then p1 from cable stitch holder.
Cable 4 Front (C4F): Slip 2 stitches onto cable stitch holder and hold in front of work, k2, then k2 from cable stitch holder.
Cable 4 Back (C4B): Slip 2 stitches onto cable stitch holder and hold in back of work, k2, then k2 from cable stitch holder.
For more information about making cables, visit our Cable Tutorial. While it shows a 6-stitch cable and this pattern uses 3- or 4-stitch ones, the technique is the same!
Cable Pattern: Written Instructions
Row 1 (right side): [K2, p2] 6 times, LC (see Notes), RC (see Notes), *p2, k2 repeat from * to end of row.
Row 2 (wrong side): Slip 1 (See Notes), p1, [k2, p2] 5 times, k3, p4, k3, *p2, k2, repeat from * to last 2 stitches, p1, slip 1 (see Notes).
Row 3: [K2, p2] 5 times, k2, p3, C4F (see Notes), p3, *k2, p2, repeat from * to last 2 stitches, k2.
Row 4: Slip 1, p1, [k2, p2] 5 times, k3, p4, k3, *p2, k2, repeat from * to last 2 stitches, p1, slip 1.
Row 5: [K2, p2] 6 times, RC, LC, *p2, k2 repeat from * to end of row.
Row 6: Slip 1, p1, *k2, p2, repeat from * to last 4 stitches, k2, p1, slip 1.
Row 7: [K2, p2] 5 times, LC, RC, p2, LC, RC, *p2, k2, repeat from * to end of row.
Row 8: Slip 1, p1, [k2, p2] 4 times, k3, p4, k4, p4, k3, *p2, k2, repeat from * to last 2 stitches, p1, slip 1.
Row 9: [K2, p2] 4 times, k2, p3, C4B (see Notes), p4, C4B, p3, *k2, p2, repeat from * to last 2 stitches, k2.
Row 10: Slip 1, p1, [k2, p2] 4 times, k3, p4, k4, p4, k3, *p2, k2, repeat from * to last 2 stitches, p1, slip 1.
Row 11: [K2, p2] 5 times, RC, LC, p2, RC, LC, *p2, k2, repeat from * to end of row.
Row 12: Slip 1, p1, *k2, p2, repeat from * to last 4 stitches, k2, p1, slip 1.
Row 13: [K2, p2] 4 times, [LC, RC, p2] 3 times, *k2, p2, repeat from * to last 2 stitches, k2.
Row 14: Slip 1, p1, [k2, p2] 3 times, k3, [p4, k4] twice, p4, k3, *p2, k2, repeat from * to last 2 stitches, p1, slip 1.
Row 15: [K2, p2] 3 times, k2, p3, [C4F, p4] twice, C4F, p3, *k2, p2, repeat from * to last 2 stitches, k2.
Row 16: Slip 1, p1, [k2, p2] 3 times, k3, [p4, k4] twice p4, k3, *p2, k2, repeat from * to last 2 stitches, p1, slip 1.
Row 17: [K2, p2] 4 times, [RC, LC, p2] 3 times, *k2, p2, repeat from * to last 2 stitches, k2.
Row 18: Slip 1, p1, *k2, p2, repeat from * to last 4 stitches, k2, p1, slip 1.
Row 19: [K2, p2] 3 times, [LC, RC, p2] 4 times, *k2, p2, repeat from * to last 2 stitches, k2.
Row 20: Slip 1, p1, [k2, p2] twice, k3, [p4, k4] 3 times, p4, k3, *p2, k2, repeat from * to last 2 stitches, p1, slip 1.
Row 21: [K2, p2] twice, k2, p3, [C4B, p4] 3 times, C4B, p3, *k2, p2, repeat from * to last 2 stitches, k2.
Row 22: Slip 1, p1, [k2, p2] twice, k3, [p4, k4] 3 times, p4, k3, *p2, k2, repeat from * to last 2 stitches, p1, slip 1.
Row 23: [K2, p2] 3 times, [RC, LC, p2] 4 times, *k2, p2, repeat from * to last 2 stitches, k2.
Row 24: Slip 1, p1, *k2, p2, repeat from * to last 4 stitches, k2, p1, slip 1.
Row 25: [K2, p2] twice, [LC, RC, p2] 5 times, k2, p2, k2.
Row 26: Slip 1, p1, k2, p2, k3, [p4, k4] 4 times, p4, k3, p2, k2, p1, slip 1.
Row 27: K2, p2, k2, p3, [C4F, p4] 4 times, C4F, p3, k2, p2, k2.
Row 28: Slip 1, p1, k2, p2, k3, [p4, k4] 4 times, p4, k3, p2, k2, p1, slip 1.
Row 29: [K2, p2] twice, [RC, LC, p2] 5 times, k2, p2, k2.
Row 30: Slip 1, p1, *k2, p2, repeat from * to last 4 stitches, k2, p1, slip 1.
Row 31: K2, p2, [LC, RC, p2] 6 times, k2.
Row 32: Slip 1, p1, k3, [p4, k4] 5 times, p4, k3, p1, slip 1.
Row 33: K2, p3, [C4B, p4] 5 times, C4B, p3, k2.
Row 34: Slip 1, p1, k3, [p4, k4] 5 times, p4, k3, p1, slip 1.
Row 35: K2, p2, [RC, LC, p2] 6 times, k2.
Row 36: Slip 1, p1, *k2, p2, repeat from * to last 4 stitches, k2, p1, slip 1.
Row 37: [K2, p2] twice, [LC, RC, p2] 5 times, k2, p2, k2.
Row 38: Slip 1, p1, k2, p2, k3, [p4, k4] 4 times, p4, k3, p2, k2, p1, slip 1.
Row 39: K2, p2, k2, p3, [C4F, p4] 4 times, C4F, p3, k2, p2, k2.
Row 40: Slip 1, p1, k2, p2, k3, [p4, k4] 4 times, p4, k3, p2, k2, p1, slip 1.
Row 41: [K2, p2] twice, [RC, LC, p2] 5 times, k2, p2, k2.
Row 42: Slip 1, p1, *k2, p2, repeat from * to last 4 stitches, k2, p1, slip 1.
Row 43: [K2, p2] 3 times, [LC, RC, p2] 4 times, *k2, p2, repeat from * to last 2 stitches, k2.
Row 44: Slip 1, p1, [k2, p2] twice, k3, [p4, k4] 3 times, p4, k3, *p2, k2, repeat from * to last 2 stitches, p1, slip 1.
Row 45: [K2, p2] twice, k2, p3, [C4B, p4] 3 times, C4B, p3, *k2, p2, repeat from * to last 2 stitches, k2.
Row 46: Slip 1, p1, [k2, p2] twice, k3, [p4, k4] 3 times, p4, k3, *p2, k2, repeat from * to last 2 stitches, p1, slip 1.
Row 47: [K2, p2] 3 times, [RC, LC, p2] 4 times, *k2, p2, repeat from * to last 2 stitches, k2.
Row 48: Slip 1, p1, *k2, p2, repeat from * to last 4 stitches, k2, p1, slip 1.
Row 49: [K2, p2] 4 times, [LC, RC, p2] 3 times, *k2, p2, repeat from * to last 2 stitches, k2.
Row 50: Slip 1, p1, [k2, p2] 3 times, k3, [p4, k4] twice, p4, k3, *p2, k2, repeat from * to last 2 stitches, p1, slip 1.
Row 51: [K2, p2] 3 times, k2, p3, [C4F, p4] twice, C4F, p3, *k2, p2, repeat from * to last 2 stitches, k2.
Row 52: Slip 1, p1, [k2, p2] 3 times, k3, [p4, k4] twice p4, k3, *p2, k2, repeat from * to last 2 stitches, p1, slip 1.
Row 53: [K2, p2] 4 times, [RC, LC, p2] 3 times, *k2, p2, repeat from * to last 2 stitches, k2.
Row 54: Slip 1, p1, *k2, p2, repeat from * to last 4 stitches, k2, p1, slip 1.
Row 55: [K2, p2] 5 times, LC, RC, p2, LC, RC, *p2, k2, repeat from * to end of row.
Row 56: Slip 1, p1, [k2, p2] 4 times, k3, p4, k4, p4, k3, *p2, k2, repeat from * to last 2 stitches, p1, slip 1.
Row 57: [K2, p2] 4 times, k2, p3, C4B, p4, C4B, p3, *k2, p2, repeat from * to last 2 stitches, k2.
Row 58: Slip 1, p1, [k2, p2] 4 times, k3, p4, k4, p4, k3, *p2, k2, repeat from * to last 2 stitches, p1, slip 1.
Row 59: [K2, p2] 5 times, RC, LC, p2, RC, LC, *p2, k2, repeat from * to end of row.
Row 60: Slip 1, p1, *k2, p2, repeat from * to last 4 stitches, k2, p1, slip 1.
Row 61 (right side): [K2, p2] 6 times, LC, RC, *p2, k2 repeat from * to end of row.
Row 62 (wrong side): Slip 1, p1, [k2, p2] 5 times, k3, p4, k3, *p2, k2, repeat from * to last 2 stitches, p1, slip 1.
Row 63: [K2, p2] 5 times, k2, p3, C4F, p3, *k2, p2, repeat from * to last 2 stitches, k2.
Row 64: Slip 1, p1, [k2, p2] 5 times, k3, p4, k3, *p2, k2, repeat from * to last 2 stitches, p1, slip 1.
Row 65: [K2, p2] 6 times, RC, LC, *p2, k2 repeat from * to end of row.
Row 66: Slip 1, p1, *k2, p2, repeat from * to last 4 stitches, k2, p1, slip 1.
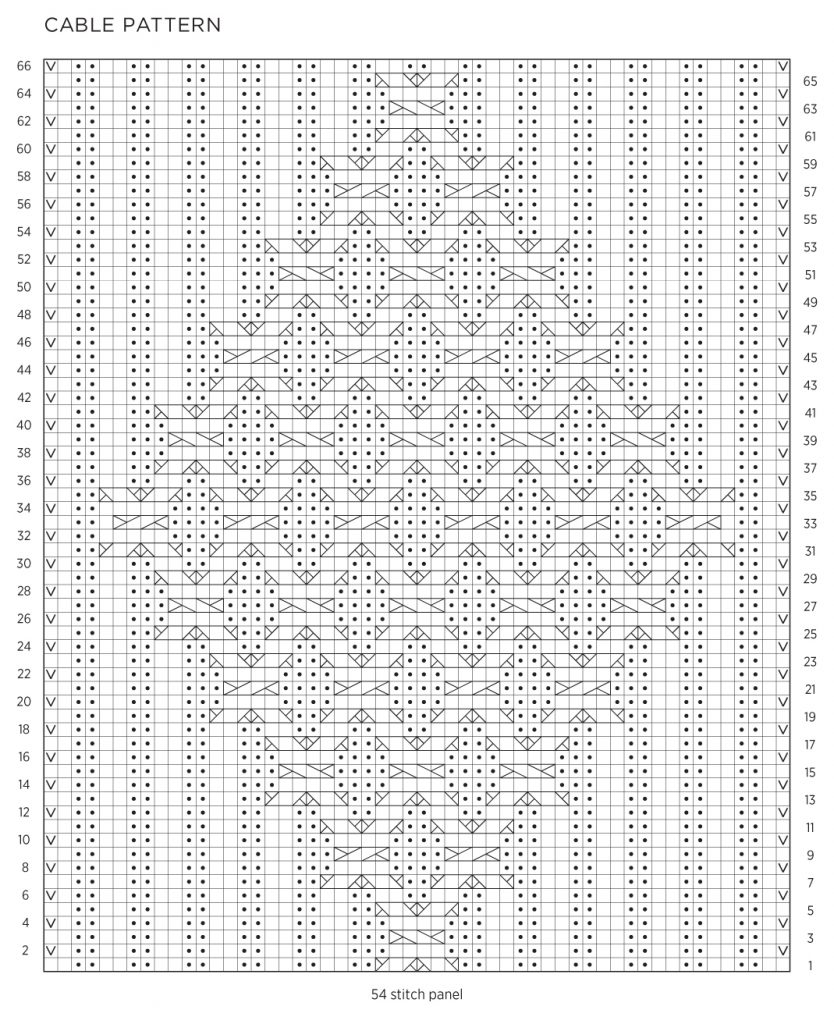
Cable Pattern: Chart
Start in the bottom right corner of the Chart and work right-side (odd number) rows from right to left, and wrong-side (even number) rows from left to right.
Pattern
Begin
Cast on 54 stitches. We used a basic Long Tail Cast On.
Set-Up Row (wrong side): Slip 1 with yarn in front (wyif, see Notes), p1, *k2, p2, repeat from * to last 4 stitches, k2, p1, slip 1 wyif (see Notes).
Row 1 (right side): *K2, p2, repeat from * to last 2 stitches, k2.
Row 2 (wrong side): Slip 1 wyif, p1, *k2, p2, repeat from * to last 4 stitches, k2, p1, slip 1 wyif.
Work Cable
Work Rows 1–66 of Cable Pattern (either from Written Instructions or Chart, both above).
Continue In 2×2 Rib
Row 1 (right side): *K2, p2, repeat from * to last 2 stitches, k2.
Row 2 (wrong side): Slip 1 wyif, p1, *k2, p2, repeat from * to last 4 stitches, k2, p1, slip 1 wyif.
Repeat Rows 1 and 2 until piece measures 61 inches from cast-on edge (or 10½ inches less than desired scarf length), ending with Row 2.
Work Cable
Repeat Rows 1–66 of Cable Pattern.
End
Repeat Rows 1 and 2 of Continue in 2×2 Rib section one time.
With right side facing you, bind off all stitches in 2×2 Rib pattern.
Weave in ends and wet block.




Very attractive scarf, but the pattern and pdf is very printer-unfriendly. Please consider formatting your down-loadable patterns so that they use home printers economically. Thanks.
Hi and thanks for reaching out! You can use our print function to create a pdf including only the parts of the pattern you want to print! If you’re on a desktop version of the site, you will find a “print” icon in the right column just below the date and tags. If you’re on a mobile version of the site, you will find a “print” icon below the pattern and above the comments.
Follow the easy on-screen instructions to delete whichever parts of the pattern you don’t want to print or save. For example, you may decide to shorten the pattern by omitting certain images or the list of materials. To remove images, click the drop down next to the image icon and change from 100% to 0%.
I hope that helps, and happy knitting!
Julianna
Just seen your pattern and I would like to be able to see/buy more
Hi Gwyneth,
Thanks for reaching out! You can browse all of our patterns and yarns right here, and if you sign up for our newsletter, we’ll deliver new projects right to your inbox!
Best,
Julianna
Hi! My internet is very bad because I live in the woods. Is there a way to print the emblem scarf pattern? Thanks!
Stay well,
Yahzi
Hi Yahzi,
Thanks for reaching out! Yes, absolutely! If you’re on a desktop version of the site, you will find a “print” icon in the right column just below the date and tags. If you’re on a mobile version of the site, you will find a “print” icon below the pattern and above the comments.
Follow the easy on-screen instructions to delete whichever parts of the pattern you don’t want to print or save. For example, you may decide to shorten the pattern by omitting certain images or the list of materials. To remove images, click the drop down next to the image icon and change from 100% to 0%.
Happy knitting!
Julianna
I tried to follow your instructions to delete unwanted pages from the pattern before downloading as a PDF. When I click on the “print” icon and see all the pages, I cannot find anyway to delete specific pages. I can delete all of the pictures as you instructed, but not just selected pages.
Hi Ila,
While in the print function, you should be able to tap or click on any unwanted paragraphs and they will disappear.
Happy knitting!
Julianna
Thank you so much 🙂
I’ve finished one cabled end and am deep into
ribbed pattern: the width is bowed out of line
from the rest of the scarf pattern. Can this be
corrected when blocking?
Hi KJ,
Thanks for reaching out! Yes, you will need to wet block this scarf for best results! The ribbing in the center of the scarf pulls in much more than the cabled emblem, but you should be able to block the whole thing to a consistent width.
Happy knitting!
Julianna
I am knitting emblem scarf from written instructions. Knitted to row 11 of cable instructions. When counting stitches to insure correct knitted do the slipped stick count? I.e, slip2 k2p2 5x = 12stiches I seem to be off in pattern
Hi Karol,
Thanks for writing in! When knitting this pattern, you should only be slipping the first and last stitch of each wrong side row as written. Row 11 begins with [k2, p2] 5 times for a total of 10 stitches, and if you are adding two slipped stitches at the beginning, it will shift your pattern over by two stitches. However, the slipped stitches on the wrong side rows should be included in your overall stitch count.
I hope that clears things up!
Julianna
Hi, I’ve just started the first cable emblem section and have a question about when I get to the other one:
After working the cable emblem section, we continue in the 2X2 rib until ready to do the cable section again. The 2×2 rib instructions say: “Repeat Rows 1 and 2 until piece measures 61 inches from cast-on edge (or 10½ inches less than desired scarf length), ending with Row 1.”
Wouldn’t we need to end with Row 2, a wrong side row? The cable pattern’s first row is a right-side row.
Hi Marjorie!
Thank you for reaching out! You are correct, the ribbing should end with a wrong side/row 2 before starting the second cable section. We’re updating the pattern right now. Thanks so much for letting us know!
Happy Knitting!
Cassandra
Thanks so much for your help, Cassandra!
I just finished the Emblem Scarf and used only three of the four skeins. Do you have a pattern for a hat that would take one ball to make? It doesn’t necessarily have to have cables. I really enjoyed knitting with the Linen Quill Worsted.
Hi Hilary,
Thanks for writing in! It’s wonderful to hear that you enjoyed working with Linen Quill Worsted! One skein will be enough to make our Classic Cuffed Hat in any size without a pom pom.
All the best,
Julianna