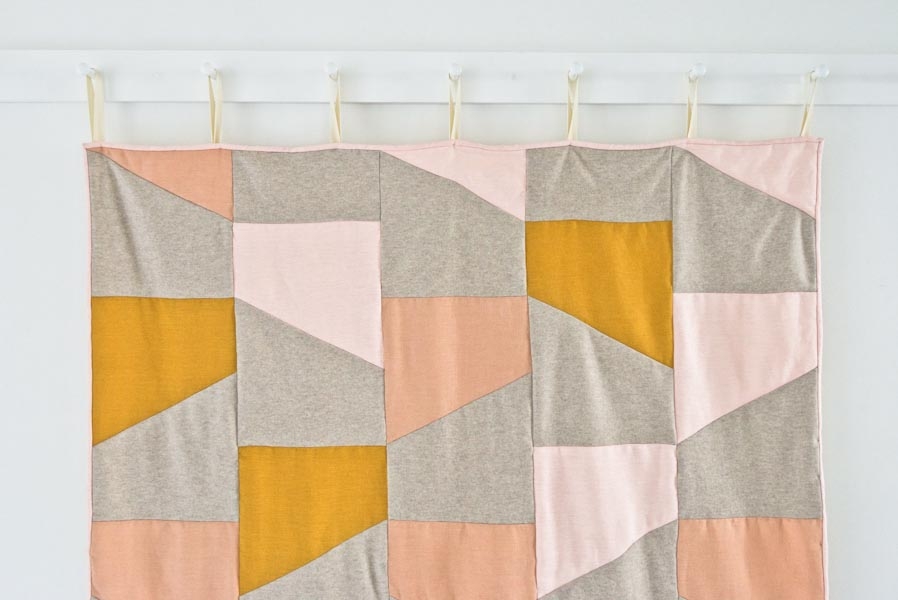
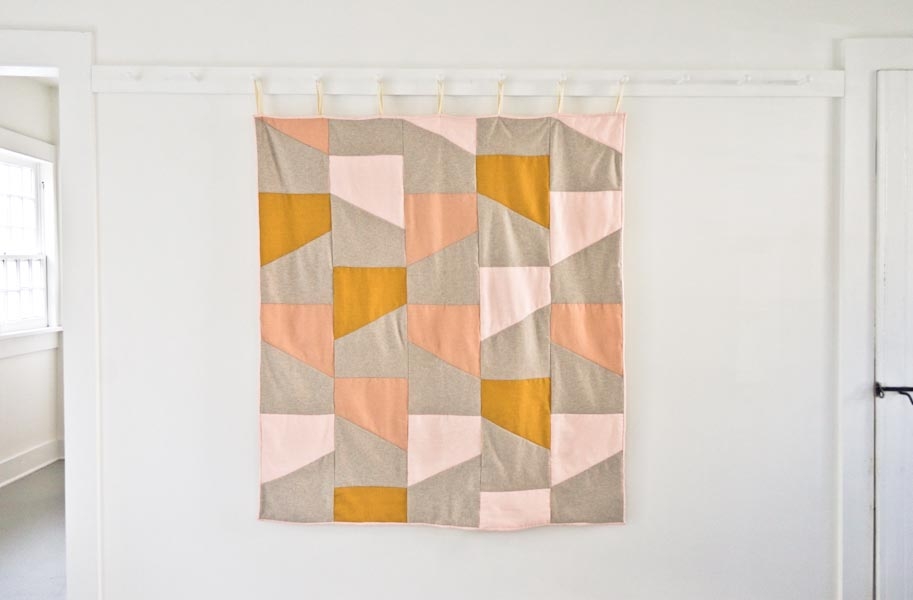

Wool + Linen Patchwork Quilt
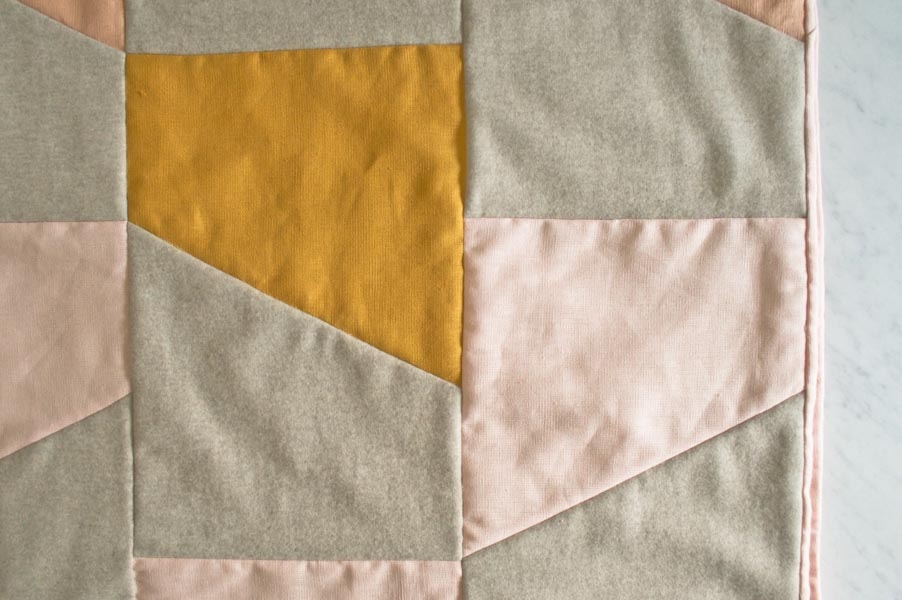
Our Wool + Linen Patchwork Quilt pairs Purl Soho’s pure and sturdy Warsa Linen with Lanecardate’s soft and elegant Lana Cotta Canberra wool. These two may seem like unlikely bedfellows, but the luminous clarity of the linen together with the rich depth of the wool create a bold mosaic, unexpected and totally beautiful!

With such surprising materials it’s only fitting that the pattern should also be something a little out of the ordinary, something involving trapezoid shaped blocks, an off kilter composition, and an unusual color combination. But while the concept may be unconventional, the crafting is straightforward and the resulting quilt is right at home! -Molly

Materials

To make one quilt you’ll need…
- Fabric 1: 1 yard of Lanecardate’s Lana Cotta Canberra in Oatmeal
- Fabric 2 and Binding Strips: 1 yard of Purl Soho’s Warsa Linen in Pale Pink
- Fabric 3: ½ yard of Purl Soho’s Warsa Linen in Blush
- Fabric 4: ½ yard of Purl Soho’s Warsa Linen in Ochre
- Backing Fabric: 1 ¾ yards of Moda’s Muslin, 200 Count, 90 inches, in Natural
- Quilter’s Dream Cotton Batting, Throw size, Request loft
- A 110- yard spool of Gutermann’s Cotton Sewing Thread in color 317
- An erasable fabric marker
- Purl Soho’s Rotary Cutting Tool Kit, which includes…
- A rotary cutter
- A self-healing cutting mat
- A 6 1/2 x 24 1/2-inch non-slip straight ruler
- A 12 ½ x 12 1/2–inch non-slip square ruler
Size
Finished dimensions: 50 inches wide X 55 inches long
Notes
All seam allowances are ¼ inch unless otherwise noted.

The wool fabric (Fabric 1) is the only fabric in this project that has a right and wrong side, but it can be a bit hard to tell which is which. If you look closely, the right side is covered in very small “V” shapes (for you knitters out there, this is the knit side of stockinette stitch). The wrong side is covered in “U” shapes (this the purl side of stockinette stitch).
Pattern
How To Cut Pieces A, B, and C
Note: You will cut three shapes for this quilt: Pieces A, B, and C. Because the wool has a right and wrong side and the linens do not, the cutting instructions for the two fabrics are slightly different.
Piece A in Wool
Cut a strip of wool 10 ½ inches wide from selvage to selvage and cut off the selvages. This strip will be about 59 inches long.
With the right side of the fabric facing up and the short edges at the top and bottom, make a mark 5 3/8 inches above the bottom right corner of the strip. Make another mark 10 5/8 inches above the bottom left corner of the strip.

Lay the rotary cutting ruler diagonally across the strip, from mark to mark, and then cut along this diagonal line.

The remaining bottom piece is your first Piece A. When oriented so the right angles are on the bottom, it is a trapezoid with a long left side, a short right side, and the top edge angling downwards from left to right.

Now returning to the strip, make a mark 5 3/8 inches above the bottom left corner and 10 5/8 inches above the bottom right corner. Lay the rotary cutting ruler perpendicular across the strip, from mark to mark. Make sure both sides of the ruler make a 90º angle with the left and right sides of the strip (If you aren’t getting a 90º angle, re-measure the marks). Cut along the ruler.
The remaining bottom piece is another Piece A. Rotate it 180º and you’ll see that it’s exactly the same as the first one you cut. You will continue to cut A pieces along this strip, getting 8 pieces per strip.
Piece B in Wool
Cut a strip of wool 10 ½ inches long, from selvage to selvage, and cut off the selvages. This strip will be about 59 inches long.
With the right side of the fabric facing up and the short sides at the top and bottom, make a mark 10 5/8 inches above the bottom right corner of the strip. Make another mark 5 3/8 inches above the bottom left corner of the strip.
Lay your rotary cutting ruler diagonally across the strip, from mark to mark, and then cut along this diagonal line.
The remaining bottom piece is your first Piece B. When oriented so the right angles are on the bottom, it is a trapezoid with a long right side, a short left side, and the top edge angling upwards from left to right.
Now returning to the strip, make a mark 10 5/8 inches above the bottom left corner of the strip and 5 3/8 inches above the bottom right corner. Lay the rotary cutting ruler perpendicular across the strip, from mark to mark. Make sure both sides of the ruler make a 90º angle with the left and right sides of the strip. Cut along the ruler.
The remaining bottom piece is another Piece B.
Rotate it 180º and you’ll see that it’s exactly the same as the first one you cut. You will continue to cut B pieces along this strip, getting 8 pieces per strip.
Pieces A and B in Linen
Since the linen fabrics don’t have a right or wrong side, Pieces A and B are interchangeable. An A can become a B simply by flipping it over, so feel free to cut these pieces all in one orientation and then flip them as needed.
Piece C in All Fabrics
Piece C is a rectangle, 10 ½ inches wide x 5 ½ inches long.
Cut All The Pieces
Note: When you cut the linen fabrics, be sure to make note of the right side and wrong side of each Piece when it is in its correct orientation.
From Fabric 1…
- Piece A: Cut 10.
- Piece B: Cut 8.
- Piece C: Cut 2.
From Fabric 2…
- Piece A: Cut 3.
- Piece B: Cut 5.
- Piece C: Cut 1.
- Binding Strips: Cut 4 strips 2 ¼ inches wide by 59 inches long. You can set these aside for now.
From Fabric 3…
- Piece A: Cut 5.
- Piece B: Cut 1.
From Fabric 4…
- Piece A: Cut 2.
- Piece B: Cut 2.
- Piece C: Cut 1.
From the Backing Fabric…
- Cut a rectangle 58 inches wide by 63 inches long. You can set this aside for now.
MARK
Gather all the linen A and B pieces.

Flip each piece so its wrong side is facing up and lay a rotary cutting ruler ¼ inch from the diagonal edge.

Make an approximately ½ inch long mark along the ruler at each edge of the fabric.
Do this to all the linen A and B pieces.
Piece the Blocks
You will pin and piece all of the linen A pieces to the wool A pieces and all the linen B pieces to the wool B pieces.
Here’s how…

Lay down a Piece A of Fabric 1 (A1) with its right side facing up and the right angles at the bottom. The long side will be on the left.
Lay a linen Piece A (in this case, since it’s Fabric 2, “A2”) on top of A1, wrong side facing up and its diagonal edge flush with A1’s diagonal edge. The linen’s short side is on the left.
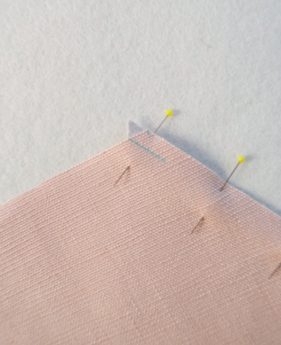
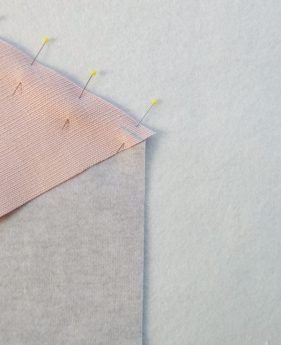
Arrange the linen piece so its left mark meets the side edge of A1. The right-hand mark should also just touch the edge of A1. Pin the pieces together along this edge.

Sew the pieces together along the pinned edge and then press the seams open.

This is now an A2/A1 Block. The linen section of the block is always the top, and the wool section is always the bottom. Repeat this for all of the A and B pieces, always attaching a wool piece to a linen piece. For both Pieces A and B, be sure to pin the acute angle of the wool piece to the obtuse angle of the linen piece.
Sew the Rows

You will now sew these blocks together into rows, as illustrated above. In the diagram you will notice that Rows 1, 3, and 5 start with a partial block. Don’t worry about that now. You will trim down those top pieces later. For now just treat them as whole blocks. (For example, the top left block on Row 1 is an A3/A1 Block.)
The quickest way to piece a bunch of blocks like this is to chain piece. Here’s how…
Gather all of the blocks and C pieces and put them into piles, one for each row, arranged in a stack from bottom of the quilt to top. So, for Row 1 your stack will be B2/B1, A3/A1, B4/B1, A3/A1.
Start by pinning the first two pieces in each stack, right sides together. So, for the Row 1 stack that will mean pinning the bottom of the A3/A1 Block to the top of the B4/B1 Block, and for Row 2 it will mean pinning the bottom of Piece C to the top of the A2/A1 Block. Arrange the pinned pieces in row order, 1 to 5.
First, sew the two Row 1 pieces together along their pinned edge. Do not pick up the foot or cut the thread at the end of the seam, instead, feed the Row 2 pinned pieces into the machine directly afterwards. Repeat until you have sewn together the pinned pieces of all 5 rows.
Snip the five sections apart and then pin on the next block or C piece from each stack. For example, for Row 1 you will pin the top edge of an A3/A1 block to the bottom edge of the B4/B1 section you just sewed. Repeat for all 5 rows and then chain piece them together.
Keep pinning and chain piecing in this manner until all 5 rows are complete. Press all of these seams open before proceeding.
Sew the Rows Together Starting at the bottom edge, pin the left side of Row 2 to the right side of Row 1, right sides together. Make sure that the seams meet up neatly where they should. For instance, if you look at the lower left of the diagram, you will see that A1, B2, A1, and A3 should meet at one point along this seam.
When you get to the top of the seam you will see that Row 1 is longer than 2. Use the rotary cutter to cut Row 1 to align with Row 2.
Sew these two rows together and press the seam allowance open.
Repeat for all of the other rows, cutting down Rows 3 and 5 as you get to them.
Your quilt top is finished!
Baste
Baste the quilt to prepare it for quilting. If you’ve never done this, please check out our Pin Basting Tutorial. (When you make the quilt sandwich, trim down the batting after you lay it on top of the Backing and before you place the quilt top on it.)
Quilt
You can quilt in any pattern you like! We chose to “stitch in the ditch” for our quilt, sewing along every seam of the quilt top. To quilt by machine, use your machine’s walking foot and sew right next to the seam. Quilt all the vertical, diagonal, and horizontal straight seams. Here’s how…

Start at “start 1,” illustrated above. Sew along the horizontal seam on Row 1 between B1 and A3, and then zigzag horizontally across the quilt, as illustrated in the diagram above, ending a couple of inches into the batting (“end 1”).
Cut the thread and then sew in the reverse direction along the next seam below (“start 2”). Repeat this process, reversing direction for each seam below, then do the same for all of the seams above.
You will be left with many unquilted vertical seams. Sew along each of these vertical seams, one by one, backstitching at the beginning and end of each seam, or if the seam is on the outside, starting a couple of inches into the batting and backstitching at the end of the seam.
Once you’ve finished quilting, trim the batting and backing to match up with the quilt top.
Bind
Use the Binding Strips you cut from Fabric 2 to bind the quilt with double fold binding. For instructions on how to do this, please check out our Making Double Fold Binding and Sewing on Double Fold Binding Tutorials!


All the quilts are beautiful
i am so excited to start on this quilt. But I am wondering about washing the fabric….. normally I would before I begin. would you prewash all the fabric? thank you.
Karen
Hi Karen-
This quilt is hand washable only because of the different fiber contents of the fabrics so you don’t need to pre-wash.
Thanks for getting in touch!
Molly
I love the design of this quilt but plan to make it with regular cotton. Would the cutting be different? Thanks!
Hi Claire,
Thanks for writing in about this – great question! We’ve used a standard quilter’s 1/4″ seam allowance in this project, so you can easily substitute cotton in place of the wool and linen! The cutting instructions will be exactly the same. I hope this helps!
Best,
Cassandra
Hello Cassandra,
Thanks so much for your reply. Unfortunately, there is no indication on each of the fabric above how much is the WIDTH (which makes yardage requirement changes because regular cotton fabrics are 42 inches). Do you have any tips on conversion?
Thanks so much once again,
Claire
Hi Claire,
You’re totally correct! – the yardage requirements will differ significantly, with the difference between a 40″ wide fabric and a 59″ fabric. With the strips cut at 10 1/2 inches wide, you will need at least 3/4 yard more of each fabric to make up for what you’re losing in length, to the best of my estimation. Even as a quilter, that’s definitely quite a bit of math – my advice would be to double the yardage required for fabrics 1-4, to be on the safe side, considering shrinkage in cotton. If there are leftovers, they can always be pieced into a decorative stripe to use on the backing! I hope this helps!
Best,
Cassandra
Thanks so much, Cassandra, for your input!! Yes, that’s quite a bit of a math!