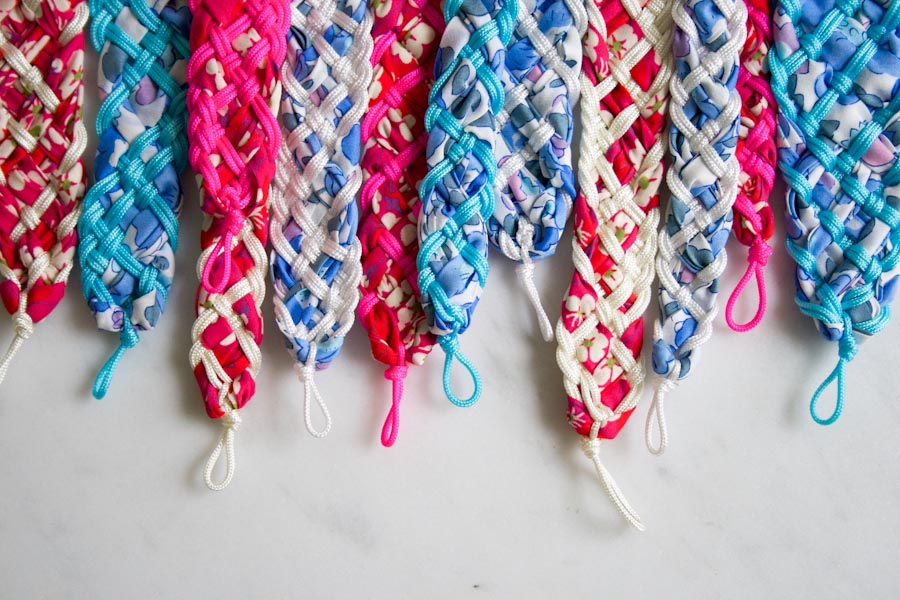
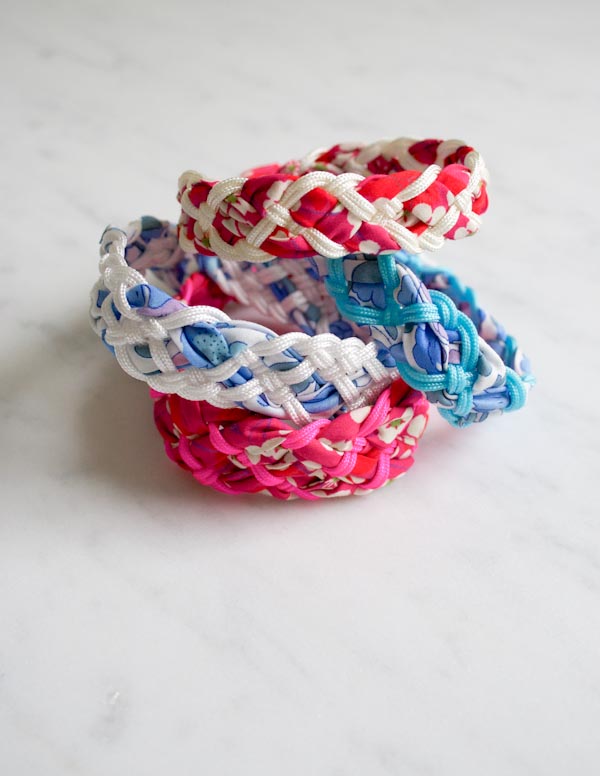
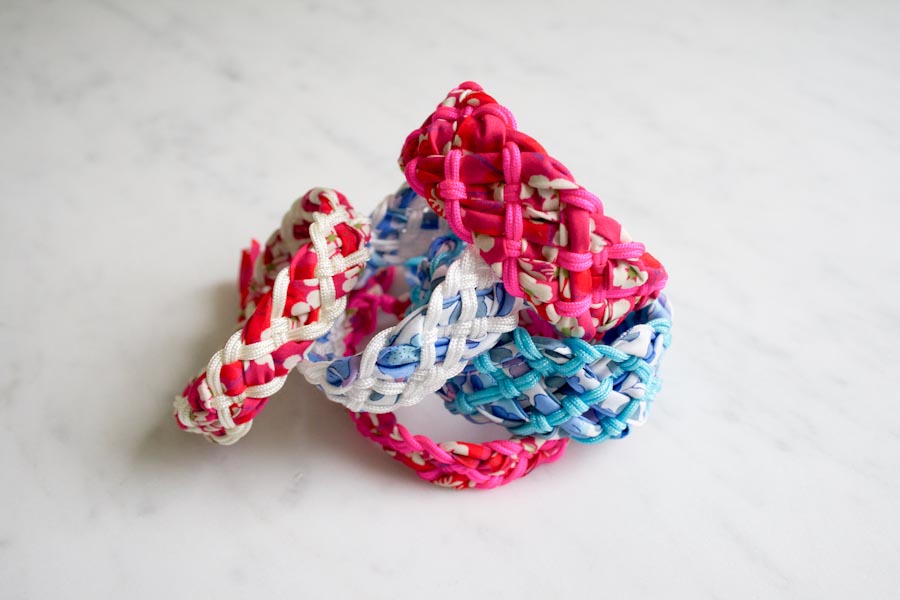
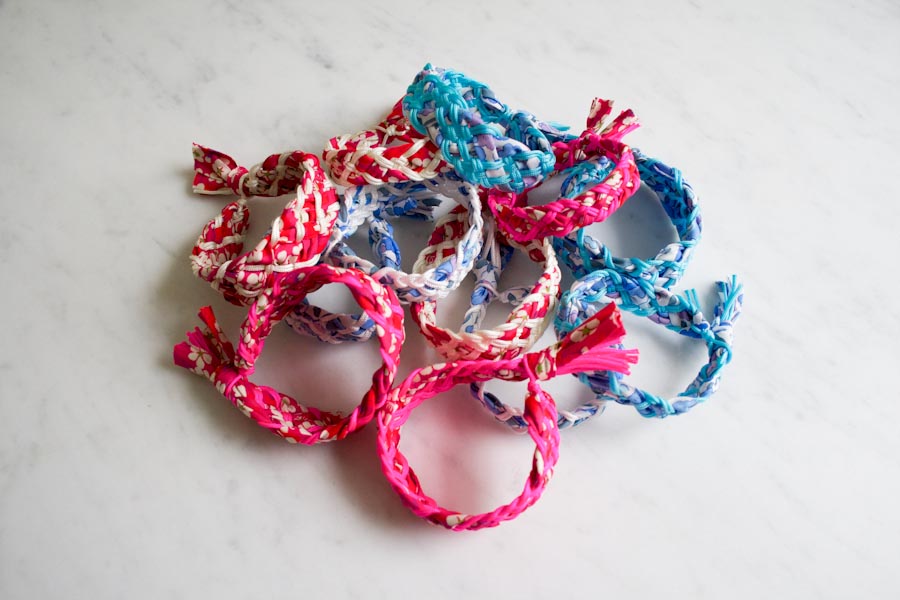
Liberty Braided Friendship Bracelets
We’ve made friendship bracelets with cotton thread, merino wool, nylon cording, and cashmere, but never with Liberty of London! This season we’re adding Purl Soho’s Liberty Bias Tape to the mix for a wild new version of our ultra easy Braided Friendship Bracelets.

There is something so joyful about the detail and color of the Liberty entwined with the simple nylon cording. These Liberty Braided Friendship Bracelets are truly a blast to make. I can’t wait to give them to all my pals! –Molly

P.S. On a roll and want to make some more? Check out our Friendship Bracelets Gallery!

Materials

- One 5-yard package of Purl Soho’s Liberty Bias Tape. We used the prints Betsy Blue and Misti Red.
- One 10-yard spool of Tangles N Knots’ Chinese Knotting Cord, 1.4 mm. We used Aquamarine or White with the Betsy Blue print and Neon Pink or Ivory for the Misti Red print.
Depending on the styles of bracelets you decide to make, one bundle of bias tape makes 3-6 bracelets and one spool of knotting cord makes 2-4 bracelets.
You will also need…
- A lighter
Size
Finished length: 8 inches, but you can easily make your bracelets shorter or longer.
Pattern
Cut
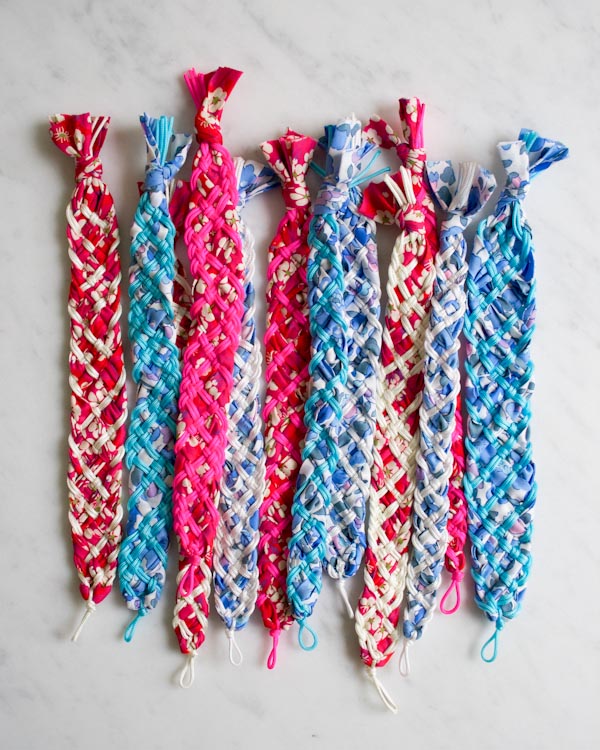
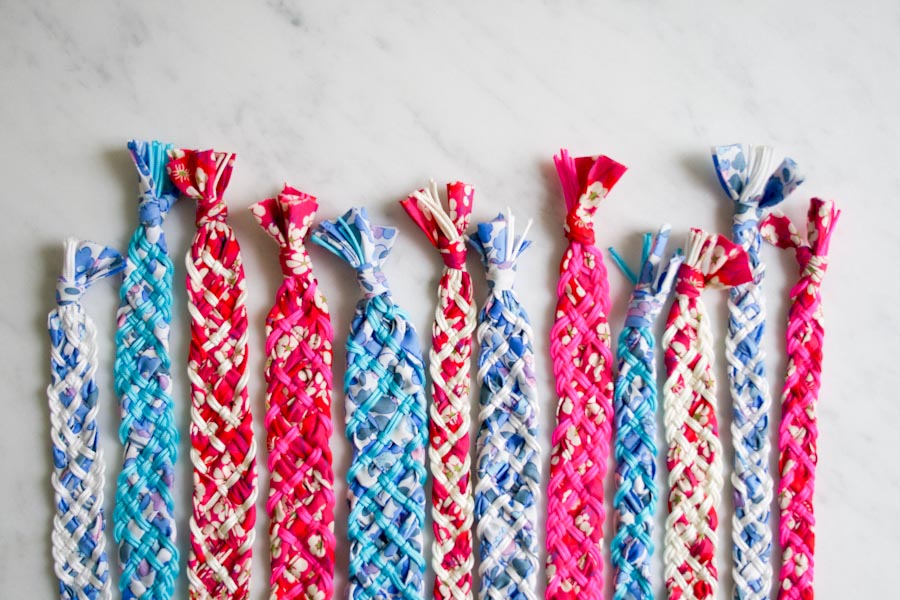
Five-Strand Braided Bracelet

From the bias tape, cut one 30-inch length.
From the cord, cut three 30-inch lengths.
Seven-Strand Braided Bracelet

From the bias tape, cut one 30-inch length.
From the cord, cut five 30-inch lengths.
Nine-Strand Braided Bracelet

From the bias tape, cut two 30-inch lengths.
From the cord, cut three 30-inch lengths.
Start
Press the bias tape(s) in half lengthwise so that the long raw edges are hidden on the inside.

Fold one piece of the cording in half and tie an overhand knot ½ inch from the fold to create a loop. Pull the knot tightly to secure the loop. Use a safety pin to attach the loop to a steady surface (like your jeans or the padding of an ironing board).
At their midpoints, place the bias tape(s) and remaining cord pieces in between the two sides of the looped cord.

With the two sides of the looped cord, tie a square knot around the bias tape(s) and remaining lengths of cord. Pull this knot tightly.
Once everything is tied into place, you have a collection of 15-inch lengths of cord and bias tape. When you braid, you will treat each 15-inch length of bias tape as one strand, but you will double the 15-inch lengths of cord so that two strands count as one.
Arrange the Strands
Before you begin braiding, you need to arrange the strands for the style of bracelet you plan to braid. Here’s how…
Five-Strand
Arrange the strands so that the bias tape is at the far left and right and the three lengths of doubled cords are in the center, as pictured above.
Seven-Strand

Arrange the strands so that one doubled length of cord is at the far left, followed by one length of bias tape, followed by 4 doubled lengths of cord, followed by the other length of bias tape at the far right, as shown above.
Nine-Strand

Arrange the strands in a mirror image, as shown above, so that, left to right, the order is bias tape, cord, bias tape, cord, cord, cord, bias tape, cord, bias tape.

Now click over to our Braided Friendship Bracelet pattern and follow along with either the Single and Double Five-Strand Braid section or the Seven-Strand Braid section. For the Nine-Strand Braid, use the Seven-Strand Braid as a guide. Follow the patterns as written, except finish your bracelets like this…
Finish

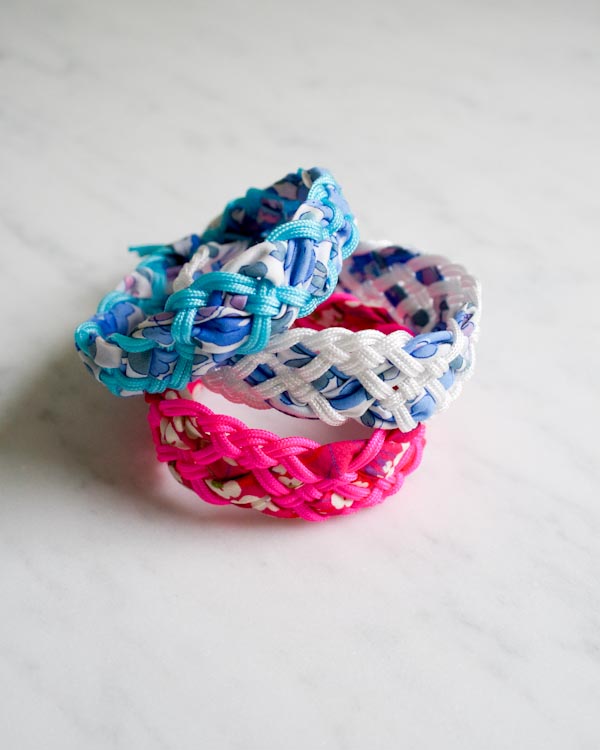
Once you have braided 8 inches or to your desired length pinch the end and pull one of the bias tape pieces out to the left. (This is a Five-Strand Braid pictured here.)

Use this piece of bias tape to tie a knot around the base of the remaining lengths. To do this, pull the bias tape piece to the right, over the top of the bracelet, and then around the back and through the loop at the front. Keep the bias tape as flat as you can to make the knot look neat.

Pull this knot tight.

Using the same piece of bias tape, repeat the same process to tie another tight knot on top of the first.

Cut all of the ends ¾ inch beyond the end of the knot. Use the lighter to lightly melt the ends of the cord, being careful to not burn the bias tape.

Pull the knotted end through the starting loop and then pull the bracelet on. Because of the natural elasticity of the braid you should be able to get the bracelet on and off without taking the knot out of the loop every time.


Hi, this are really cute and I tried with some bias tape I had in the house. I’m finding that the knot at the end doesn’t hold firmly and I’m worried it will open. Is there a way to secure it better? It also doesn’t always stay on, but I assume that’s because I made the loop too big! thanks.
Hi Julie-
I’m so sorry to hear you’ve been having problems with these staying on! I would recommend making the loop smaller and pulling on the end knot very tightly. Also, make sure to braid the bracelet long enough so that you can just pull it on and off without pulling the knot through the loop every time. If this still doesn’t work you can hand sew the knot closed with some matching polyester thread: https://www.purlsoho.com/purl/products/item/9760-Gutermann-Sew-All-Thread.
Please let me know if you have any more questions and thanks so much for getting in touch!
Molly
i am going to try this cute bracelet but i will be sewing a bead on the end to put in the loop. i have a stash of beads and i think it will be cute!
I would like to make the Liberty friendship bracelets but having trouble finding the bias tape on your website. Please help. Thank you.
Hi Ann,
Thanks for reaching out! Unfortunately, we no longer carry Liberty Bias Tape – I’m so sorry about that! However, you could make your own from your favorite print of Liberty Tana Lawn or Liberty Seasonals and a 1″ Bias Tape Maker to make your own! For this project, you don’t have to cut your fabric strips on the bias, so you can get many bracelets from a quarter yard of fabric.
I hope that helps!
Julianna