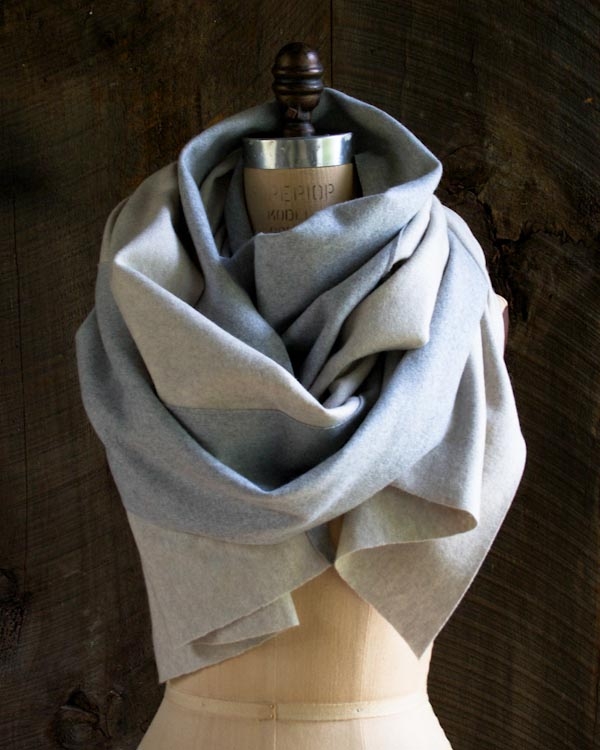
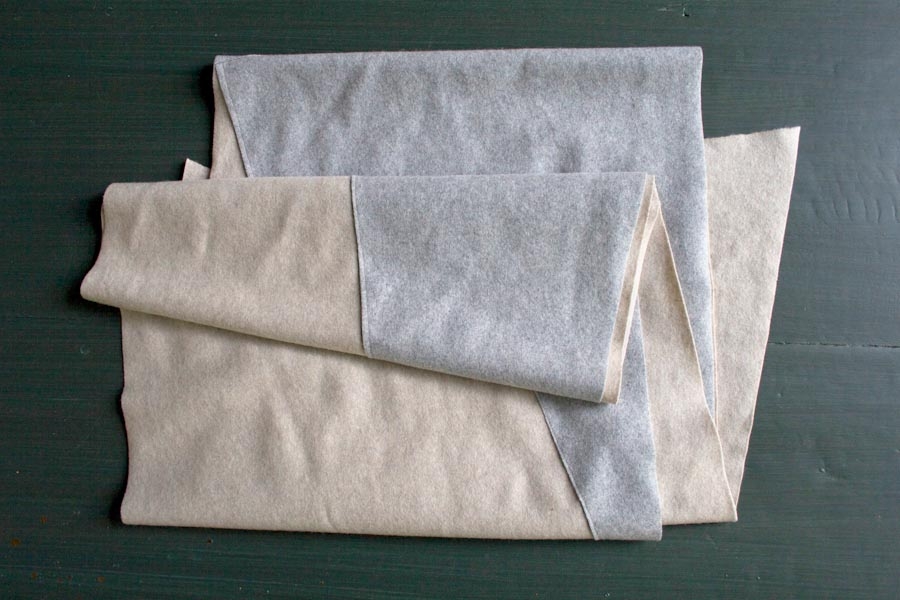
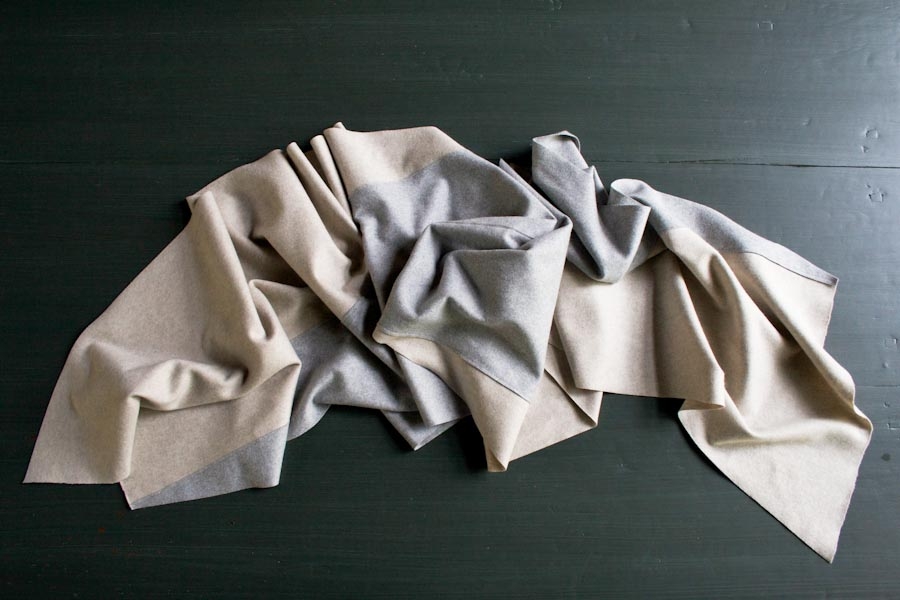
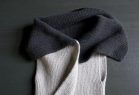
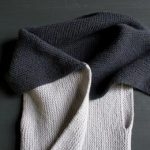
Bias Cut Wool Scarf
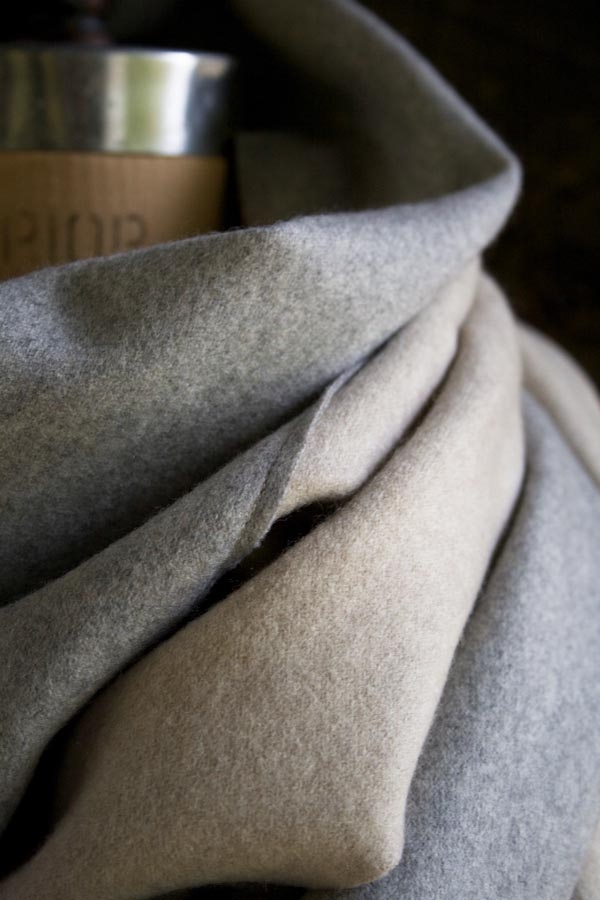
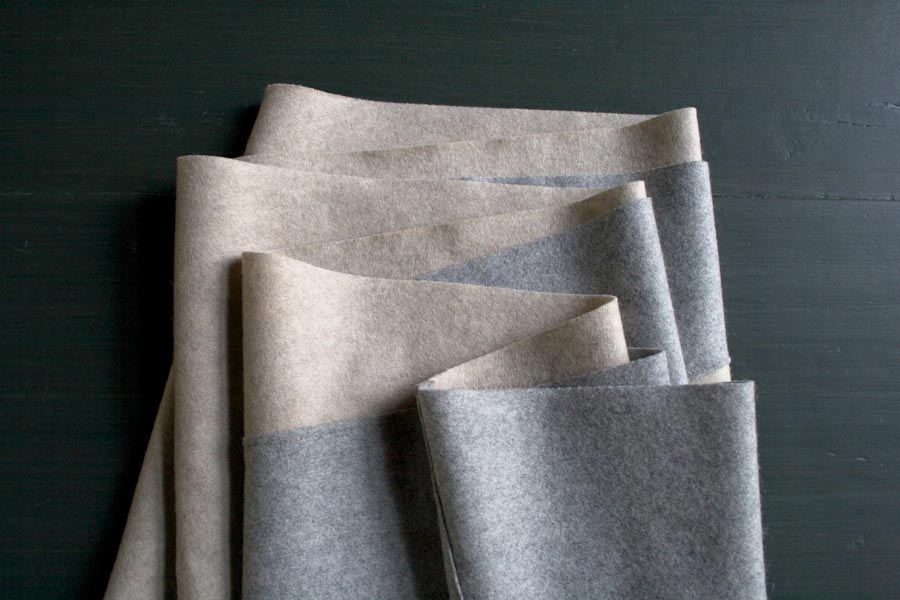
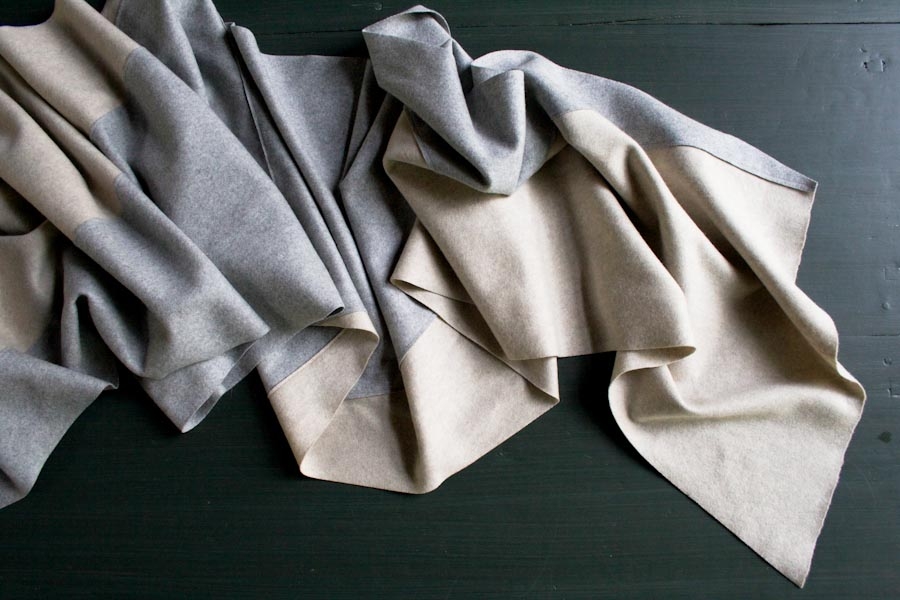
Lanecardate’s Lana Cotta Canberra is a truly exceptional fabric. Made from a fine Australian merino, it has an elegant drape and a super soft feel. And since the wool is knitted, boiled and felted, the cut edges will never fray, making it surprisingly no-fuss as well!

A fabric this special demands a seriously special project, and our Bias Cut Wool Scarf fits the bill! A long, cascading scarf with a fluid drape and unexpected seam lines, I made it with only two ½-yard pieces of Lana Cotta Canberra. Cut the pieces in half on the bias, piece them back together along their straight edges, sew a seam down the middle, done. Turns out, special can be awfully simple! -Corinne

Materials
- Color A: ½-yard piece of Lanecardate’s Lana Cotta Canberra
- Color B: ½-yard piece of Lanecardate’s Lana Cotta Canberra
- A 110-yard spool of Gutermann’s Cotton Thread

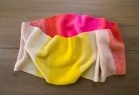
There are six beautiful colors of Lana Cotta Canberra to choose from. Above are some of our favorite color combinations, from left to right…
- Color A: Grigio 0 (Light Gray)
- Color B: Volga (Oatmeal) (Color B)
- Thread: Color 3756
- Color A: Bromida (Blue)
- Color B: Bajkal (Dark Blue)
- Thread: Color 6250
- Color A: Grigio 3 (Medium Gray)
- Color B: Grigio 5 (Dark Gray)
- Thread: Color 9430
Recommended tools . . .
Size

Note
Make a small backstitch at the beginning and end of all seams.
Pattern
This pattern is also available as a printer-friendly PDF. Just click here!
Cut
Note: If you’re new to rotary cutting, please check out our Rotary Cutting Tutorial before you start.
Using the rotary cutter with the clear quilting ruler on a self-healing cutting mat, square up the Color A fabric.
Cutting from selvage to selvage, trim the Color A fabric to 17 inches wide,
Repeat with the Color B fabric.
NOTE: I used my pieces at full length from selvage to selvage to make an extra long scarf. If you would like your scarf shorter, trim the pieces down now. Here’s how . . .
First, determine the final length you would like your scarf to be. Divide this number by 2 and then add 1 to that number. For example, if you would like your finished scarf to measure 90 inches, the number you are looking for here would be 46 (90/2 = 45 + 1 = 46). Let’s call this number “x”.
The finished length of the scarf is measured along the diagonal or “bias” cuts of the fabric. The length of this cut is slightly longer than the length of the long straight edge.

To cut the fabric to the correct length for a bias cut x, lay one piece of fabric out flat. Use a measuring tape to measure a diagonal line from one corner to the opposite long, straight edge, moving the tape around until you find the point on the edge that measures x from the corner. Make a mark at that point, “A” in the image above.
Cut the fabric from point A straight up to point B.
Repeat with the other piece of fabric. Continue on to the next step.

Cut the rectangles in half along the diagonal to make two acute right triangles.
In the illustration above and in all subsequent illustrations, the black lines represent the long, straight cuts, the pink lines represent the diagonal cut, and the thin gray lines run parallel to the selvage.
To get this diagonal cut straight, you may find it helpful to mark the cut line first by folding and pressing the fabric. Here’s how . . .

Fold the Color A fabric in half along the diagonal, as illustrated above..
Press lightly to create a crease.
Unfold the fabric and cut along the diagonal crease.
Repeat with the Color B fabric.
Piece

Lay one of the Color A triangle pieces out flat with its long straight cut at the bottom, its right angle on the left and its acute angle on the right.
Use a clear quilting ruler to measure a parallel line ¼ inch from the bottom edge and place a series of pins to mark the line.

Orient one of the Color B triangle pieces so that its long straight cut is at the top, its right angle corner is on the right and its acute angle is on the left.
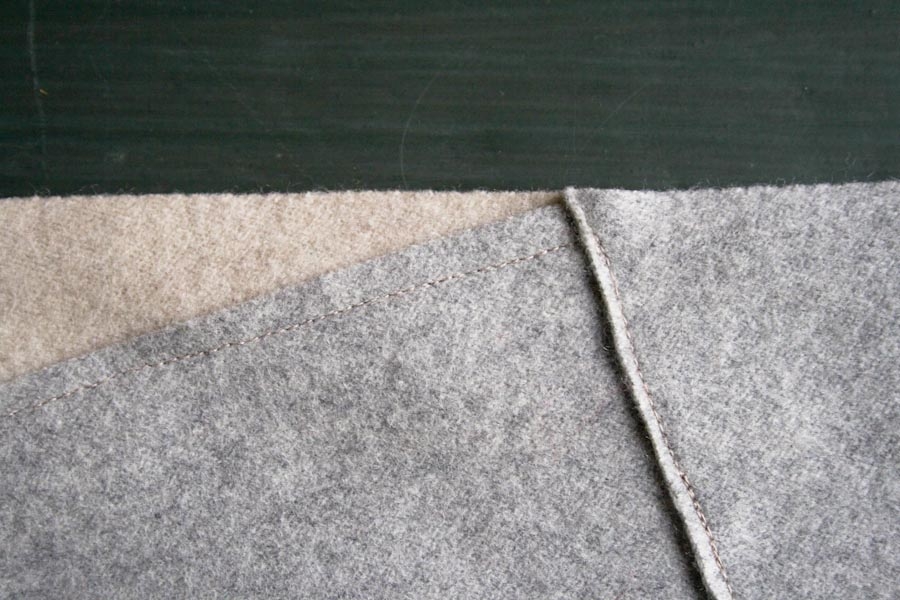
Place the top edge of the Color B triangle over the bottom edge of the Color A triangle so that B’s top edge lines up with the pinned line on A. At each far end, where the acute angle of one triangle meets the right angle of another, push the fabric so that the acute point overhangs the right angle by a ½ inch.
Pin in place.
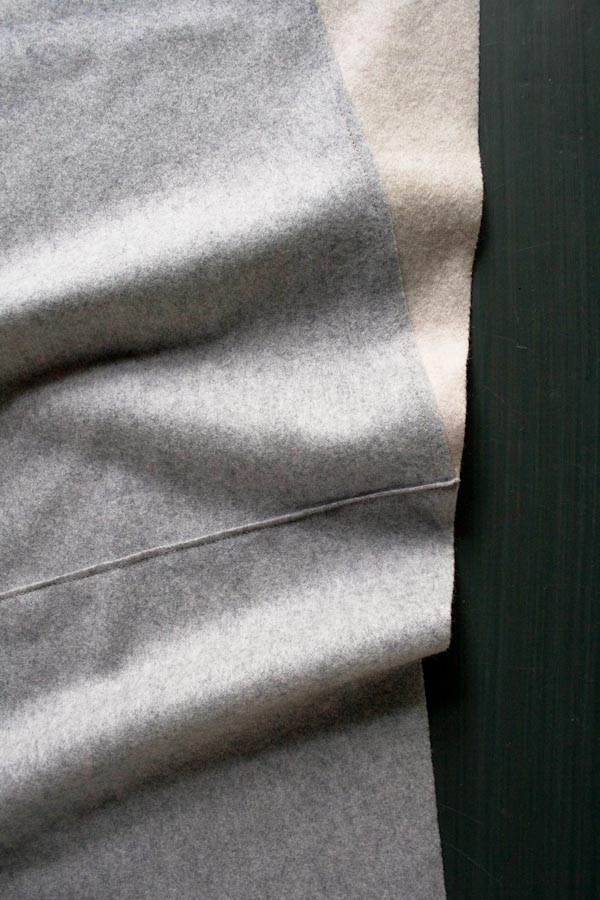
Sew along the pinned line, 1/8 inch in from the cut edge of fabric. This sewn line will run down the middle of the ¼-inch overlap of the two triangle pieces.

Trim off the overhang points on both ends of the newly pieced rhomboid. This is now Piece 1.
Repeat with the remaining two triangle pieces. This is now Piece 2.
Cut off both Color A selvage edges (if they’re not already cut off).

Lay Piece 1 out flat with Color B at the bottom and the short, straight edge of Color A on the left. Use a clear quilting ruler to measure a parallel line ¼ inch from the short, straight edge of Color A and place a series of pins to mark the line.

Lay Piece 2 out flat with Color B at the top and the short, straight edge of Color A on the right. Place Piece 2’s short Color A edge over Piece A’s short Color A edge so that Piece 2’s edge lines up with the pinned line on Piece 1. You may find that the two Pieces aren’t exactly the same width. Don’t worry! It’s easy to trim the Pieces later.
Pin in place.

Sew along the pinned line 1/8 inch in from the cut edge of fabric. This sewn line will run down the middle of the ¼-inch overlap of the two pieces
Trim
If you find that the Pieces don’t line up perfectly, simply use the rotary cutter with the clear quilting ruler on a self-healing cutting mat to trim off any overhang. The fabric is quite forgiving, but be sure to make long, straight cuts with the rotary cutter to avoid any jagged lines or obvious curves.


Really nice! Would you say that this scarf is gender neutral, or more feminine?
Hi Fiona-
I would say that this is more feminine since it’s very wide and long. But you could certainly make it shorter and thinner to give it a more masculine look!
Thanks for your question!
Molly
Gorgeous! Also love the simplicity! I will definitely be making one!
This is a very nice elegant project. Could you make this with other types of wool? The merio in this project is gorgeous but out of my budget for making several for gifts. Just curious if something else would still give a nice drape? Thank you for such lovely ideas.
Hi Chelle-
You could certainly make it with other types of wool as long as they are felted and won’t fray. We have this felted wool yardage which would work, although it would be fluffier and a bit less soft:
https://www.purlsoho.com/purl/products/item/9278-Dorr-Mill-Wool-Yardage
Thank you for your question!
Molly
Thank you! I wouldn’t mind the zen of hand sewing, I am a knitter and crocheter after all and used to delayed gratification in pursuit of beauty. 🙂 Thanks for all the lovely patterns and inspiration.
I’m curious if this project can lend itself to hand-sewing since the fabric doesn’t fray. I don’t sew with a machine (yet) but am a very skilled knitter and crocheter. I’m visualizing overlapping the fabrics at the cuts and doing a running stitch all along (in the style of Indian kantha embroidery and Alabama Chanin). What do you think?
Hi Deepa –
I think this sounds lovely! It’s quite a bit of stitching (about 140 inches worth!), but I think you are right that this project and material are both well suited for hand sewing.
Thanks!
-Corinne
Lovely, thank you.
Hi there!
Wow, the fabric looks beautiful, I can almost feel it! Nothing like high end Italian wool…
I’m looking to make a luxurious throw with the fabric, rather than a scarf – if I use the dimensions/pieces you have cut for a scarf of 16″ x 120″, and instead of piecing on the short end, I am visualizing piecing on the long end (so one has a dimension of, roughly, 32″ x 60″) -from a size perspective, this makes for a cozy throw size. But does the pattern work?
Thoughts?
Thanks so much again for a phenomenal website!
Brigitte
Hi Brigitte –
Thank you for writing in! Yes, this fabric is so wonderfully soft and would make a beautiful throw blanket. If I am understanding the pattern you describe correctly then, yes! I think it does work. My only concern would be sewing the two bias-cut sides together. I have not tried this, so I can’t be sure that the fabric wouldn’t stretch or ripple along the seam line.
Also note that the blanket won’t be a perfect rectangle, but rather a rhomboid. To build the pattern for the scarf, I found it helpful to cut it out of paper first and then play around. This could be a helpful method for you while building the pattern for your throw!
Thanks again for your question and kind words!
-Corinne
The felted wool fabric is beautiful but I am wondering if one can make it with another fabric. I want to make it as a gift for someone who is allergic to wool (as am I). Are there other fabrics that can be cut and draped accordingly? I assume that I would have to sew finishing seams along the edges.
Thanks!
Hi Deborah –
This is a great question!
There are many fabrics that would drape beautifully for this project. The first few that come to mind are Robert Kaufman’s Brussels Washer (Solid or Yarn Dyed), a fluid linen and rayon blend (https://www.purlsoho.com/purl/search/?search_keywords=brussels), Robert Kaufman’s Shetland Flannel, which is super soft and cozy (https://www.purlsoho.com/purl/products/item/9570-Robert-Kaufman-Shetland-Flannel), or, as with most projects, Liberty of London’s Tana Lawn could be gorgeous, though much lighter weight (https://www.purlsoho.com/purl/products/item/1695-Liberty-of-London-Tana-Lawn-Classics).
As you mentioned in your comment, the only concern with these fabrics would be that all of their cut edges would need to be finished in some way. This finishing would add a small amount of bulk and weight along the joining seam lines and could affect the overall drape. With whichever fabric you choose, I suggest playing around with finishing techniques before you start the project to find the solution that works the best.
I hope this helps!
-Corinne
What a beautiful simple scarf!
Wondering if the Volga (oatmeal) and Bromida (blue) would look wonderful together.
Hi Debbi-
Yes, that would look beautiful!
Thanks, and please send us a picture if you end up making it!
Molly
Hi Corinne,
This is so beautiful! Will you be getting in more of the Grigio 0 (Light Gray) color?
Thank you!
Hi Pam-
We will! If you’d like to be notified when it comes back in stock please email customerservice AT purlsoho DOT com
Thank you!
Molly
Thanks for sharing this with me. I love sewing, I have had Pfaff sewing machines and Pfaff over lockers for many years.
I enjoy designing and making clothes for my family and friends.
I also do a lot of knitting, a specially jumpers for toddlers.
Kind Regards Coral.
Hello Coral –
Thank you for writing in! It’s great to hear from our creative kindred spirits!
-Corinne
Wondering what fabric you’d recommend as an alternative since this fabric doesn’t seem to in stock any longer……?
Hello Kendra,
Thank you for reaching out! I think you have two options that would work well for this pattern. Either the lovely Dorr Mill Wool or the beautiful Shetland Flannel.
I hope this helps and happy sewing!
-Marilla