
Christmas in July! Our Advent Calendar Kit and Pattern

Amidst summer’s lemonade, swimming pools and fireflies, it may feel pretty counter-intuitive to think about Christmas right now. But hard as it may be to replace thoughts of popsicles with visions of sugarplums, July’s long, lazy days are a great time to get started on a very special holiday project!

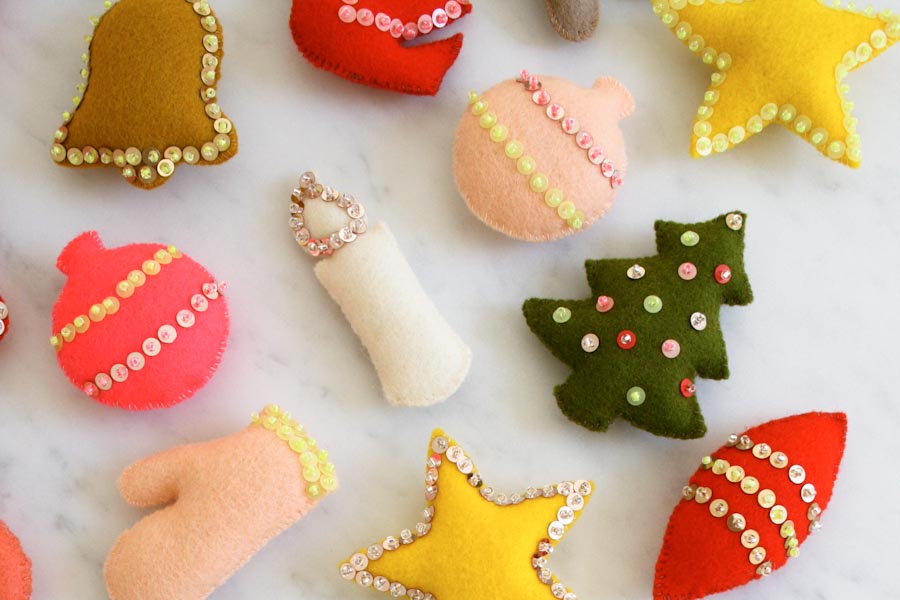
We love the sweet, vintage flavor of Purl Soho’s Advent Calendar Kit, and while its exquisite details are what make it so special, this project can’t exactly be classified as quick. So, instead of adding to your future holiday stress, you might want to consider getting started now! Our Advent Calendar Kit includes everything you’ll need, from a rainbow of lovely wool felt to sequins, beads, and embroidery thread.

And in response to popular demand, we’re happy to announce that we are now selling the Advent Calendar Pattern (with templates) on its own! Choose to recieve our full-color instructional booklet in the mail or as a quick and easy PDF dowlnload.
Plus, we’ve added some à la carte supplies to our menu. Pick our 12-gram tins of sequins and 9-gram tin of beads, individually or all together, and also available, a pack of 6 beading needles… all right here!

Buying the Advent Calendar Pattern on its own? Here’s what else you’ll need…
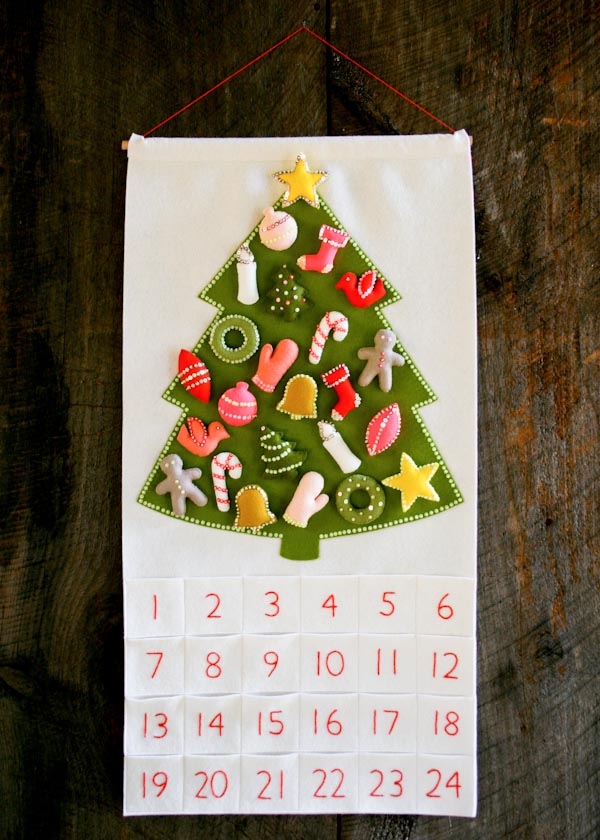
- 100% wool felt for the Background and Pockets. We used ½ yard of Wollfilz’s 1mm Wool Felt Yardage, cut to 18 x 36 inches, in the color Ecru.
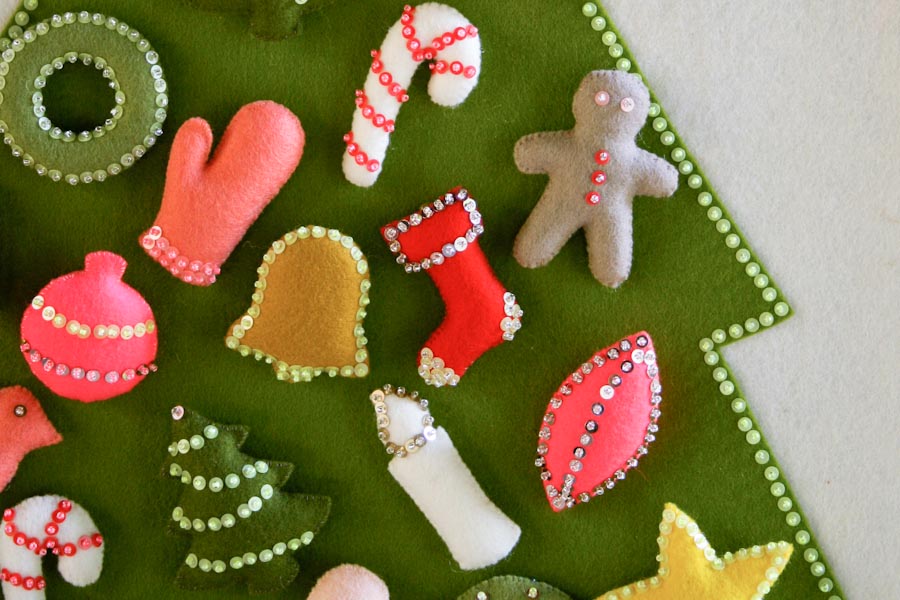
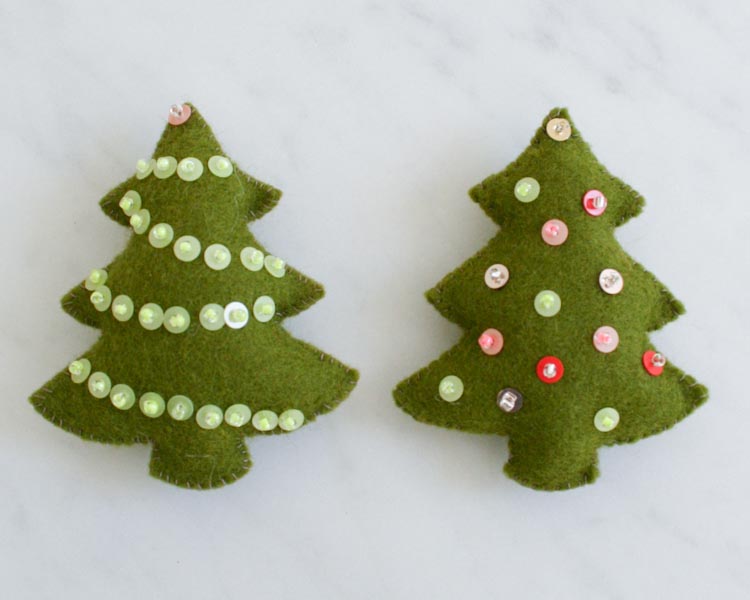
- 100% wool felt for the Tree (at least 18 by 18 inches). We used Wollfilz’s 1mm Precut Wool Felt in Olive.
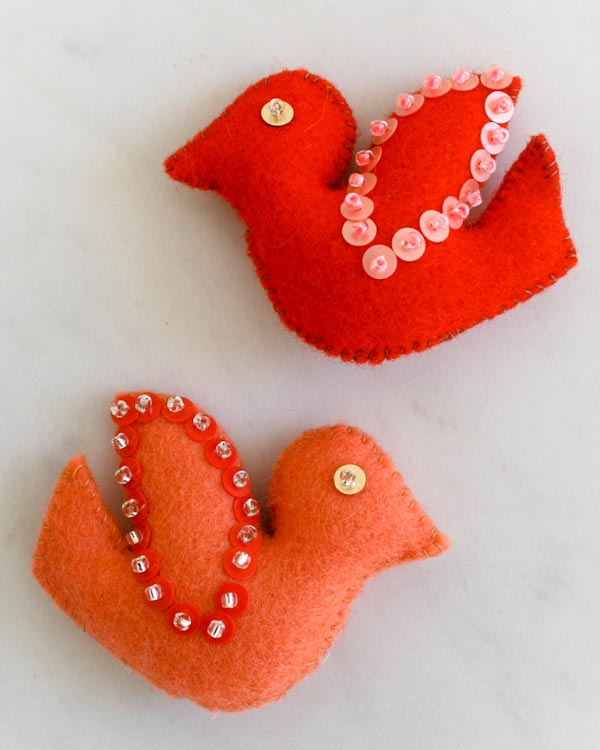
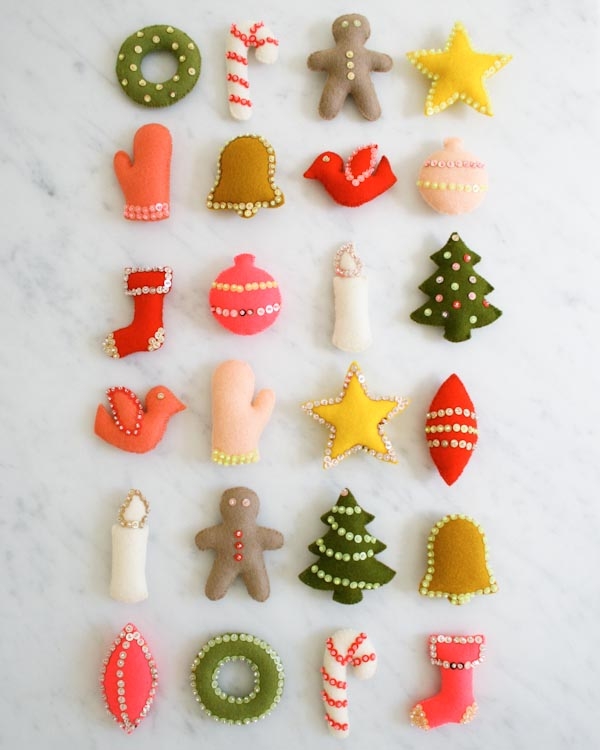
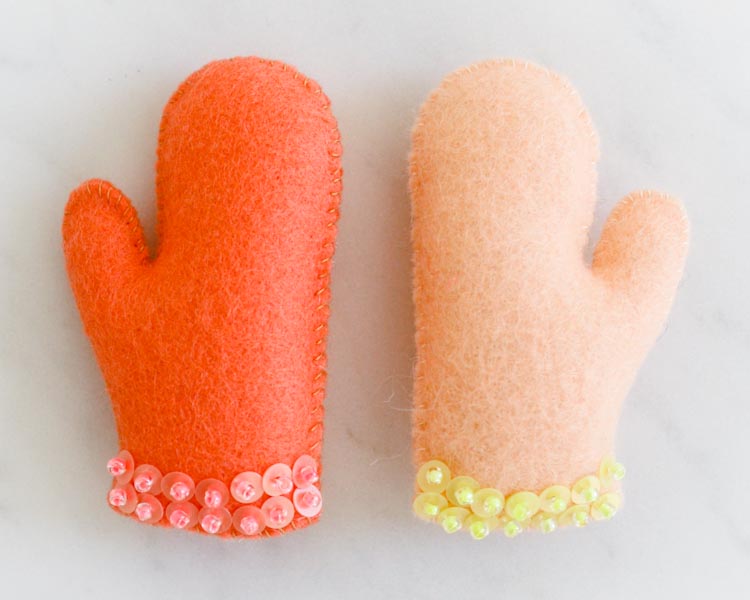
- 100% wool felt for the Ornaments in an assortment of colors. There are 24 Ornaments, which each requires two 3 x 3-inch pieces of felt (a Felt Bundle would work great!). We used Wollfilz’s 1mm Precut Wool Felt in 10 colors: Tomato, Bright Pink, Coral, Peach, Yellow, Ochre, Pea, Moss, Mouse, and Ecru.
- Sewing thread to coordinate with felt colors
- One skein of embroidery floss (for the numbers)
- An embroidery needle
- A beading needle
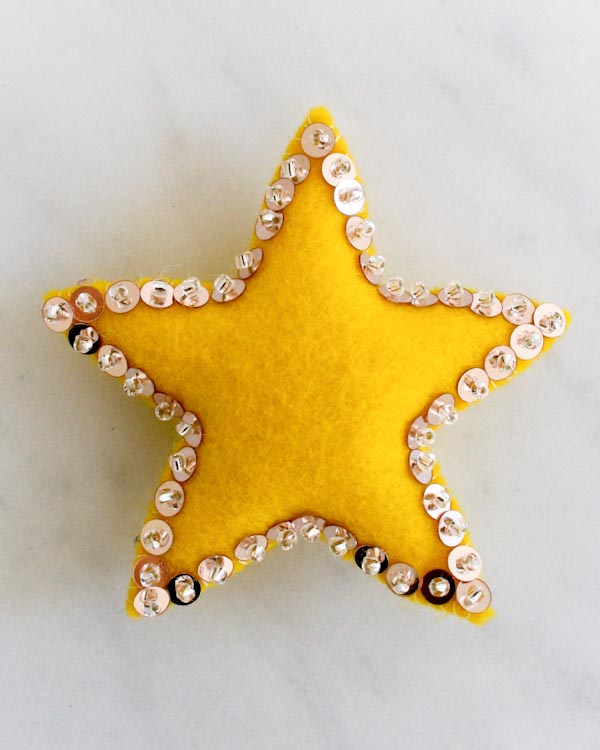
- Sequins
- Seed beads
- Straight pins
- An iron-on transfer pencil
- A fabric marker
- Stuffing for the ornaments
- A 15-inch long 1/4-inch wood dowel for hanging

Even though this project has Christmas written all over it, the little ornaments make for surprisingly great summer sewing, easy and portable enough to tuck into weekend totes and carry on bags. So why not cut your future holiday self a break? Come November, you’ll be glad you did!


Thank you, thank you for doing this as a pattern! I already have a felt advent tree and now I can make ornaments to go with it. I'm so excited to get started.
This is so exciting! So glad the pattern is available a la carte, I have so much wool felt that it was hard to justify buying the whole kit.
What size seed beads are y'all using for this?
How do the ornaments attach to the tree? The kit is so sweet, and EXTREMELY tempting! I have a two year old who would probably LOVE it! 🙂
Hi Jen-
The beads are a size 12.
Thanks for your question!
Molly
I am not completely clear about the difference between the two pattern options. Thanks!
Hi Alicia-
The ornaments are attached with straight pins but you could use safety pins or velcro if you're concerned about the pins.
Thanks for your question!
Molly
Hi Jane-
There is only one pattern but you can either get it in paper form, which will be shipped, or digital PDF form which you can download. If you choose the paper pattern you will also be able to download the PDF but you will have to pay for shipping.
I hope this clears things up! Thanks for writing in!
Molly
Are the ornaments stitched by hand? Looking for a project I can keep in my bag and work on while we travel this summer…
Hi Zoey!
Yes. They are stitched by hand, making it a perfect travel project!
Thanks for writing in.
Best,
Laura
This is so similar to the one we had growing up that my auntie made us. It brings a little nostalgic tear to my eye. 🙂
I absolutely adore this project!
Do you have any tips for using the iron-on transfer pencil beyond what’s in the instructions? We are having difficulty getting a good transfer. Thanks!!
Hi Amy –
Because of the thick paper stock of the Template paper, a few of our readers have had similar issues. Here are some tips that can help …
First, you could use the iron-on transfer pencil to trace the numbers onto a piece of standard white copy paper and then iron them onto the felt from that paper. The paper that the templates are printed on is slightly heavier than standard text weight and this could be what is causing the problem. The lighter weight paper should transfer the numbers faster and with less heat.
Or, one of our commenters, Jayne, had another great tip that uses the fabric marker:
Use a large pin/needle or thin nail to pierce numerous holes in the number outlines on the template. Lay the Template on the felt numbered side down. Push the tip of the fabric marker through the holes pierced through the template. You should have visible blue dots to follow for stitching. After stitching, these marks can be erased with opposite end of blue fabric marker.
Alternatively, you can cut the templates out of the Template sheet and simply trace them onto the felt with the fabric marker.
I hope one of these solutions works for you!
-Corinne
Thank you so much for this beautiful pattern! I am really enjoying it. I am about to attach the sequined tree to the background, but I’m a little confused about how to do so. It says “pick up a small stitch from the Background and then bring the needle back up through the Tree, coming out underneath the next sequin.” Is this like the sewing technique (i.e. sewing vs stabbing) in embroidery? I guess I’m mainly confused because it says to pick the stitch up, which I only know how to do in knitting. Thanks!
Hi Jane,
Basically what you are doing is called a blind stitch when you sew the tree to the background you will pick up a small piece (stitch) of the fabric with your needle as is shown in the photo, then bring your needle back through the tree. By doing this you do not see any stitches with the naked eye hence the name.
I hope this helps,
Melissa
Any suggestions for sequins and bead stringing?
Hi! The gold sequins I received in my kit appear much darker than the ones in your photos. They’re more garish than I’d like. Could you please tell me the size and color of the gold (champagne? yellow? hard to tell) sequins you used for the photos? Thank you!
Hi Sarah,
Thanks for reaching out! The sequins that come in the kit should be the exact same as the ones used in the photos, and unfortunately, we no longer sell the sequins separately from the kits. If you would like us to verify, please feel free to send a photo of your sequins to out customer service team at customerservice@purlsoho.com!
I hope this helps!
Gianna