Railroad Tote

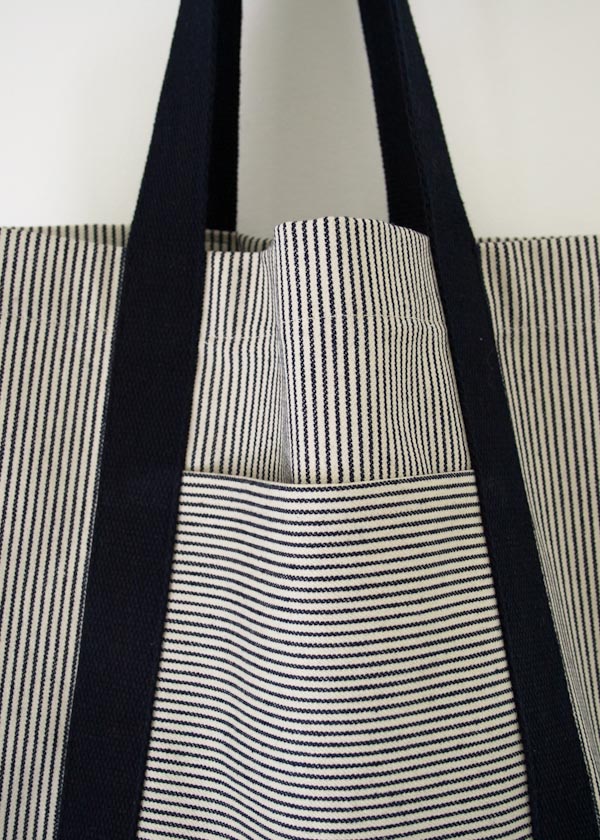
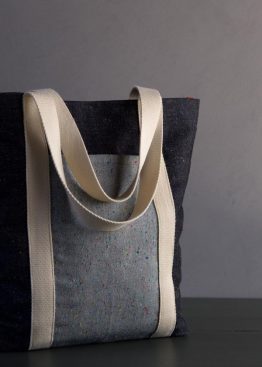
I recently had a run of bad bag luck. I had a leather purse that I loved, but it was destroyed when a bottle of water opened up inside of it. Then the pretty tote bag I used as a replacement ripped, leaving me completely bagless, disheartened and uninspired. Then one day as I was sitting by my sewing machine, I caught a glimpse out of the corner of my eye of some Railroad Denim fabric and eureka! With its sturdy weight and classic stripe, I knew I could make a winning bag that I’d be excited to carry!

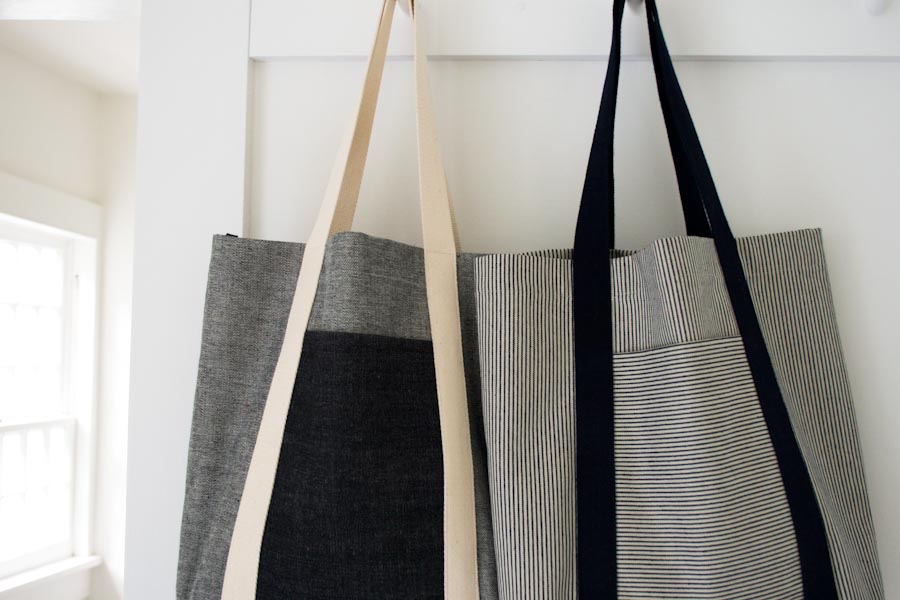
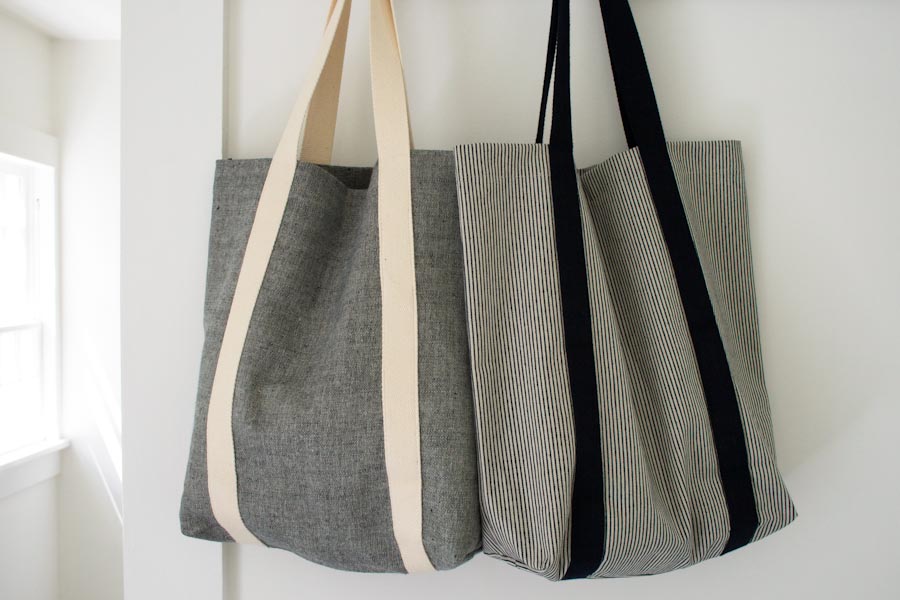
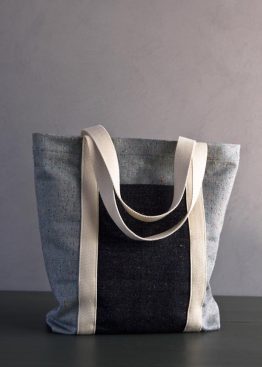
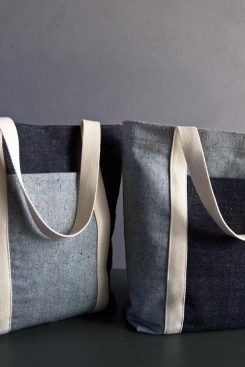
A mere hour after my initial inspiration, I was tossing my wallet, lip gloss and keys into my beautiful new Railroad Tote, and my bag woes were a distant memory! I was so happy with how this tote turned out that I quickly made another using double-sided Black Washed 8 oz Denim. Both versions are hearty and strong and will stand up to washing and water bottle mishaps while still looking cute.

So if you’ve been having some bad bag luck yourself, or if you just need something fresh for summer, this project is for you. Make your own luck! -Molly
Update: New Fabric
November 27, 2015
We made a new version of this bag with Robert Kaufman’s Denim with Colored Motes. It’s a perfect fabric for this simple, classic bag. For the list of materials and to see more photos , check out our Favorite Totes in Denim with Colored Motes story!
Materials

For the Striped Version:
- ¾ yard of Robert Kaufman’s Railroad Denim, Deluxe Twill Stripe Indigo
- 2 yards of Purl Soho’s Bias Tape in Indigo
- 3 yards of Purl Soho’s Sangle Cotton Webbing in Navy
- A 110-yard spool of Gutermann’s Cotton Thread in color 1040. This is the Fabric Thread.
- A 110-yard spool of Gutermann’s Cotton Thread in color 6210. This is the Bias Tape Thread and the Webbing Thread.
For the Solid Version:
- ¾ yard of Robert Kaufman’s 8 oz Denim in Black Washed.
- 3 yards of Purl Soho’s Sangle Cotton Webbing in Natural
- 2 yards of Purl Soho’s Bias Tape in Indigo
- A 110-yard spool of Gutermann’s Cotton Thread in color 1040. This is the Webbing Thread.
- A 110-yard spool of Gutermann’s Cotton Thread in color 6210. This is the Fabric Thread and the Bias Tape Thread.
Size
12 inches wide x 15 inches high x 4 inches deep
Notes
Wash and dry the fabric, but not the trims, before starting.
Pattern
Cut

From the fabric cut:
- Two Body Pieces: 17 inches wide by 19 inches tall. If you are doing the Striped Version, make sure that these pieces are cut with the stripes running vertically.
- One Pocket: 7 ½ inches wide by 15 inches tall. If you are doing the Striped Version, make sure that this piece is cut with the stripes running horizontally.
For the Solid Version pick either the lighter or darker side to be the right side of the Body Pieces and use the opposite side to be the right side of the Pocket piece.
From the Webbing cut two 53-inch long pieces.
From the Bias Tape cut two 17-inch lengths, one 15-inch length, and two 5 ½-inch lengths.
Sew on the Pockets and Handles
To hem the top of the Body Pieces, press the top (short) edge ¼ inch towards the wrong side and then again 1 ¼ inch. Pin this fold into place and edgestitch it down using the Fabric Thread.
To hem the top of the Pocket, press the top (short) edge ½ inch twice towards the wrong side. Pin this fold into place and edgestitch it down using the Fabric Thread.
Press one of the Body Pieces in half lengthwise so the two long edges meet, creating a crease down the center. Do the same for the Pocket.
With right sides facing up. match the two center creases and the bottom raw edges. Pin the Pocket to the Body Piece around the three raw sides of the Pocket, leaving the top hemmed edge unpinned.

Using the Fabric Thread, sew the Pocket to the Body Piece around all three pinned sides with a ¼-inch seam allowance.

With the right side of this Body Piece facing up, align one of the raw ends of the webbing with the bottom edge of the Body Piece so that the left edge of the Webbing is 4 3/8 inches from the left side of the Body Piece.
Keeping the Webbing straight and consistently 4 3/8 inches from the left side, pin the Webbing all the way up the length of the bag, hiding the Pocket seam in the process.
When you get to the top, measure 18 inches of Webbing for the handle and then reverse direction and pin the Webbing down the right hand side of the bag. Keep the right edge of the Webbing 4 3/8 inches from the right side of the Bag Piece, and make sure not to twist the handle!

Using the Webbing Thread, edgestitch the Webbing into place by sewing up the side, across the Webbing where it meets the top of the Body Piece, down the other side, and then across the bottom edge. Do the same for the other end of the Webbing.
Pin and sew the second length of Webbing to the second Body Piece in the same manner.
Sew the Bag Together

With right sides facing, pin the two Body Pieces together around their three raw sides. Make sure that both sides of the Webbing meet up neatly at the bottom of the bag.
Using the Fabric Thread and a ½-inch seam allowance, sew the two Body Pieces together.

Starting at the top of the bag and leaving a 1-inch overhang, fold a 17-inch length of Bias Tape around the raw edges of one of the bag’s long sides. Pin the Tape in place, tucking its raw ends under at the top (there is no need to tuck the ends in at the bottom since you’ll be cutting them off in the next section).
Pin the second 17-inch length of Bias Tape down the opposite side of the bag in the same manner.
Center the 15-inch length of Bias Tape over the bottom raw edges of the bag, fold the Tape over the edges, and pin in place. Do not tuck either end of this Bias Tape.
Using the Bias Tape Thread, edgestitch all three Bias Tapes into place, making sure you catch both sides of the Tape. If you miss a little, go back and sew it again (don’t worry, it’ll be your little secret deep inside your bag!).
Create the Boxed Bottom

Pull the two Body Pieces away from each other at one of the bottom corners of the bag until the bottom seam and the side seam are lying directly on top of each other and the corner is at a 90-degree angle.
Flatten the bias-taped seams so that they are lying in different directions (i.e. one is folded to the right and one to the left so that the bias tapes are not piled on top of each other).
Press the corner down in this orientation. Make a mark perpendicular to the seams at the point where the pressed corner is 4 inches across. Pin everything together along the mark.

Using the Fabric Thread, sew along the mark and then cut off the corner ½ inch beyond the sewn line.

Encase the raw edges of this new seam with a 5 ½-inch length of Bias Tape. Tuck under both of the raw ends of Bias Tape for a neat finish. Pin in place and use the Bias Tape Thread to edge stitch it into place.
Repeat for the opposite corner of the bag. Make sure that when you are arranging the seams in different directions that the bottom seam is going in the same direction as it is on the opposite corner; you don’t want it to twist.
Turn the bag right sides out, iron out any creases and you’re all done!







Your designs are so nice because they are simple and they have lovely finishing work.
This is beautiful! I love totes – not only for carrying my stuff around, but also for stowing away – for example my knitting works in progress.
Thanks a lot, I feel inspired to sew one (or two?) right now.
🙂
Alexandra
Great tutorial ~ love the inside bindings!
Awesome tote bags! Thank you so much for sharing….
Excellent. So simple and they're beautiful!
Who could fail to love the simplicity and beauty of this tote bag? I have only recently come across your website and I am hooked already!
Is this tote available as a kit? If so how much and how can I purchase it.
Im sure, it's much better than normal bags so it make this idea fantastic. I Love it. Eliza 😀
Hi Ellen-
It isn't a kit but you can buy the fabric and materials by clicking on the light blue links in the materials section.
Thanks so much for getting in touch!
Molly
Wouldn't you be able to put a loop of fabric sewn into the side seam on the inside of the tote to hold a water bottle upright*? Or two strips of fabric with velco to work with different size bottles?
*I'm thinking to have a dedicated water bottle for the tote 🙂
Great tutorial!
HI Lizabeth-
Sure, those sounds like good ideas! If you end up making one please let us know how it goes!
Molly
I love the bag and made it in reversed side blue denim. One question though. If the bag sides are cut 19 inches long and the top hem is 1.5 inches, then the final length of the bag will be 17.5 inches rather than 15.5 inches. I cut off 2 inches from the bottom before sewing the sides together. Did I miss something?.
I was thinking, maybe elastic loops, top and bottom, for a water bottle???
Great pattern, thank you!
Hi Jennifer-
I understand why you are confused but the missing 2-inches comes from the boxed bottom. In other words, the final length measurement is measured from the side of the boxed bottom, not the bottom seam. Imagine measuring from one of the bottom corners up to the top of the bag, The extra two inches can be found in the "depth" measurement, which is 4-inches, 2-inches from each side panel.
With that said, there was a typo in the patten. The final length measured from the boxed bottom to the top should be 15-inches, not 15 1/2. I have corrected the pattern.
Since you have already cut your pieces shorter you can just go ahead and sew the bag, it will be shorter than the bags pictured but I'm sure it will still be cute.
Thank you!
Molly
I have just finished your Tote. Very well explained ; it was a pleasure to make it as I am not an expert ; I am very proud of the end result!
I am french, live in France and the fabric size is not your standard size, neither the webbing, but, who cares..
I love your site but unfortunately, I cannot buy a lot of things as everything become very expensive crossing the Atlantic. Never mind, I take inspiration.
Thank you very much.
Another great tote! I just finished making this one and plan to make more. For those who are interested, I was able to complete this project from start to finish in a few hours.
What fabric is the gray on the solid bag? I’m thinking only the pocket is the denim in black. Does the solid version just appear gray in the pictures? Thanks for your help. Adorable tote. Can’t wait to make one!
Hi Nikki-
The gray solid is the reverse side of the black denim! You could certainly make a bag just using the lighter side, it would be beautiful!
Thanks for your question!
Molly
Nice work and excellent tutorial 😉
Thanks ! I will try this one –
I just completed this project today and am very pleased with the results. Thank you for a great pattern!
The fabric I want to use is lightweight. What are your suggestions for lining the bag? Would I be able to simply sew the body parts of the two fabrics together at the very beginning and then add the webbing and binding?
Hi Marilyn-
I would maybe use double sided fusible webbing to fuse your lightweight fabric to some plain canvas and then just treat the fused together fabrics as one.
Thanks for your question!
Molly
Made a couple of these for Christmas gifts out of striped linen left over from tablecloth project. Splendid instructions.
Many thanks for continuing to inspire.
What about making felled seams instead of using bias tape?
Hi Katie-
Felled seams would look great here! I don’t know if they would work along the short sides of the boxed bottom but they would be great as the long side seams! Thanks so much for writing in with this suggestion!
Molly
I’m on vacation, no access to bias tape, so I was thinking French seams… learned to make them at school 60 years ago but I’m sure I will remember!
Next time, though, I will use the bias tape; I love all the possibilities.
Thank you for a beautiful, classy site and the inspiring ideas and patterns.
Hi Gina-
French Seams would probably work just fine! Thanks for the kind words!
Best-
MOlly
Thank you for sharing thus pattern. Have just finished making it and it looks beautiful.
Just made a few of these — in a variety of heavy fabrics — and each one is beautiful. I love using your patterns as they are always clearly written and easy to follow. Thank you for sharing creativity.
Easy te make, looks nice and it’s better
than using all the plastic bags
Hello! I absolutely adore these. I’ve been searching for a bag this perfect for some time.
I am not very crafty, but I would love one of these so I was wondering if you also sell&ship them.
Puhhhlease, say yes!
Hi Arina-
No, unfortunately we don’t sell these finished. But they would make a great first sewing project if you ever want to learn~
Thanks for getting in touch!
Molly
i love this, I would really like to make one but I’m not so good with written instructions do you have a video tutorial?
Hi Lilly-
We don’t have a video tutorial for this but if you have any specific questions on this pattern we are happy to answer them here!
Thank you for getting in touch!
Molly
OMG. I have been receiving emails from Purl Bee for a long time and was considering unsubscribing but first I looked deeper into the site. Why hadn’t I do so ages ago? I’ve found so much that has inspired and excited me.
Just wanted to say thank you.
Sue
Love, love, love and love it. I came across this page on Pinterest and I was so impressed. I just made one last night and your instructions and dimensions were spot on. I made some modifications but it was still great. Thanks so much. It’s my first tote and I can’t wait to sport it.
Hello Purlbee, Which grey fabric is this in solid version?
Hi Kim-
The gray fabric is the reverse side of the 8 oz black denim fabric listed in the materials section. And here is a direct link as well: https://www.purlsoho.com/purl/products/item/9379-Robert-Kaufman-Denim-8-ounce
Thank you!
Molly
thank you so much for sharing. I just started sewing and this little project was just inspiring, easy and beautiful!
Just getting into sewing totes and upcycled denim bags as well as other styles and fabrics. Awesome tutorial. Thank you for generously sharing.
Hello Purlbee,
Today I made this beautiful totebag.
Thankyou so much for this pattern.
You can take a look at my facebookpage, if you like.
https://www.facebook.com/hommadwebshop/
Greetings from Marlies
Hi Marlies-
Beautiful! Thank you for sharing!
Molly
Thanks you for this great tutorial, Molly!
I made a pretty tote bag black & white.
Which of the Railroad Denim did you use? Your site list at least four of them and they all look very similar. Thanks,
Jennifer
Hi Jennifer,
Thanks for writing in! We used the Twill Stripe, Indigo, 14108-62 print of Railroad Denim for this project.
Happy sewing!
Julianna
First want to say I love Purl Soho and the different sewing and knitting patterns. I’m new at sewing patterns so I’m a little confused on how to do the boxed bottom of the tote. Any help with this would be appreciated. I’m confused on how\where to measure the 4 inches. I’m afraid of sewing & cutting the bottom wrong.
Hi Lonnie,
Thanks for reaching out! You’re right that this step can be a bit tricky! The good news is that, even if you are a bit off, it really isn’t critical and that bag will still look just fine when you are using it. The key thing to look for is that the line you cut measures 4″ from folded edge to folded edge.
It is quite helpful to use a ruler, rather than a measuring tape, for this step. A regular straight ruler will work, but if you have one, a large quilting ruler, either square or rectangular, really makes it easy to cut a perfect corner. After folding the corner as shown in the pictures, place the ruler on top of the corner so that the side or bottom seam lines up with one of the straight lines. You can then slide the ruler until the two bottom points of the triangle formed by the corner of the bag are 4 inches apart according to the markings on the edge of the ruler, and either mark a line to cut or use a rotary cutter to trim off the triangle.
I hope that clears things up!
Julianna
Hi, this is wonderful tote. I made one in cream shoe canvas with black stitching and black bias tape, and made the straps instead of buying webbing. It turned out great. Thank you!
what type of sewing machine do you use? i am worried my basic machine will not be able to handle it.
thanks
Hi Denise,
Thanks for writing in! We used a very basic Janome to make this bag. To make this lovely bag, you can use the most basic of machines! We just used basic straight stitches for this lovely bag and just about any machine will do!
Happy sewing!
Cassy
Hi Denise, most average domestic machines will tackle a project like this. The most important thing to remember is to match the machine needle size to the weight of fabric you decide to use. For a project like this sewing through canvas & twill tape, I would use a size 16 needle, more likely a denim 16. This should handle all the layers! I hope you decide to make one! I am about to pull out my canvas stash & give it a go!! ?? Tania
Are the final dimensions of this bag 12 wide 15 high (inches)? How can I size it down to say 10 wide and 12 high (inches)?
Hello Icia,
Thank you for reaching out! To size down you will just want to cut your pieces smaller. This means that you will cut your two body pieces to 15 inches wide by 17 inches tall.
I hope this helps and happy sewing!
-Marilla
I’v been wanting to make a tote and this one looks great. I really like hand sewing for small projects (I find it pretty zen). Will this fabric be too heavy for hand sewing? Thanks, Giorgiana
Hi Giorgiana,
Thanks for reaching out! If you are used to using a thimble and slightly heavier gauge needle, then yes, you could certainly hand sew these totes! It might get a bit difficult when attaching the handles, so if you are planning on carrying heavy items in the bag, I would recommend doing that step on a machine.
Best,
Julianna
Hello, I think I’m probably being a bit stupid but can’t work out how to download or print the pattern for this beautiful bag; can you help?
Hi Lorraine,
If you’re on a desktop version of the site, you’ll find a “print” icon in the right column just below the date and tags. If you’re on a mobile version of the site, you will find a “print” icon below the pattern and above the comments. Follow the on-screen instructions to delete whichever parts of the pattern you don’t want to print or save. To remove images, click the drop down next to the image icon and change from 100% to 0%.
If you want to download it rather than print, you can choose save as pdf in your print options. I hope this helps!
Best,
Cassandra
Pattern looks great. Is the railroad stripe fabric available? I did not see a link for it. Thank you,
Hi Deb,
Thanks for writing in! Unfortunately, Railroad Denim has been discontinued and we don’t have any denim at all in stock at the moment – I’m so sorry about that! I would recommend substituting Draper Denim Indigo once it’s back in stock, or for a super sturdy all-weather tote, Merchant & Mills Dry Oilskin.
I hope that helps!
Julianna