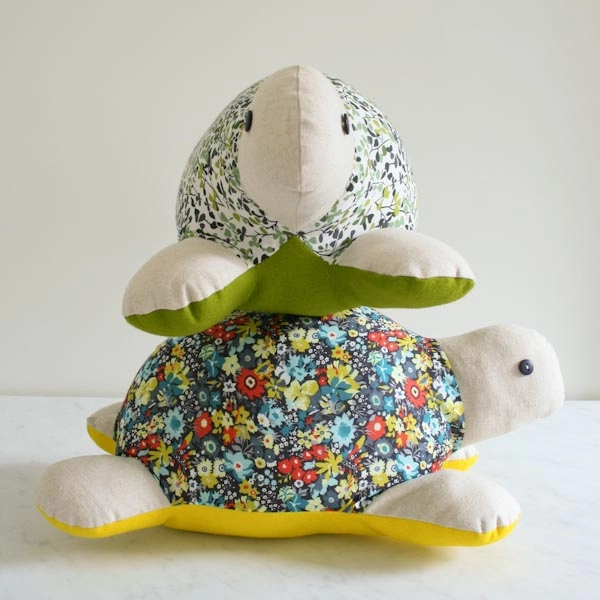
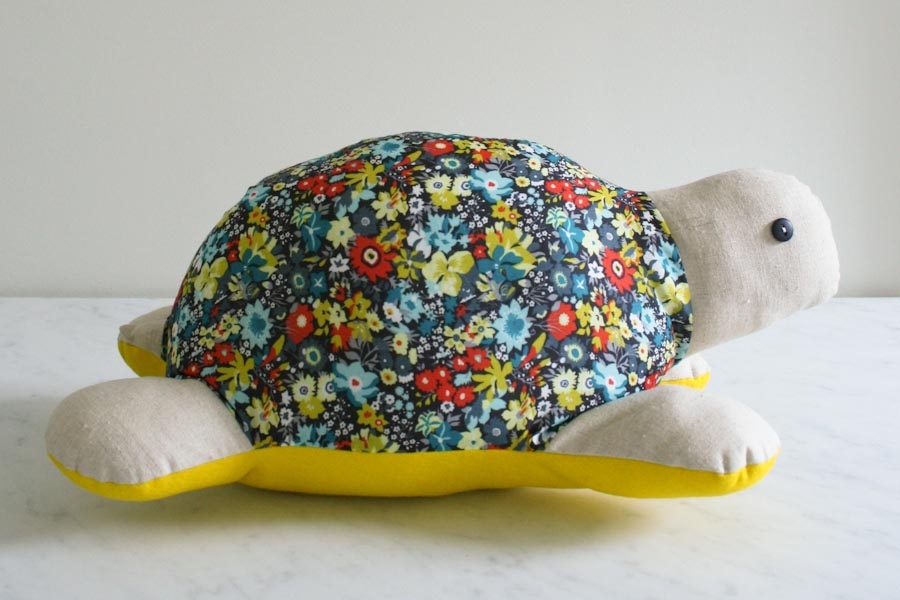
Myrtle the Purl Turtle

At first glance it may not seem that a hard-shelled, scaly-skinned reptile would be all that likable, but there’s just something about turtles that sparks the imagination. Maybe it’s their uniquely shaped shells, like tiny traveling houses. Or perhaps it’s because of their wise-looking countenance and unhurried manner. Whatever the reason, these ectotherms have captured our fancy!

Our Myrtle the Purl Turtle is just as appealing as her real life counterpart, only much more huggable. Her big, cuddly size and soft Liberty of London shell make her a fun pillow-like companion, perfect for sleepovers and keeping the bed warm. And despite a real turtle’s sluggish reputation, this pattern is super quick to sew!

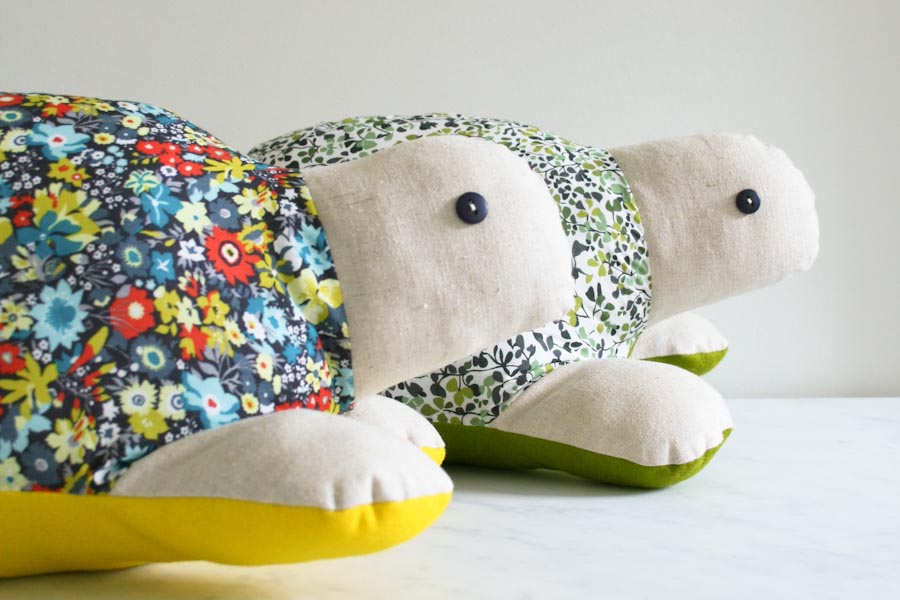
Myrtle’s shell is made with Liberty of London’s bright, beautiful Tana Lawn; her body is rustic Essex linen; and her underside is vibrant 100% wool felt. These lovely, sturdy materials ensure that your turtle will be around for just as long as a real one! Everything you need to make your own is available in our Materials for Myrtle the Purl Turtle kit right here! –Molly

Materials

A Materials for Myrtle the Purl Turtle Kit, in Vintage or Green, containing…
- A Fat Quarter of Liberty of London’s Tana Lawn in Green Ninataylor for the Green kit or Teal Manuela for the Vintage kit.
- 1/4 yard of Robert Kaufman’s Essex in Natural
- An 18-inch square of Wool Felt in Olive for the Green kit or Yellow for the Vintage kit.
- 100% cotton thread in color 3310
- 2 Medium (size 19) Buttons in Navy
- 1 bag of Poly-fil
You will also need a Myrtle the Purl Turtle Template available to download for free here, printed, cut out, and taped together.
Pattern
Cut
From the Tana Lawn, use the template to cut:
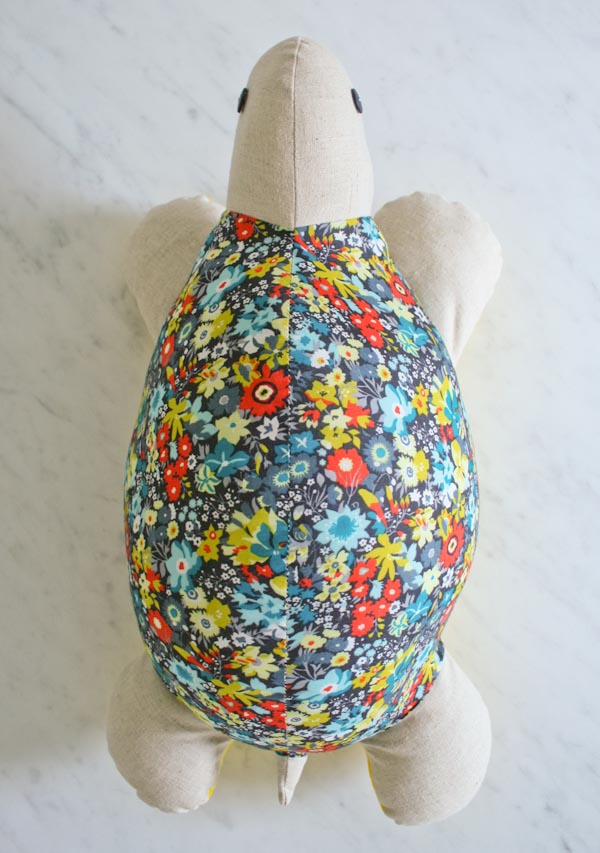
- Two Shell pieces: Cut one with the right side of the Tana Lawn facing up, and cut the second with the wrong side facing up so that the two pieces are mirror images of each other.
From the Essex, use the template to cut:
- 2 Hand pieces
- 2 Foot pieces
- 2 Tail pieces
- 2 Head pieces
Note: If you are substituting the Essex for a fabric with a right and wrong side, cut the preceding pieces in the same manner as the Shell pieces: one with the right side of the fabric facing up, and one with the wrong side facing up. The cut pieces will be mirror images of each other.
From the Felt, use the template to cut:
- 1 Underside piece.
Sew

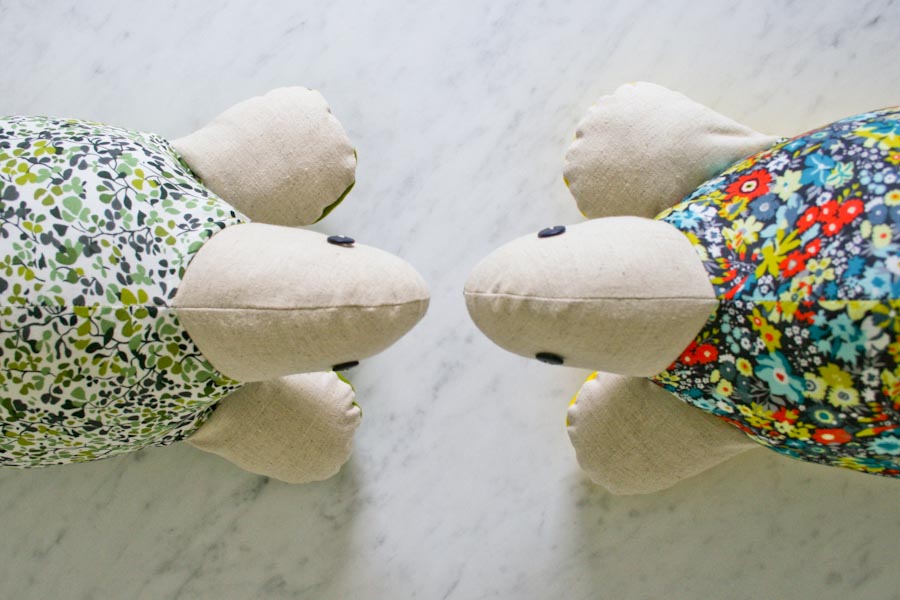
With the right side of a Shell piece facing up, pin a Tail, Foot, Hand, and Head piece onto the Shell piece at the appropriate spots (this info is on the Shell Template). The Essex pieces should lie on top of the Shell piece, as shown above, and make sure the Essex pieces are oriented correctly, with their fronts facing the neck area of the Shell and their backs facing the tail area of the Shell.

Sew these pieces onto the Shell with a 1/4-inch allowance. Press the Essex pieces away from the Shell with the seam allowances ironed towards the Shell.

Repeat this for the second Shell piece and the second set of Essex pieces. You will have two turtle-shaped pieces facing opposite directions as shown above.

With right sides together, pin together the two pieces. Start at the bottom base of the Tail, pin around the tail, along the top of the Shell, and around the Head. Leave the Hands, Feet, and bottom of the Shell un-pinned.

Sew the pinned area together with a ¼-inch seam allowance. Do not sew into the bottom area of the Shell at all. This whole piece is now the Turtle Top.

Open up the Turtle Top along the unsewn bottom section and lay it flat with its hands and feet pointed outward. Pin it to the Underside piece around the entire outer edge as shown above.

When you get to the chin section of the Underside, pull the chin upwards and pin it to the two Shell pieces until the tip of the chin meets the base of the Head piece. The seam allowance of the Head piece should be open.
When you get to the tail section of the Underside, pull the seam allowance of the Tail piece open so that both sides lie flat on top of the tail section of the Underside.

Sew the Underside to the Turtle Top with a ¼-inch seam allowance, leaving a 3-inch unsewn gap on one side of the Shell.

The tail section should look like this after it’s sewn, with the seam allowances open and sewn to opposite sides.
Stuff and Finish

Turn the Turtle right sides out through the unsewn gap.

Beginning with its extremities, stuff the Turtle tightly with the Poly-fil.

Pin the gap closed with the raw edges of the Felt and Tana Lawn tucked ¼-inch inside. Using a blindstitch, hand sew the gap closed.

Stitch the buttons onto the head. To secure, tie a knot at the back of the button and then push your needle out an inch or so away from the button. Snip the thread at its exit point and the thread end will disappear.


Love this.
Hi Girls! I just did a post on our visit to your wonderful shop. http://www.amandamakes.blogspot.co.uk. Lots of love, Amanda x
Oh my how beautiful and huggable are your turtles. I know my great-grandbabies would love them too. Thank you for such loving softies. Beverlyjane
Hi Amanda-
Thank you so much for sharing your post! It looks like you guys had a great time! So glad we could be a part of it.
Best-
Molly
So cute. I have one almost identical to yours that is from the 70's! And is a smaller version.
Thanks for sharing this with us!
Very very cute, I adore the fabrics and the turtle is adorable!
There is a beloved sea turtle named Myrtle, who lives at the New England Aquarium in Boston. She is Queen of the giant ocean tank. My children, and now my grandchildren love going to the Aquarium. I think these Myrtles will find good homes with the 3 grandchildren.
Thanks for sharing this. I'd love to have a go one day, hope you don't mind I've pinned this in Pinterest
You make that look so simple! I might just have to resurrect my sewing machine from the back of the attic!!
I'm thinking Christmas presents… Thank you xxx
Just wanted to let you know this project was featured on the At Play blog today.
http://atplayonline.com/2013/09/20/friday-finds-9-20-13/
Thanks
Megan
Thanks for this fun pattern! I had two friends over for a crafting party and we made 3 of these in a couple of hours. Tip: Skip the tail – it doesn't come out right, and it looks like it was even omitted from the example on this web site. No worries, however. These are terrific and pretty foolproof!
Moi je l’ai cranté et elle est sortie plutôt bien. Par contre pas évident les explications pour coudre la tête…
Hi Amy-
Thank you so much for the kind words about the pattern! But just to be clear the example turtles do have tails! We would love to hear what your issue was with the tail because we want to make this pattern as clear as possible!
Thank you!
Molly
I wanted to thank you for this lovely pattern, it will be perfect for my grand daughter.
great job.
Thanks so much for the awesome pattern and tutorial! I'm going to make it with green and tan felt. 🙂
Hi,
love your turtle. Just a quick question. Is seam allowance included in your pattern or should I add this before cutting ?
Hi Tine-
The seam allowance is included on all of our patterns, including this one, unless otherwise noted.
Thanks so much for your question,
Molly
Thank you for your pattern. Myrtle made my daughter’s day 🙂
I see on shell A and shell B the indications are to connect the two pieces, I don’t see on the instructions when to do that. I connected them from the beginning in order to connect the head, hand, foot and tail, what am I missing? Very cute pattern that I hope to make.
Hi Pat-
You are supposed to attach the paper pieces of Shell A to shell B before you cut the fabric, you also do this to Underside A and B You’re instructed to do this in the materials section:
You will also need a Myrtle the Purl Turtle Template available to download for free here, printed, cut out, and taped together.
If you have any other questions please let me know! Thanks for getting in touch!
Molly
Thank you Molly for getting back to me in a timely fashion. Now I know, the second one will be better or I may take this one apart to avoid a seam.
These look so cute and would love to make one for my daughter who is just off to uni but I’d like to use a heavy filling and make it into a door stop, do you have any recommendations, oh and I’m a complete novice!
Thanks
Hi Jac-
I don’t have any experience making a door stop but I think your best bet might be sand in a plastic bag. You may want to google “sew a doorstop” to find more specific filling ideas.
I hope this helps! Good luck with the project and please let us know how it goes!
Molly
All my kids love Myrtle,so did a test run one for the youngest and it was completely doable even for a non savvy sewer like myself-thanks for a wonderful pattern,
Hello! I have tried to thank you via email (by emailing customerservice@purlsoho.com) but I am not sure it has worked. I have made a turtle using this AMAZING (free) pattern for my textiles GCSE project at school so would like to say a big thank you and get your feedback on my work. Is there any way I can send you some photos?
Thank you xx
Hi, Zoe!
Thank you so much for your kind words! We would love to see photos of your turtle. You can email them to customerservice@purlsoho.com. Again, thank you for writing in!
Best wishes,
Kumeko
Hi Kumeko
That’s no problem. Thank you for your quick reply. I have sent the email again so hopefully it should come through. Sorry if you end up receiving it more than once!!
Zoe
Myrtle is a cutie- and just in time to meet my friend’s new baby-her first! Thanks again for your amazing blog and sharing with us all. 🙂 😀
Where do I find the pattern. Wonderful instructions, but no pattern.
Hi Beverly,
Thanks for writing in! The link to the template for Myrtle can be found linked in the Materials section! I am including the link here for your convenience: https://www.purlsoho.com/create/wp-content/uploads/2013/09/Purl_turtle_template.pdf
I hope that this helps and happy sewing!
Cassy
Hello,
Do you recommend clipping the seams around the curvy parts? (head, feet and hands)? When I stuffed my turtle I’m finding some wrinkles at the curves. I also wanted to ask if it’s ok to substitute another fabric for the base (other than the felt)?
Thank you!
Hi Jooe,
Thanks for writing in! While we did not clip around the curved edges of Myrtle, you certainly can if you would like. Rather than grading down the seams, I would suggest clipping little v’s into the seam to allow the curves to sit a little flatter.
Additionally, you can certainly use a different fabric for the bottom. I would recommend a medium to heavier weight fabric and it helps to stabilize the whole turtle and is a little more durable!
I hope that this helps!
Cassy
Thank you for the tips Cassy!
Thank you for the cute pattern! My daughter is obsessed with turtles and tonight she asked me to make her a turtle lunch bag. I wasn’t sure I could do it, but when I saw this pattern, I thought about inserting a zipper in the seam between the two shell pieces, making sure the interior is lined, and sewing seams to keep the stuffing in the head/tail/appendages so that the inside of the shell could contain a lunch. Am I crazy, or could this work? And how much bigger do you think I should make it?
Hi Brett,
What a great idea! I certainly think that this could work! I think that Myrtle might be a good size for a lunchbox without modification! You can certainly print up the template and get a feeling for the size! It may take a bit of trial and error to get it write but it could be very sweet!
Let us know if you try and how it turns out!
Cassy
Hi, it looks like the link to the kit is broken. Was it taken down, or is it a glitch? Also, is there somewhere I can get just the pattern?
Hello Angelina,
Thank you for reaching out! Unfortunately we no longer sell this kit, however you can still purchase all of the supplies separately. The only item that is not available is that particular Liberty of London print, but there are lots of other beautiful Liberty prints to choose from.
The pattern for this project is free and readily available on the project page. You can also Print or download this pattern as a pdf by following these simple instructions.
If you’re on a desktop version of the site, you will find a “print” icon in the right column just below the date and tags. If you’re on a mobile version of the site, you will find a “print” icon below the pattern and above the comments.
Follow the easy on-screen instructions to delete whichever parts of the pattern you don’t want to print or save. For example, you may decide to shorten the pattern by omitting certain images or the list of materials. To remove images, click the drop down next to the image icon and change from 100% to 0%.
I hope this helps you bring Myrtle the Purl Turtle to life!
Happy crafting,
Marilla
Should be 2 x shell B?
Its written 1 x shell B but does not make.up thr pattern?
Hi Georgia,
Thanks for reaching out! For the pattern template, you will want to tape Shell A and Shell B together to get the single shell piece. Then in the cutting directions, it notes that you will want to cut 2 shell pieces, one with the right side of the Tana Lawn facing up, and cut the second with the wrong side facing up so that the two pieces are mirror images of each other.
I hope that this clears things up!
Cassy
Bonjour
pourriez vous sur le dessin faire quelques notes pour mieux visualiser le schema qui n est pas tres compréhensible.
ou se trouve la tète ; par rapport au corps?
Merci beaucoup
Hi Vidal,
Thanks for reaching out! You will be attaching the head at the side of the template that is marked “Neck.”
I hope that helps!
Julianna
Bonjour,
Magnifique! Est-ce possible d’avoir la traduction en français ?
Merci,
Annie
Hi Annie,
Thanks for reaching out and for your kind words! Unfortunately, we don’t have this pattern available in french but thank you for expressing your interest, we really appreciate your input!
Warmly,
Gianna
Squish
Bonjour,
Merci pour cette jolie tortue. J’ai un peu de mal à coudre la tête avec le cou. Est-il possible d’avoir d’autres explications?
Hi Julie,
Thanks for reaching out! I am happy to help, is there a specific section of the head and neck instructions that you are having difficulty with?
Warmly,
Gianna
Yes!
Loved this! I had found the bear first (https://www.purlsoho.com/create/2013/05/30/mollys-sketchbook-wool-and-liberty-teddy-bear/) but haven’t sewn in a long time and thought it might be too complicated, so I started with Myrtle here. Very easy once you figure out that you’re making two halves that are mirror images of each other. Also my old sewing machine crapped out, so did the whole thing by hand – took about 4-5 hours, and yes it looks a little bit handmade, but still very happy with the result. On to the bear!
Bonjour,
Comment obtenir le patron, le gabarit
pour les différents découpes de la
tortue.
Merci à vous
Cordialement
Hi Nadine,
Thanks for reaching out! You can find the template for the pattern under the MATERIALS section!
Happy crafting!
Gianna
Bonjour Pourriez-vous m’envoyer votre patron pour la tortue s’il vous plaît merci
Hi Isabelle,
Thanks for reaching out. You can find the templates for this pattern right here! Hope this helps.
All the best,
Lili