
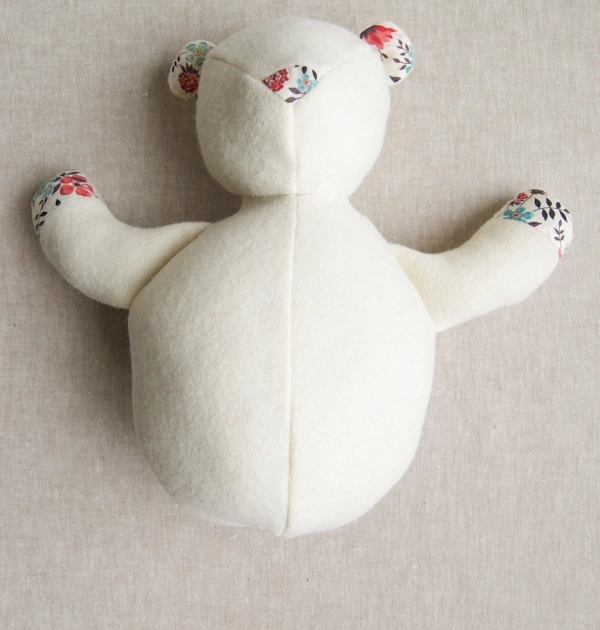
Wool + Liberty Teddy Bear

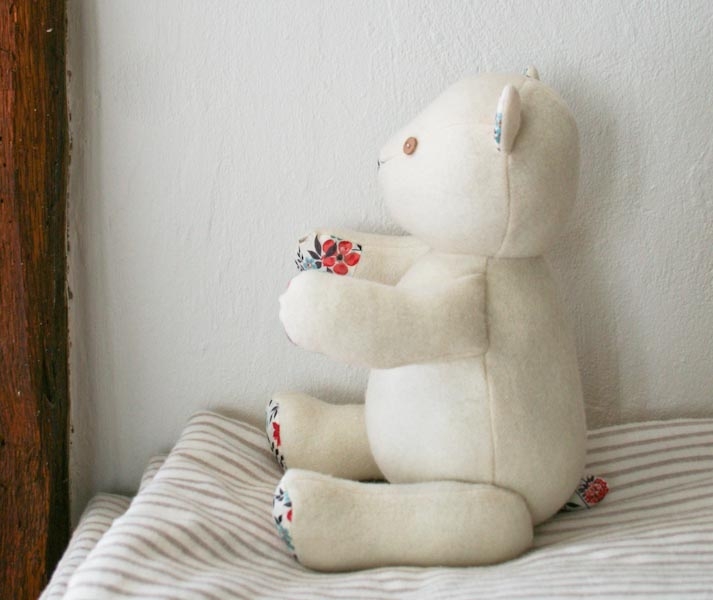
In my mind’s eye, the perfect teddy bear is based on my own childhood toy, aptly named “Teddy.” He would sit with his arms outstretched, all round and cuddly in his midsection. Sadly, he was lost in a move, but his ideal form has stuck in my head.

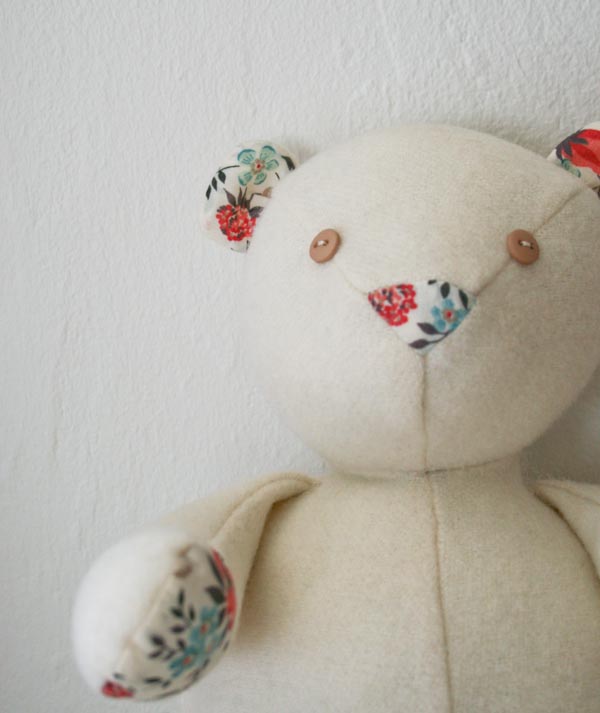
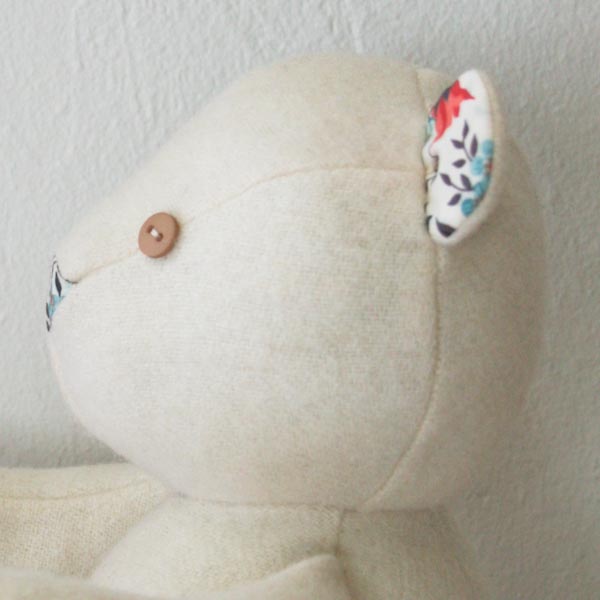
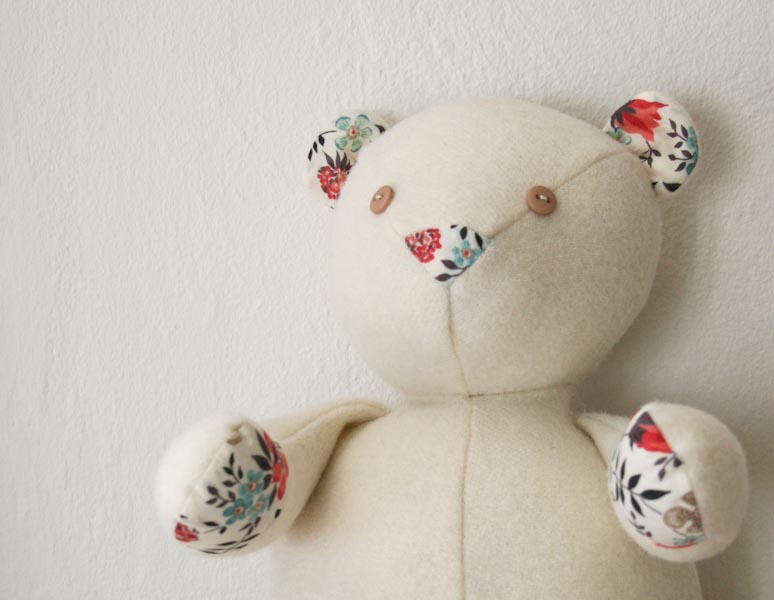
To tackle my own version of dearly departed Teddy I knew I had to use felted wool because it’s soft and rich and sews like a dream. Wool’s natural elasticity smooths the edges of curves and kindly forgives little imperfections. And to make my bear extra special I finished off his ears, nose, paw pads, and tail with some sweet Liberty of London Tana Lawn.
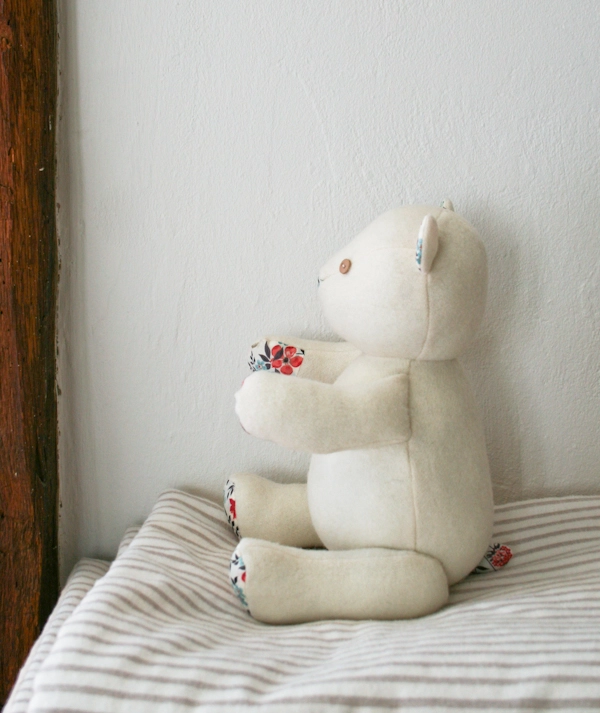
Usually, I am intimidated by 3-D sewing. It seems so complicated and advanced, but I’ve found that if I work slowly and methodically, it is totally doable. If you have sewn a garment or any other intermediate project, I’d say you’re ready for this project! For me, all of the detailed work was easily worth it because this sweet little bear looks and feels just like my old pal, Teddy! –Molly

Materials

To make one bear you’ll need…
- A 27 X 19-inch piece of Dorr Mill Wool Yardage in Natural
- A fat 1/8th of Liberty of London Tana Lawn in Edenham brown/ aqua
- 6 oz of poly stuffing
- 2 buttons for the eyes
- Gutermann 100% cotton thread in color 1040
You will also need…
- A Wool + Liberty Teddy Bear Template, printed and cut out. It is available for free download here.
Before you start you will need to felt the wool by washing it in hot, rinsing it in cold, drying it for 20 minutes, and then pressing it flat.
Size
Finished Measurements:
9.5 inches high
6.5 inches wide including legs
5.5 inches wide without legs
Note
All seam allowances in this project are 1/4-inch unless otherwise noted.
Pattern
Sewing the Head
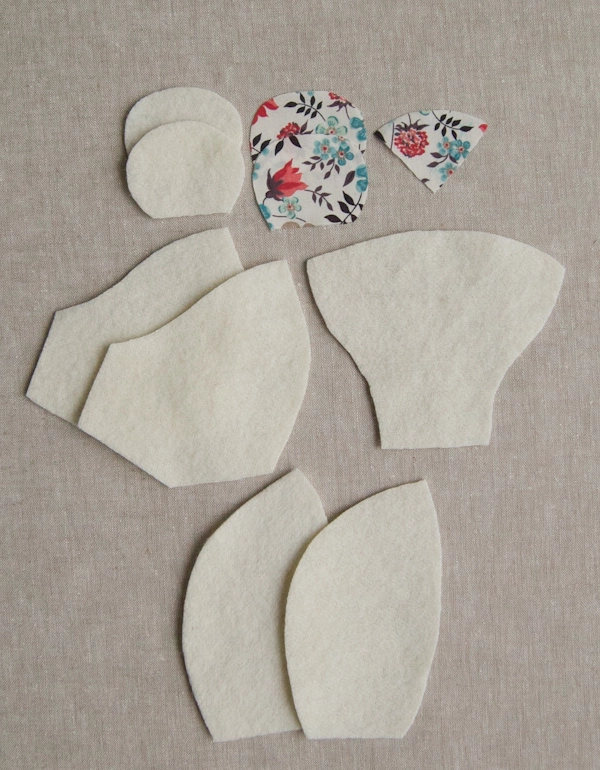

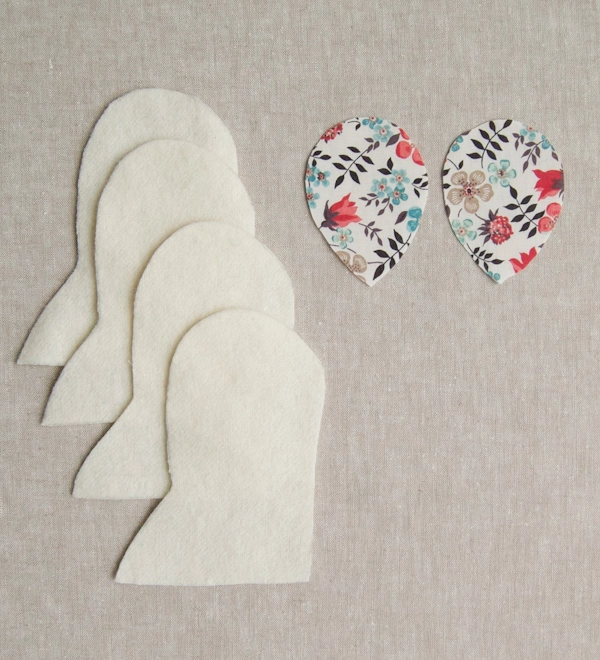
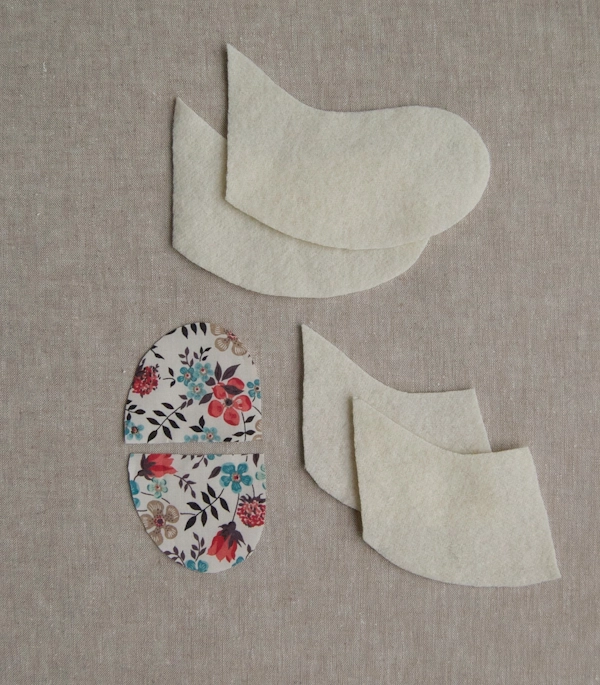
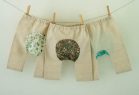
Cut out the following pieces from the Head Pieces page of the template:
From the Felted Wool,
- 1 Top Head
- 2 Back Heads
- 2 Side Heads
- 2 Ears from
From the Tana Lawn,
- 1 Nose
- 2 Ears
You do not need to transfer the markings from the templates to the cut pieces, but keep the templates nearby so you can reference which edge is which.

Pin and sew the tops of both Side Head pieces to opposite sides of the Top Head piece. Stop sewing 1/4 inch before the nose edge.
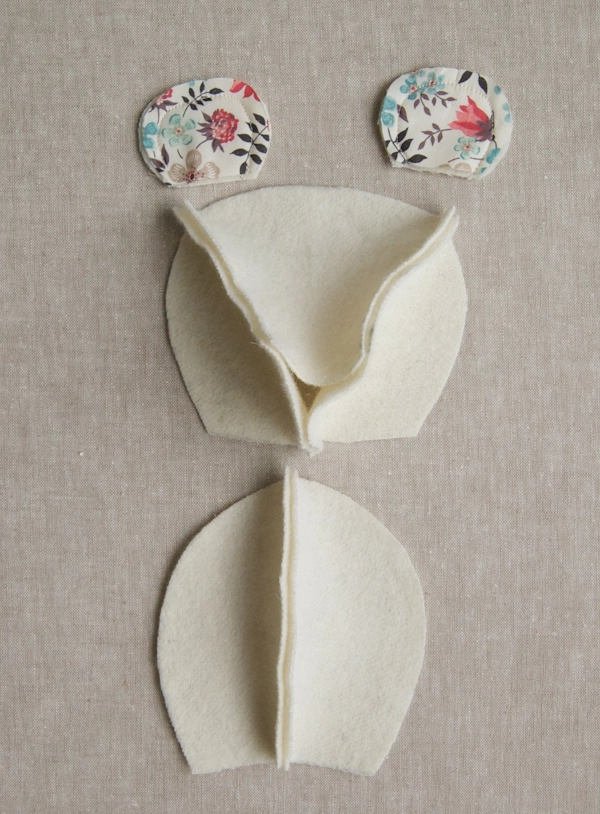
With the right sides still facing, pin and sew the mouth edge of the Side Head pieces together, stopping 1/4-inch before the nose. This is the Front Head section now.
With right sides together, sew a Liberty Ear to a Felted Wool Ear, leaving the bottom straight edge unsewn.
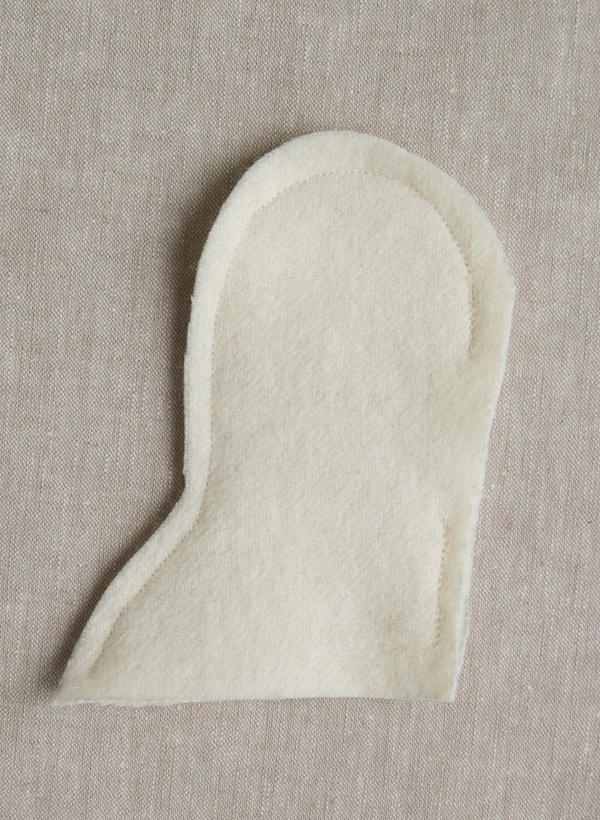
Pin and sew the two Back Head pieces together along their back edges.
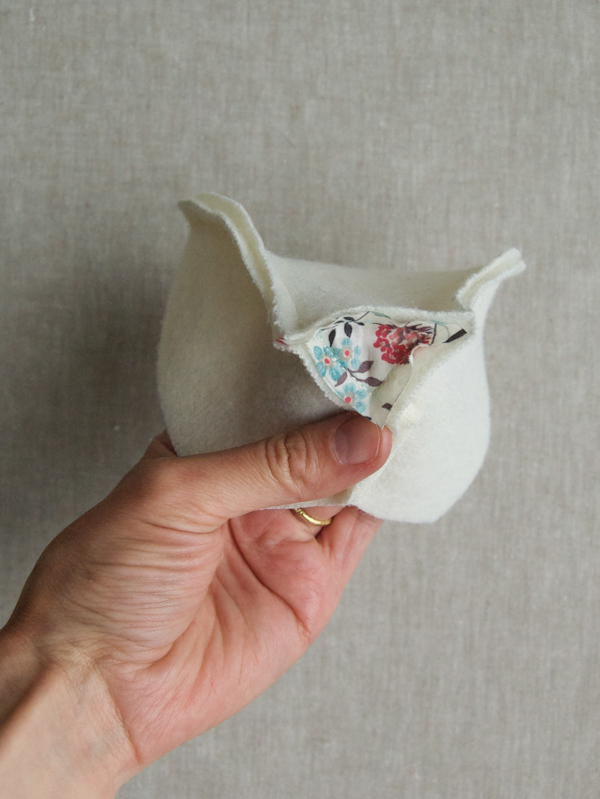
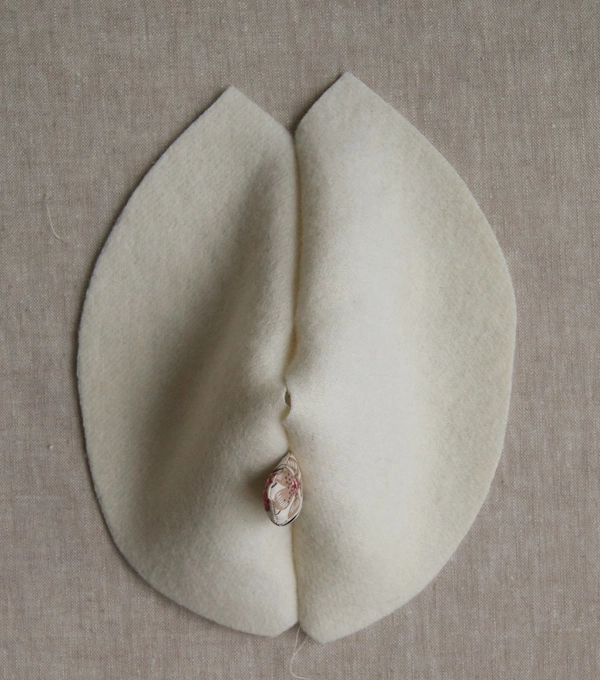
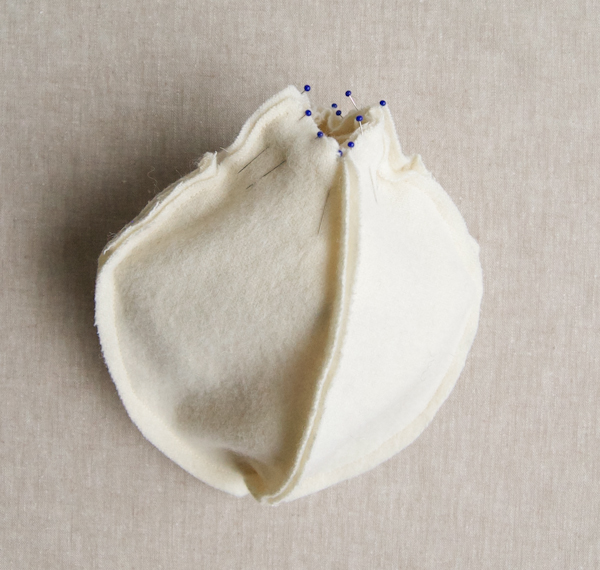
With right sides facing, align the Nose piece along the nose edges of the Front Head. The unsewn 1/4-inch sections should make it so you can lay the Nose down flat.
Pin the Nose’s curved edge to the top of the nose edge. Starting 1/4 inch from the edge, sew the top of the Nose to the Front Head, stopping 1/4 inch from the end.
Pin and sew the next side of the Nose in this manner, starting and stopping 1/4 inch before and after the edges.
Repeat for the final Nose side.

Turn the Front Head right side out and make sure the Nose is neatly sewn into the muzzle.
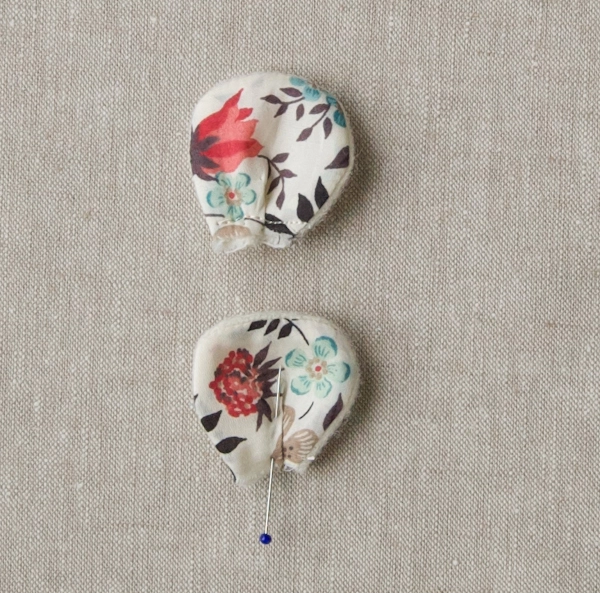
Trim the seam allowances on the Ears to 1/8 inch and turn them right side out.
Create a little 1/4-inch pleat through both the Tana Lawn and the Felted Wool at the bottom open edge of the ears and pin it in place.
Sew the bottom edge closed with a 1/8-inch seam allowance, just to keep the pleat in place.

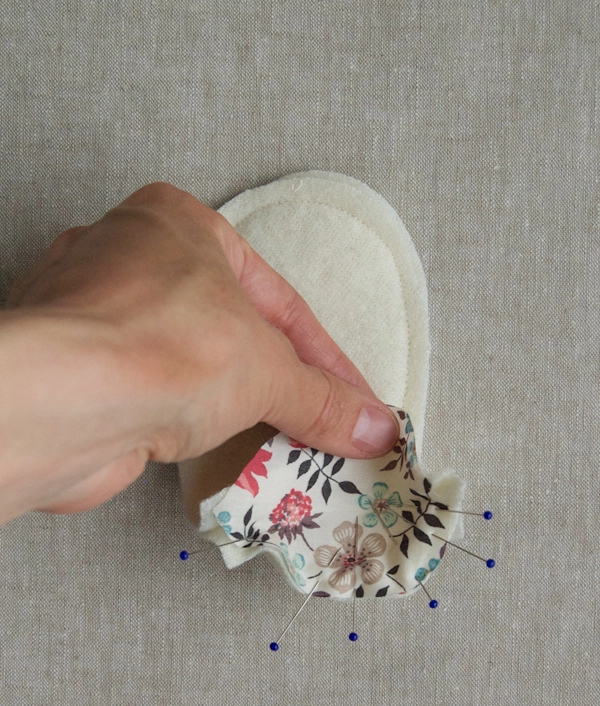
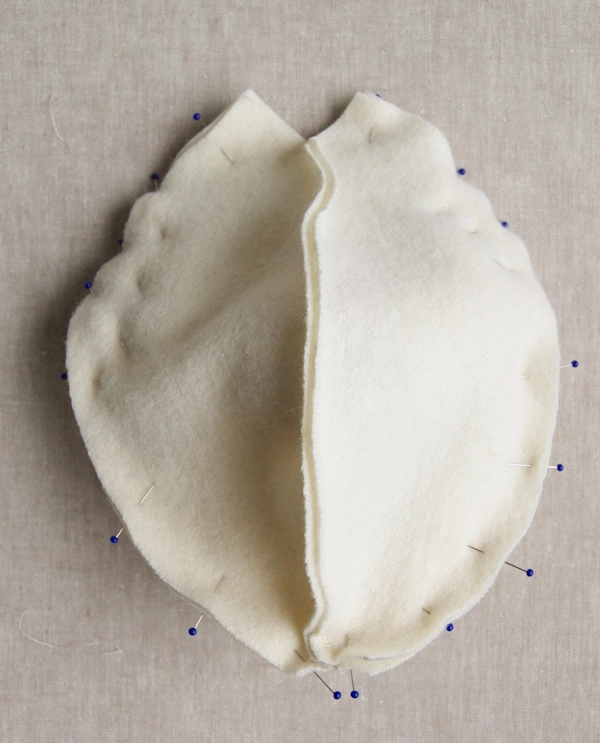
With right sides together, pin the Back Head pieces to the Front Head, sandwiching the Ears in between the two layers. The inside corner of the Ears should align with the seam of the Top and Side Head piece, and the Tana Lawn sides should face towards the Front Head.

Sew these pieces together, leaving the neck edge unsewn.
This is now the Head.

Turn the Head right side out and make sure that the ears are sewn on straight and that you like how everything looks.
Put the Head aside for now.
Sewing the Legs
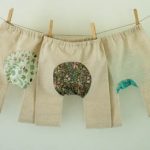
Cut out the following pieces from the Leg Pieces page of the template:
From the Felted Wool,
- 4 Legs. Transfer the “gap” marking onto two of these pieces.
From the Tana Lawn,
- 2 Foot Pads.
Pin the Leg pieces together in pairs of one marked piece and one unmarked piece.
Starting 1/4 inch from the bottom edge of the Leg, sew the pieces together along the perimeter except for the flat bottom edge and the gap section. Stop sewing 1/4 inch before the bottom.
Open up the unsewn bottom edge of the Leg. With right sides together, arrange the Foot Pad so that its pointed heel is facing the back of the Leg and the rounded toe is facing the front. Pin one half of the Foot Pad to one half of the bottom edge of the Leg and sew them together.
Repeat for the second half of the Foot Pad, then go over the seam to make sure there are no gaps and that the curved angle of the toe is smooth.

Turn the Leg right side out.
Repeat for the second Leg.

Stuff the Legs through the gaps, making sure the Legs feel firm and full. Sew each gap closed with a blind stitch.
Put the Legs aside for now.
Sewing the Arms
From the Arm Pieces page of the template cut:
From the Felted Wool,
- 2 Outside Arms
- 2 Inside Arms
From the Tana Lawn,
- 2 Paw Pads, that face opposite directions, from the Tana Lawn. To make sure that they face opposite directions cut one with the Tana Lawn’s right side facing up and one with its wrong side facing up.
You do not need to transfer the markings from the templates to the cut pieces, but keep the templates nearby so you can reference which edge is which.

With right sides facing, pin the Paw Pads to the Inside Arms along their straight edges, making sure to align the top edges with the top edges and the bottom edges with the bottom edges.

Sew these pieces together and then press them flat. They should be mirror images of one another.

With right sides together, pin the Arm Insides to the Arm Outsides and sew them together leaving the straight sides unsewn.
Turn the Arms right side out and stuff them so that most of the stuffing is towards the Paw Pads and there is no stuffing poking though the unsewn edges.
Keeping the wrong sides together sew the final edges together with a 1/8-inch seam allowance.
Put the Arms aside for now.
Sewing the Body

From the Body Pieces page of the template cut:
From the Felted Wool,
- 4 Body pieces. Transfer the arm and gap markings onto one of these pieces and just the arm markings to another Body piece.
From the Tana Lawn,
- Two Tail pieces that face opposite directions.
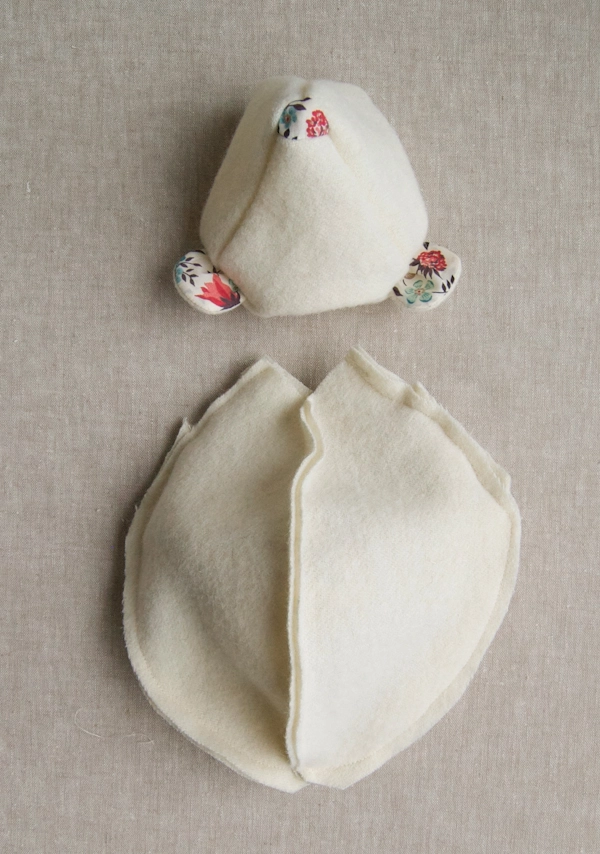
With right sides facing, sew the Tail pieces together along their curved edges, leaving the straight side unsewn.
Turn the Tail right side out and stuff it lightly. With wrong sides facing sew it closed along the unsewn straight edge with a 1/8-inch seam allowance.
Pin the Body piece with the gap and arm markings to the Body piece with just the arm makings along their back sides, marked sides facing out. Sandwich the Tail between the layers just below the bottom gap marking.
Sew these two Body pieces together, leaving the gap unsewn and sewing in the Tail in the process. This is the Back Body
Pin and sew the other two Body pieces together along the tummy side.
This is the Front Body.
With right sides facing, pin the Front Body to the Back Body along their side and bottom edges, leaving only the neck section unpinned.
Unpin the area between the marked arm sections. Put the Arms inside the Body, aligning the Arms’ raw edges with the Body’s and making sure the Paw Pads face towards the Front Body. The arms should slope downwards towards bottom of the Body.
Pin the Arms into place. Starting 1/4 inch from the neck opening, sew all around the Body, stopping 1/4 inch before the opposite neck opening.

Turn the Body right side out through the back gap.
Attaching the Head
With the Body inside out and Front side up and the Head right side out, face up and upside down, slip the Head into the neck opening of the Body.
Carefully matching up the edges, pin the neck edge of the Head to the neck edge of the Body.
Using a backstitch, hand sew the Head to the Body around the circumference of the neck. Go around twice to make it super secure.
Turn the piece right side out through the gap at the back of the body.
Stuff the Body and Head very firmly and sew the gap closed with a blind stitch.
Attaching the Legs
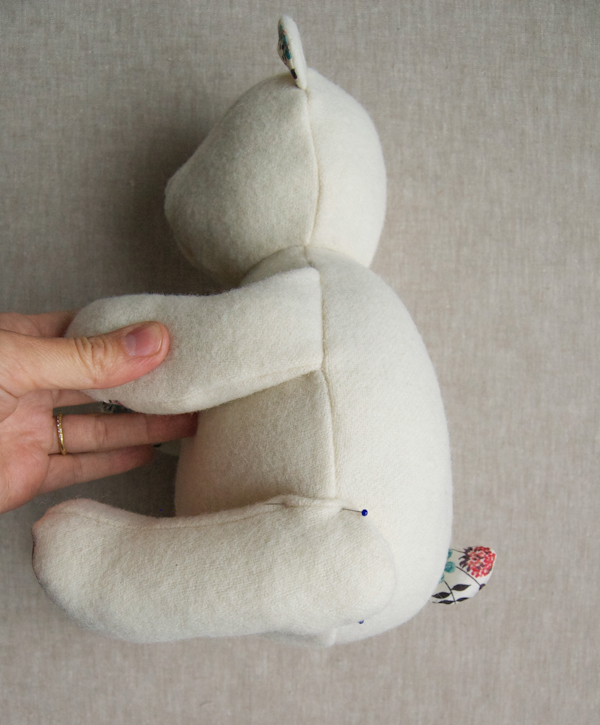
Pin the Legs to the bottom left and right sides of the stuffed Body. Make sure that the bear can sit on its own.
Using a blind stitch, hand sew the Legs into place where they make contact with the body. Go around this area twice to make sure the Legs are on very securely.
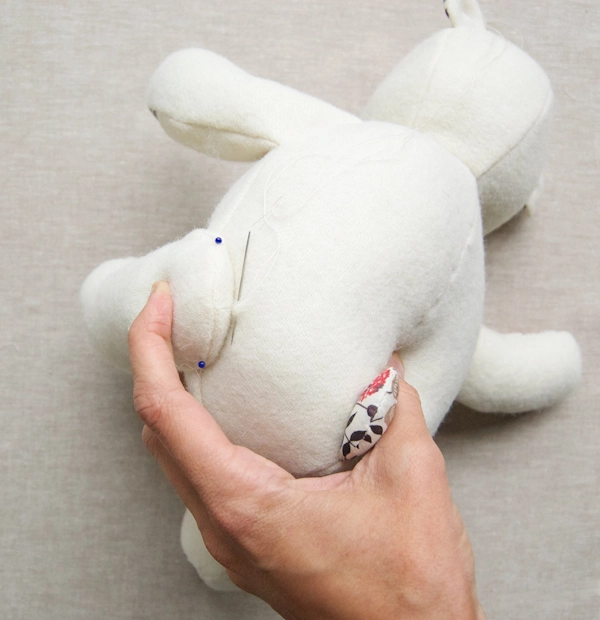
Sewing on the Eyes

Sew a button into place along the top seam of the front of the head. Here’s how:
Leaving a long tail at the beginning, stitch the button just as if you were sewing it onto a garment. Once you’ve sewn through a few times, tie the two thread ends into a knot behind the button. Then hide both ends inside the stuffing of the bear.
Repeat for the second button and you’re all done!


Just finished making Ted. A fabulous project during lockdown in France. Have been used to making lots of quilts but this is my first attempt at a teddy bear. Really pleased with the finished Ted. I will be making another one soon.
Hi Lyn,
Glad you enjoyed it! Please feel free to share any photos with us at customerservice@purlsoho.com or on Instagram using the hashtag #purlsohobusyhands. We’d love to see your work!
Kindly,
Anna
purlsoho.com
Bonjour, Je suis intéressée pour faire ce nounours mais je suis désolée mais je ne vois pas ou trouver le patron ?
Hi Christelle,
Thanks for reaching out! You can find the template for the Bear here: A Wool + Liberty Teddy Bear Template!
All the best,
Gianna
Hi, I’m 12 and love to sew but am not very good at. This was a super easy pattern to follow, and I think my brother will love his bear!
Hi Vivi,
Thanks for reaching out and for your kind words! I am so glad to hear that you enjoyed making this Teddy Bear and I bet your brother will love it!
All the best,
Gianna
Thank you for this pattern! It was a perfect base for a fat cat plushie I made, I just had to adjust the ears and tail and add some yarn fur tufts. The instructions were nice and easy to follow too. I’ll share to the hashtag on Instagram when I’m done! 🙂
Hi Brooklyn,
Thanks for reaching out! That is so cool! I am glad to hear that this pattern worked for you and you found it easy to understand! We look forward to seeing pictures!
Warmly,
Gianna
Thank you for sharing. My grandmas taught me how to sew by hand when I was young. They are no longer living, I miss them. I’ve been re-teaching myself how to sew for the past 2 years. I’m a food delivery driver. I hope to make this teddy bear pattern twice for my sister’s twin babies.
Hi there
Just wanted to thank you for making this pattern available, I started this yesterday and it has been very easy to follow, especially with the photographs. I think it’s going to be a very enjoyable project!
Hi Steph,
Thanks for reaching out and for your kind words! I am so glad to hear that you are enjoying this pattern!
Please let us know how your Teddy Bear works out!
Warmly,
Gianna
Hi Gianna,
Oh I’ve had lots of fun making the teddy bear, I’ve actually made two now! I’m allergic to wool so I used this scrap velvet I had and some scrap blue cotton, so they look a wee bit different to the picture but I am very happy with them, thanks again.
Cheers!
I just finished the Bear, I enlarged to 120% and made it out of some Levi jeans. Bear has three pockets cut to fit.
One comment I have regarding construction…next time I will leave an opening in the back of the arms to stuff later. It will make sewing the head on much easier the bulk from the stuffed arm will not get in the way.
Ps I’ve also made the rabbit.
Hi Eileen,
Thanks for reaching out and sharing your tip! Your version of the teddy bear sounds so cool! We would love to see your finished bear, so please feel free to email us a photo at customerservice@purlsoho.com or share on Instagram tagging us at @purlsohobusyhands or by using the hashtag #purlsohobusyhands
Warmly,
Gianna
Maravilloso tutorial y el resultado: un osito hermoso, tierno y gordito.
Muchas gracias por su dedicación al explicar su elaboración.
Un saludo desde Colombia.
Thank you for the post and pattern. Made one out of leather for my son. Had to adjust and do thing a little different. I am still happy with the outcome.
I am new at sewing and I am just curious of the 1/4-inch allowence is included in the pattern or do you cut the pieces adding the allowence?
Hi Kat,
Thanks for writing in! The seam allowance is included when you cut the pieces!
Happy crafting!
Gianna
Hi Lyn,
I just wanted to tell you huge thanks for the amazing explanation and pattern. I will definitely make some teddy bears with my children in after school club and we will send them to children in the hospital. Thank you very much 💋💋💋💋
I can’t find the pattern pieces template please can you send or advise where to find them, thanks.
Hi Sue,
Thanks for reaching out. You can find the template for this pattern in the MATERIALS section! I’ll also link to it here, for quick reference.
All the best,
Lili
Merci pour le partage. Je vais me lancer moi qui ne sait pas coudre mais je relève le défi. C est tellement joli !
De joyeuses fêtes 🥳