Baby Pants
Big marble eyes and tiny toes, bobbly heads and Lilliputian arms, babies’ disproportions are just intrinsically adorable. But for me, the real charmer has always been the sweet baby bottom! I love the way puffy diapers make a baby’s backside so over-sized and perfect for patting.

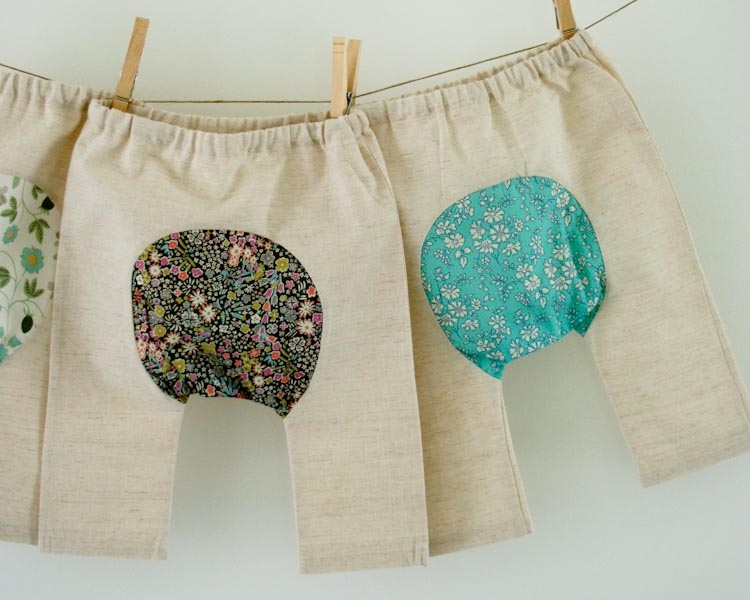
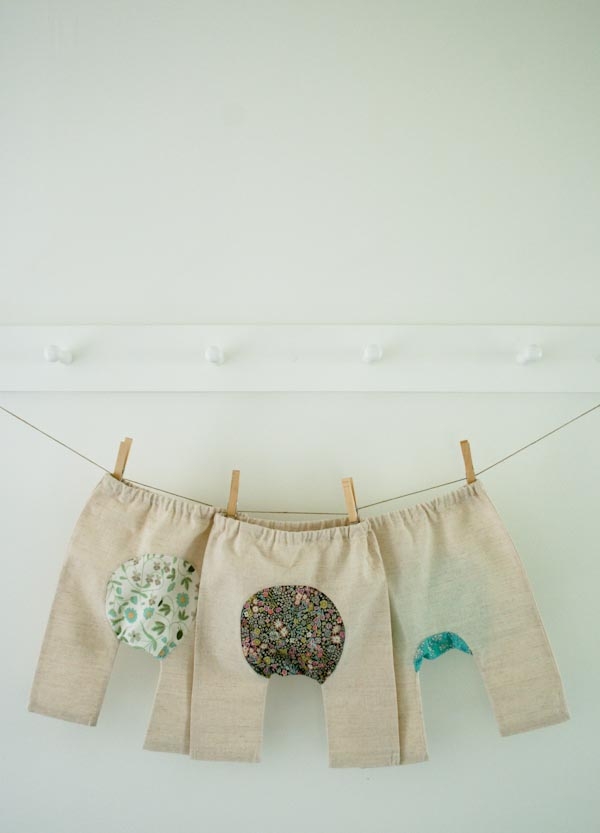
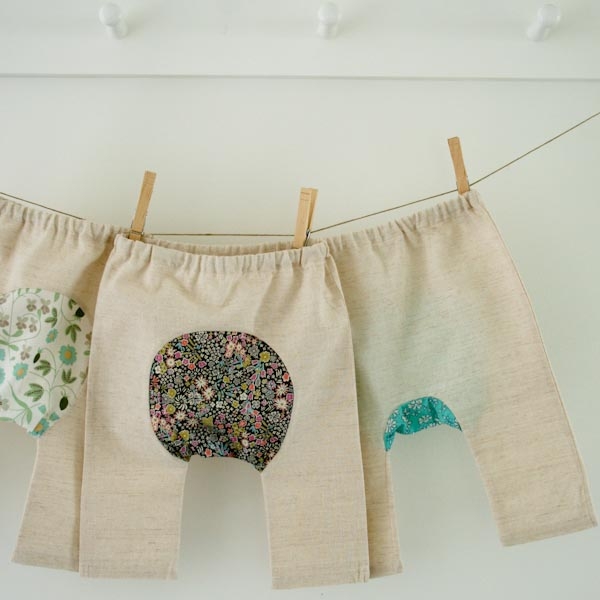
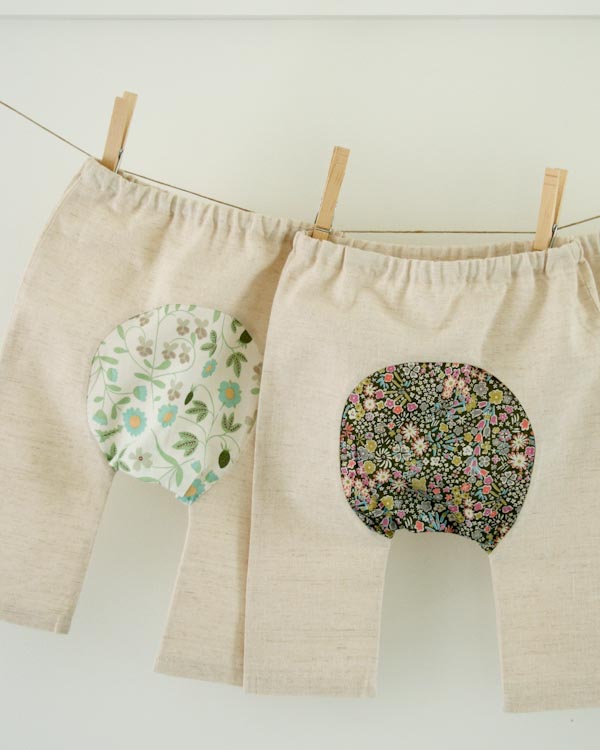
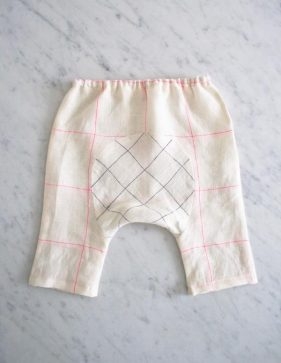
Since finding out that I was expecting my second child, I knew I would need to celebrate her finest feature with a comfy, cozy pair of Baby Pants. These trousers, with their rear gusset, make room for even the squishiest of tushes!
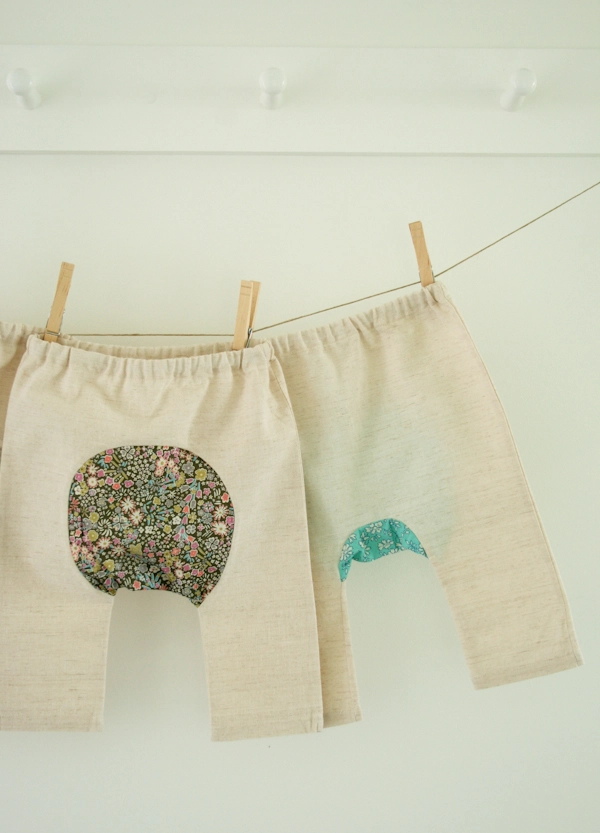
The curved gusset seam offers a little bit of challenge for this otherwise easy-as-pie project. And with patterns for sizes 0-9 months, you can make a set in every size. You’ll be needing them sooner than you think!

For the fabric I chose Kiyohara’s Linen Blend Solid, one of the softest fabrics out there, and it only gets better with wash and wear. Plus, I couldn’t resist a pop of a beautiful Liberty of London in the back, right on the cute spot! – Corinne
Update: New Fabric
JUNE 15, 2015
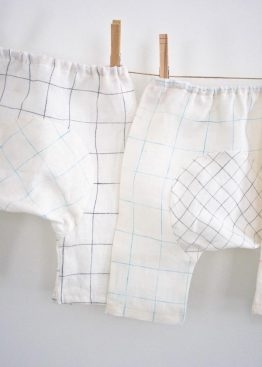
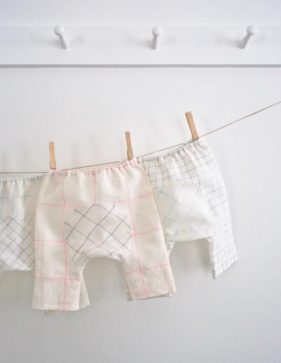
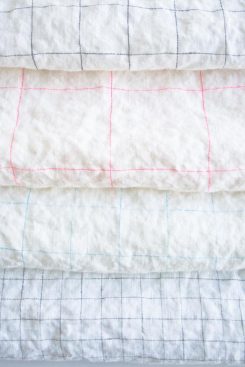
To celebrate another new birth (namely that of Purl Soho’s Linen Grid fabric!), I’ve made a new group of Baby Pants! Our Baby Pants in Linen Grid include a new list of materials and special instructions for a bias-cut gusset!
Update: New Sizing
JUNE 6, 2015
We’ve adjusted the pattern for sizes 3-9 months to give a wider leg and a roomier fit! The template and all measurements reflect this change.
Materials
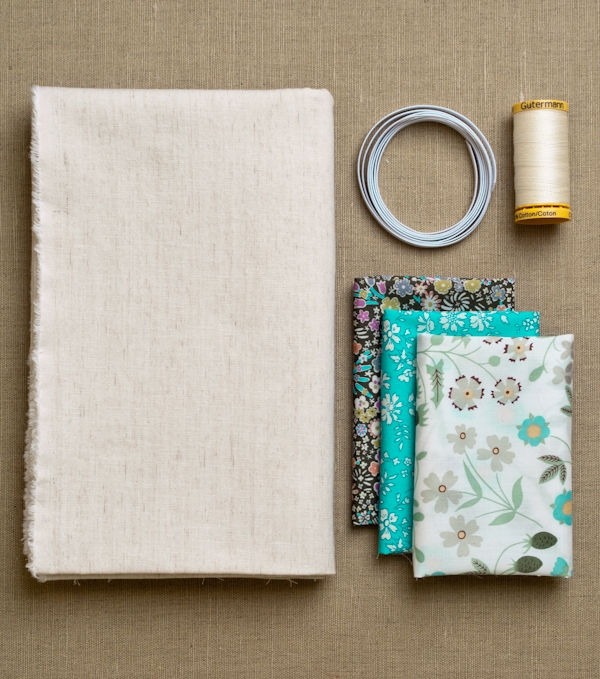
One Materials for Baby Pants kit (available in an Aqua or Pink color way) includes…
- Main Fabric: 1 yard of Kiyohara’s Linen Blend Solid in Light Beige
- Gutermann’s 100% Cotton Thread to match the fabric
- 1 1/2 yards of ¼-inch Braided Elastic in white
- Contrast Fabric: A bundle of 3 Liberty of London Tana Lawn prints cut in fat sixteenths (9 inches by 13 inches)
These are enough materials to make 3 pairs of pants in any size from 0 to 9 months.
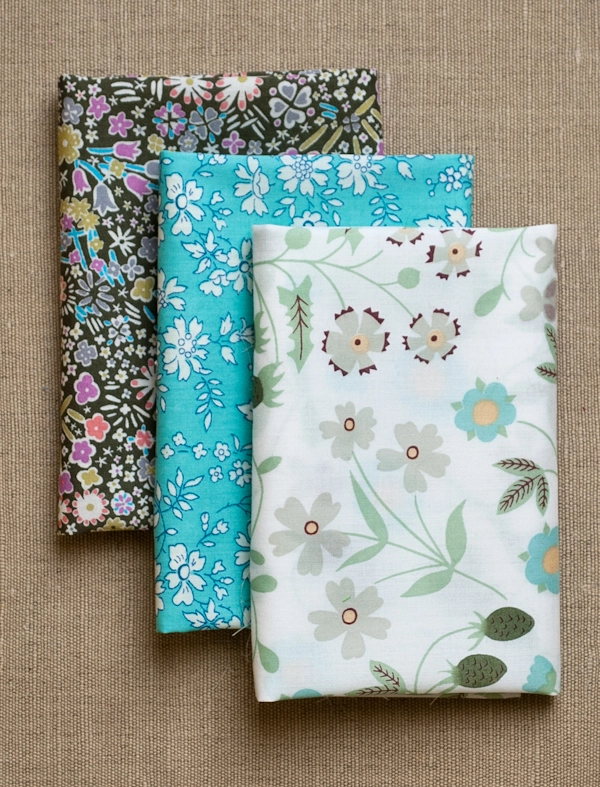
The Aqua fabrics are, from the left, Moss Kayoko, Aqua Capel, and Mint Mirabelle,
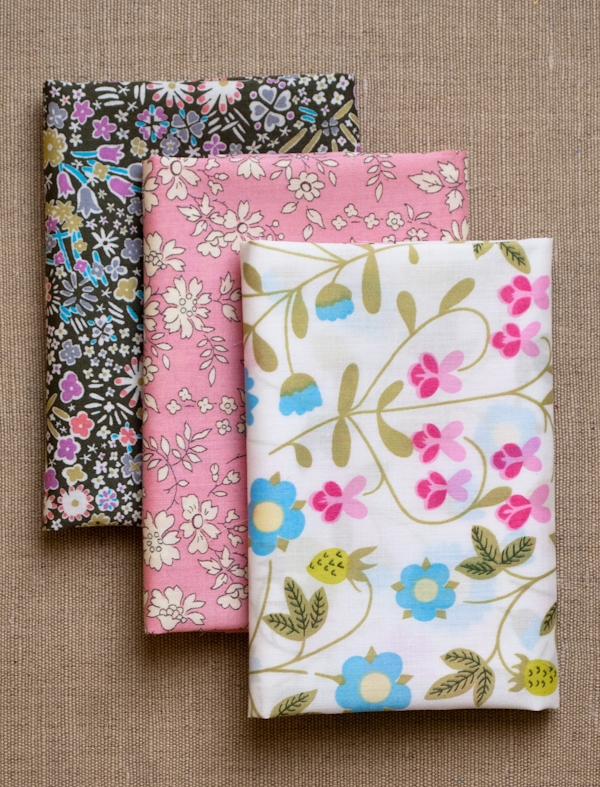
The Pink fabrics are, from the left, Moss Kayoko, Pink Capel, and Mirabelle – Pink Light Blue.
You will also need…
- A Baby Pants Template, printed, cut out, and taped together. It is available for free download here in 0-3 months, 3-6 months, and 6-9 months
Sizes
To fit 0-3 months, 3-6 months, and 6-9 months.
Notes
Prewash all fabrics before starting.
All seam allowances in this project are 3/8-inch unless otherwise noted.
Pattern
Cut
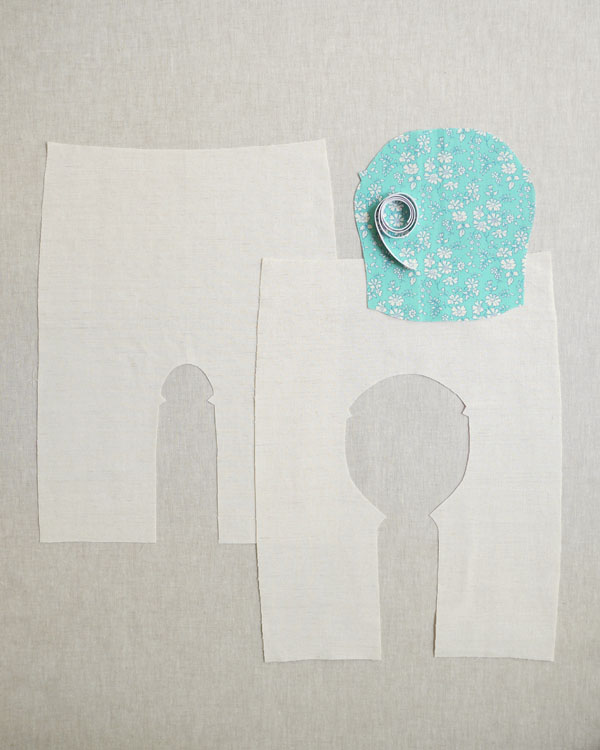
For each pair of pants, cut one piece of ¼-inch Braided Elastic to 16 inches for size 0-3 months, 17 inches for size 3-6 months, and 18 inches for size 6-9 months.
Using the free template, cut out the following pieces:
From the the Main Fabric
One Front Piece. Cut this piece by folding the fabric and placing the template edge along the fold. Cut around the template.
One Back Piece. Cut this piece in the same manner as the front piece, placing the template on the fabric fold.
From the Contrast Fabric
One Gusset. Again, cut this piece by folding the fabric and placing the template edge along the fold. Cut around the template.
Pin the Back Gusset
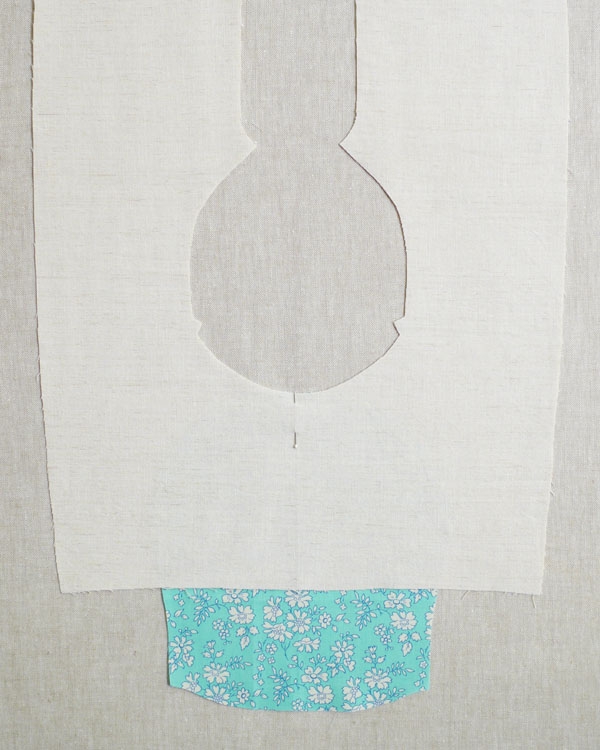
With right sides together, pin the right-side-up Gusset to the upside-down Back Piece at the midpoint of each piece (marked by the fold), as shown above. (The fabric I am using for the Back and Front Pieces doesn’t have an obvious right or wrong side, but if you are using a print, it’s important to keep in mind that you are pinning the right sides together).
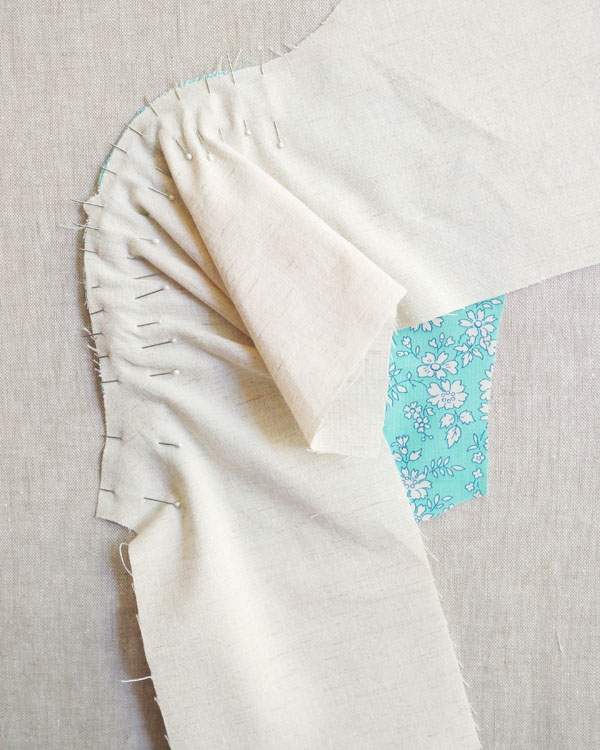
Moving out from the center, first in one direction and then the other, pin the Back Piece to the Gusset along the curve, making sure to match up the cut notches.
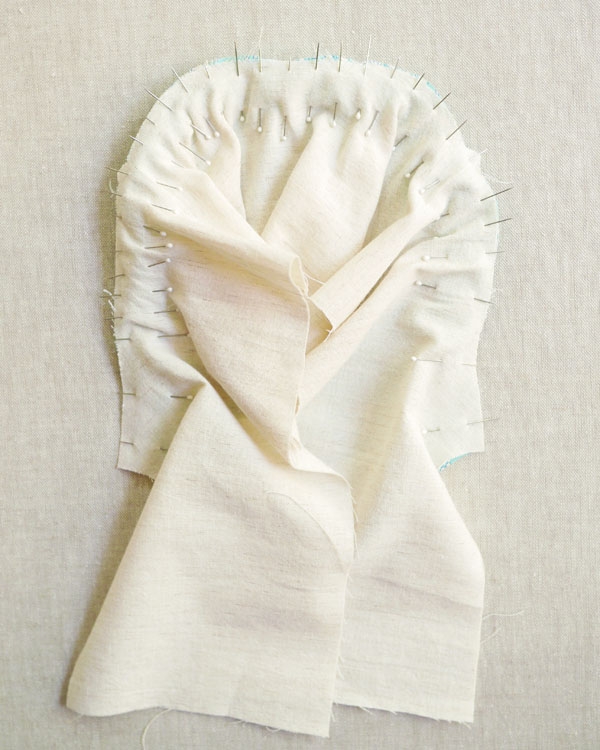
It can be tricky to keep curved seams wrinkle-free. Use a lot of pins to ensure that your seam will come out un-puckered and smooth.
Sew the Gusset
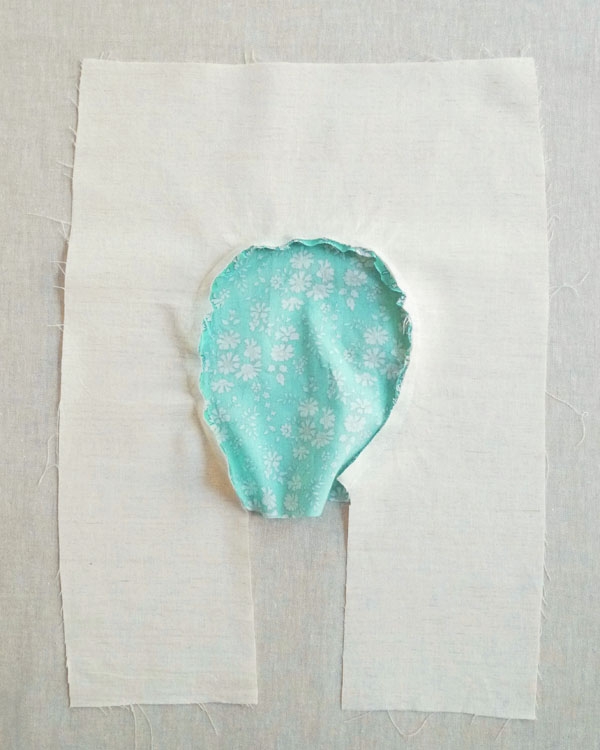
With the Back Piece on top, sew around the pinned curve. Go slowly and take the pins out as you come to them. Backstitch at each end.

Sew the Inseam
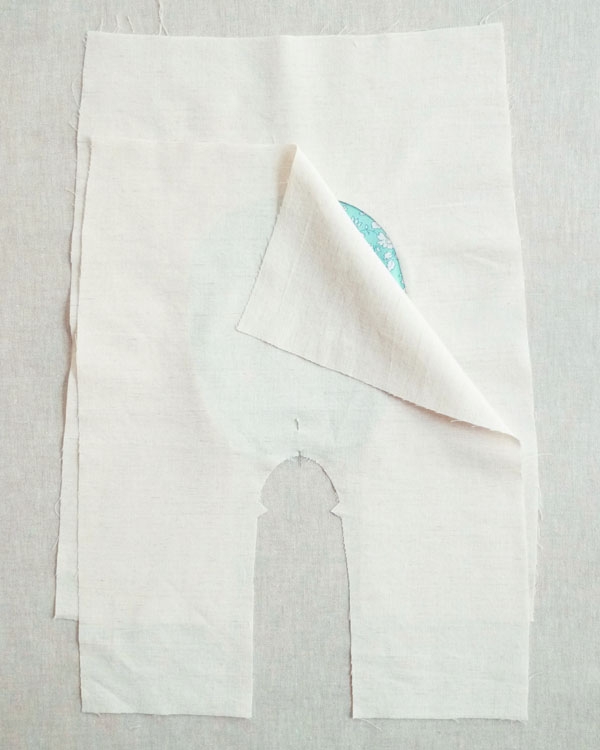
With right sides together, pin the Back Piece to the Front Piece, starting at the center of the inseam.
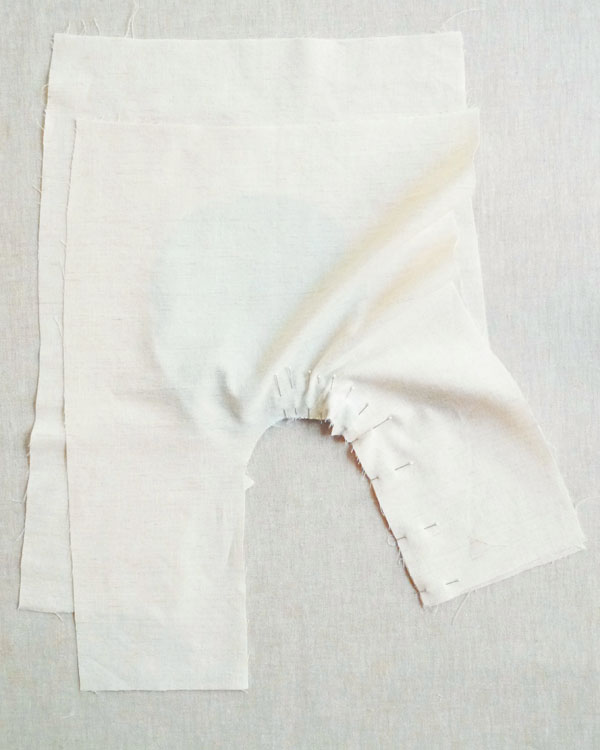
Moving out from center, first in one direction and then the other, pin along the inseam curve and down the leg, making sure the notch on the Front Piece matches up with the Gusset-Back Piece seam. Don’t be afraid to use a lot of pins to ensure a smooth seam.
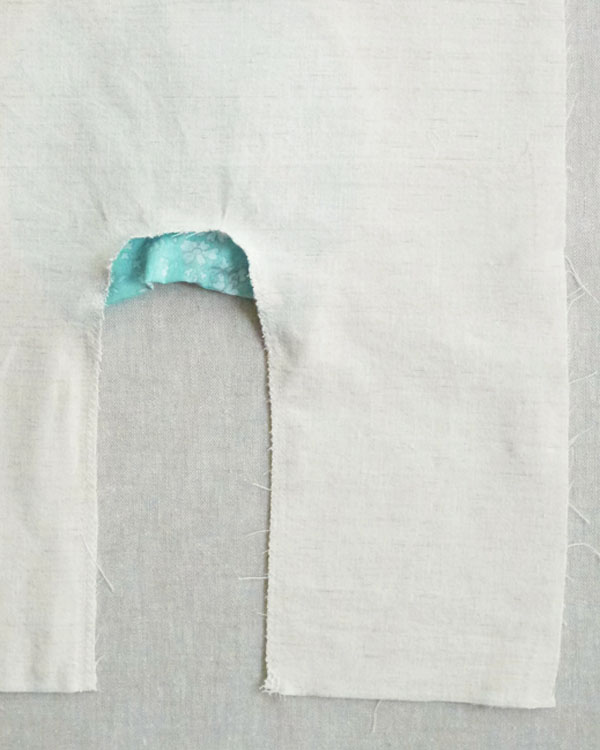
With the Front Piece on top, sew the pieces together. Trim the seams and sew along the edge with a zigzag stitch.
Sew Front and Back Pieces Together
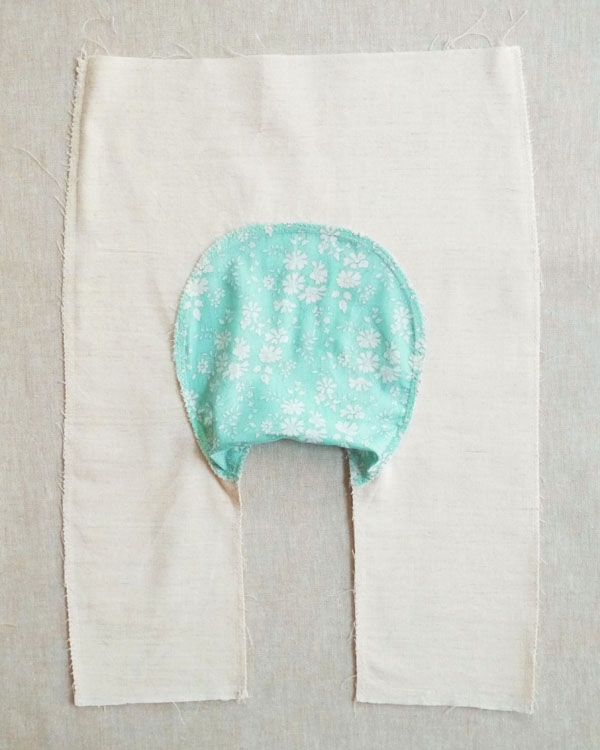
Pin and sew along the side edges. Trim the seams and sew along the edges with a zigzag stitch.
Hem and Finish
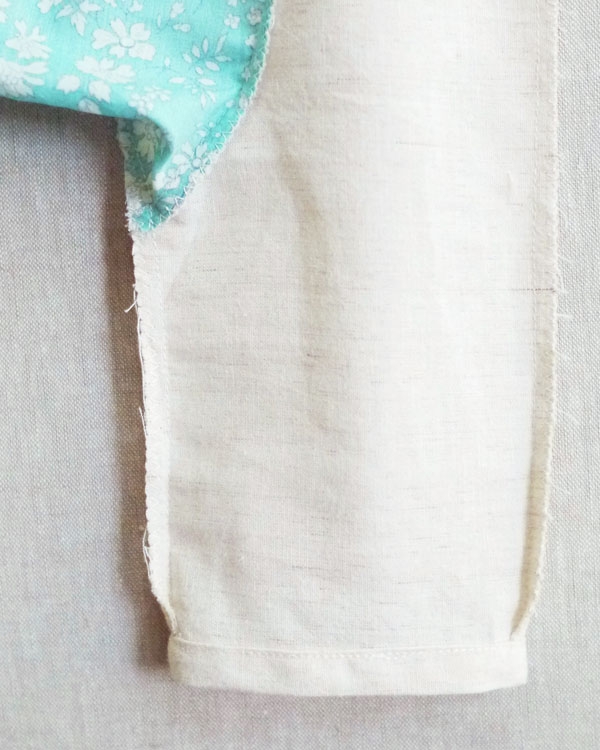
Turn up the bottom of the pants’ legs ¼ inch toward the wrong side twice and press. Edge stitch along the fold, backstitching at the end of the seam.
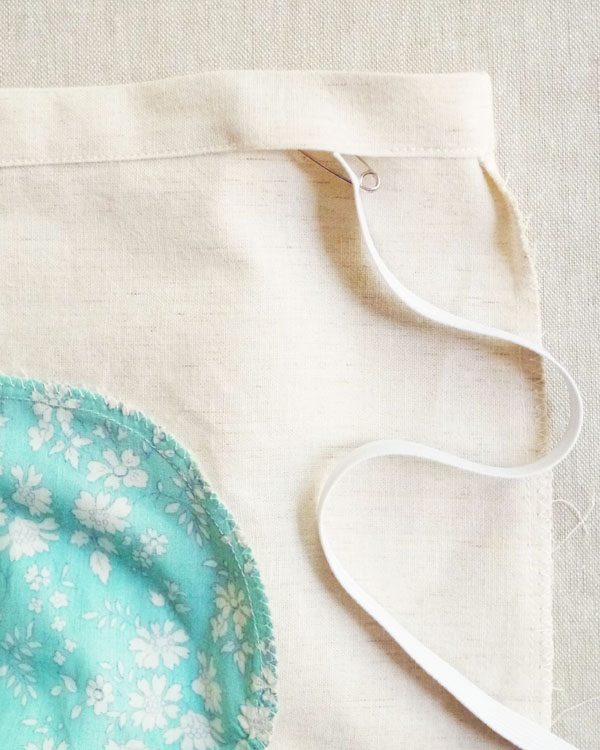
Fold down the top edge of the pants ¼ inch toward the wrong side and press. Fold again ½ inch from folded edge. Press flat. Edge stitch along the fold leaving a 1-inch gap. Attach a safety pin to one end of the Braided Elastic. Insert this end into the channel created by the top hem. Pull through, making sure to not to pull other end into the channel.
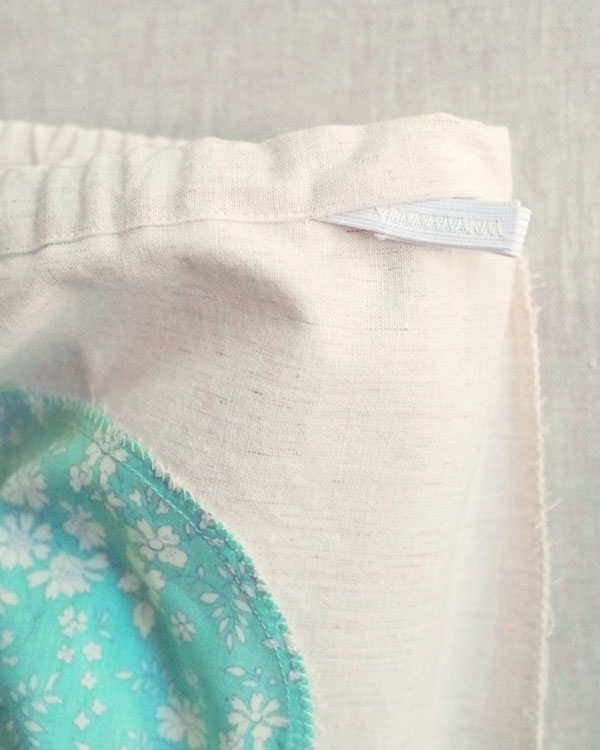
When you have pulled the pinned end of the elastic through the other end of the channel, overlap the two ends by 1 inch. Sew the two ends together lengthwise with a zigzag stitch.


How do you hem the pants with the machine when the opening is so small?
Sorry, I’m new to sewing!
Hi Ruth –
This is a great question! You sew the hem on the pants in the same way you would on any opening, but you’ll want to move slowly and carefully to avoid picking up multiple layers, repositioning the fabric as you sew.
I hope this helps!
-Corinne
Don’t circle the opening around the arm base of your sewing machine, as you typically would if you have a free-arm machine, sew with the pant leg opening “up”, so you are sewing inside the hole, not around the outside. That way, you don’t have to worry about it fitting around the arm.
I sewed the hem after sewing the side seams But BEFORE the crotch seam. That way you won’t have the small opening to contend with. Hope that helps:)
I have a 2 year old daughter and really really want to make these trousers. They are so cute! Could you please reccomend how to grade up the pattern for a 2 year old.
Thanks in advance!
Hi Bethany –
I do not have experience making these pants for a toddler, so I can’t say for sure what adjustments to make to guarantee a perfect fit, but if I were going to size the pattern up, here’s what I would do …
First, take the following measurements of your daughter:
From the crotch to waist front
Around the waist
From the waist to ankle
Use these measurements to make the following adjustments:
Extend the top edge of the Pants Front pattern piece so that the measurement from the crotch edge to the top edge is equal to the crotch to waist measurement you took above, plus 2 1/4 inches.
Extend the side edge of the Pants Front so that the measurement from the fold line to the side edge of the pattern piece is equal to 1/4 of the waist measurement plus 1 1/4 – 1 3/4 inch.
Extend the leg of the Pants Front so that the measurement from the top to bottom edges is equal to the waist to ankle measurement plus 1 1/2 inch.
Now, place the original Pants Front pattern piece on top of the new adjusted pattern piece. Measure the distance between the original edges of the pattern piece and the extended edges. For example, you may find that you added 1 inch to the top edge, 1 inch to the side edge and 1 1/2 inches to the bottom edge. Make these same extensions on the Pants Back pattern piece.
Cut the waist elastic to the waist measurement plus 1 inch.
Keep the Gusset as is.
I hope this helps! Please let me know if you have any questions about these directions. I would love to hear how they turn out!
-Corinne
Would this pattern work without the gusset? Perhaps cut 2 fronts? I wanted to line them with contrasting fabric and roll pant leg.
Hi Julie –
Thank you for writing in. This is a great question!
The Gusset at the back adds a little bit of extra space for a fully diapered bum. If you were to eliminate the Gusset, I worry that the pants might end up a little tight. I suggest using two Front pieces as you suggest, but instead of placing the straight edge of the pattern piece directly on the fold of the fabric, I would pin it about 1/2 inch out from the edge. This will add a little bit more room to the front and back pieces and should give the room you need!
I hope this helps!
-Corinne
I did a rolled pant leg on mine with contrasting fabric by lengthening the leg by a few inches and sewing the same amount of contrasting fabric to the end of the leg. I then turned it under after the pants were finished and top stitched it in place. With this method I was able to turn the cuffs up to the original pattern length at first and roll them back down later when the little goblin grew.
Have you made these with jersey knit? Do you think this would work?
Hi Stuart –
Thank you for writing in! This is a great question.
I have not made these pants in a jersey knit, but I know that other readers have with great results! Your comment has actually inspired me to try making a pair in Robert Kaufman’s lovely new Double Layer Jersey, a super soft reversible jersey knit that will work perfectly for the contrast gusset!
Thank you for the inspiration!
-Corinne
It looks like you used a serger to finish the seams. I don’t have a serger. Will the fabric hold up through many washings with plain seams or should I finish the edges of all the pattern pieces with zig-zag or other stitch before sewing to reduce the chance of unraveling? Thanks
Hello, Jan!
Thank you so much for writing in! You don’t need to do any edge stitching to the individual pattern pieces. However, you will want to sew a zigzag stitch each time you sew two pieces of fabric together. For example, you’ll zigzag after you sew the gusset, the inseam and when you sew the front and back pieces together.
Again, thank you for writing in! Happy sewing!
Best,
Kumeko
For all the interior seams on my clothing I’ve taken to using some 1/4 inch bias tape made from muslin to seal them up. I was able to make over 20 meters of it in one afternoon and I use it on everything. Everything comes out looking super nice and is so sturdy. I expect a lot of these baby clothes I am making will be passed down to my children for their children.
Hi, I have made several of those pants, I just love them (my baby too), thank you for sharing ! I’m gonna do another one today but I wanted to make sure, your pattern does include the seams allowances or shall I add them ? (my baby is very tiny so it was ok until today). Thanks.
Mona.
Hello Mona –
I’m so glad you (and your baby!) have enjoyed this pattern!
All seam allowances are included in the pattern, so there is no need to add them in when you cut.
Thanks for writing in!
-Corinne
What a delightful pattern! I am a beginner sewer and Do not quite understand where exactly the gusset on the front piece should line up with the back piece/crotch. Thanks!
Hi Chelsea –
Thank you for writing in! I’m sorry you’re finding this part of the pattern confusing. Hopefully I can help clarify!
The Gusset is attached to the Pants Back first, with right sides together, matching up all notches. Next, with right sides together, you’ll pin the Front and Back to each other. You will match up the Gusset-to-Back-piece seam lines with the notches on the Front piece. This means that you will be pinning the Front piece to the Gusset fabric in the space between the two notches in the crotch of the Pants, and pinning the Front to the fabric of the Pants Back down the inseam of the legs.
I hope this all makes sense! Please let me know if you have any other questions!
-Corinne
Thanks for this great free pattern! I made up my first pair recently and they look so cute! The pattern instructions were really easy to follow. I’ll definitely be making more, I only wish I’d seen this pattern when my own boy was a baby!
I love your patterns. Thank you so much for them. I’ve made several of these pants and your baby kimono shirt. Unfortunately for me, my kids come out as huge chunks so I have to size up the patterns quite a bit, but they all come out so lovely and sew up so quick and easy. I made these pants in the largest size the first time but my 5 month old is just about too big for the rise on them so I’m back again to make bigger ones.
Thank you again!
Just finished making these to go with your little kimono-style baby top. They turned out really well, though I had a hard time getting the arrows to match up. It all worked out in the end, though. Thanks for the tutorial and pattern!
Hi Sarah-
Thanks for writing in! This sounds like a perfect summer baby outfit. So glad you we able to make the pants work!
Happy sewing,
Corinne
We are expecting our 5th & 6th grandsons… FINALLY there’s something I can actually make for BOY babies! Thanks so much!
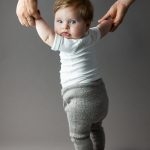
Do you have any images of these on an actual baby? I’d like to see the fit.
Hi Amy! Thanks for writing in!
We unfortunately don’t have any available images of babies modeling these adorable pants. If any of our readers have made these we encourage you to post a photo of your creation by using the hashtag #purlsohobusyhands!
I’ve made a few pairs of these Amy and can attest that for newborns the fit is very accurate and accommodating. They make a super cute and super easy addition to any baby’s wardrobe!
Thanks (everyone!)
Keith
These where made with both non stretch fabric correct? Trying to find woven patterns that work for me! Thank you for your get tutorial
Hi Ashley,
Thanks for writing in and for your kind words! You are correct! We have only used woven fabric for these adorable pants.
Happy sewing!
Cassy
I’m coming back to these pants for baby #2, but am a bit disappointed that the fit has changed. Is there somewhere to get v1 of the pattern from, to make sure I can sew many more of the same pants we loved the first time around? My babies are on the tall and skinny side and cloth diapered, so the older narrower leg + gusset combo fit them perfectly…
Thanks!
Hi Emilie,
Thanks for writing us. Sorry you don’t like the new fit! Unfortunately we are not offering the old pattern because the new pattern is less constricting. If you’d like to take the legs in a bit you can take off however much from the cuff as you like and blend that width into the side seams and inseams. Thanks!
-Adam
Hey Emilie,
I believe I have the old pattern saved on my computer. I can email it to you if you’d like.
Heidi
I’d like to make these pants for the winter season, so I’m wondering if one could also use a slightly heavier (woven) fabric. Do you have any suggestions?
Thanks so much!
Hi Anne,
Thanks for writing in! I think that any of our flannels would be lovely for a winter version of there pants!
Happy sewing!
Cassy
I just made 3 pairs o these, and I LOVE them! Thank you so much for the great pattern. Just one thing to note, in the previous article about baby pants it says to cut the gusset on the bias, but this article says to cut on the fold. I cut on the fold, since that’s what the pattern said, but had a brief moment of panic when I saw the note about the bias. It might be worth editing the article for clarification.
Again, thanks for the pattern! I’m just smitten with these, and can’t wait to give them as a baby gift!
Hi Rachael,
Thanks for writing in and for your kind words! For the Linen Grid version of these sweet pants, we cut the fabric on the bias to create a design element that showcases the grid of the fabric. For all other versions, cutting the fabric on the bias is not necessary unless you like the look!
I hope that this helps!
Cassy
Hi, what size of paper do I print the template on? Do I just use regular 8.5×11” paper?
Hi Catherine,
Thanks for writing in! You are correct! You will be using 8.5 x 11″ paper to print the template!
Happy sewing!
Cassy
I have been trying to print your free pattern for baby pants and the page opens blank ? Is there a problem with the link ?
Hi Nancy,
Thanks for writing in! I have checked the link and it appears to be working now. I am including it here for you: https://www.purlsoho.com/create/wp-content/uploads/2013/06/purl_bee_baby_pants_v2.pdf
Please do let us know if you continue to have difficulties!
Cassy
Hi !! The seam allowances are included or I have to include it?? And the gusset had to have the seam allowance??
Thank you in advance !!
Hi Crystal,
Thanks for your question! This pattern does include a 3/8″ seam allowance on all template pieces.
I hope that helps and happy sewing!
Julianna
I´ve made this super cute pants more times than I can count, for my kids and to give as presents for newborns and babys, it´s an awsome proyect, super easy to sew, thank you so much for sharing. It fits perfectly every single time and it works for knits as well. Thanks again.
Which direction should the grain line be?
Hi Kathy,
Thanks for writing in! The fabric should folded along the straight grain, selvage to selvage, and all pattern pieces should be cut on the fold for the original version. For our Baby Pants in Linen Grid, however, we cut the gusset piece on the bias for a bit of visual interest, so that is also an option!
Happy sewing!
Julianna
How am I missing the pattern to cut by? Can someone help me find it? These are adorable! … Diane
Hi Diane,
Thank you so much for the kind words and for writing in! You can find the free template linked above right above the “Sizes” section of the pattern, or by clicking right here: Baby Pants Template!
Happy stitching!
Julianna
Adorable pattern! But I’m having an issue. At the part where the instructions say to “pin the Back Piece to the Gusset along the curve, making sure to match up the cut notches” my notches didn’t match up! This is for the newborn size. I went ahead and completed the pants anyway, and the result is cute but I did end up with two pleats at the corners of the gusset, where the extra fabric had nowhere to go.
I wonder is this because the pattern for printing has 3 different sizes for the front and back pieces, but only 1 size for the gusset piece? But honestly I don’t know what to make of this because nobody else has commented on having this issue, so I do assume it’s an error on my end.
I actually am now cutting out and piecing together another pair of these, this time in the 6-9 month size and I’m encountering the same exact issue again! Any thoughts on what I could be doing wrong??
Hi Julia,
Thanks so much for the kind words about this pattern and your question! Sewing curves like this can be pretty difficult so it’s likely you’re having trouble easing the two pieces together correctly. You mentioned that the notches didn’t match up, but you have to make the notches match up after pinning the center of the back to the center of the gusset.
It’s going to look like there’s a lot of extra fabric bunched up between the pins, but that’s normal. You can mitigate this extra fabric by easing the back pants piece around to match the curve of the gusset, using lots of pins as shown in our pattern.
Some similar patterns call for you to snip tiny notches into the piece that has to be eased to make this easier, but we wouldn’t recommend that in this case because the seam allowance is already so small and you have to make sure the snips don’t go past the seam allowance. It might be helpful to be aware of that for the future though so I thought it was at least worth mentioning!
I hope that helps your next pair work out better! Please let us know if you’re still having any problems getting that just right.
All the best,
Zha Zha
Hi,
What are the size dimensions for each pattern?
Hi Yvonne!
Thank you for your question! This pattern is available in sizes 0-3 months, 3-6 months, and 6-9 months, and the individual dimensions for each size can be found in the free template here! We recommend double checking the reference square in the upper right corner of the template so that it measures 1″ square after printing. This way, the dimensions for your pants will be accurate!
I hope this helps!
All the best,
Margaret