

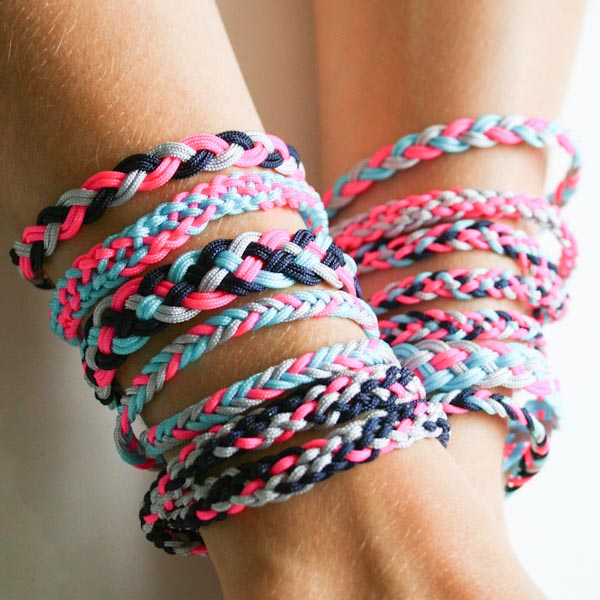
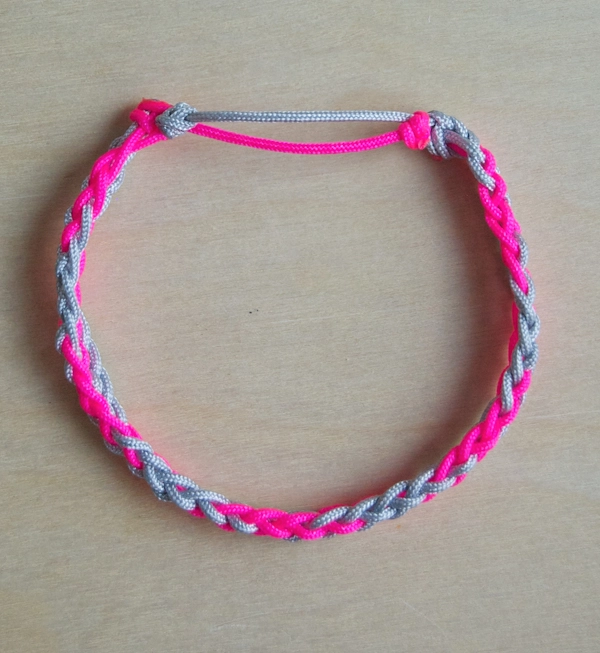
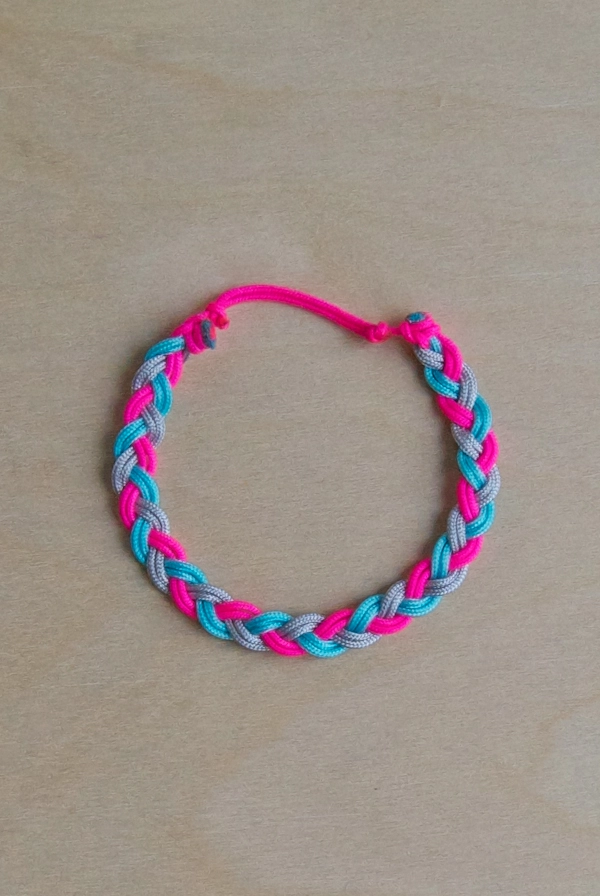
Braided Friendship Bracelets
It will surprise no one that at summer camp my favorite activity was always and without fail arts and crafts! I wasn’t great at archery or rowing, but I could make a lanyard like nobody’s business. I loved that camp craft projects were simple and fun to make, with no fussy equipment required. My summer days were happily filled with the satisfaction of gods-eyes, reed baskets and of course, friendship bracelets!
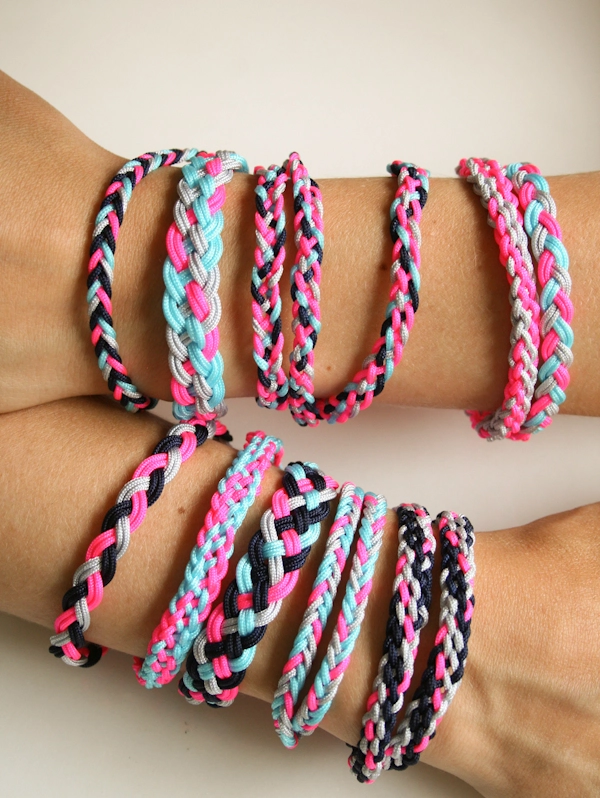
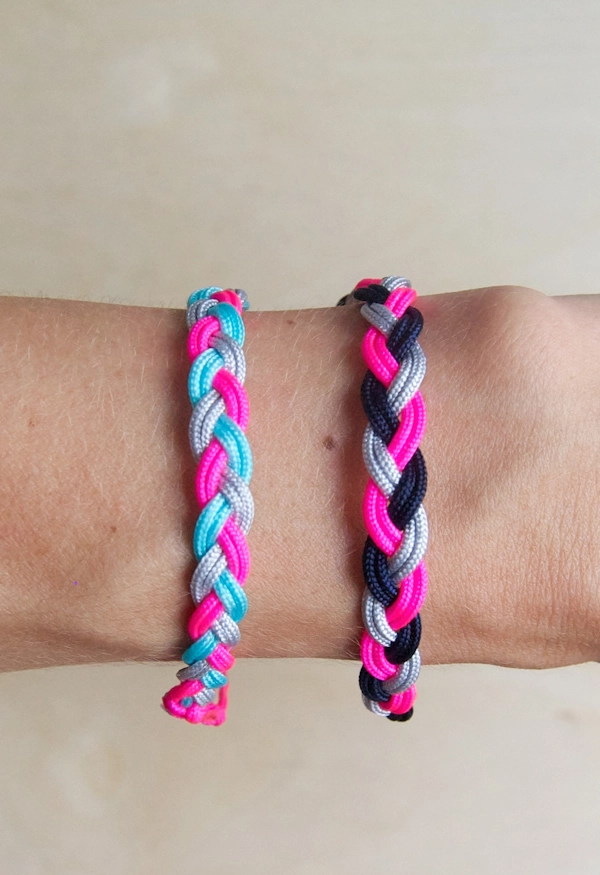
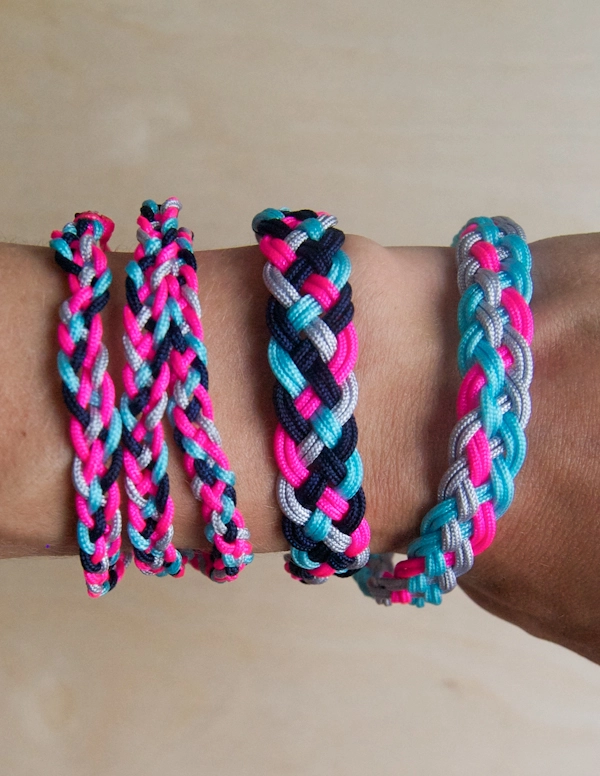
I’ve talked about my love for friendship bracelets here before, and we have created versions in cotton, wool, and even cashmere. This time Ikept the colorful essence of a traditional macramed friendship bracelet but used a completely different (and much easier) technique to create a new kind of bangle: a craft-hybrid of friendship bracelets, rope tying, and lanyards!

To create these little beauties I used our thickest Chinese Knotting Cord which comes in a vibrant rainbow of colors, and I finished them with a neat and effortless sliding closure. The resulting bracelet is so pretty and best of all, it perfectly captures the spirit of summer camp! -Molly
Materials

To make several bracelets:
- 4 spools of 1.4mm Chinese Knotting Cord in Grey, Aqua Marine, Neon Pink, and Navy
You will also need scissors and a lighter.
Update May 2024: While we no longer carry these materials a la carte, you can find our Friendship Bracelet Kit right here!
Pattern
Cutting
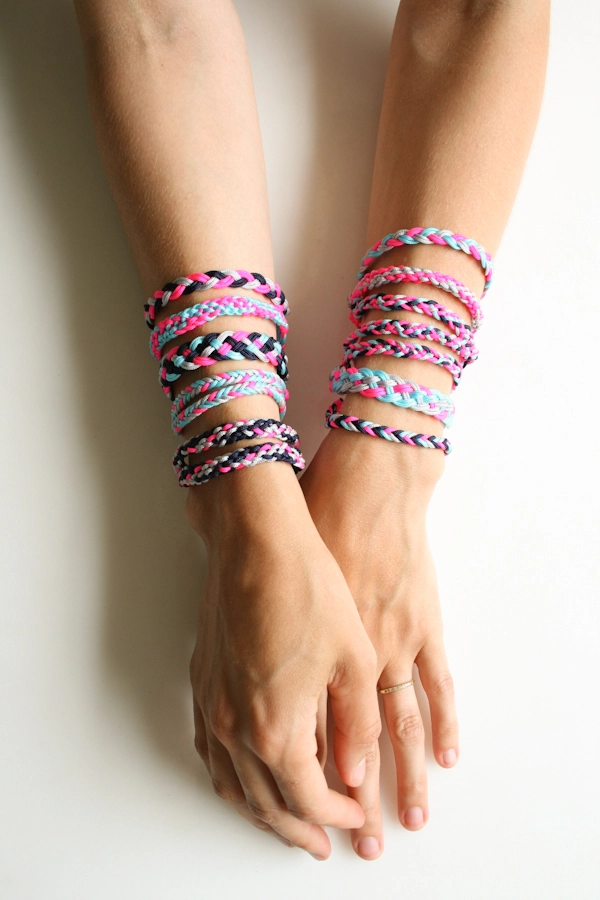
These bracelets can be made in three lengths: to wrap around your wrist once, twice, or three times. For a one-wrap bracelet cut the cords to 19 inches; for two wraps cut them to 27 inches; and for three wraps cut them to 35 inches.
Starting and Finishing All Bracelets
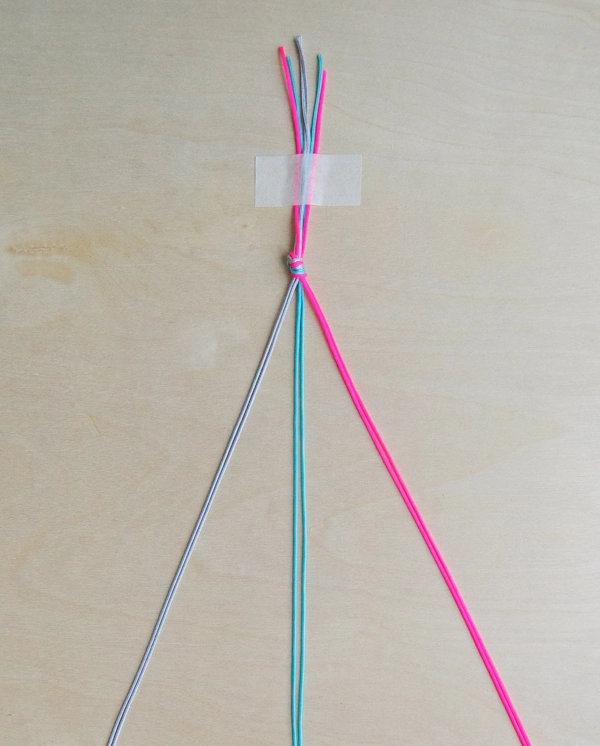
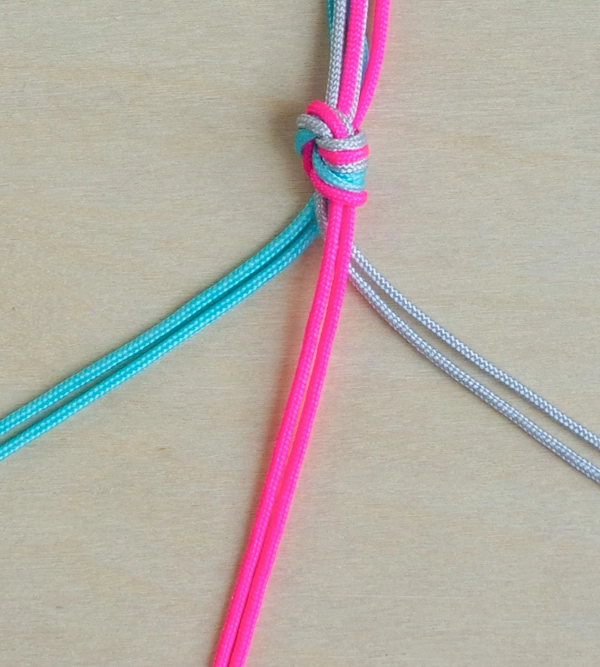
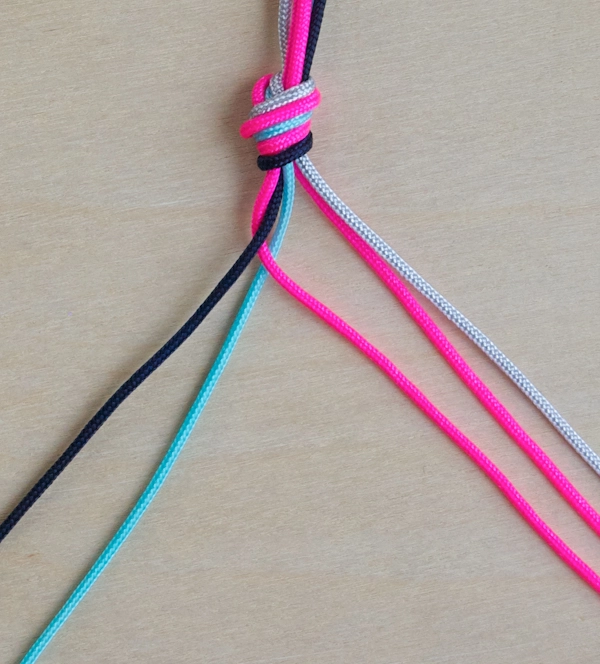
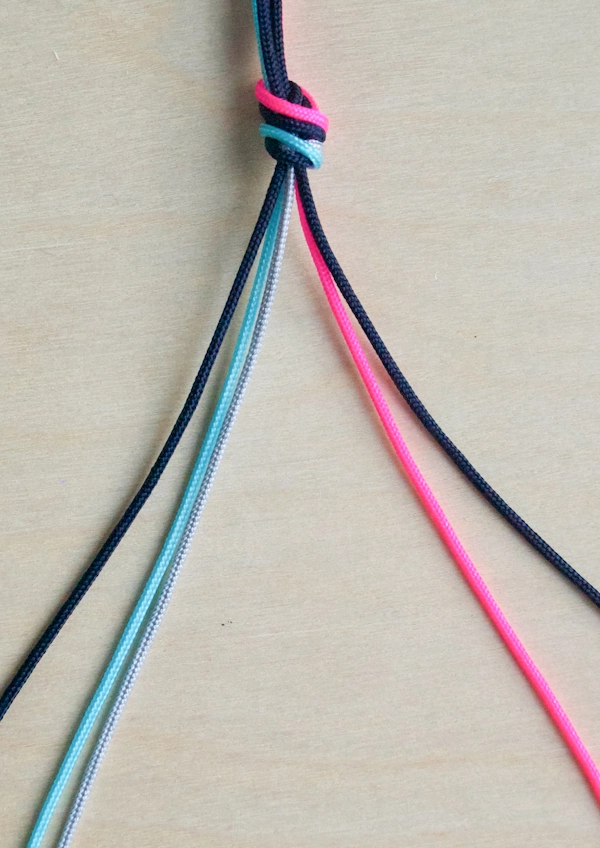
To start, tie all of your cords in a simple overhand knot 5 inches from the end, and tape the knotted end down to a flat surface.
To make the body of the bracelet follow the desired braid pattern (see below). For a one-wrap bracelet make the braided section 7 inches. For a two-wrap bracelet make the braided section 14 inches. And for a three-wrap bracelet make the braided section 21 inches.

At the end of the braided section use an outer-edge cord to tie a simple overhand knot tightly twice around all of the other cord strands.

Snip off all of the strands (except for the one you used to tie the knots) very close to the knots.
In a well-ventilated room burn the ends of these snipped strands with a lighter until they melt together and are secured. Untie the knot at the beginning of the bracelet. Use an outer-edge cord to tie a simple overhand knot tightly twice around all of the other cord strands, just as you did for the end of the bracelet. Snip off all the cords except the one you used to tie the knots and burn the beginning just as you did the end.

You will have a 5-inch tail coming from each end of the bracelet.
Make sure the bracelet isn’t twisted and tie the left-hand tail in a double knot around the right-hand tail 1 3/4 inches from end of the braided section. Snip off the left-hand tail and burn the tail and the knot wraps together to secure the knot.
Repeat for the right-hand end. Your bracelet will now be complete with a closure that slides open and shut by pulling on both knots.
Doubled Basic Braid
This is the easiest of the braids!
Cut six strands, two in each color, to the correct length.
Put one same colored pair to the left, one to the center, and one to the right.

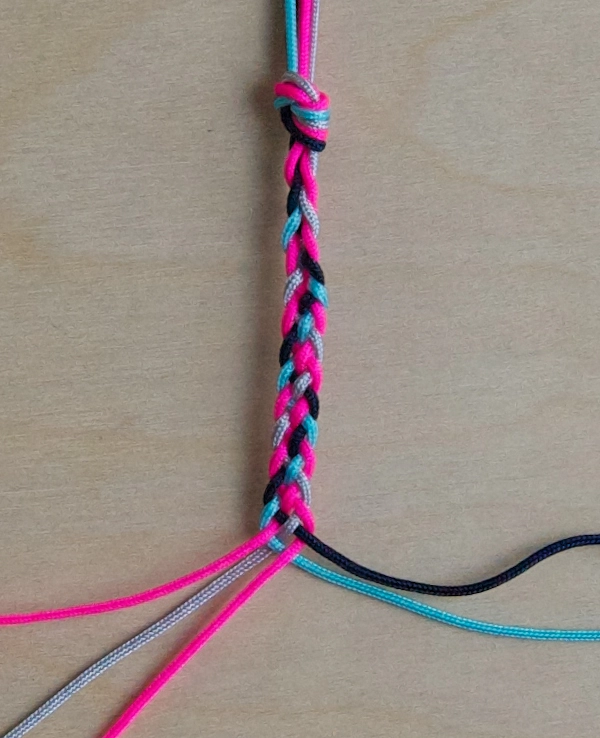
Pull the left-hand pair over the center pair so that it becomes the center pair. Keep the pairs of thread flat, one strand next to the other, making sure they don’t get twisted as you go. This way the bracelet will lay flat when you are done.
Pull the right-hand pair over the center pair so that it becomes the center pair.
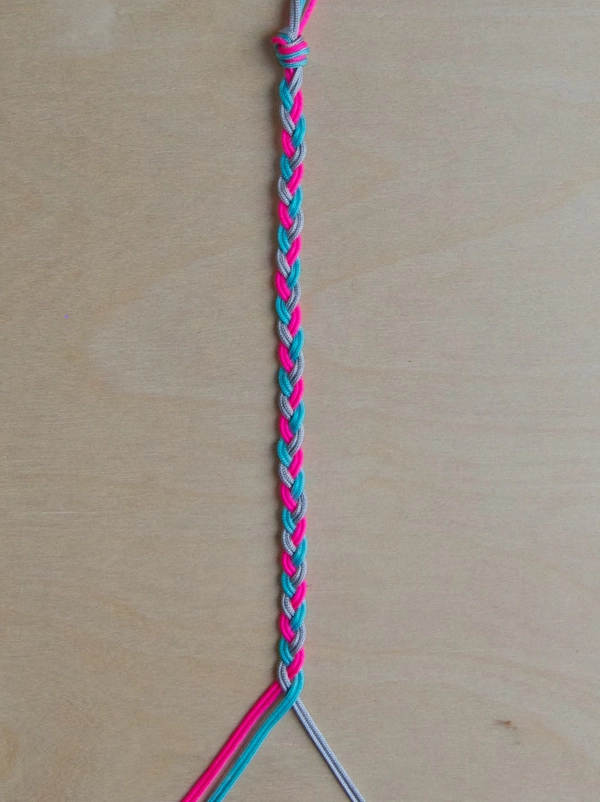
Keep braiding in this manner until you reach the desired length, then finish the bracelet.
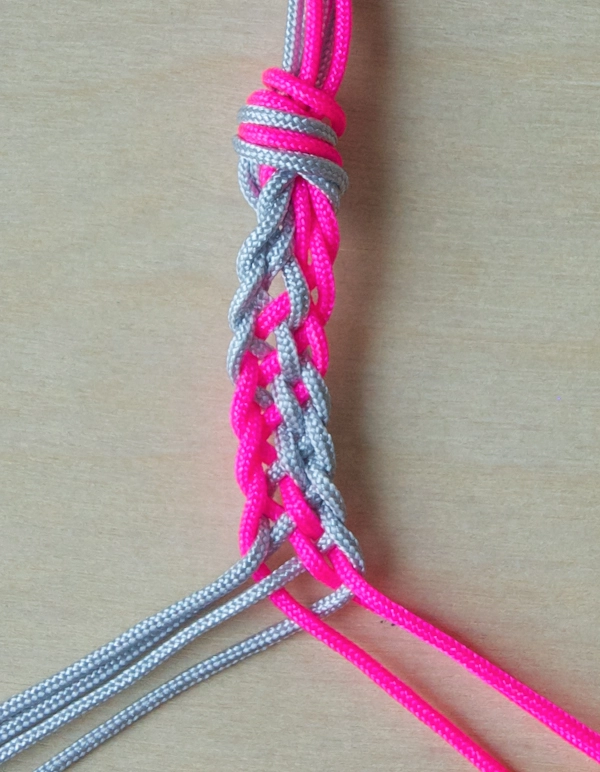
Single and Double Five-Strand Braid
Below are photo instructions for making a single five-strand braid. To make a double five-strand braid you will need to cut five pairs of cording and treat each pair as one strand. Just as for the doubled basic braid, you need to make sure that the pairs lay flat and don’t twist as you go so that the bracelet will lay flat.

Cut five strands of cording to the correct length.
Arrange the strands so there are three on the left side and two on the right side. You will always be working towards the center.
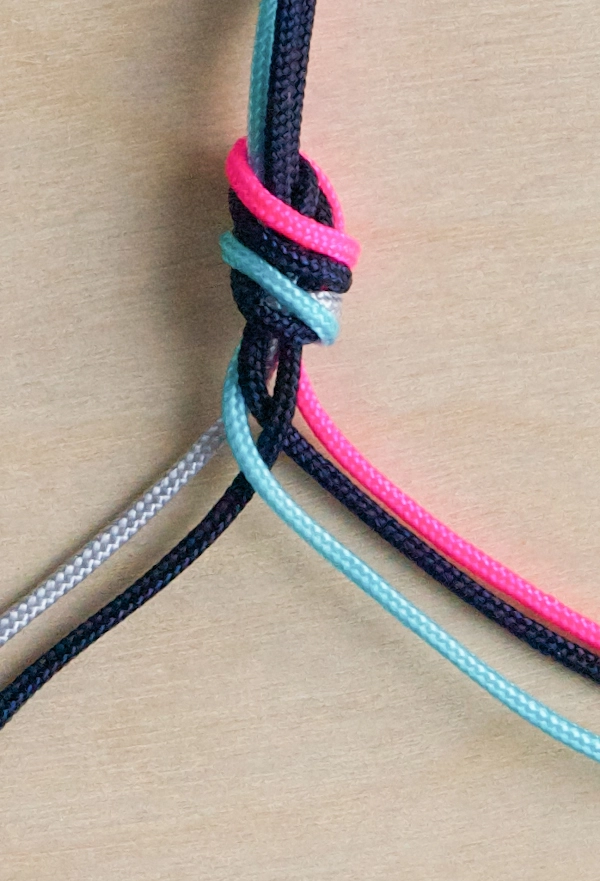
From the left side, pull the outermost strand towards the center, traveling under its neighbor and over the next adjacent strand.

Repeat from the right, pulling the rightmost strand under its neighbor and over the next adjacent strand towards the center.
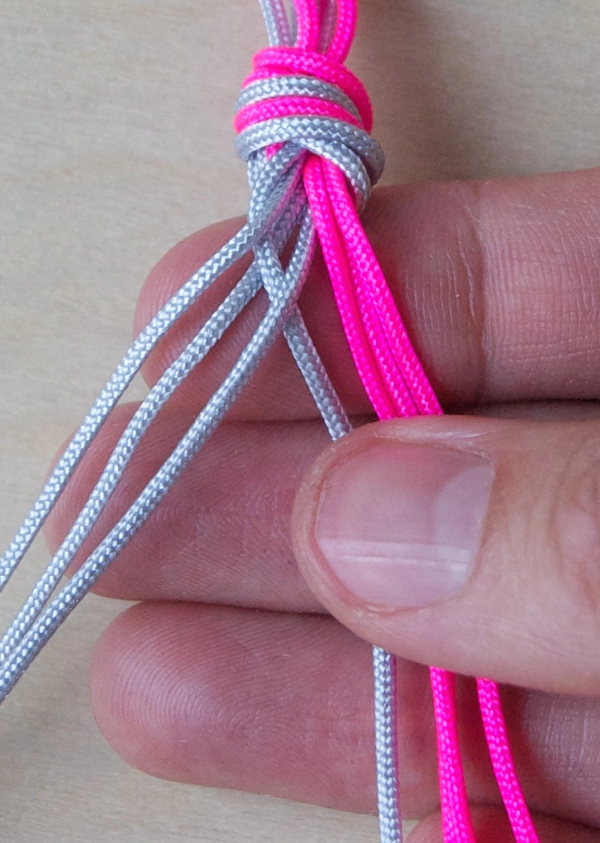
Slowly a pattern will start to emerge. This braid, as well as the seven-strand braid, are a little hard to make look nice at the beginning, but that’s okay. Just braid a little further than your desired length, and when you undo the beginning knot, you can take out the messier beginning section before you finish that end.
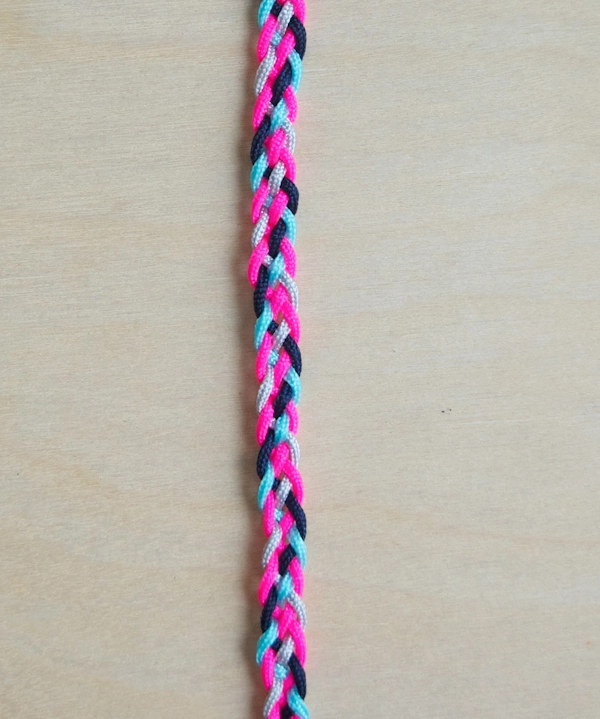
Keep braiding in this manner until you reach the desired length, then finish the bracelet.
Five-Strand Dovetail

You can make a dovetail braid with any odd number of strands, but with cording this wide more than five can start to look a little messy.
Cut five strands of cording.
Arrange them so you have three on the left and two on the right.

From the left side pull the leftmost strand over the two adjacent strands, making it the new middle strand.

From the right side pull the rightmost strand over the two adjacent strands, making it the new middle strand.
Repeat from the left.

And from the right again.

Keep braiding in this manner until you reach the desired length.
Seven-Strand Braid

This braid is made in much the same manner as the five strand braid and the same principles can be applied to make a braid with any odd number of strands!

Cut seven strands of cording.
Arrange them so you have four on the left side and three on the right side.
Working towards the center pull the leftmost strand under its neighbor and over the next adjacent strand and then under the following one.

Repeat for this right side: pull the rightmost strand towards the center, under its neighbor and over the next adjacent strand and then under the following one.
Keep braiding in this manner until you reach the desired length and then finish the bracelet.


Cute! One quick tip – my girls find it easier to clip the strands in a clipboard rather than taping them down somewhere. It provides enough tension and makes their projects perfect for taking to their brother's ball games, road trips, etc.
Nice… I love the closure on these. They are friendship bracelets but you don't have to wear them til they turn into old dirty strings! Does this mean I am a bad friend?
I love what you did to make these bracelets modern and perfect for grown ups. Great tutorials. They bring back memories of making friendship bracelets out of that plastic gimp. In the good ol' 1970s at summer day camp, in my cut-off jean shorts and one of those baseball-style shirts with an iron-on image!
These are great! And the adjustable knot is fabulous. I will definitely be making some of these soon.
Where can you buy Chineese Knotting Cord locally?
Hi Vintage Quilter-
You can find the cord on our website here: https://www.purlsoho.com/purl/products/item/9166-Tangles-n-Knots-Chinese-Knotting-Cord-14mm
Or at our store in NYC.
Thank you for writing in!
Molly
Wonderful! I totally have to make these with my daughters! They just started some summer crafts (they have been doing the box stitch / Gimp), so I am sure they will love this!
These look so fun! I used your earlier tutorial for the classic style, but I love the idea of using the bright knotting cord. Will put this on my DIY-to-do-list!
These are so cute! I love the colors you picked. This is a great tutorial, I am gonna show this to my daughters they would love this, Thanks!
love this! ordered the cord and made some with my daughters yesterday. any suggestions for how to keep the burned ends from looking all yucky black? bummed me out on something so pretty 🙁 I used a match. Wondering if a sparker thing (name??) might make a difference. Thanks for the tutorial!!
I don’t burn mine I dip the ends in clear fingernail polish with my grandchildren
Hi Megan-
I found that using a lighter worked better than a match because you have more control. If you use a lighter you can melt the ends just to the point when they melt and not until they burn.
Thanks so much for getting in touch!
Molly
Hi Megan – Girl Guides of New Brunswick (Canada) are in the middle of a "make the longest chain of friendship bracelets" word record attempt and this is very timely. Thank you for clear instructions with lots of pictures. I hope you don't mind that I've linked to your post on my blog. Thanks again! Cara
These are awesome! I used a little different method for the closure: http://blueberryhillcrafting.com/2013/07/15/the-wonders-of-chinese-knotting-cord/
I'm so glad you posted this project, I wouldn't have known about Chinese knotting cord otherwise, which is so great to work with!
Am I able to use embroidery thread instead of the cord?
Hi Angelica-
Sure! They will be a lot thinner but they would still be beautiful! You just might want to finish them differently because you can't burn the ends.
Thanks for your question!
Molly
Awesome. One suggestion: I find it easier with all of these macrame projects to make my knot on a safety pin, then tape it down to a hard surface. Thank you for the best craft project ever!!
Great! Love the colors. Do you think you could put together a list of crafts similar to this that would be good for tween to teen girls? Thanx!
Hi Lily-
Thanks! We don't have plans for a post like that but if you're interested in crafts for teens you should check out our galleries at the top of the right column. Especially the Craft Projects and Embroidery Projects!
Thank you!
Molly
están muy lindas las pulseras!! es una muy buena idea para dar como recuerdo en una despedida de soltera!
hello thank you for posting such a beautiful project like this and i really like it 🙂 .i would like to ask you can i translate it to my language and post it in my blog by refering to your
blog . thanks again for the project 🙂
Hi Dooja-
Can you please send this request and a link to your blog to my email address:
Molly AT purlsoho DOT com.
Thank you!
Molly
I love these! I love how informative the instructions are on this site. Just a note, I think that the other side of the single five-strand braid bracelet is more pretty, and looks more braid-like. Thanks so much Purl Bee.
Oh my gosh! Ignore my previous comment. I don’t know what I was thinking. That five strand braid looks exactly the same on both sides and it is gorgeous.
hey so cool
I would love the multi-strand charm bracelet, I haven’t made one like that yet. It would be a fun opportunity to explore a new style.
I think something is missing with regard to the adjustable closure instructions. I knotted and snipped one cord so that the middle looked like a Capital T shape like the picture. But then the next step doesn’t make any sense, or explain how the cord will adjust.
Also, it seems these instructions are specific to Chinese knotting cord only. I am using Bamboo and the piece where the lighter was used broke apart while I was working on the closure.
Hi Jen,
Thanks for reaching out! Once you have finished the first step of the closure, you will then repeat that step using the “loose” tail, which is the tail sticking up in that picture, by tying it around the tail which you used to tie the knot in the first step. If you do it correctly, each tail of the closure will be knotted around the opposite tail so that they can both slide through the knots, which allows you to pull on the bracelet to loosen it and slide the knots to tighten it.
I’m not familiar with bamboo cording, but the lighter works on Chinese Knotting Cord because it is pure nylon, which melts before it burns when exposed to heat. If your bamboo cording does not melt, I would suggest applying just a dab of glue or a product designed to stop cut fabric from fraying to the cut ends. Be very careful if you decide to glue the ends of the adjustable closure knots to make sure you don’t actually glue the knots to the cord that is meant to slide through them!
I hope that clears things up!
Julianna
I love these! I love how informative the instructions are on this site. Just a note, I think that the other side of the single five-strand braid bracelet is more pretty, and looks more braid-like!!