Roll and Dash Hankies
Don’t you just love when a new technique is born from a happy accident?!? That’s the story of these hankies. It was business as usual. I needed to whip up a quick gift and so, sat down to make what must have been my hundredth set of Rolled Hem Handkerchiefs.

I rolled and rolled the edge until Kokka’s beautiful fine cotton fabric held the shape on its own. Always amazed at fabric’s sculptural potential, I took a moment to admire this tiny tube along my hankie’s border. It seemed a cause for celebration, and suddenly, I found myself working unlike I had on the previous ninety nine sets.

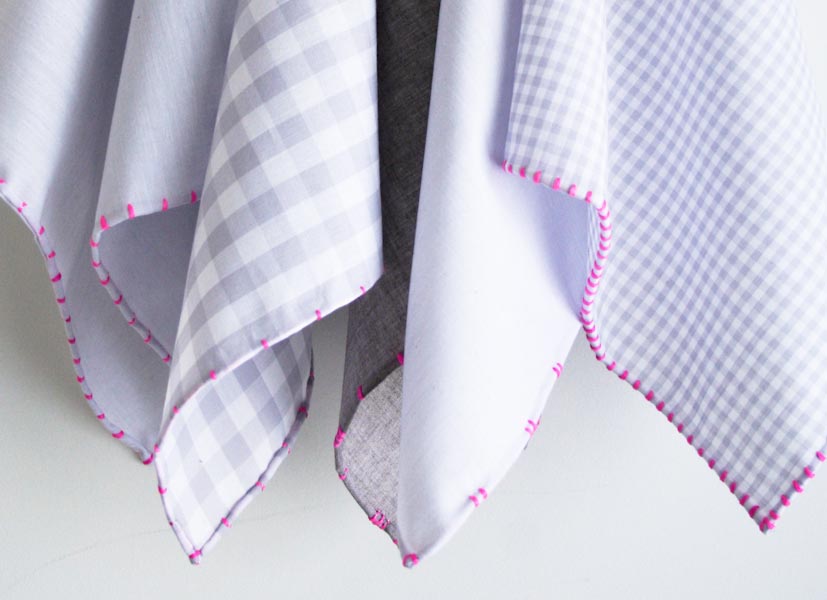
I ditched the matching cotton thread I would normally have used and chose instead the brightest, most surprising yarn I could find, Alchemy’s Silken Straw. I threaded an embroidery needle, and rather than making an invisible stitch in the crease of the roll, I went bold. I carried the silk around the rolled hem, marking the gentle curve with graphic little lines of hot pink.
Form follows function, or something like that… does that apply here? I am not sure it does, but I am sure about how satisfying it was to turn my stitches into functional ornamentation, a series of dashes outlining each hankie.

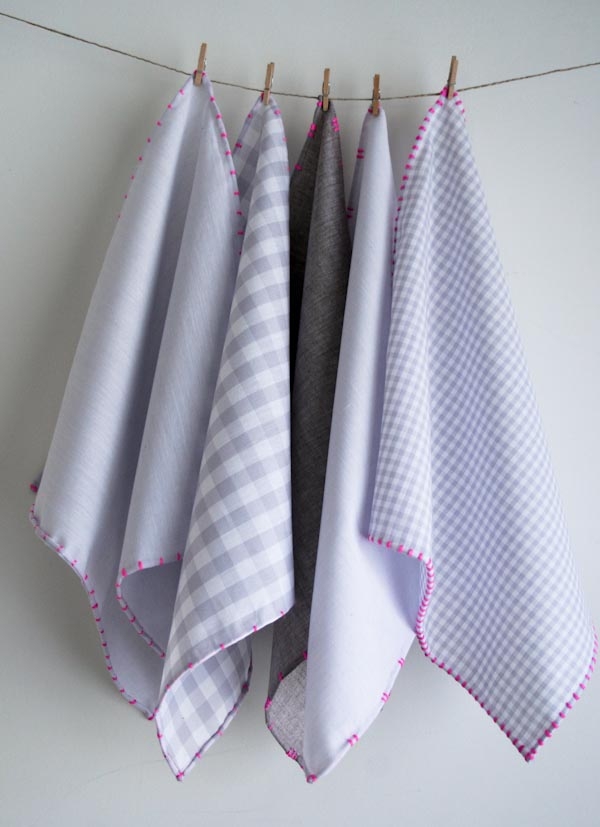
So, I rolled and dashed, rolled and dashed, and before I knew it, I had five unique handkerchiefs. Some with many dashes, some with few, some equally spaced, some hiccupping their way around the edges. It’s so fun to just follow your fancy! -Laura
Designed by Purl Soho designer, Laura Ferguson.
Materials

To make 12 inch square handkerchiefs:
(1/2 yard is enough for three handkerchiefs)
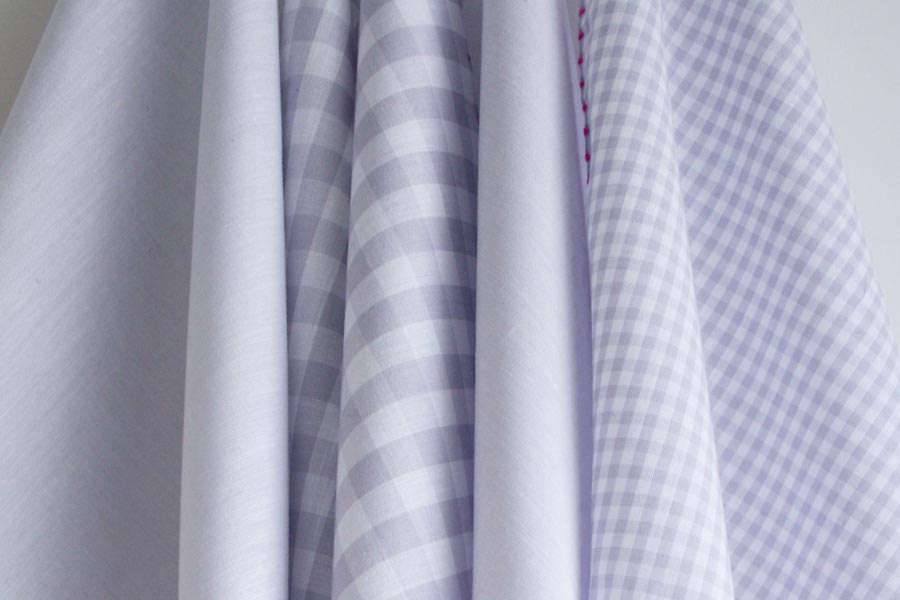
- 1/2 yard of Kokka’s Fine Solids in Gray
- 1/2 yard of Kokka’s Fine Solids in Brown
- 1/2 yard of Kokka’s Large Gingham in Gray
- 1/2 yard of Kokka’s Small Gingham in Gray
- 1 skein of Alchemy’s Silken Straw. I used the color Fuchsia.
- Embroidery needle
- Chaco pen or pencil (optional)
Pattern
Mark Your Fabric

For the solid fabrics:
Draw a line parallel to each of the four sides, 1/2 inch in from the edge.
- For a Single-Dashed edge shown on the gray handkerchief, make a mark every 1 1/2 inches.
- For a Double-Dashed edge shown on the gray handkerchief make a mark every 1/2 inch.
- For a Triple/Single-Dashed edge shown on the brown handkerchief, make a mark every 1 inch.
The gingham fabrics don’t need marking because you can use the gingham itself as a sewing guide.
Roll the Edge

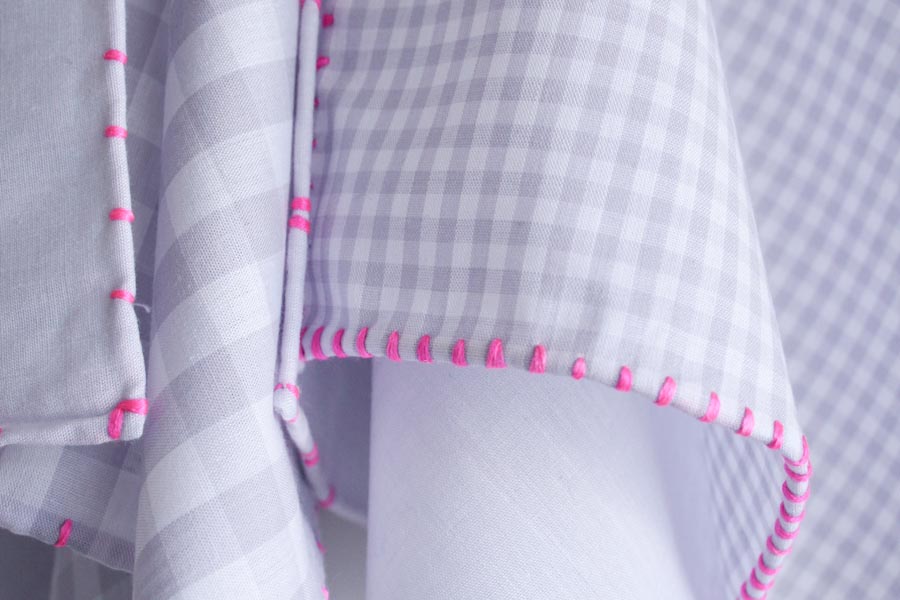
Roll the edge of the fabric towards you between your moistened thumb and index finger. (You can just lick your finger as if to turn a page, but if this is unappealing to you just summon your inner bank teller and have a wet sponge at hand to moisten your finger.) Roll the edge to the marking or to the second gingham check for the large gingham or the forth check for the small gingham. Be sure that its tight enough so that it feels secure and also so it won’t reveal itself after the hanky has been washed several times.
The side of the fabric facing you will be the back of the hankie and the side away from you will be the front of the hankie.
Create a Hem

Thread your needle and tie a small knot at the end.

Place the needle into the end of the rolled edge and come out in the middle of the first dark gingham square (or at your first marking.)
Bring the needle around to the front side of the hankie and through the fabric towards you, just below the rolled edge as shown above.

Now, place the needle into the rolled edge a few threads below your previous exit point.

Run the needle through the roll and pull it out at the middle of the next check (or your next mark.) Take another stitch just like the previous one.

Continue in this way for the entire length of one side of the hankie. Stop approximately 1/2-inch before the end.
Roll and Sew the Corner

To make the corner, roll the perpendicular side of the hankie just as you did the first side. This time you will have the roll of the first side to contend with, but if you roll it tight it will make a neat edge.
Place the needle into the roll below your last stitch and exit inside the corner on the back side of the hankie. You will make the following two stitches through the same hole.

Pull the needle around to the front of the hankie and through the fabric towards you, just below the rolled edge of the new side. Then, bring the needle around to the front again and through the same hole that you just came through, this time wrapping the edge of the first side.
Place the needle into the roll just below the exit point inside the corner of the new side.
Continue Around
Work the remaining edges and corners as you did the first.


Ooh these are so pretty! I think I may do this project as cafe curtains for my small bathroom window. The size is almost perfect (I can adjust) and I love the small pop of color.
Gorgeous! I love the colour combination.
I ve loved it!!!!
Thanks for sharing so many pictures!!
Raquel
http://costurandocriatividade.blogspot.com.br/
Could I make these with flannel? Does flannel roll like this? I'd like to make some soft hankies for my grandchild-to-be.
Hi Margie Boule,
I think so. I haven't tried it yet so I am not totally sure how the flannel will respond, but I believe it would be possible and lovely. What a sweet idea.
Laura
Wow! Great idea!
Tiziana
Is it possible to use silk or linen embroidery thread instead? If so, is there a certain weight recommended?
Thank you!
Hi Elizabeth,
Silk of Linen embroidery thread would definitely work! The flat width of the Silken Straw packs a punch, but a more subtle thinner weight would look lovely as well. This would work with any of our embroidery threads (https://www.purlsoho.com/purl/products/26-embroidery-embroidery-thread). The Koigu will be on the heavy side, I probably wouldn't use that one, but all the others… YES!
Thanks for you interest in the pattern.
Laura
I love this pattern and am working on a batch right now. It is looking great. I am wondering what to do when I run out of thread and need to stop and re-thread my needle. With regular sewing thread I can pop the knot through to hide it, but this thread is so thick. I am not sure how to anchor and hide the thread in the roll. What do you suggest. Thanks!
Hey Girogiana,
Wonderful question. I’m glad you wrote in. When this happened to me, I tried to draw my freshly threaded needle down the tube of fabric formed from rolling the edge. That way the knot is hidden and secured in the roll. Hope this helps. Let me know if you have any questions.
Thanks,
Laura
Hi –
I’m wondering the same thing as Giorgianna (above)…
How do you properly anchor the floss and hide the knot when you’ve reached the end?
Thanks!
Hi Ariana.
Thanks for writing in. I usually take a second and sometimes a third stitch over my previous stitch, so it is as discrete as possibly, this will serve as an anchor. Then draw the needle through the tube to hide the tail. Similarly, to start a fresh length mid-side, I’ll knot the thread and I draw my needle down the tube of fabric formed from rolling the edge and draw it from the inside of the tube to the outside and begin. That way the knot is hidden and secured in the roll. Hope this helps. Let me know if you have any questions.
Thanks,
Laura
Do you recommend washing the material before starting?
Hi, Katherine!
Thank you so much for your question! I recommend prewashing the fabric to prevent the stitches from pulling when you launder the hankies later. Wash and dry the fabric the same way that you plan on laundering it.
If you have further questions, please let us know!
Best,
Kumeko