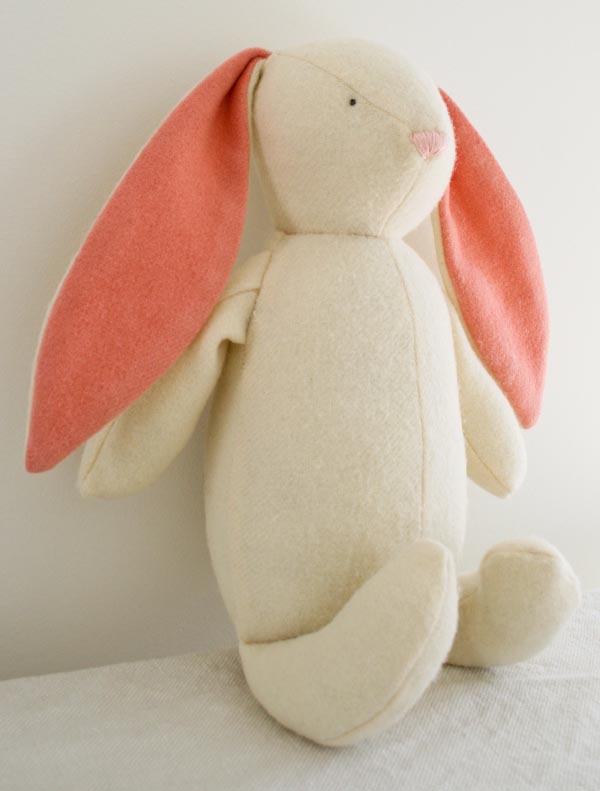
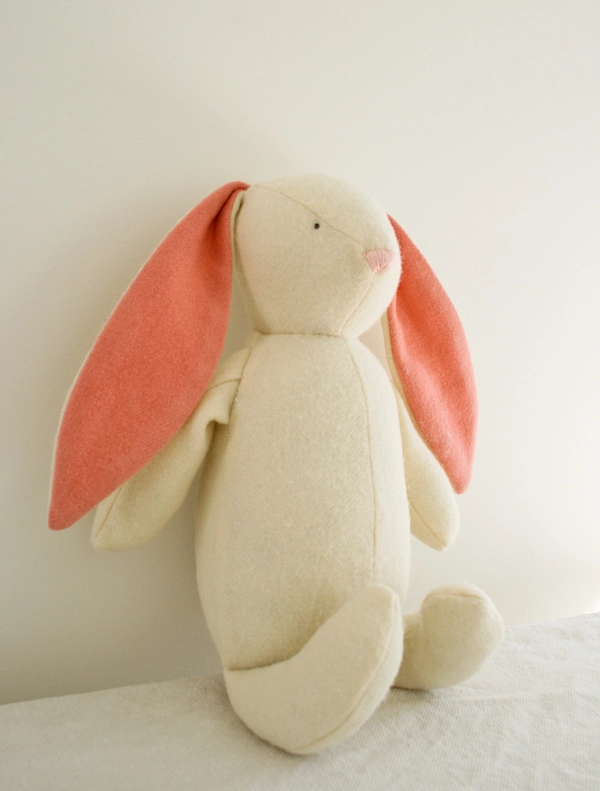
Soft Woolen Bunny
There is something almost miraculous about sewing a stuffed animal. You start with a bunch of odd shapes that don’t seem to have much to do with one another. Then as you sew them together, they gradually begin to take form, and suddenly, as you turn it right side out and begin stuffing, it comes to life! Those mismatched pieces are somehow transformed into a cuddly friend!

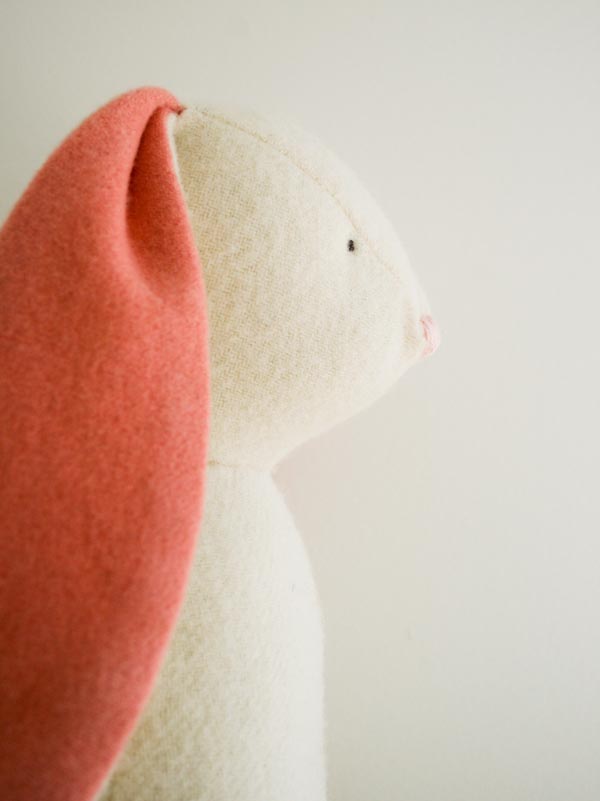
In my opinion, there is no stuffed animal more inviting than a bunny. And with Easter fast approaching, now is the perfect time to create one. This little guy is made from cozy 100% felted wool, making him oh, so huggable. Plus, he would look right at home in an Easter basket!

This Soft Woolen Bunny is a totally approachable project, even for your first stuffed animal. The wool is lovely to sew and its forgiving nature hides all those little mistakes. I hope you enjoy watching your bunny come to life as much as I did!

Materials
To make one 16-inch tall bunny:
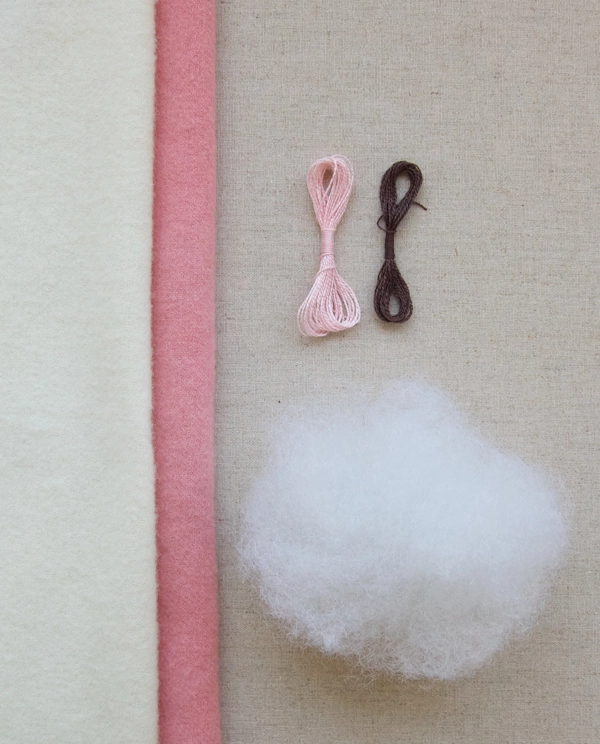
- A 1/2 yard of Dorr Mill Wool in Natural
- A 13 X 15-inch piece of Mary Flanagan Felted Wool in Pink
- One package of Cotton or Bamboo stuffing
- DMC Pearl Cotton in color 938 (dark brown) and 605 (pink)
- 100% cotton thread in color 1140
- A pencil
- A Soft Woolen Bunny Template, available for free download here, printed and cut out.
Pattern
Cutting

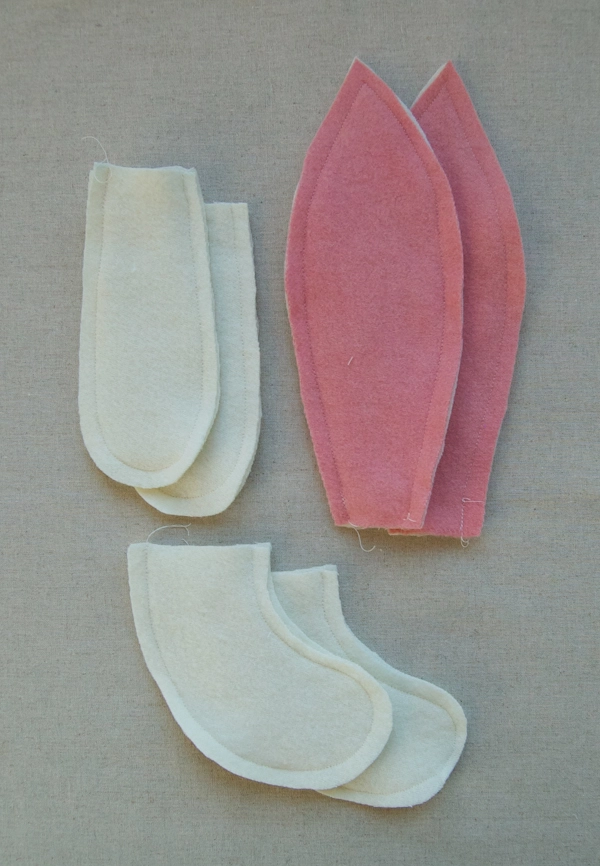
Cut out the pieces as directed on the template. You will have:
From the undyed felted wool:
- 2 ear pieces
- 4 arm pieces
- 4 leg pieces
- 1 tail piece
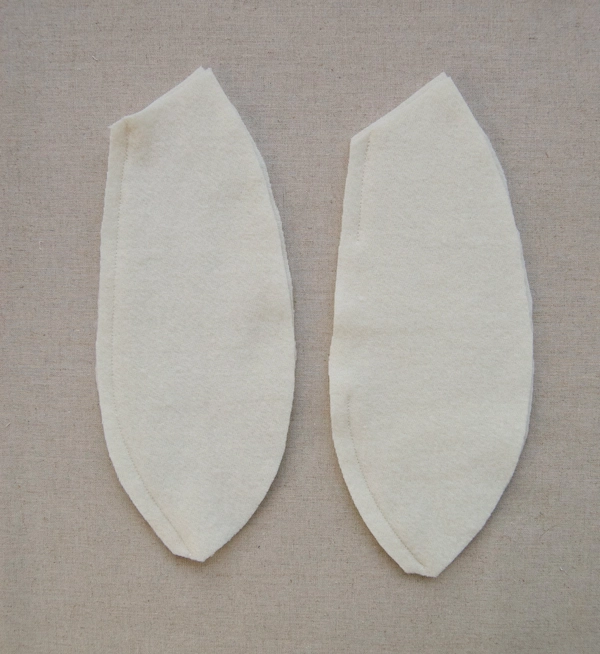
- 1 head top piece
- 2 head side pieces
- 4 body pieces
From the pink felted wool:
- 2 ear pieces
Mark all the pieces with the marks indicated on the template.
Note: All seam allowances are 3/8-inch unless otherwise noted. Also, make sure to back stitch at the beginning and end of each seam.
Sewing the Arms, Legs, and Ears.
Pin the pink ear pieces to the undyed ear pieces and sew them together with a 3/8 leaving the bottom straight sides unsewn.
Pin the leg pieces together in two pairs and sew them together leaving the short straight sides unsewn.
Pin the arm pieces together in two pairs and sew them together leaving the short straight sides unsewn.

Cut notches in the curves of all of the sewn pieces and turn them right sides out.

Press the sewn ears, legs, and arms flat and rights sides out. Put the arm and leg pieces aside.
The Head

To sew the head you will need:
- the 2 sewn ear pieces
- the two head side pieces
- the head top piece
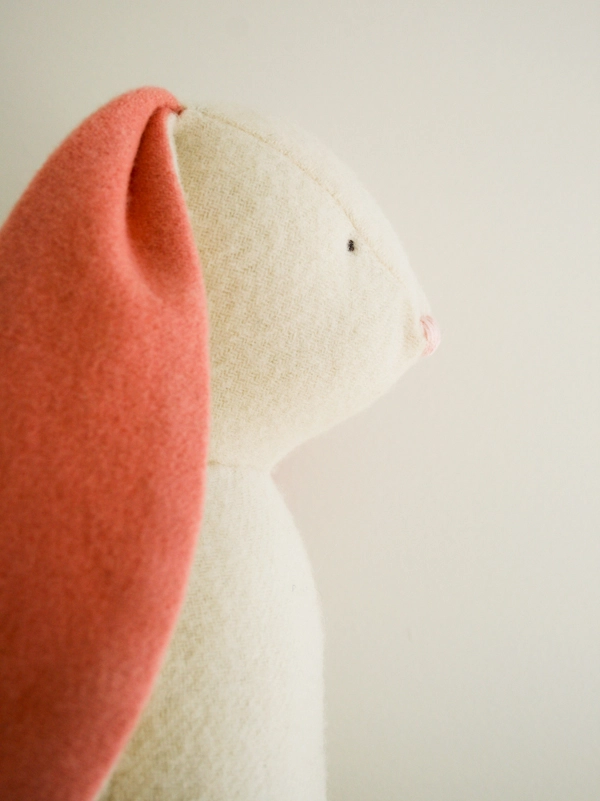
Sew the two head side pieces together along their diagonal straight edge just until the nose mark.

Open the head side pieces, right sides facing up.

Pin the right-hand curved side side of the head top piece all along the curved side of the right-hand head side pieces, starting at the nose. The ear marks are indicated by the yellow pins in the picture above.
Pinning along a curve can be tricky so use lots of pins and make sure there are no puckers.

Sew the pinned section together with two separate seams, one from the nose mark to the first ear mark and the next from the second ear mark to the end. The section between the ear marks will remain unsewn.

Pin and sew the opposite sides of the head side piece and head top piece in the same manner. You should have a head shaped piece with an open bottom (the neck) as shown above.

Fold the ear pieces in half at their short raw edge, with the pink section on the inside (as shown above on the right.)
With the head still inside out slip the ear inside the head and pin the folded section of the ear into one of the open sections between the ear marks, with the pink side of the ear facing towards the nose section of the head piece.
Pin the other ear into the opposite ear marked section in the same manner.

Using a small backstitch hand sew both the ears into place.
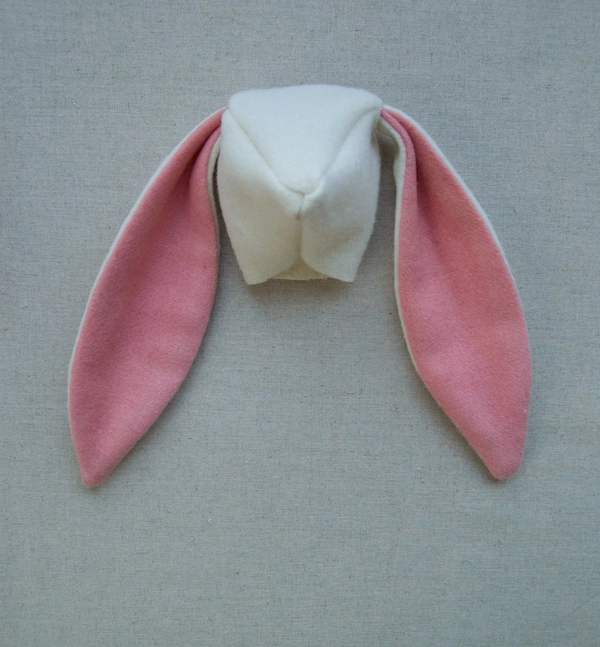
Turn the head right sides out through the neck. It should look like the photo above.
The Body
Pin the body pieces together in two pairs across side 1 (the side with the marked gap). Sew the first pair together leaving a gap, as marked. Sew the second pair together across the entire length of side 1 without leaving a gap.
The pieces with a gap are now the back body.
The pieces without the gap are now the front body.

Loosely stuff the arms and legs. Match the seams of each piece together and sew each piece shut with a 1/4-inch seam allowance. The arms and legs will be more 3-dimensional now, as shown above.
Make a pencil mark 1-inch below the top inside corner of each of the arms as shown above.

Pin the front body to the back body matching up to their respective side 2s. The arm and leg marks are indicated in the picture above by the double yellow pins.

Sew the back to the front leaving the areas between the arm and leg markings open.
With the front of the body facing pin the legs and arms inside of the body piece. The photo above shows how the arm will be pinned once it’s slipped inside of the arm marking: Line up the mark on the arm to the bottom arm marking to create a (roughly) 45-degree angle and face the arm inward towards the body’s center seam.

Slip the arm into the body through the arm hold in this orientation and pin it in place. Do the same for the opposite arm.
Pin the legs inside in the same manner only with no 45-degree angle, just matching the raw edges of the legs with the raw edges of the leg openings. The points of the toes should be facing up, towards the front of the body.
Using a small backstitch hand sew the arms and legs in place.
Trim off the little triangle of excess fabric at the tops of the arms.

Turn the body right sides out though the back gap. If you are unhappy with the angle of the arms or legs you can rip them out and try again. Make sure you’re happy with all four extremities before going forward.
Sewing Together and Stuffing

Turn the body inside out again though the back gap, with the arms and legs tucked inside.
With its right side facing out slip the head into the body through the neck opening.
Tuck the ears inside the body as well.

Lining up the front seam of the head to the front middle seam of the body pin the bottom of the head’s neck opening to the body’s neck opening right sides together.
Using a small backstitch hand sew these edges together. Go around the circuherence twice to make it extra secure.
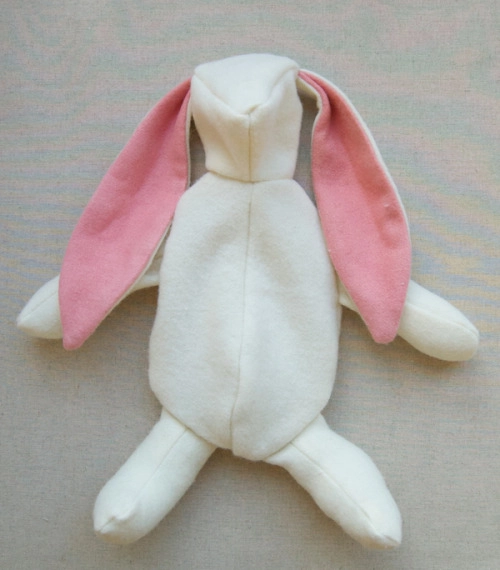
Turn the piece right sides out through the back gap.
Make sure the head is sewn on securely and at a straight angle before proceeding.

Stuff the bunny tightly through the back gap. Pay special attention to getting the head stuffed to your liking before you stuff the body.

Hand sew the back gap closed with a slip stitch.

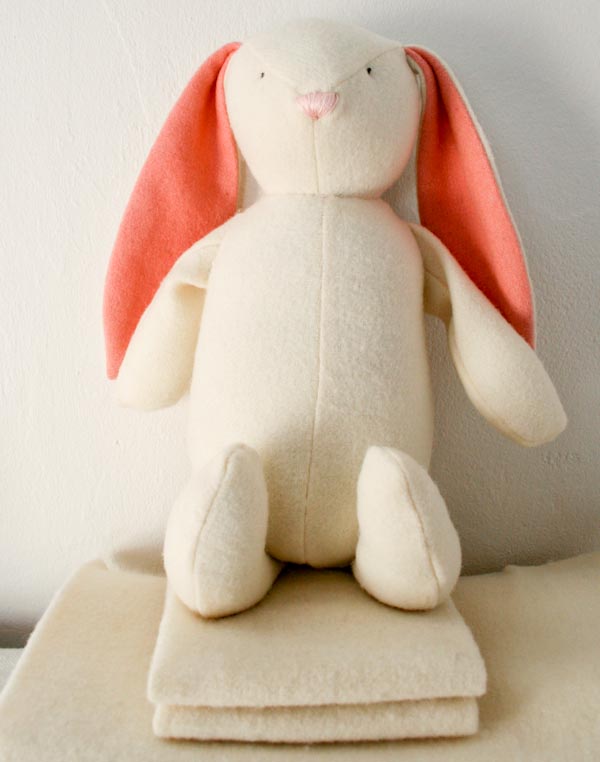
It should really look like a bunny now!
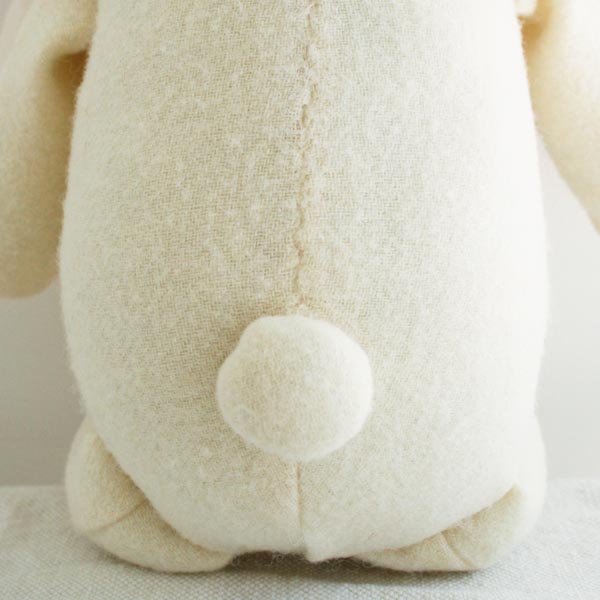
The Tail and The Face
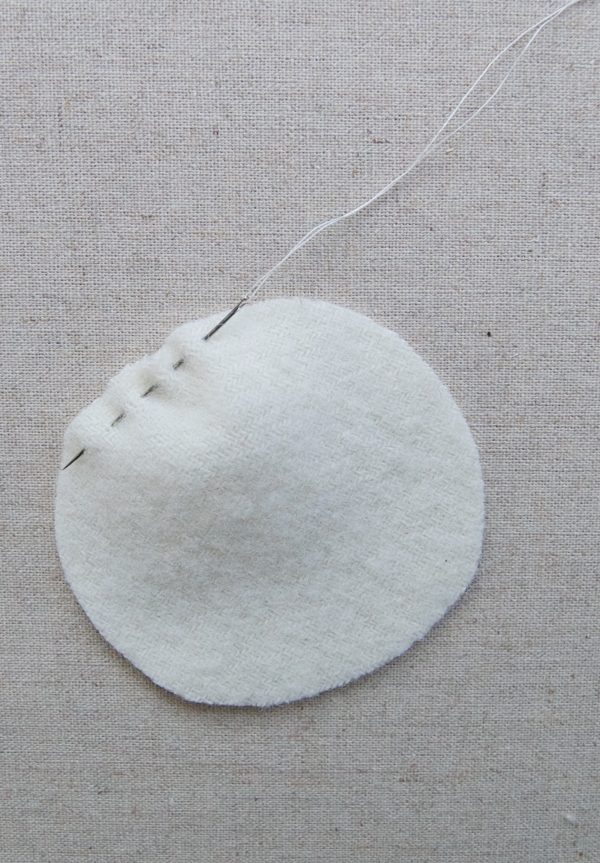 Sew a running stitch around the circumference of the tail piece.

Once you’ve gone all the way around put a pinch of stuffing in the middle and then pull the thread to cinch up the circle. (It’s like sewing a yo-yo if you’ve ever done that.)
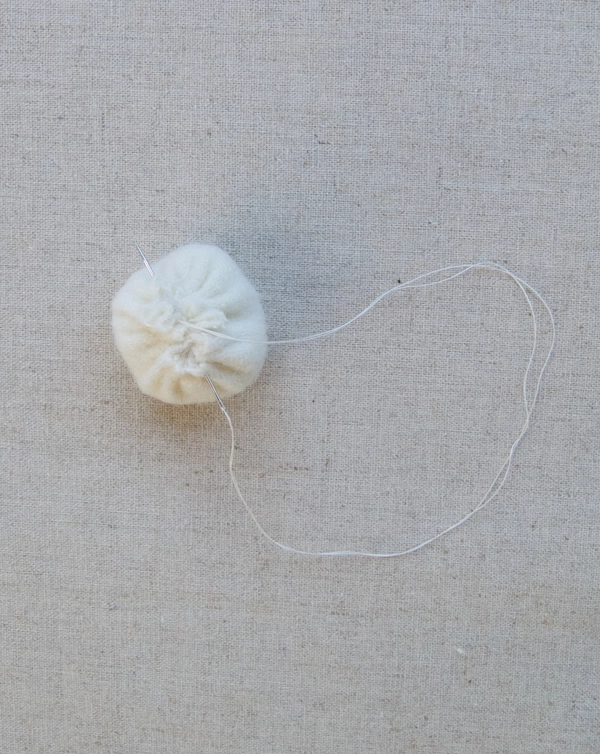
Cinch it tightly and then tie several knots to secure it.

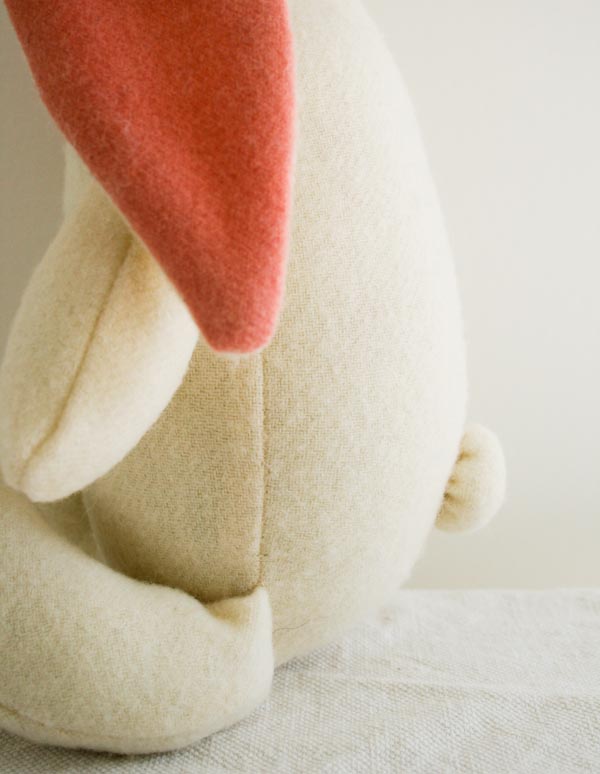
Using a slip stitch sew the tail on just below the bottom of the (recently sewn) back gap.

Go around its circumference twice in order to secure it well.
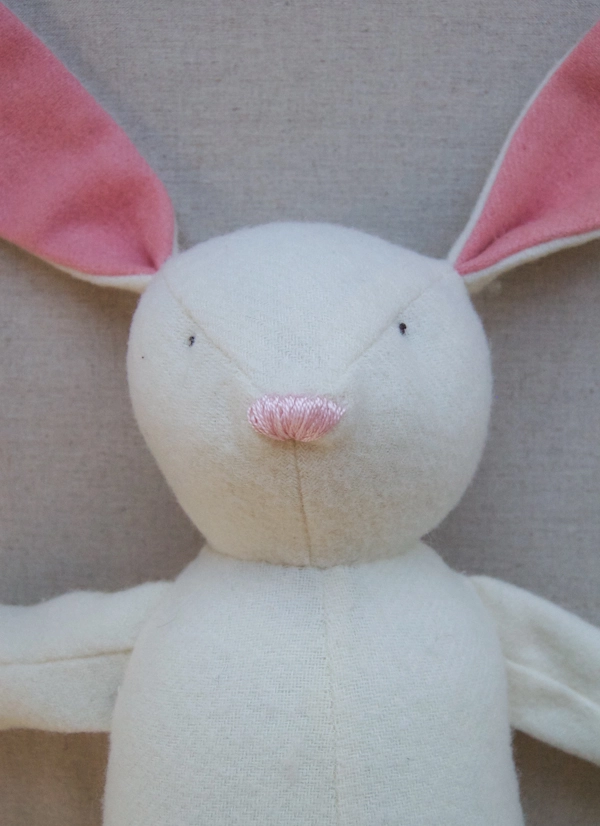
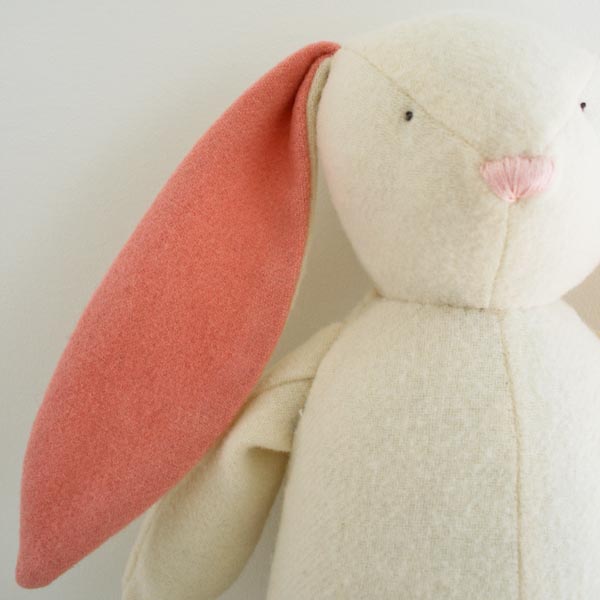
The face of your bunny is a very personal thing and will give your bunny its own unique personality so don’t worry if it doesn’t look just like this one!
Using the brown embroidery thread create the eyes by tying a couple of french knots in the same spot, up and to the right of the nose just below the right front seam of the face. Then pull your thread through to the opposite side of the face and tie a two more french knots in the same manner for the other eye. Thread the loose ends onto your needle one at a time and pull them inside the stuffing thus hiding them.

Using the pink embroidery thread create the nose by taking a series of satin stitches all radiating from the same entry point, 1/4-inch below the tip of the nose at the middle seam. Gradually work from right to left always entering your needle at the same point and exiting just a little to the left of your previoius stitch until a small triangle is formed as shown two photos above. You can go back and forth a couple of times to make sure no wool is showing from underneith.
Thread all the loose ends onto your needle one at a time and pull them inside the stuffing thus hiding them.
Your bunny is all finished!


Thank you so much for this lovely pattern! I’ve made my bunny and now I’m a little confused on how to start and finish the eyes! I’ve watched a video on how to do a french knot but can’t figure out how to replicate it on my bunny! Any help would be great please! 🙂
Hi Nicky,
Thanks for writing in, and congratulations on your nearly completed bunny! Since the bunny is already stuffed and assembled, you will need to hide the beginning knot and tail of your embroidery floss inside of her head. To do so, tie a knot in your embroidery floss about an inch from the end, just as you normally would, and insert the needle either at the back of the bunny’s head or under her chin, bringing it up where you want the first eye to be. If you pull firmly, you should be able to pop the knot through the fabric so it becomes “buried” in the stuffing – just make sure you don’t pull too hard once you have the knot in the right place! You can then work your first french knot, except, instead of inserting your needle straight down into the head after you have wrapped your yarn, you will insert it into the fabric at a shallow angle so you can bring it back up a few threads away to work the second one. After that, you can take your needle straight across to where you want the second eye to be, and repeat the process. Once the second eye is complete, you can then take your needle back through the head, exiting at either the back of the head or the chin, and clip your thread close so it is buried in the stuffing.
I hope that helps!
Julianna
Thanks so much! It turned out perfect and was loved by the little boy I made it for! 🙂
Hi there,
I hope you are well.
I am having some trouble with the following steps:
Open the head side pieces, right sides facing up.
Pin the right-hand curved side side of the head top piece all along the curved side of the right-hand head side pieces, starting at the nose. The ear marks are indicated by the yellow pins in the picture above.
Pinning along a curve can be tricky so use lots of pins and make sure there are no puckers.
Sew the pinned section together with two separate seams, one from the nose mark to the first ear mark and the next from the second ear mark to the end. The section between the ear marks will remain unsewn.
Is it possible you could explain how to form the head. I am confused as to how to form the head top piece in the way you have shown in the photo with the blue pins, and yellow pins indicating the ear marks.
If it is possible a video series demonstrating it would be invaluable. The bunny is for my niece who lost hers and she wanted me to re-create her teddy,
Anyway, thank you for this design
Any help you can give is appreciated
Hi Sambanath,
Thanks for reaching out! Unfortunately, we do not have the resources at this time to create a video tutorial, but hopefully I can explain this a little more! Before you get started you should transfer the ear placement marks from the pattern pieces to the felt head pieces using a washable fabric marker or chalk. In the second picture, which is the first one with yellow pins, the nose is at the top of the picture and the ear marks are at the right. We added the yellow pins on top of the ear placement marks just to make them easier to see while you are sewing! This part is odd because it really doesn’t look much like a head until you are finished and turn the whole piece right-side out, but if you follow along with each step one by one, it should turn out correctly!
I hope that clears things up!
Julianna
hello its Elaine just confused on step 2 of the head and was wondering if you had any tips or videos on how to do it or if you could make one
thanks so much for the pattern elaine
Hi Elaine,
Thanks for writing in! We don’t have the resources at the moment to create a video for this step, but hopefully I can clear this up for you! In the pictures, the bunny’s head is oriented to that its nose is pointing down and the ears are to the sides. The pointy end of the head-top will align with the noise. Once you’ve got the head-top positioned you can pin the right-hand curved side of the head top piece all along the curved side of the right-hand head side pieces, starting at the nose (which is in the middle of the head and is marked by the yellow pins in the picture). Remember that pinning along a curve can be tricky so use lots of pins and make sure there are no puckers! You will have two seams, one that goes from the nose to the bottom ear mark and one that goes from the top ear mark to the end. The section between the ear marks is left unsewn.
I hope that helps!
Julianna
A lovely bunny and a perfect pattern! 2 comments that I think might be helpful:
Doing the eyes and nose before attaching the head to the body makes the whole process a lot easier!
After doing and undoing the nose several times, I found it was more symmetrical by stitching a couple of stitches on each side at a time, ending up in the middle. The”fan” is perfectly balanced from the centre point.
Hello, I love your pattern. I was wondering how tall is the bunny from the bottom of the feet to the top of the bunny’s head? Thank you
Hi Brandi,
Thanks for reaching out! The finished Bunny is approximately 15″ fro head to toe!
Warmly,
Gianna
lovely. like ut very much
I love this! Can I make it from other fabrics too? Does it have to be wool? Wanted to try making it out of some patterned cotton. Thanks! Jenny
HI Jenny,
Thanks for reaching out! You could certainly use another fabric for this pattern! I think a patterned cotton would be great!
Please let us know how this turns out!
Warmly,
Gianna
hi !! i love this pattern and i was wondering if id be able to sell a few bunnies that ive made with it? i wanted to ask since it’s not my pattern, id give you credit of course !
Hi Alex,
Thank you for your interest in our patterns! While we’re happy you like our Soft Woolen Bunnies, our patterns and designs are copyrighted and are for home use only. This means that you can’t use our patterns to make things for sale. We hope you understand!
Warmly,
Gianna
okay , that’s no bother!!!! thanks for getting back to me 🙂
I’ve made one of these bunnies for each of my babies while I’m pregnant with them..it’s become a really sweet tradition and I love how different they each have turned out. 😍
Hi Whitney,
That’s so wonderful, what a special gift for your little ones! We’re so glad that you’ve enjoyed the project!
Warmly,
Kelsey
just finished mine, looks amazing it is my first sewing project and i will say it has come out quite good, thank you sew much!
I can’t wait to try this project! I have a question about the white wool: if I use the Dorr Mill wool from Purl, should I wash and dry it to “felt” it, or is it ready to use right out of the package?
Thanks!
Hi Mary,
Thanks for reaching out! For this pattern, we didn’t felt the wool prior to sewing the bunny, so you can use it right away instead of washing the wool first.
I hope this helps!
Gianna
Désolée mais je ne parle pas l’anglais mais j’aimerais beaucoup pouvoir faire ce lapin pour ma petite nièce Pouvez vous me donner le lien pour avoir le patron s’il vous plait? Merci 😉
Hello!
Thank you for your question. Our patterns are currently only available in English, however we suggest using an online translating service like Google Translate to translate this pattern. You can either copy and paste sections of the pattern into the translator, or download a PDF of the pattern from our website by clicking on the word “PRINT” and following the prompts from there to save a PDF to your device. Then, in Google translate, you can upload the file to translate it!
All the best,
Margaret
I love the simplicity of the bunny. While I was lining up the head to the neck opening, I noticed that the “V” shaped opening of the neck didn’t line up in the back because the head opening is straight. Did I miss something?
Hi Nat,
Thanks for writing in! We’re glad you enjoyed the pattern thus far and would be happy to help you finish it! The opening will look like a “V” upon first glance, but it should close up neatly if you pin the edges of the head to the neck opening all the way around so the edges align exactly, including at the v-shaped area which is the slope of the bunny’s back.
We like to imagine that we’re hiking up a pair of pants when pinning areas like that, pulling up the edges of the V to align with the straight edge of the head. There’s also a better image of this step in our Wool + Liberty Teddy Bear pattern. I recommend taking a look at that for a better angle!
All the best,
Zha Zha
I just made this but used a different fabric due to allergies to wool. I loved this pattern, it was east to understand and complete. I used buttons on the eyes and nose instead. Thank you so much for having this available and with clear instructions. My niece already loves it!
Does the pattern template include a seam allowance? Thanks
Hi Harrison,
Yes, this pattern does include seam allowance! All seam allowances are 3/8-inch unless otherwise noted. Hope this helps!
All the best,
Lili
i am logging in to leave a thank you note. your post made many babies happy and gave me many chances to give handmade gifts. THANK YOU!
Hi Juyoung,
Thank you so much for sharing that! We are always looking for feedback and your support of Purl Soho is much appreciated!
Happy making,
Gavriella
Thank you so much! I made my bunny out of pillow ticking fabric. Turned out so cute.
bonjour , j’ai du mal avec cette étape :Cousez la section épinglée avec deux coutures séparées, une de la marque du nez à la première marque de l’oreille et la suivante de la deuxième marque de l’oreille à la fin. La section entre les marques d’oreille restera non cousue.
Hi Mercer,
Thank you for writing in! This section is meant to be sewn to leave space for the ear to be attached, so you will want to have a space between those two seams. For example, think of the way you would sew closed a pillow, you would stitch all the way around, leaving a small gap in stitching to turn it inside out and then sew it closed. I hope that makes sense but please feel free to email us at customerservice@purlsoho.com if you have any other questions!
Happy sewing,
Gavriella