Felted Thanksgiving Oven Mitts
The thought of Thanksgiving puts me right into the heat of my mother’s kitchen. We chop and stir and baste for days, scrupulously following stuffing recipes many pages long, peeling endless sweet potatoes like we’re in the galley of an aircraft carrier, praying that some relative will notice the difference between a parsnip and a turnip and the fact that we’ve pureed both.
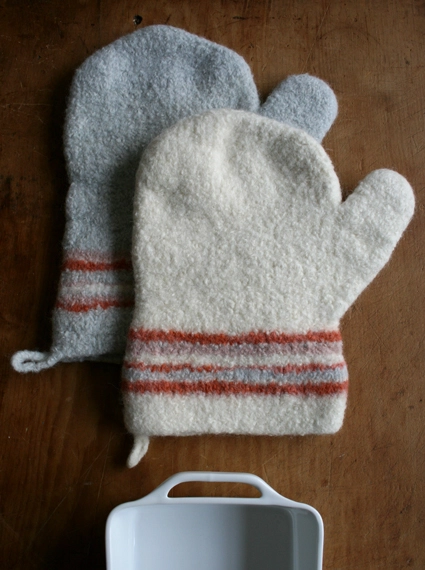
Of course all the toil is an act of love, and while the meal is important, the preparations are the true heart of the holiday. So this Thanksgiving, I’m adding to the pleasure with the sumptuous goodness of hand knit Felted Oven Mitts. Now I’m looking forward to every basting!
Designed by Purl Soho designer, Whitney Van Nes.
Share your progress and connect with the community by tagging your pics with #PurlSoho, #PurlSohoBusyHands, and #PurlSohoFeltedThanksgivingOvenMit. We can’t wait to see what you make!
Materials
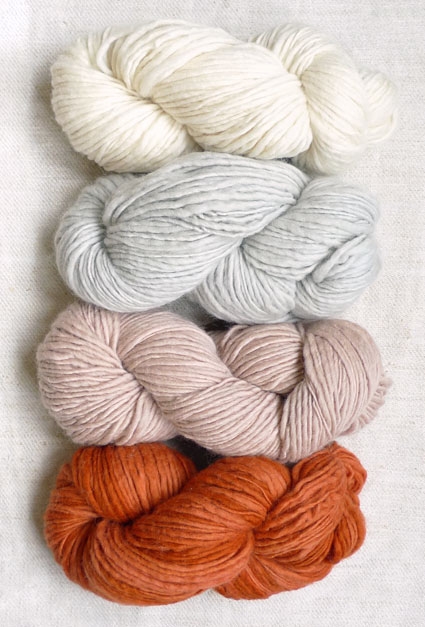
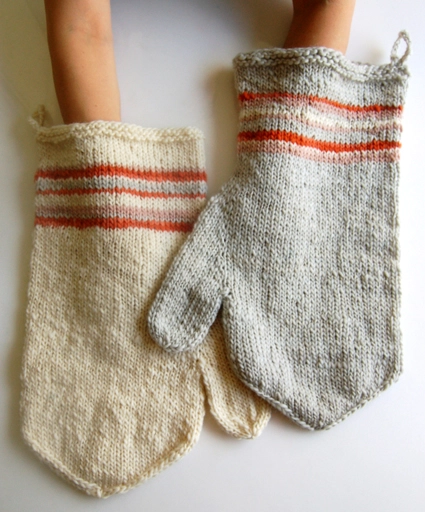
- Manos Del Uruguay’s Handspun Semi Solids, 100% Wool. These colors are, from the top, Natural, Mist, Cameo, and Pumpkin. Each Oven Mitt requires about 190 yards, or 2 skeins. For Oven Mitts like mine you’ll need 2 skeins of each of the Main Colors (Natural and Mist) and 1 skein of each of the Contrast Colors (Cameo and Pumpkin).
- US 11 (8 mm), 16 inch circular needles
- A set of US 11 double pointed needles
- A stitch holder and stitch markers
GAUGE
12½ stitches = 4 inches in stockinette (before felting)
Finished Size
14 inches in circumference and 13 inches from cuff to top (after felting)
Color Notes
For the gray mitt my colors were:
- Main Color – Mist
- Color A – Pumpkin
- Color B – Cameo
- Color C – Natural
And for the cream mitt I used:
- Main Color – Natural
- Color A – Cameo
- Color B – Pumpkin
- Color C – Mist
Pattern
Cuff
With the Main Color and the 16 inch circular needle, cast on 61 stitches. Leave a 24-inch tail which you will use later. We used a basic Long Tail Cast On.
Place a marker and join for working in the round being careful to not twist your stitches.
Round 1: Purl.
Round 2: Knit.
Round 3: Purl.
Knit every round until piece measures 2 inches from the cast on edge.
With Color A, knit 1 round.
With Color B, knit 2 rounds.
With Main Color, knit 1 round.
With Color C, knit 2 rounds.
With Color B, knit 1 round.
With Main Color, knit 3 rounds.
With Color A, knit 2 rounds.
With Color C, knit 1 round.
With Color B, knit 2 rounds.
With Main Color, knit until piece measures 7 inches from cast on edge.
Gusset
Round 1: K30, place a marker (pm), make 1 right (m1r), k1, make 1 left (m1l), pm, knit to end round. (63 stitches)
Rounds 2 and 3: Knit.
Round 4: Knit to first marker, slip marker, m1r, knit to next marker, m1l, slip marker, knit to end of round. (2 stitches increased)
Repeat Rounds 2-4 until there are 19 stitches between the gusset markers. (79 stitches total)
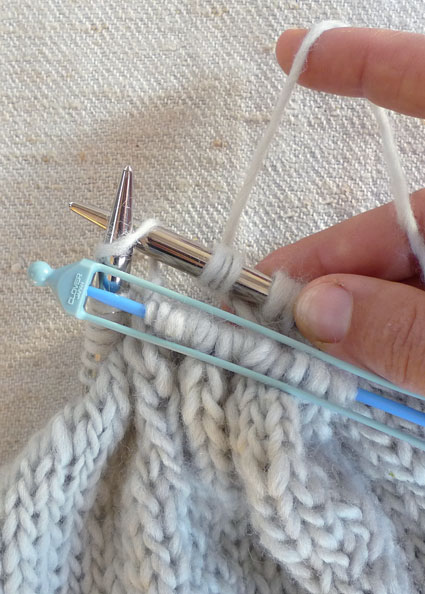
Knit to the first gusset marker and put the next 19 stitches on a stitch holder, removing the markers.
Hand
Turn the work so the purl side is facing you and use a Cable Cast On to cast on 2 stitches.
Turn the work back around so the knit side is facing you again. Join for working in the round, knitting from the second cast on stitch to the first stitch after the stitch holder. (62 stitches on needle and 19 stitches on holder)
Knit for 4 1/2 inches.
Next Round: K1, ssk, k25, k2tog, k1, pm, k1, ssk, k25, k2tog, k1. (58 stitches)
Next Round: K1, ssk, knit to 3 stitches before next marker, k2tog, k1, slip marker, k1, ssk, knit to 3 stitches before next marker, k2tog, k1. (4 stitches decreased)
Repeat the last round until 10 stitches remain, changing to the double pointed needles when necessary.
Cut the yarn and thread it through the remaining stitches, pulling tight.

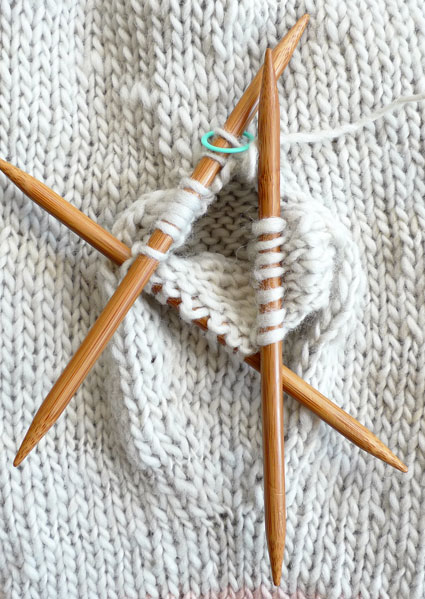
Thumb
Slip the 19 stitches from the holder onto 3 double pointed needles.
Join the Main Yarn and knit the 19 stitches.
Pick up 3 stitches at the base of the the thumb in order to bridge the thumb into a circle. Place a marker for the beginning of the round. (22 stitches)
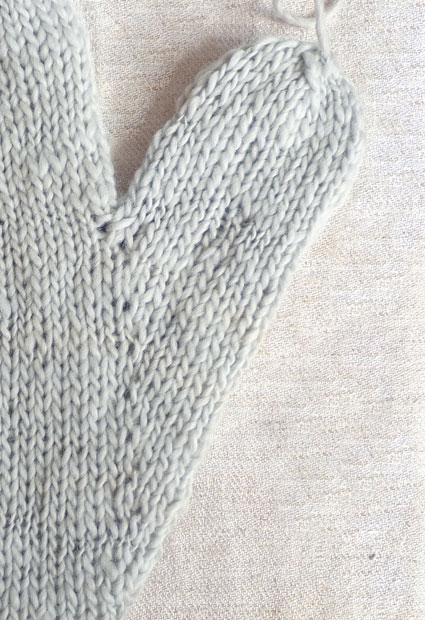
Knit for 3 1/2 inches.
Next Round: K1, ssk, k5, k2tog, k1, place a marker, k1, ssk, k5, k2tog, k1. (18 stitches)
Next Round: K1, ssk, knit to 3 stitches before first marker, k2tog, k1, slip marker, k1, ssk, knit to 3 stitches before next marker, k2tog, k1. (4 stitches decreased)
Repeat the last round two more times.(10 stitches)
Cut yarn and thread it through the remaining stitches.
The Loop
Using the cast on tail, crochet a single chain about 5″ long.
Dip the crochet hook back into the cast on edge where the chain began, and pull a stitch through. There are now two stitches on the crochet hook.
Pull the first stitch through the second, and bring the tail through the remaining stitch.
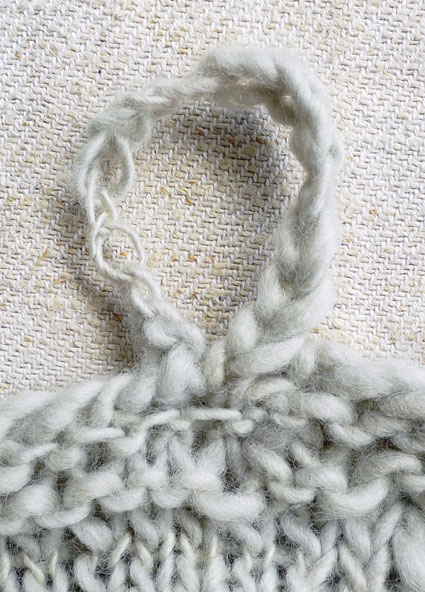
Your oven mitt should look pretty wacky by now. Big, floppy, and quite ungainly. Something like these!
Felting
Put your mitts inside a pillowcase and then into a top-loading washing machine. Throw in a pair of jeans (or tennis balls) and some delicate wash detergent. Set the temperature to hot and start the wash cycle. You want maximum agitation, so for quickest results, keep the machine in the wash cycle.
Everyone’s machine is different, so check your project frequently. When your mitts are about 14 inches in circumference and 13 inches from cuff to fingertip (or whatever size you like them!), take them out and sqeeze out the excess water. Let them dry (and dry and dry…).
Now think about that turkey!


Love those colors from Manos del Uruguay. Thought I might point out that Manos is fair trade which, for me adds that extra benefit to using this particular yarn. I like knowing my purchase help sustain a living for a woman and her family in Uruguay.
These are amazing. If only I could knit. ;o) You're making me want to learn, today!
I love these and am thinking they would make a great house gift for the Thanksgiving hosts (I'm also thinking Christmas colors too!) I am wondering how heat proof these mits are? Can you actually use them to reach into the over and lift out the roasting pan filled with a turkey? Have you tried them for cooking and baking?
HI Mamacin,
I use my Manos Hot Pads (https://www.purlsoho.com/create/four-felted-hot-pads/) all the time and haven't felt the heat yet! Of course, you want to make sure to felt the mitts sufficiently so that you get a thick, tight fabric, but, yes, they really do work!
Thanks for asking!
Whitney
I love, love, love, these mitts! I will be busy making holiday gifts with this wonderful yarn and pattern.. Thank you so much. I also love the fact that the yarn is a fair trade yarn!
I would love to try these but have a front loading washing machine. Any ideas?
Mary
Hi Mary,
Being a New Yorker, I don’t actually own a washing machine and have to admit that this is pretty far out of my area of expertise. (I do my felting at the nearest laundromat with top loading washers!) However, when I googled “felting with a front loading washer”, lots of very thorough and helpful advice popped up.
I’m sorry to not give you the answer straight from the horse’s mouth, but it does seem the vast community of online knitters is to the rescue!
Thanks for your question and please let us know if you have any others!
Whitney
Here I am in 2015 knitting these oven mitts. My project is 11″ wide & 17″ long so far. Will this huge mitten felt to size. I have done needle felted dryer balls but their size before felting seemed closer to the end result. Thanks for your help.
Hello Nancy!
The rule of thumb for felting knit projects is that they will shrink to be about 1/3 of their original size! Make sure to use 100% wool (Merino if you can!), and the hottest setting on a top load washing machine. Give it a shot and let us know how it goes! Best of luck! -Alyson
I’m looking at these as a great project for the fall before holiday season approaches! It doesn’t look like the yarn you used for this project is available anymore. What would you recommend instead? Thank you!
Hi Mary,
The yarn they used was a worsted, I would suggest either Madeline Tosh, or Manos del Uruguay Maxima. They would both felt up beautifully.
I hope this helps,
Melissa
These look great! I actually only have one oven mitt and the last few times I roasted a turkey I thought I should get a second one. Question, after felting these, are they machine washable and (I feel silly asking) machine ‘dryable’?
Hi Grace,
Thanks for writing in! I machine wash and dry my felted items. However, it should be noted that they will continue to shrink a bit each time. I find that my felted items stretch out a bit with use and when I wash them, they shrink back up. Given that felting is a bit more art than science, I would suggest testing things out lest you end up with a doll sized mitt (we have all had that type of accident). You can try drying your mitt a few minutes at a time to figure out where the threshold for your item is.
I hope that this helps!
Cassy
I purchased a washing machine from Amazon. It is a countertop or just sit in the bathroom floor. Very reasonable price. It has a timer on it too so you can check your felting process.