Four Felted Hot Pads
I had the idea that I would like to knit in a way that was more like painting, a bit more spontaneous, more whimsical, more for the sake of itself. A hot pad seemed a perfect little canvas for my experiments. With some quick sketches formed out of the haze of deep sleep, I set to work!
I started out with a strangely clear vision of what colors I wanted to use: dusty pinks, deep yellows and foggy lavenders. When I’m feeling uncompromising, I always turn to Manos Del Uruguay’s Handspun Semi Solids. With dozens of incredible hand dyed colors to choose from, Manos is the closest you can get to mixing your own paints. I knew it! Each color I had envisioned was sitting right there on the shelf!
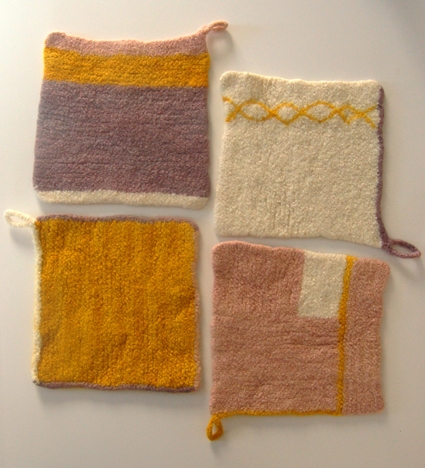
Riffing off common knitting designs and techniques, I ended up with these four little “paintings”: the Argyle Hot Pad, the Striped, the Log Cabin, and the Bordered Square. None are complicated or fancy, but to me each one has a sort of precious completeness to it. I never knew knitting pot holders could be very satisfying!
Designed by Purl Soho designer, Whitney Van Nes.
Share your progress and connect with the community by tagging your pics with #PurlSoho, #PurlSohoBusyHands, and #PurlSohoFourFeltedHotPads. We can’t wait to see what you make!
Materials

- 4 skeins of Manos Del Uruguay’s Handspun Semi Solids, 100% Wool. Each skein is 138 yards/ 100 grams. These colors, from top to bottom, are Natural 14, Cameo 52, Slate 25 and Marigold 58.
- A US 11 (8 mm) straight or 16-inch circular needles
- If using straight needles: Two US 11 double pointed needles for I-Cord
- A size J or K crochet hook
Please Note: Manos Del Uruguay’s Maxima, while slightly thinner, would be an excellent alternative for the felting process and would require a change in gauge. We recommend trying a US 10.5 (6.5 mm) knitting needle!
Gauge
13 stitches = 4 inches in garter stitch, before felting
Size
12 inches square, before felting
8½ inches square, after felting
Notes
COLORS
The four colors used in this pattern are referred to as Colors A, B, C and D. Here is how I designated my colors:
Color A – Natural
Color B – Shale
Color C – Marigold
Color D – Cameo
“RIDGES”
When this pattern refers to “ridges”, it means a garter stitch ridge that is formed by knitting two rows. Counting “ridges” is an easy way to determine how many rows you have knit without having to count as you work. If you find this confusing, just multiply the number of ridges given by 2 and that is how many rows you should knit (ie 3½ ridges is 7 rows).
Pattern
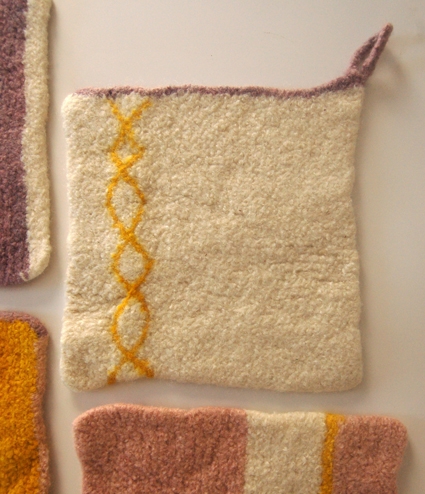
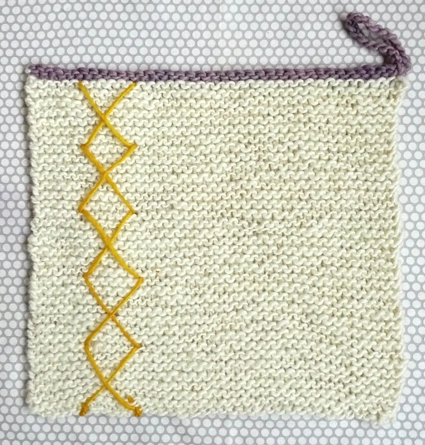
Argyle Hot Pad
With Color A, cast on 39 stitches. We used a basic Long Tail Cast On.
Knit every row for 35 ridges.
Cut Color A and with Color B, knit 1 row.
Still with Color B, bind off, leaving the last stitch on the needle and do not cut the yarn.
The Loop
Transfer the last stitch from the needle to the crochet hook.
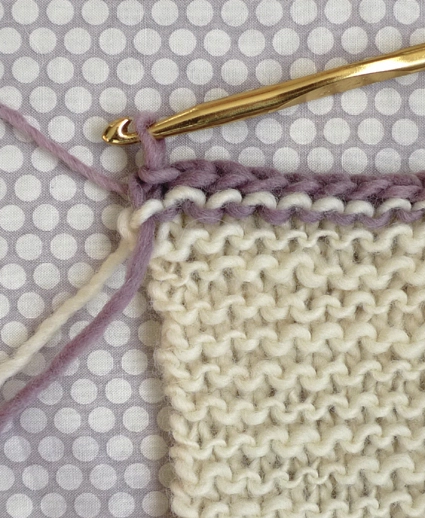
Chain 20 stitches.
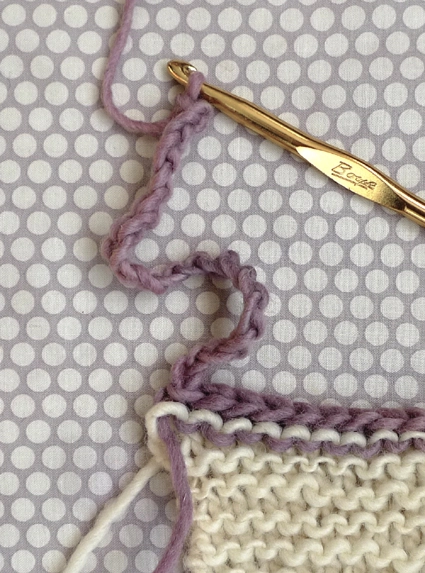
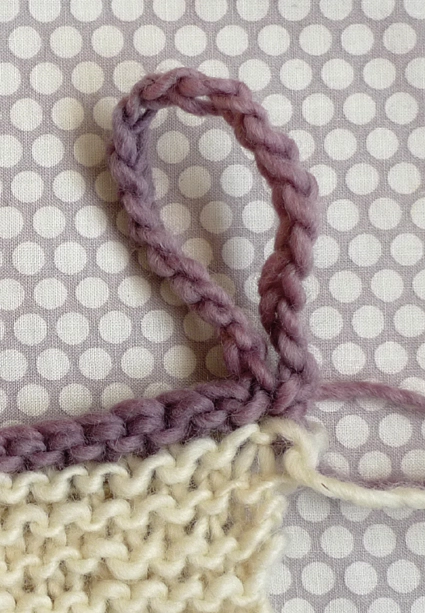
Form a loop by inserting the hook back into the starting point of the chain and slip stitch.
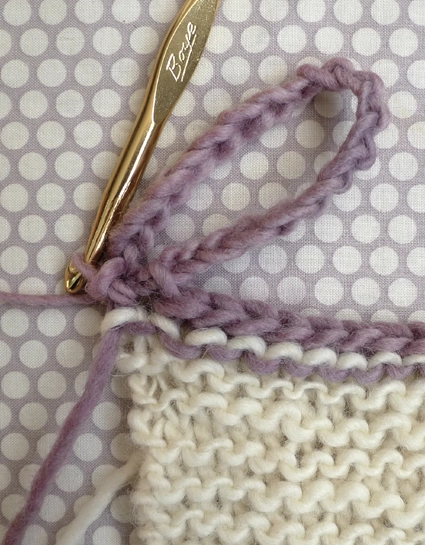
Cut the yarn and pull it through the last stitch.
The Argyle
Cut a piece of Color C yarn about 2 yards long and thread it through a tapestry needle.
Bring the needle from the back of the work to the front about 6 stitches in from the left edge and just above the cast on edge.
Return the needle to the back, 7 rows up and 7 stitches to the right.
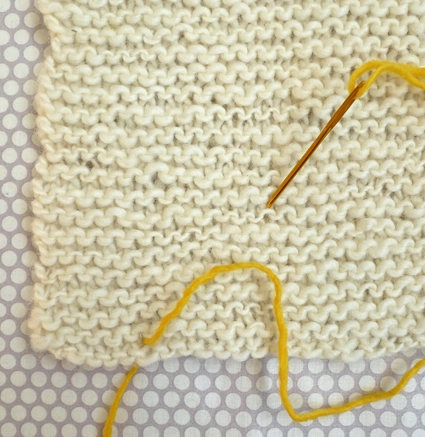
Bring the needle to the front again, 7 rows up and 7 stitches to the left. Pull the yarn so that it is relaxed, but taught, both on the front and back of the work.
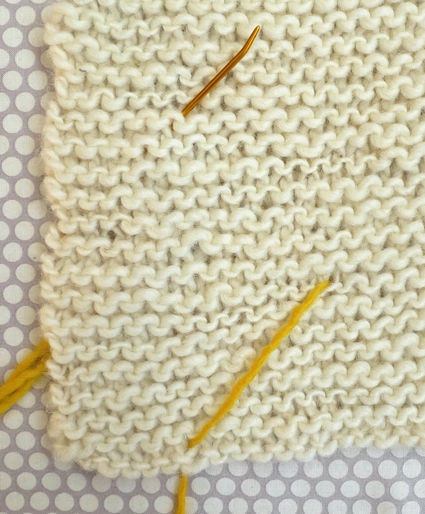
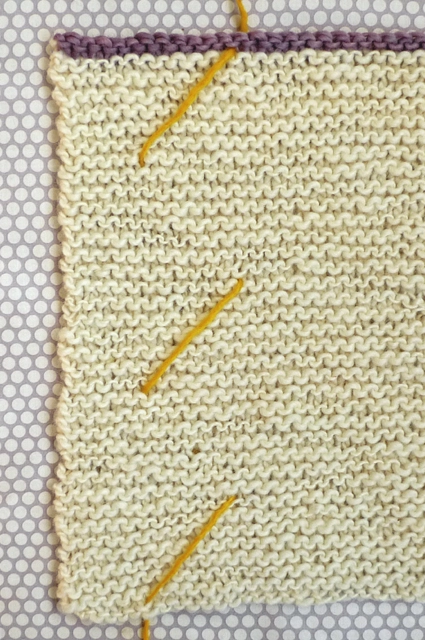
Make 2 more parallel lines the same way you made the first, keeping the beginning and end points aligned, and finishing right below the color change.
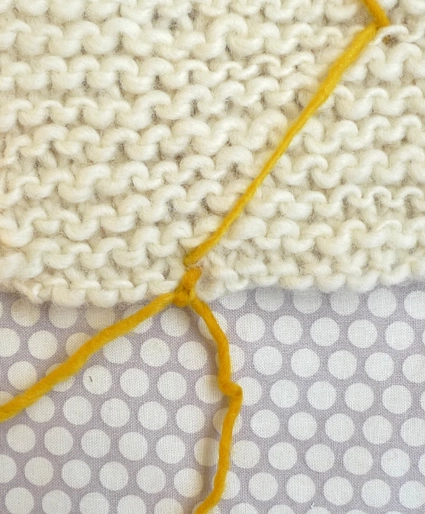
Return the needle to the front, coming up through the bottom point of the top line.
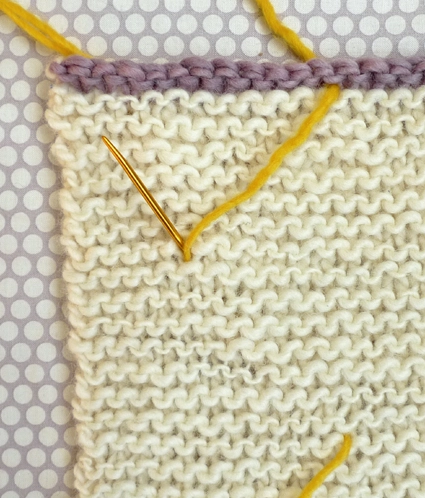
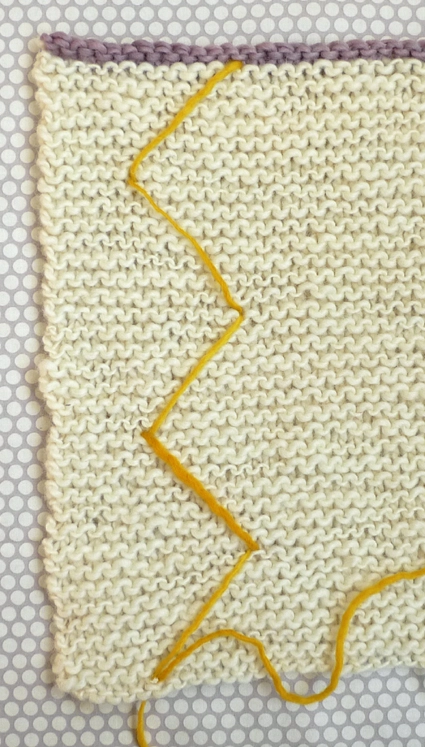
Bring the needle to the back through the top point of the next line (think about creating a zig zag). Continue to sew the yarn, connecting line to line until you reach the starting point.
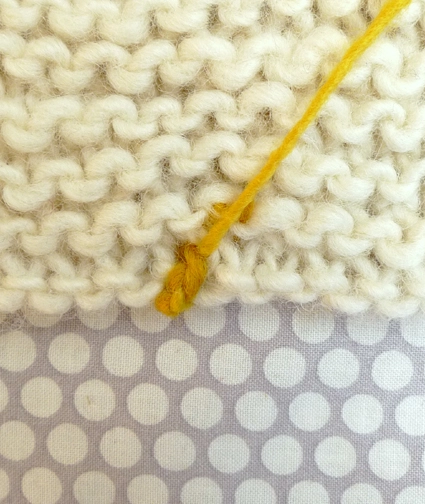
With the two ends of the yarn, make a simple knot around the cast on edge.
Weave the ends. (Just running it under a few stitches is sufficient since all the ends will be felted securely down in the end.) Cut the yarn.
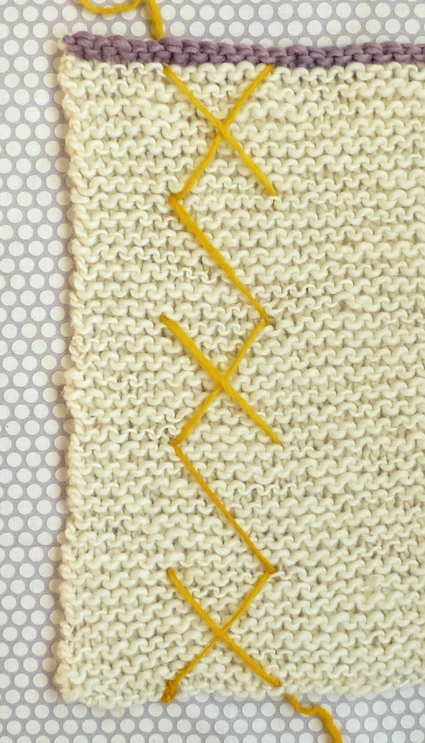
Re-thread the needle and starting just above the cast on edge, bring the needle from the back to the front 7 stitches to the right of where you just tied the knot.
Repeat the above steps, creating 5 parallel lines that cross the lines you already made and ending just below the color change.
Continue to repeat the above steps to finish the argyle. End where you began, just above the cast on edge.
Tie another knot and weave in those ends.
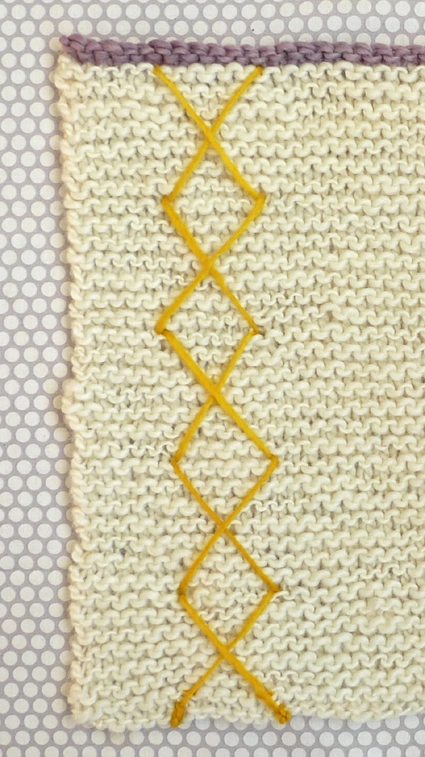
Weave in any remaining ends and you’re ready to felt!
To Felt
To felt your hot pad, simply put it in a pillowcase (to protect your washer from lint-o-mania). Toss it into a washing machine (you don’t really need a top loader for this project since the finished size isn’t crucial) with a few tennis balls (or baseball hats or jeans or sneakers) and set the water level to low, the water temperature to hot, and go! Let the machine run a full cycle and you will be pleasantly surprised to see your knitting transformed into a dense fabric perfect for hot pots!
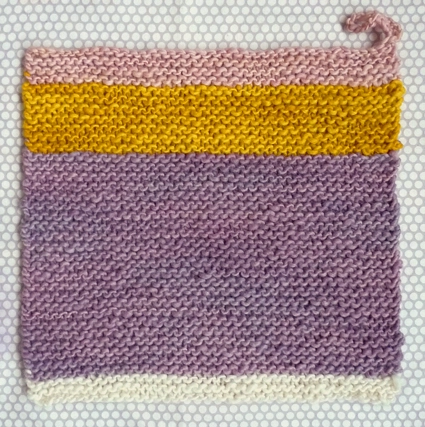
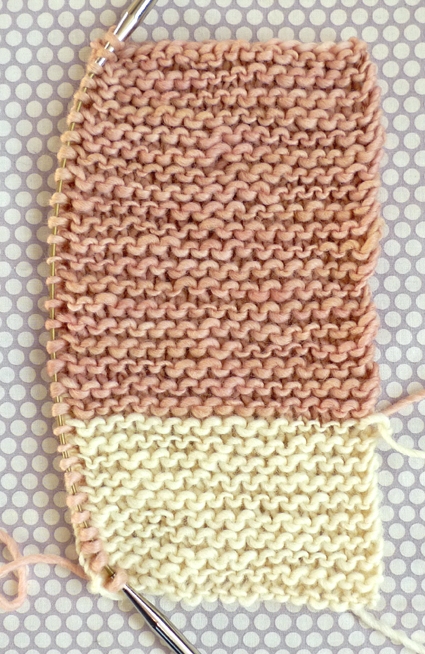
Striped Hot Pad
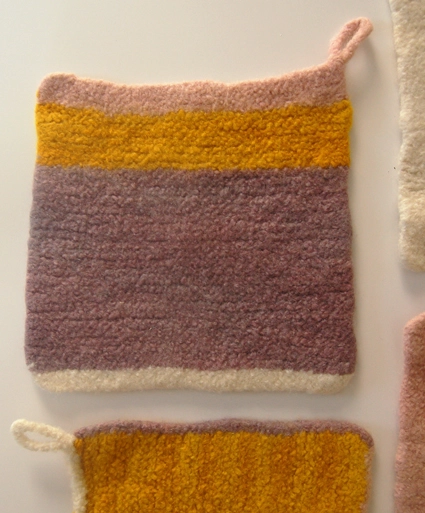
With Color A, cast on 39 stitches.
Knit 2 ridges and cut the yarn.
With Color B, knit 23 ridges and cut the yarn.
With Color C, knit 7 ridges and cut the yarn.
With Color D, knit 3 1/2 ridges.
Bind off, leaving the last stitch on the needle and do not cut the yarn.
The Loop
(For photos of this step, see “The Loop” section of the Argyle Hot Pad, above.)
Transfer the last stitch from the needle to the crochet hook.
Chain 20 stitches.
Form a loop by inserting the hook back into the starting point of the chain and slip stitch.
Cut the yarn and pull it through the last stitch.
Weave in all the ends.
Now felt the hot pad, following the directions at the end of the Argyle Hot Pad pattern, above.
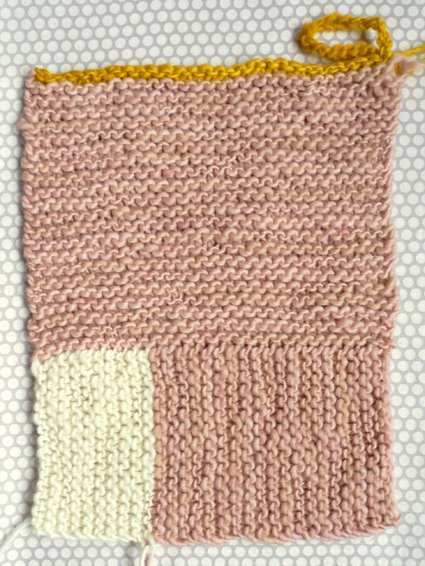
Log Cabin Hot Pad
With Color A, cast on 16 stitches.
Knit 9 ridges and cut the yarn.
With Color D, knit 19 ridges.
Bind off, leaving the last stitch on the needle.
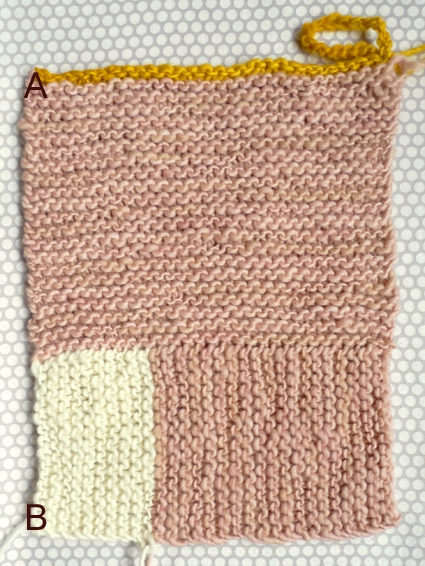
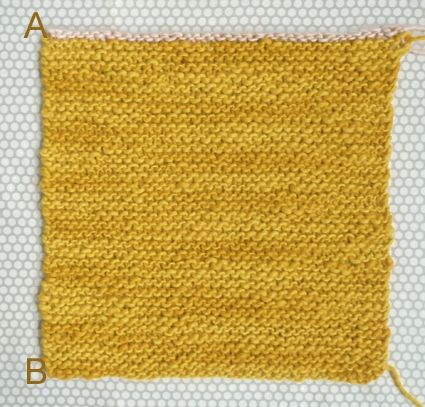
Still with Color D, turn the work clockwise and pick up 29 stitches from corner A to corner B, illustrated below.
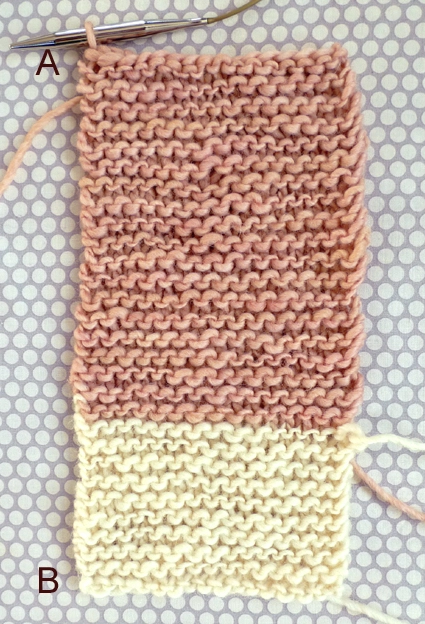
Here’s what the picked up stitches look like:
With a total of 30 stitches on your needle, knit 20 1/2 ridges. Cut the yarn.
With Color C, knit 1 row.
Bind off, leaving the last stitch on the needle.
The Loop
(For photos of this step, see “The Loop” section of the Argyle Hot Pad, above.)
Transfer the last stitch from the needle to the crochet hook.
Chain 20 stitches.
Form a loop by inserting the hook back into the starting point of the chain and slip stitch.
Cut the yarn and pull it through the last stitch.
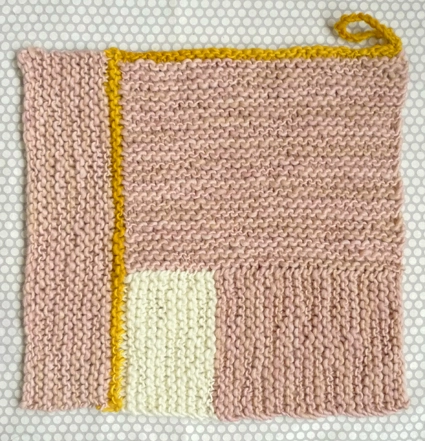
Continue the Log Cabin
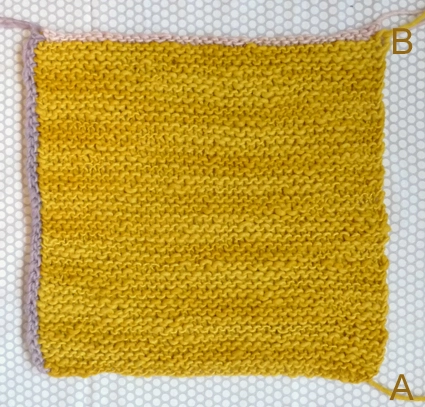
With Color C, pick up 36 stitches from corner A to corner B, illustrated below.
Here are what the picked up stitches look like:

Knit 1 row and cut the yarn.
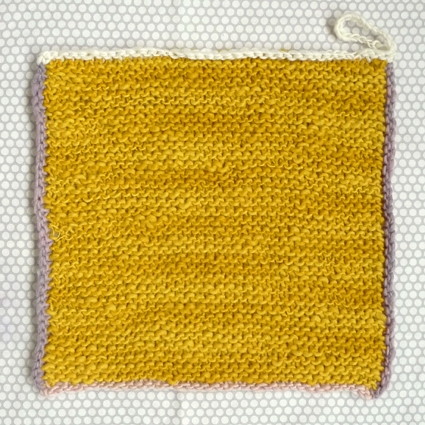
With Color D, knit 9 ridges. With the wrong side facing you, bind off.
Weave in the ends.
Follow the felting directions at the end of the Argyle Hot Pad pattern, above. And you’re done!
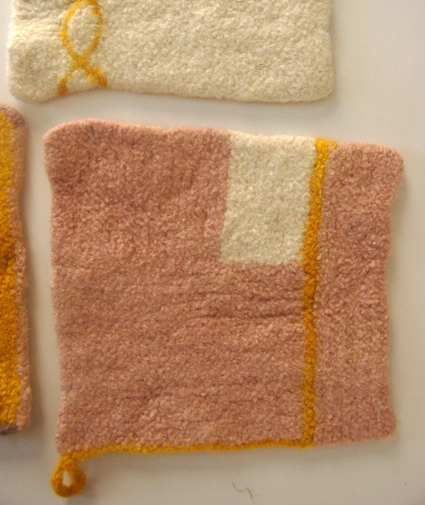
Bordered Square Hot Pad
 With Color C, cast on 36 stitches.
Knit 34 ridges and cut the yarn.
With Color D, knit 1 row.
Bind off and cut the yarn.
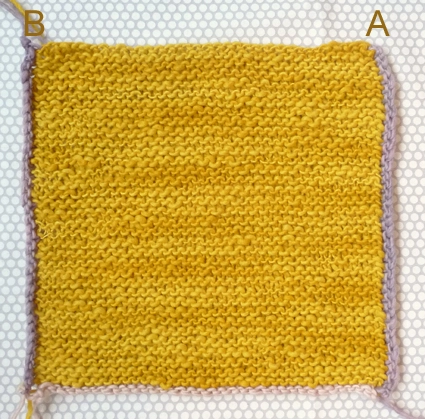
With Color B, pick up 36 stitches from corner A to corner B, shown below:
Knit 1 row and bind off. Cut the yarn.
Again with Color B, pick up 36 stitches from corner A to corner B, shown here:
Knit row and bind off. Cut the yarn.
With Color A, pick up 38 stitches from corner A to corner B, illustrated below:
Knit 1 row.
Bind off, leaving the last stitch on the needle.
The Loop
(For photos of this step, see “The Loop” section of the Argyle Hot Pad, above.)
Transfer the last stitch from the needle to the crochet hook.
Chain 20 stitches.
Form a loop by inserting the hook back into the starting point of the chain and slip stitch.
Cut the yarn and pull it through the last stitch.
Weave in all the ends.
Follow the felting instructions at the end of the Argyle Hot Pad pattern, above, and you have your very own set of Four Felted Hot Pads!


Love this…very artistic, the yellow is beautiful…so 12 x 12 before being washed, and what was the end result? 8 x 8 inches or thereabouts?
Hi Martha –
Whoops! Thank you for pointing out that we forgot to fill in the final measurements! They are approximately 8 1/2 inches by 8 1/2 inches.
Thank you!
Whitney
Fabulous, love Thank you for sharing.
gorgeous! gorgeous colors and there is something perfect and complete in their simplicity that is so compelling.
How do I “pick up” the stitches on the sides? I'm fairly new to knitting and VERY new to felting. Thanks!
Hi Laurie,
Picking up stitches is how you create “live” stitches along a finished edge. There are many helpful videos online that show you how to do it. Here's a good one at knittinghelp.com: http://www.knittinghelp.com/video/play/pick-up-and-knit-stitches .
I admire your bravery – good luck!
Whitney
Hello,
Can these then be machine washed ongoing without further shrinking or changing shape?
Hi Leanne,
Yes! Depending on how much you initially felt your hot pads, they may shrink a little bit more the first couple of times you wash them. But they do reach a point of maximum shrinkage and are completely machine washable.
Thanks for your question!
Whitney
Hi, Love these patterns!!
I just purchased the yarn for these want to get started. I have size 10 and size 12 needles and am hoping I can do this project without purchasing more needles, I am not very knowledgeable about how different sizes will affect the pattern since I have never felted before, would you recommend I go up or down in the size of the needles??
Thank you for posting all your wonderful patterns and in advance for help with this!
Hi Katie-
Technically you should knit a gauge swatch before you get started and see which pair of needles gets you closest to the gauge of the pattern, which is 3 1/4 stitches per inch. However, this pattern doesn't really need to fit in the same way a sweater does so the gauge is less important. I think you can wing it- if you are a tight knitter go for the larger sized needles, if you tend to be loose try the smaller ones. As long as you're getting in the ball park of 3 1/4 stitches per inch you should be fine.
Thanks for writing in!
Molly
Thank you for the patterns and friendly instructions. Is there a way to block the pads after being washed/felted? Can they be pinned and air-dried like other blocked wool knits? I love the irregularity of yours, but if I give as gifts, I wonder if I need to plumb the squares a bit. Hope you understand. Thanks again. Just today found your page. Great job!
Hi Bonnie,
Yes, I do think you could block these a little bit more regularly than I did! I just sort of tossed my down on a towel and let them dry, but a little bit more shaping and definitely some pinning would probably whip these guys into better shape. Keep in mind, though, that the handspun nature of this yarn will always add a little bit of quirk!
Thanks so much for asking and good luck!
Whitney
Thanks, Whitney! Gotta love quirk!!! Take care.
Thank you for sharing this lovely pattern, I also enjoy mixing up colors and this looks like just the ticket. I may try needle felting a pattern onto them before wash machine felting, though your argyle is on both sides. We shall see what comes of that.
do you have yarn/color suggestions to recreate these? i LOVE them but it looks like you don’t sell the yarn anymore.
Hi Jessica,
Thanks for reaching out! We have several great feltable wool yarns that would work well for this pattern! I would suggest substituting Manos del Uruguay Maxima, Cascade 220, or our Good Wool held double.
Best of luck and happy knitting!
Julianna
I love your felted hot pads! Do you ever sell them?
Hello Daria,
Thank you for your kind words! We do not sell ready mades, but they are fairly simple if you care to give it a try!
Warmly,
Marilla
I just finished to of the four (log cabin and argyle) and I must say in all my knitting experience this is the most fun with color I’ve ever had! These are going to be a regular gift knit of mine! Thank you for your creativity!
I am not happy, though, with how mine blocked out. They came out of the wash bunched up, of course, but in spite of my having tugged and stretched them into shape as much as I could, they remain a bit wrinkly. Is there a fix?
Susan Bowyer
Hi Susan,
Thank you so much for the kind words, I’m so happy to hear you enjoyed knitting our hot pads! It sounds like you might have felted your hot pads in a top-loading washing machine or run them through the spin cycle in your washing machine. This can result in creases or wrinkles in the finished hot pads that are a little difficult to get out! You could try steaming or soaking your hot pads to see if you can reshape them, and in the future, just make sure to cancel your wash cycle before it spins!
I hope that helps!
Julianna
Thank you, Juliana. I used a front-loader, but yes, it did go through the spin cycle. That’s good advice.
A soak has helped.
I may try hand-felting the next one and see what I get.
Hello, if I were to use just one color, how many skeins are required?
Hi Thea,
Thanks for reaching out! Unfortunately, this is an old pattern of ours, and we didn’t keep track of the yardage used. We also no longer carry the yarn we used for this project. Can you let me know if you have a different yarn in mind that you’re planning to use? And also how many hot pads did you want to make?
I’ll keep an eye out for your reply, and then I’ll be able to provide an estimate of the yardage in one color!
All the best,
Lili