Mother’s Day Embroidered Scarves
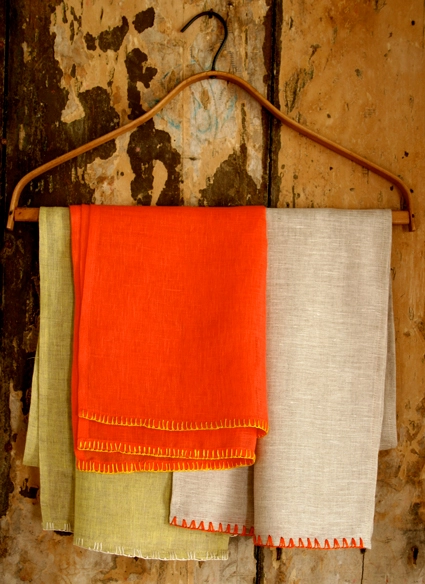
These scarves are simple to make, even if you have very little embroidery experience. Best of all, once you’re done, you will have such a special gift for your mom (or grandmother or sister or aunt or friend!)
Designed by Purl Soho designer, Molly Schnick. Click here to see even more of Molly’s work!
Materials

For the green/yellow scarf with white embroidery:
- 1/2 yard of Sheer Linen in Leaf Green
- One spool of Trebizond Silk Embroidery Thread in color 132
- One spool of 100% Cotton Sewing Thread in color 8915
For the natural scarf with orange embroidery:
- 1/2 yard Sheer Linen in Beige
- One spool Trebizond Silk Embroidery Thread in color 3526
- One spool of 100% Cotton Sewing Thread in color 3260
For the coral scarf with yellow embroidery:
- 1/2 yard Daily Linen* in Goji Berry or Autumn Russet (as substitutions to the original Peach in Open Weave Linen)
- One spool of Trebizond Silk Embroidery Thread in color 203
- One spool of 100% Cotton Sewing Thread in color 4860
*Please note, the original Open Weave Linen in Peach is no longer available but we think Daily Linen in Goji Berry or Autumn Russet would make a lovely substitution!
Sewing the Scarves

Every scarf is sewn in the same way before the addition of the embroidery.
The best way to cut a straight line across a long space (like a scarf) is to pull a thread. Luckily for us, this is an easy thing to do on loosely woven linen!
Start by making a small snip into the fabric along one of its long sides.

Using tweezers pull one of the weft threads across the entire length of the scarf. The “weft” threads refer to the threads that run from selvage to selvage and the “warp” threads run perpendicular to the selvages.
If the thread breaks start pulling again from the break (you can pull a thread next to the first one if you can’t find the broken one again.)

Once you’ve pulled your weft thread(s) across the entire length of the scarf smooth it out and cut along the line made by the pulled out thread.
Repeat this for the opposite long side and then do the same along the two short sides by pulling a warp thread.
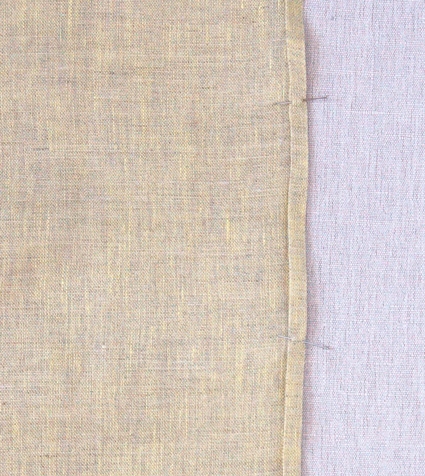
Press and pin the long sides 3/8-of an inch over twice to hide the raw edges. Sew these folds down.
Repeat for the short sides. You should have no raw edges at this point.
Starting and Finishing the Embroidery

The embroidery for all three of these scarves is based on a blanket stitch (also known as a buttonhole stitch) and will be started in the same way for each variation.
Please note that for all stitches the sewn down hem line across each short side is your stitch length guide. Your blanket stitches should be 3/8-inch long, from the outer edge of the fabric to the sewn down hem line. Also note that the embroidery is only done on the two short sides of the scarf.
Thread a 24-inch length of the twisted silk thread onto an embroidery needle. Start the embroidery at the right hand edge of one of the short sides of the scarf going in through the front (at the bottom of the sewn fold) and leaving a 5-inch tail. Don’t tie any knots.

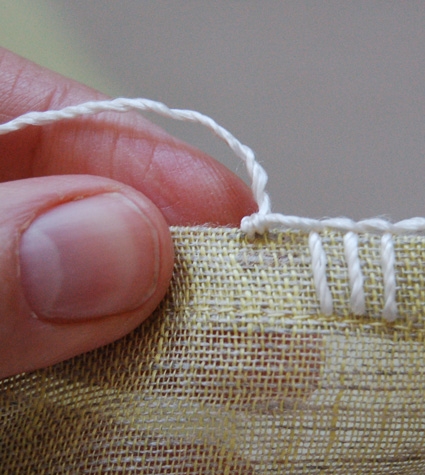
Place the tail to the left of the active thread and put your needle through again, just to the left of where you placed your first stitch as shown above.
Bring your needle out through the back making sure the needle passes over the active yarn. Here is a clearer picture of this step:

It is the thread looping over itself in this manner that creates the blanket stitch.
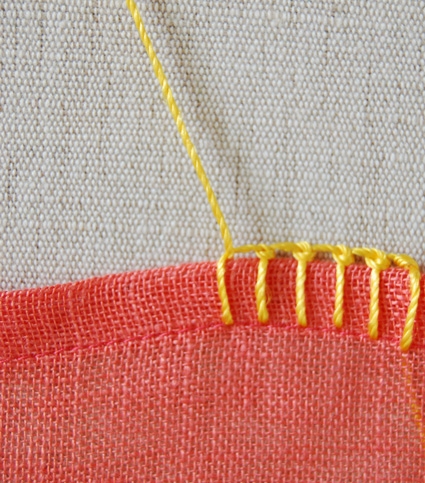
When you finish a length of thread leave a 5-inch tail and don’t tie any knots.
 When you are done with the entire row you will have a bunch of beginning and ending tails. Simply thread their ends onto the embroidery needle and pull them through the folded hem of the piece, thus hiding them.
Regardless of the stitch you use (or even if you choose to make up your own blanket stitch variation) you can start and end in this same manner!
Embroidery: Triple Blanket Stitch with a Knot

Then place the needle approximately 1/4-inch to the left of the third stitch at the very top of the fold as shown above to take a very shallow blanket stitch.
Pull the thread through this shallow stitch.

Then place your needle underneath this shallow stitch in-between the silk thread and the linen (but not sewing through anything). Place the needle over the working thread creating a little wrap as shown above.

Pull the needle through this wrap, thus creating a little knot as shown above.
Start your next series of three blanket stitches 1/4-inch to the left of this knot.

Repeat these steps until the end of the row.
Repeat for the other short side of the scarf.
Embroidery: Knotted Buttonhole Stitch
This stitch starts like a regular blanket stitch. Insert your needle in from the front to the back, catching the top loop as shown above.
Pull the thread to create a blanket stitch.

Place your needle underneath the top of the blanket stitch you just created and on top of the working thread in the same manner as for the blanket stitch- the difference being that you are now creating a little knot instead of a stitch.

Pull the thread creating a cute little knot at the top of the stitch.
Start your next stitch approximately 1/8-inch to the left of the previous one.

Repeat these steps to the end of the row.
Repeat for the other short side of the scarf.
Embroidery: Chevron Blanket Stitch

Start with a basic blanket stitch.
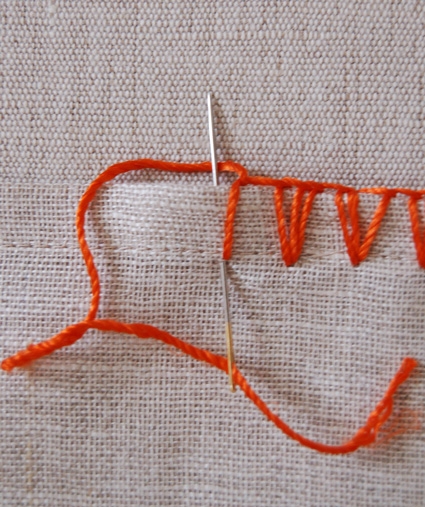
Take a second blanket stitch by starting in the exact same spot as the first but pull it out 1/16-inch to the left of the first , as shown above.

Take a third blanket stitch, starting it in the same spot as the first two and pulling it through 1/16- inch to the left of the 2nd stitch. This will create a little chevron shape as shown above.
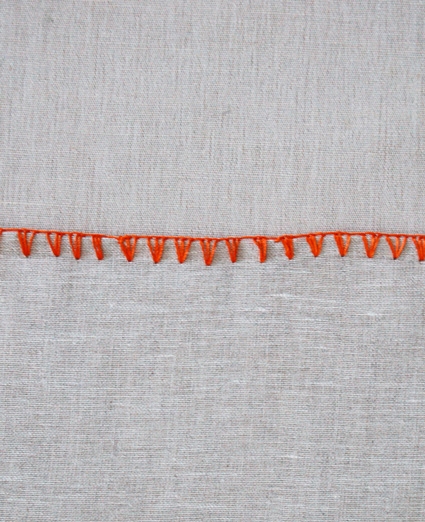
Start the next group of three stitches 1/8-inch from the previous one.
Repeat these steps to the end of the row.
Repeat for the other short side of the scarf.


I love the explanation of these techniques! Thank you for sharing. A great finishing touch and applicable to many embroidery projects!
for once, a mother’s day project that i think my mother will drool over! these are beautiful. cannot wait to try it out.
My goodness! This is a beautifully done tutorial! Thank you for your time and effort.
beautifully photographed reminder of these stitches, much nicer than looking up my foosty old embroidery book (I love it, but it's nearly 50yrs old and smells like it!).
Thanks for the great pictures of the stitches that are so much more clear than others I have seen. Although I once knew how to do these, I had forgotten and this is really appreciated.
LOVE the blanket stitch, but only knew how to do the basic. Thanks for sharing the other two!
me encanto nosaviacomo hacerlo gracias
I recently did a post on felt food and put a link to your blog for a great tutorial on the blanket stitch. Thanks for sharing. http://thewhetmans.blogspot.com/2014/01/felt-mini-oreo-tutorial.html
Beautiful tutorials, I love doing blanket stitch on alot of things I make,
My problem is starting a new piece of thread, I can't figure out
out how to blend it in where I left off
Hi Vicky-
To start a new length of thread you start sewing in the same stitching pattern, leaving a tail that you will weave in later. You might want to check out the "Embroider" section of our Felted Wool Hot Water Bottle Covers project, which goes into more detail about starting a new length of thread in a variation of a buttonhole stitch: https://www.purlsoho.com/create/the-purl-bee/2014/1/12/mollys-sketchbook-felted-wool-hot-water-bottle-cover.html
Thank you!
Molly
This is a lovely tutorial, very clear illustrations. I love the colour combination and fabric choices. I look forward to reading more from purl bee.
I love your tutorial really helped me I love to embroidery but it’s intimidating. Thanks for sharing.
Esse ponto me deu uma saudade imensa de minha mãe.Ela fazia em seus panos de cozinha esse ponto,e ficava uma graça.Gostei imensamente de entrar nesta página.Espero não perder você,Beijos carinhosos e continue nos ofertando lindos trabalhos.Bom dia.Maria Lucia Rodrigues Monfardine.
beautiful
I know you intended these to be scarves but they are so cool, I can see them all as table runners, place mats or napkins. So clean and beautiful. Thanks for the inspiration!
Beautiful tutorials. Sangat menginspirasi… terima kasih ya….thanks for sharing.
Hello from Indonesia.
I love your tutorials very much and want to stitch with you mam.
Beautiful stiches, I’m learning something that I could never do, when I was in grade school. In my time we had this class for about 3 yrs. My embroideries were horrible…now I can only remember, and laugh. Getting to the big numbers gives me some kind of validation. ..yes I can do it. Thank you for the tutorial.
Nice tutorial.
Thank you – clear instructions – easy to follow!
Should the reverse look exactly the same as the front? Not sure I am doing it correctly.
Hi Coral,
Thanks for writing in! Both sides of these lovely scarves should look pretty much the same!
Best,
Cassy
it looks so cool to me i love it
Me encantaría verlo pero no abre la aplicacion
Hi Almudena,
Thanks for reaching out and bringing this to our attention! I will be sure to pass this along to our team, and we will get the missing images back as soon as possible!
Warmly,
Gianna