Little Boy’s Tie
 This little boy’s Easter tie is quick but very well made and will brighten any Easter outfit. The tie is sewn almost entirely by hand, so if you don’t have a machine its easy to finish without one.

Designed by Purl Soho designer, Molly Schnick. Click here to see even more of Molly’s work!
Materials

- 3/4-yard Liberty of London Tana Lawn in Blue Cars
- 1/4-yard Moda Muslin in White
- 1/4-yard Sew in Stabilizer
- 1 spool of 100% cotton thread in a color that compliments your fabric
- Hand sewing needle
- Print, cut and tape together Little Boy’s Tie Templates, available here
Cut Front and Back Tie
Cut the 27-inch x 54-inch piece of Tana Lawn in half length-wise to create two 27-inch squares.
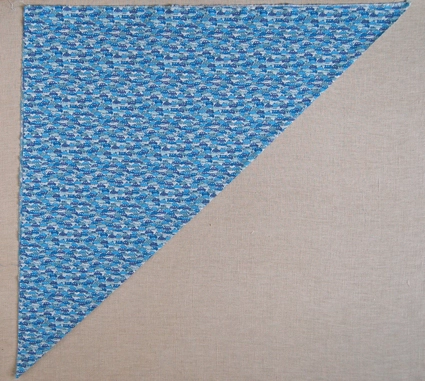
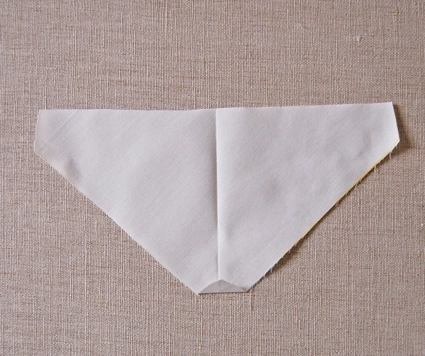
Take one of these squares and fold it in half diagonally as shown above and press it. This diagonal line is the bias fold.
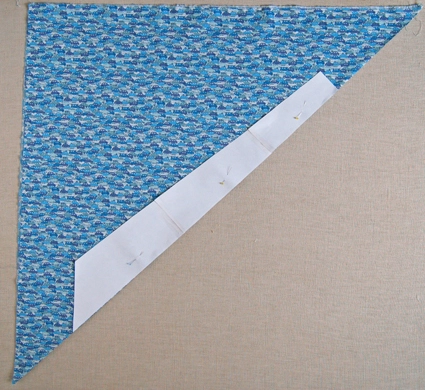
Place your Front Tie template piece along the diagonal fold where indicated on the template and pin. Make sure that the fabric print is oriented in the correct way, it is hard to tell from this picture but the cars are right side up.
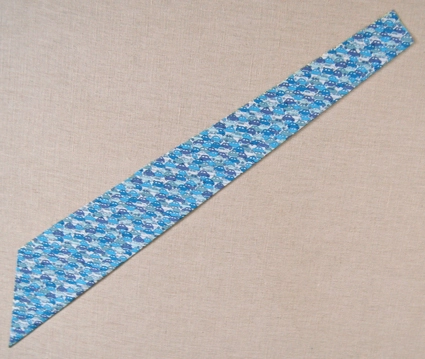
Cut out the Front Tie piece.
Cut Front Tie Lining and Back Tie Lining
Using the second 27-inch Tana Lawn square cut out the Back Tie in the same manner as above, along the bias fold.

Cut a 9-inch square of Muslin, fold it in half diagonally and press it. Place both the Front Tie Lining and the Back Tie Lining templates on the muslin, being sure to place the correct edge of the template along the fold as indicated on the template.
Cut Front Tie Interfacing and Back Tie Interfacing
From the Sew in Stabilizer interfacing, cut the Front Tie Interface and the Back Tie Interface pieces. Because the stabilizer is not woven you don’t need to worry about cutting it on the bias.
Prepare to Sew Tie
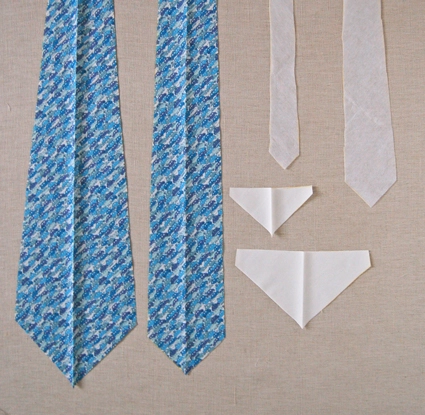
Open up your pieces, you will have:
- 1 Front Tie Piece
- 1 Back Tie Piece
- 1 Front Tie Lining
- 1 Back Tie Lining
- 1 Front Tie Interfacing
- 1 Back Tie Interfacing
Do not iron these pieces flat. You will need their middle markings for reference later.
Front and Back Lining
From the Front Tie Lining, fold the bottom tip up 1/4-inch and press it.

Fold the bottom sides of the lining in 1/4-inch each and press them into place. This will form a neat point at the bottom angle of the lining.
Repeat this step for the Back Lining.
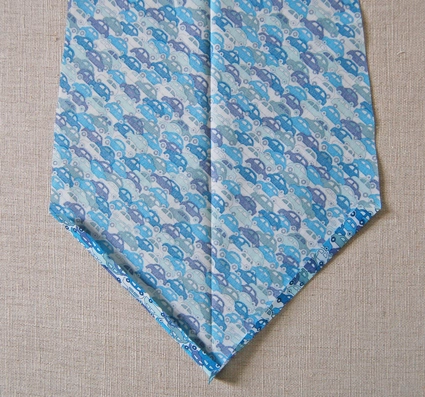
Fold the bottom edges of the Front tie in 1/4 and press them into place.
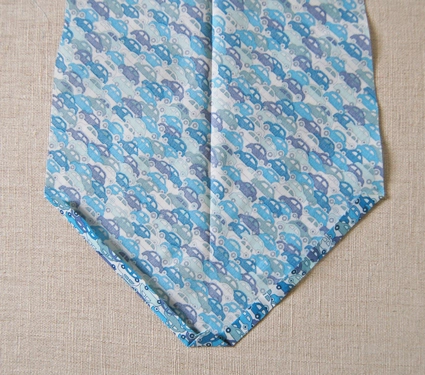
Fold the tip up 1/4-inch press it, and then fold in the sides to a neat point and press it again, as you did above with the lining pieces.
Repeat this step for the Back Tie.
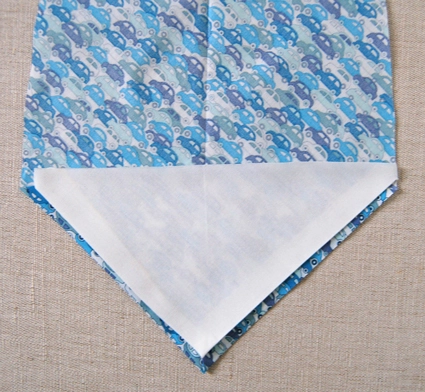
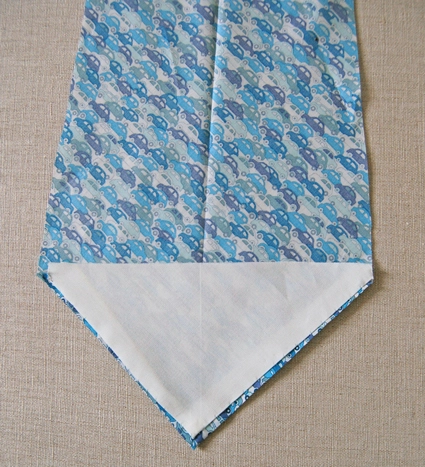
Place the Front Lining on top of the Front Tie end, wrong sides together. Make sure that the lining is contained within the borders of the end of the tie as shown above. It should be a little bit smaller than the tie end.

Pin the Lining in place

Sew the folded edges of the lining onto the tie end with a slip stitch. Sew only through the folded layer of the Tana Lawn- Do not sew though to the front of the tie. This is very similar to sewing on the binding of a quilt.
Please click here if you need a more in depth explanation of slip stitch.
It’s not necessary to sew the top of the lining, it will get enclosed within in the shaping of the tie.
Repeat the same steps to sew on the Back Lining.
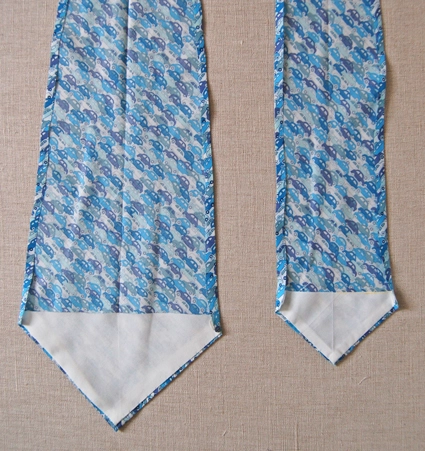
Sew the Halves Together

Place the square end of the Back Tie piece on top of and perpendicular to the square end of the Front Tie piece, right sides together, to form a right angle as shown above. Do the same for the interfacing pieces. Draw a diagonal line from right to left across this intersection, as pictured above in yellow. This will be your seam line.

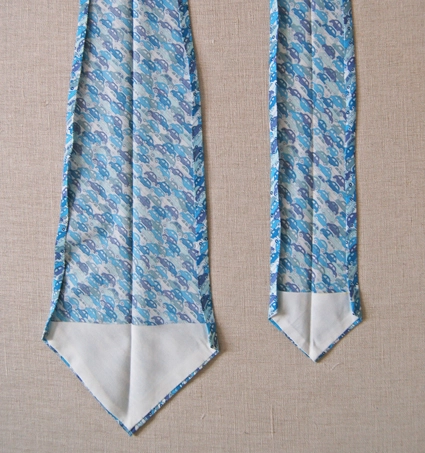
Sew the fronts and backs together along the seam line.
Trim off the excess fabric to 1/4-inch.

Press the seam open. It will be practically invisible on the right side since the print has so much going on!
Shaping the Tie
Fold in edges of the long sides 1/4-inch and press into place.
Fold again 1/4-inch and press.

Fold both edges in so they meet at the crease in the center of the tie and press.

Open up the sides and slip your interfacing in as pictured above. It should fit snugly inside the tie.

Now it’s time to close up the tie. Refold the edges, press them again and pin into place.
Sew Tie

The inside seam of your tie will be sewn by hand.
Please Note: I used red thread for the following steps, but only so the technique would be more visible. At home you should use thread that matches your fabric.
Tack the point where the two edges meet a few times before you start your seam.

The tie is sewn up with a different type of slip stitch than was used for sewing the lining:
- Start from the tack run your needle through the fold on the left side and come out about 1/2-inch above.
- Insert your needle directly across from where you came out into the right side and slide it up though the fold for a 1/2-inch.
- Then enter the left side directly across from where you exited the right side.
- Repeat
Once you do this a few times you will have a little ladder of stitches as shown above.

- Pull the stitches taut and they will almost disappear.
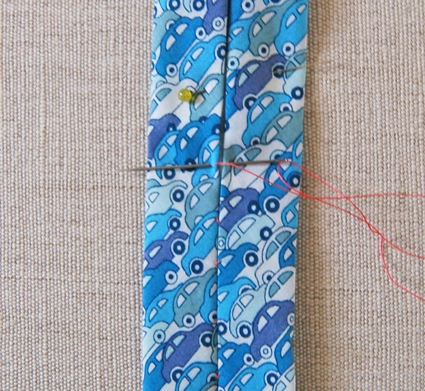
- When you get to the end of your length of thread take a couple of tacking stitches but this time sew though the interfacing as well, while making sure not to sew though to the front of the tie, which will hold the interfacing in place.
Sew the entire inside seam of the tie in this way.
Once you’re done, press the tie thoroughly to get rid of the middle seam and you’ll be finished! Enjoy! –Molly


Do you know how much smaller I would need to make it to fit a 1 year old?
Hi Mehnaz-
We don't recommend that you make this for a baby. Usually neck ties for babies are clip on or snap on because of the risk of strangulation.
Thanks for your question!
Molly
Hi Molly I made the tie! Love it. It was a great learning experience. I am so excited that I made a tie!!!!! Thank you so much for your wonderful tutorial. Here is a link to my blog where you can see the pics. Thanks, Linda
I don't know if I've commented before – but I found this pattern a few years ago and have come back to it every year to make a Christmas tie for my son. I just had to make sure I said thanks this year in case I haven't before 🙂
Hi!
I found a link to this tie on Pinterest and I just fell in love with it!! It looks adorable!
I have two questions for you though:
1- What age group do you think your tie fits? I will be making one for my son next Summer, he will then be the size of a 2,5yo toddler…
2- Would you by any chance know the reference of the fabric? I have found some blue cars Tana Lawn, but they don't look as blue as yours…
Thanks in advance for your help.
Cheers
Fred
I am so~in~love with this little boy's tie pattern!! I would just love to make one for Valentine's Day for my Grandson, Jack. I've been attempting for two days to print out the pdf and I am not having success. Do you have any ideas or recommendations for me?! I L-O-V-E everything you share with us here—amazing and wonderful and super nice! Sending you warm love from up here in Middlebury, Vermont!! xo
Hi Mary Ann-
What is the problem exactly? Can you see the PDF when you click on it? If not you might try opening it from a different web browser. If that doesn't work let me know and I can email you a copy of the PDF.
If you can see the PDF and it's just not printing then I'm not sure what to suggest. You might need to go to Kinkos (or someplace like it) to get it printed out for you.
Thanks for getting in touch!
Molly
Thanks for the perfect pattern and instructions.
I am a school librarian and one of my students is giving a speech to the library association on a children's book.
He wants to dress up and I thought I'd make him a tie with images of the book's character. Fabric isn't available so I'll be printing my own fabric using a computer printer and transfers and then make the tie out of that. He'll have a truly one of a kind memento of his big moment.
He is 9 years old so I'm not sure how well this pattern will fit him. I think I'm going to have to make it bigger. He is bigger than a five year old.
Dear Molly!
Just wanted to tell you that I was able to finally print out your sweet pattern! Thank you for getting back to me. And huge thanks for sharing your pattern!
I have made this tie for my grandson twice and I love it!! Thank you so much for sharing!!!
Thanks so much for this pattern! I saw it years ago, and saved the link, but just made one this weekend for Easter! While it definitely took a bit of time to do all the hand sewing, it turned out great! I added a bar in the back of the tie to keep the smaller end from swinging free, it worked great!
I used quilting cotton for the tie, and used a light weight iron on interfacing instead of sew-in, so that it wouldn't bunch if I ever had to wash it (being little boy's tie and all!). I am glad that I did that, as it has already been wadded up! It was easy to iron it flat again though, so it was fine in the end!
I will say that I love the double Windsor knot, but this tie was too short to do it with for my almost 7 year old. I could only do a single knot. I will be making this again, however, and am so glad that you also have a father's (adult) tie pattern as well!
Thank you so much for this pattern. I wanted to make a necktie for my 5 year old grandson, but was only finding clip on ties. This was so easy to make. Thank you!
This is the perfect pattern for a class gift for the boys in my daughter’s class. Will make matching corsages out of yoyos and buttons for the girls. Thanks.
Non riesco a scaricare il cartamodello
Hi Maria,
Thank you for writing in! The direct link to the pattern for this tie can be found here: https://www.purlsoho.com/create/wp-content/uploads/2009/03/littleboystie.pdf
Best,
Cassy
Olá! Primeiro queria agradecer pelo molde, procurei por muito tempo um para fazer uma gravata assim pro meu filho e amei! Mas o molde do forro ficou bem menor que a gravata no comprimento, tenho que aumentar? Obrigada!
Hi Daniela,
Thanks so much for the kind words! We haven’t had any problems with the tie losing its shape or being difficult to tie with the shorter lining, but if you prefer, you could certainly cut the lining to match the full length of the tie.
I hope that helps!
Julianna
Do you have a pattern for a Bow Tie?
Hi Elizabeth,
Thanks for reaching out! We don’t have a bow tie pattern, but thank you for expressing your interest!
Warmly,
Gianna