

Wedge Wrap
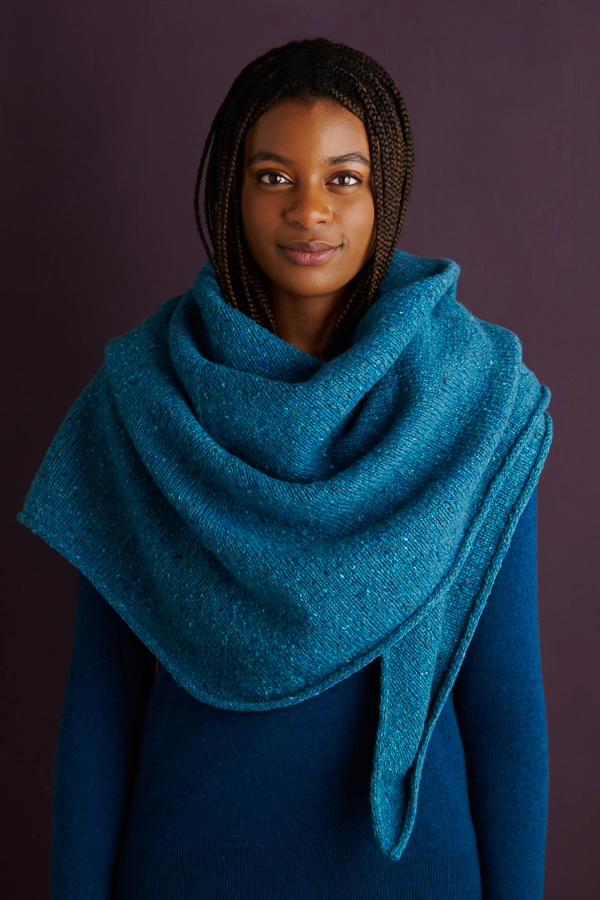
With its quiet ease and timeless beauty, our Wedge Wrap is one for the ages.

You begin the Wedge Wrap with a stockinette variation of a “garter tab cast on.” This is an easy, tidy way to start a top-down shawl with just a few stitches at the center back.
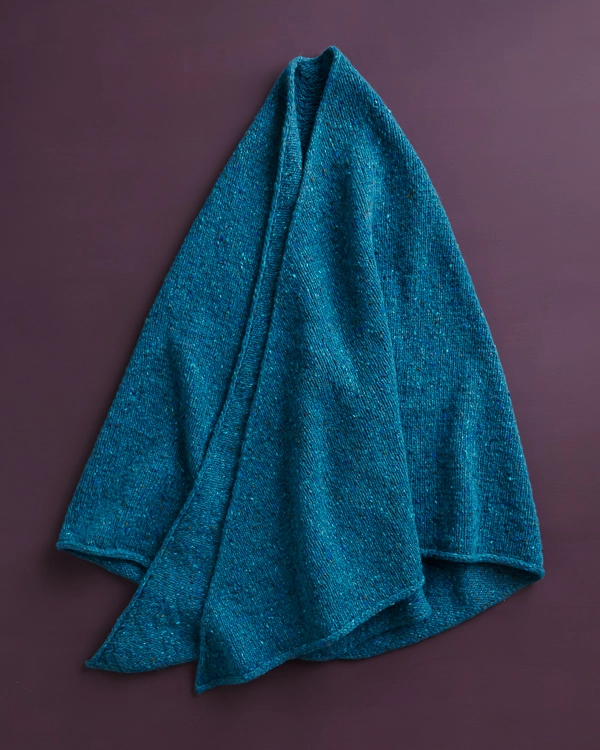
Once you’ve worked the tab, simple increases widen each “wedge,” and the finishing touch is an I-cord bind off that adds a bit of structure to the lower edge.

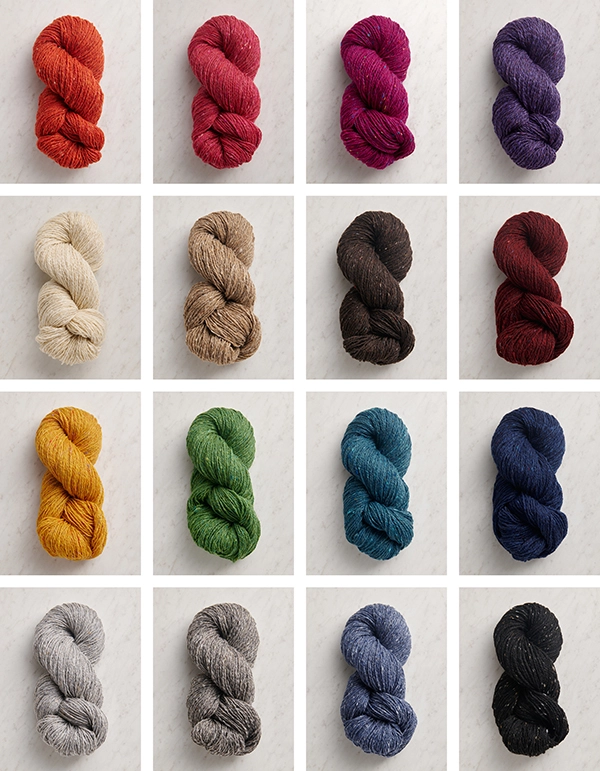
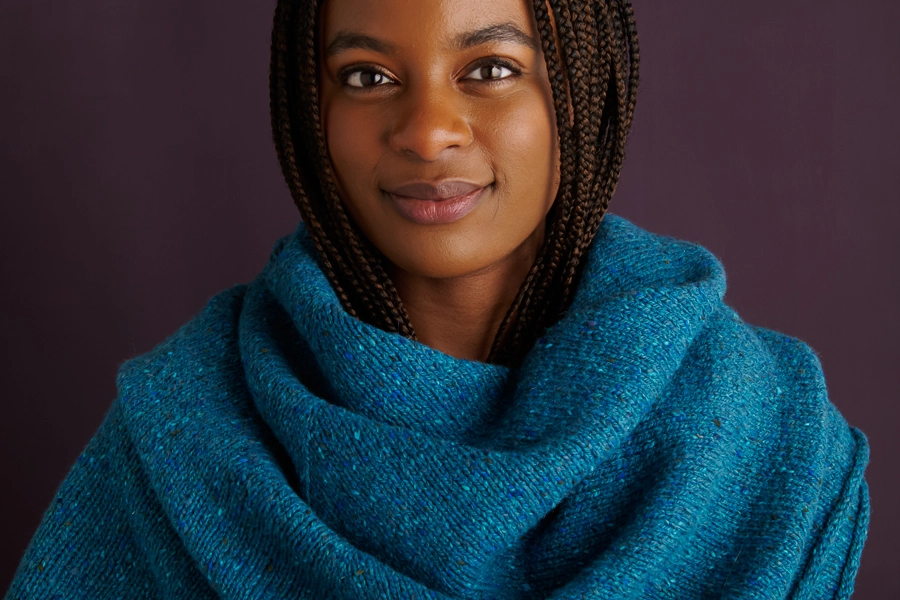
Full of depth and character, Hedgerow brings tons of charisma to simple stockinette stitch. It is made in County Donegal and features that region’s classic “burrs,” which are small, colorful bits of fiber speckling the yarn. We depart from traditional Irish tweed yarn by softening the fibers with a mix of 93% merino wool, 3.5% cashmere, and 3.5% mulberry silk.

Pick up five skeins of beautiful Hedgerow to make your own Wedge Wrap, embracing the evening light as we did with Turquoise Dusk, or choosing a favorite color of your own!
Yarn lovers, if you adore the yarn used in this project, you’ll love exploring all of our other yarn collections! Discover over 45 thoughtfully designed yarns in nearly every natural fiber and in every spectacular color you can imagine. Only available here at Purl Soho’s online yarn store, where every skein is created with care and your creativity in mind!

Designed by Purl Soho designer, Keith Foster. Click here to see even more of Keith’s work!
Share your progress and connect with the community by tagging your pics with #PurlSoho, #PurlSohoBusyHands, #PurlSohoWedgeWrap, and #PurlSohoHedgerow. We can’t wait to see what you make!
Materials
- 5 skeins of Purl Soho’s Hedgerow, 93% merino, 3.5% cashmere, and 3.5% mulberry silk. Each skein of this worsted/aran weight yarn is approximately 243 yards/ 100 grams; approximately 1165 total yards required. We used the color Turquoise Dusk.
- US 6 (4 mm), 32- or 40-inch circular needles
- Stitch markers
- Scrap yarn and a crochet hook for Provisional Cast-On
GAUGE
20 stitches and 28 rows = 4 inches in stockinette stitch
SIZE
- Finished Depth from Cast-On Edge to Bind-Off Edge: 30½ inches
- Finished Wingspan: 70½ inches
NOTES
PROVISIONAL CAST ON
For assistance, including how to put live stitches back onto needles, please visit our Provisional Cast-On: A Two-Step Method Tutorial.
SLIP STITCHES
Slip all slipped stitches knitwise with yarn in back on right-side rows and purlwise with yarn in back on wrong-side rows.
PATTERN
STOCKINETTE TAB CAST-ON
With scrap yarn and using a Provisional Cast-on (see Notes), cast 3 stitches onto circular needles.
Set-Up Row (wrong side): P3.
NOTE: You might find it helpful to place a removable marker or scrap yarn on the last stitch of each Row 1 in this section, then when you need to pick up stitches later, simply pick up 1 stitch for each marker!
Row 1 (right side): Slip 1 (see Notes), k2.
Row 2: P3.
Repeat Rows 1 and 2 five more times.
NOTE: For some tips on picking up, please visit our Picking Up Stitches Tutorial.
Next Row (right side): Slip 1, k2; rotate piece 90 degrees clockwise and continuing with same needles, pick up and knit 6 stitches evenly to end of edge; rotate piece 90 degrees clockwise again, carefully undo Provisional Cast On and slip 3 stitches onto left needle, k3. [12 total stitches]
BODY
Set-Up Row (wrong side): Slip 1 through back loop (tbl), p2, place marker (pm), p1, pm, p4, pm, p1, pm, purl to end of row.
Row 1 (right side): Slip 1, k2, slip marker (sm), make 1 left (m1L), knit to next marker, make 1 right (m1R), sm, knit to next marker, sm, m1L, knit to next marker, m1R, sm, knit to end of row. [4 stitches increased]
Row 2: Slip 1 tbl, purl to end of row, slipping markers as you come to them.
Rows 3 and 4: Repeat Rows 1 and 2.
Row 5: Slip 1, k2, sm, m1L, knit to next marker, m1R, sm, k1, m1L, knit to 1 stitch before next marker, m1R, k1, sm, m1L, knit to next marker, m1R, sm, knit to end of row. [6 stitches increased]
Row 6: Repeat Row 2.
Repeat Rows 1–6 thirty-four more times, until piece measures approximately 30¼ inches from cast-on edge, ending with Row 6. [502 stitches]
I-CORD BIND OFF
With right side facing, use a Cable Cast On to cast 3 stitches onto left needle.
Bind-Off Row: *K2, knit 2 together (k2tog) tbl, slip 3 stitches back to left needle, repeat from * until last 4 stitches, bind off 1 stitch, k2tog tbl, pass loop from bound off stitch over.
FINISHING
Weave in all ends and gently wet block to finished dimensions.

Learn About Hedgerow + All Our Beautiful Yarns
Our Hedgerow yarn makes this project extra special! Created in County Donegal with 93% merino wool, 3.5% cashmere, and 3.5% mulberry silk, Hedgerow has a softer hand feel than strictly traditional Irish wool, while still celebrating the aesthetic and integrity of Donegal tweeds. A classic worsted/aran-weight yarn, Hedgerow brings joy to every stitch!
More Free Knitting Patterns
- Be sure to explore our collection of (mostly free!) Hedgerow knitting patterns and cast on!
More Worsted/ Aran-Weight Yarns
- Shop our entire collection of worsted/aran-weight yarn (What does worsted-weight yarn mean, really? Our guide to worsted-weight yarn will answer your questions and more!)
- If you want to use a different yarn, be sure to take the time to get the correct gauge. Need help? Check our All About Gauge Tutorial!
More Yarns With Similar Fiber
- Shop merino wool yarn
- Shop cashmere yarn (What makes cashmere so special? Learn all about this amazing fiber in our guide to cashmere yarn!)
- Shop silk yarn
Looking for more inspiration? Explore all of our free knitting patterns and knitting tutorials, buy one of our many knitting kits and yarn bundles, and shop for beautiful yarn. We have over 35 gorgeous natural fiber yarns in 100’s of magnificent colors, designed to bring integrity, beauty, and joy to your next knitting project and only available at Purl Soho!


hi so with the wedge wrap you need 5 skeins and it is $28 a skein ….is this correct?
Hi Janice,
Thanks for writing in! Yes, that is correct! To make this project, you’ll need 5 skeins of Hedgerow and each skein is $28. Let us know if you have any other questions!
Kindly,
Cat
hi when you say rotate 90 degrees are you knitting flat with the circular needles?
Hi Mary,
Thanks for reaching out. Yes, you will be working flat at that point in the pattern! This entire pattern is actually worked flat, even though it uses circular needles. That’s because you’ll eventually have a whole lot of stitches on your needles!
All the best,
Lili
Hello, I made this, also in a merino wool and it’s a great piece, falling on the shoulders exactly like it should. I’m going to wear it a lot this winter ! Thanks for this very nice and easy, yet really classy, pattern.
Hi there — just in case you may not know this — virtually all the images on this page are blank boxes with a small, blue question mark in the middle. Makes it really difficult to get any idea of what this shawl looks like.
I find the same problem with most of the images I get when I receive my email from your site. (Sad Face emoji)
Hi Roberta,
Thank you for reaching out. We’ve been aware of this glitch happening for a few people, and we’re so sorry for the trouble! Can you let us know what device (e.g. computer, phone, tablet) you’re accessing our website from and what browser you’re using? In the meantime though, I have a few suggestions for how you could resolve this more quickly so that you can view the yarn:
First, I would recommend clearing the cookies in the settings of your browser. If you have any trouble doing this or are not sure how, I’d be happy to send over some simple instructions for how to reset them so everything should run smoothly again. If that doesn’t work, then another option would be to try accessing our website from a different browser or device.
I’ll keep an eye out for your reply with more details, and please let me know if you have any other questions or concerns! Again, we’re so sorry for the inconvenience this issue has caused.
All the best,
Lili
I have the same issue with my iMac.using Safari
Carol
Hi Carol,
I’m so sorry about that! Have you tried my suggestion of clearing the cookies in the settings of your browser yet? For Safari, you would just follow these steps:
1. Go to the Safari app on your Mac.
2. Choose Safari > Settings, then click Privacy.
3. Click Manage Website Data.
4. Select one or more websites, then click Remove or Remove All.
Let me know if that solves the problem, or if you’re still experiencing it!
All the best,
Lili
It didn’t work.
I’m so sorry to hear that! Would you mind reaching out to us directly by sending an email to [email protected]? That way, we can help out better from there!
All the best,
Lili
Is this pattern for a beginner?
Hi Y,
I’d say that this pattern would be an exciting challenge for a beginner knitter! It would be a great “next step” pattern after completing a very simple one to start. We know that learning new techniques enriches the process of making, I’ve included a list of skills that this pattern requires, as well as links to any tutorials we have on them:
Picking up stitches
Slipped stitches
Make 1 increases
Cable cast-on
Knit 2 together
I hope this helps you get started, and please don’t hesitate to reach out to us if any questions come up as you knit!
All the best,
Lili
You recently posted directions on how to print the pattern without all the extra photos. Of course I can’t find it now. Could you post it again please? Thank you!
Hi Nancy,
For sure! Here are the instructions on how to print any of our free patterns: If you’re on your computer, you’ll find a “print” icon in the right column just below the “Save To Favorites” button. If you’re on a mobile version of the site, you will find the “print” icon below the pattern and above the comments.
Click on this button, and a window will pop up where you can delete whichever parts of the pattern you don’t want to print. When you hover over any image or a text block, it will be highlighted in yellow and a “trash” icon will appear. Just click on this icon to delete anything that’s not necessary to the pattern! For example, you may decide to shorten the pattern by omitting certain images or the list of materials. Then, just click on the “Print” button in the upper left-hand corner of the pop-up window!
All the best,
Lili
Hi Lili, I just printed the pattern per your instructions and the printing didn’t stop at the margins. I print to this printer all the time and have never experienced this problem. Any suggestions? Thank you!
Hi Jennie,
We’re so sorry that function didn’t work for you! Could you please send a photo of the issue you are encountering to [email protected] ? That way we can better visualize what’s going on and assist you from there!
All the best,
Gavriella
Question about the slip stitches. In the Notes, it says to “Slip all slipped stitches knitwise with yarn in back on right-side rows and purlwise with yarn in back on wrong-side rows.” But in the written directions, it says to Sl 1 tbl on the wrong side. Slipping purlwise wyib is not the same as slipping tbl as I was taught it. Which is the correct instruction?
Hi Amy,
That’s a great question! You’re correct that slipping a stitch wyib/wyif is completely different than slipping a stitch through the back loop (tbl) or through the front loop. Because the position of the working yarn is independent of which leg/loop you slip the stitch through, both are applicable to each slipped stitch. By default, you will slip all slipped stitches knitwise wyib on the right side and wyif on the wrong side, and if the pattern says to slip it tbl, you’ll also do that. So for example, on the Set-Up Row (which is a wrong side row), you will slip the first stitch knitwise with yarn in front through the back loop. Hope this helps clarify things!
All the best,
Lili
Oooohhhhh! Got it now, thank you!!