Two-Piece Woven Bag
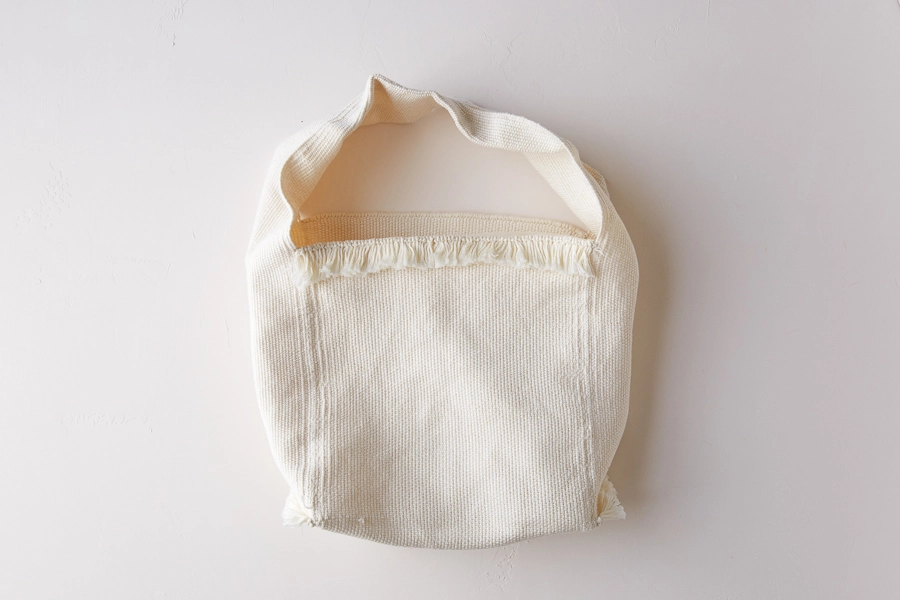
So visually alluring and tactiley pleasing, our Two-Piece Woven Bag serves as a daily reminder of the beauty in natural materials and handmade objects.

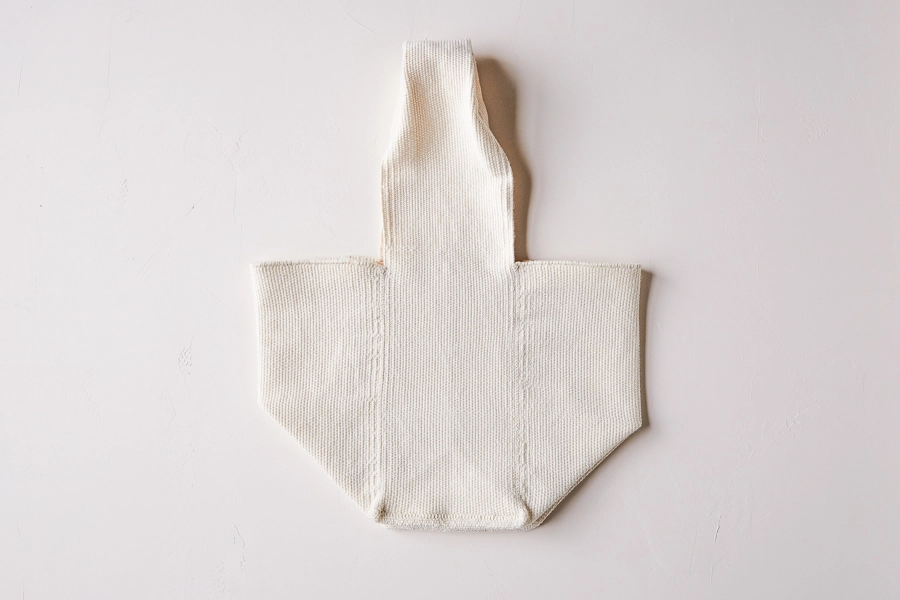
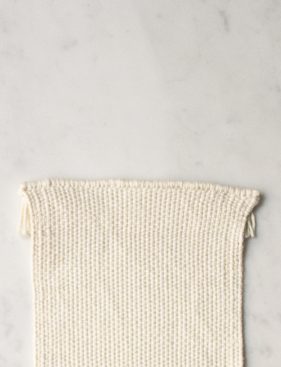
The eponymous “two pieces” are two woven strips that you whip up on Schacht Spindle Co’s Cricket Loom, a super simple rigid heddle loom that fits right on your kitchen table. Woven in a nice, dense weft-faced plain weave, you sew the two strips together to create this sturdy boxy tote.
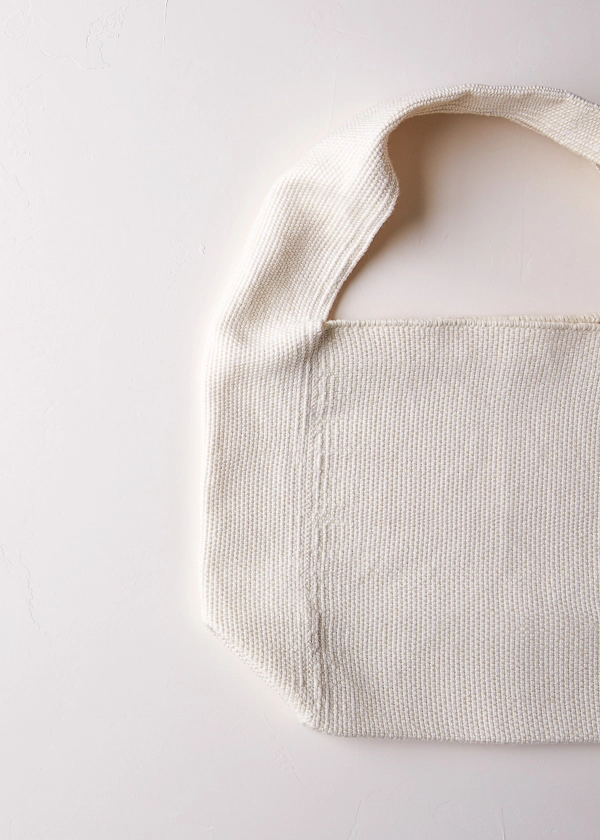
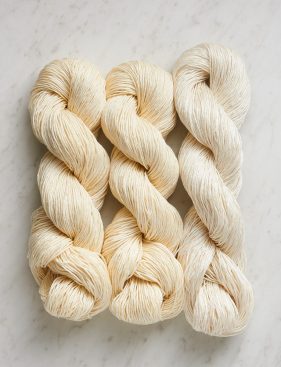
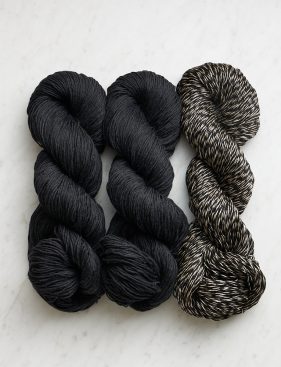
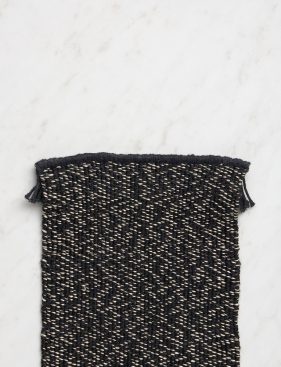
For the warp we used our Cotton Pure and for the weft our Field Linen, both made for wear. Use them together to construct our Two-Piece Woven Bag, shown in three classic palettes: Coral White (shown here), Salt Marsh, and Black Sand.
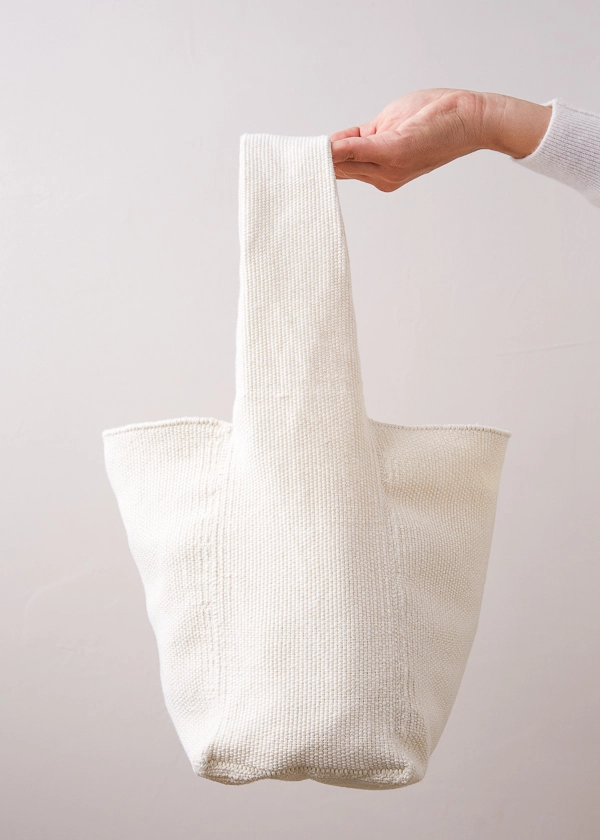
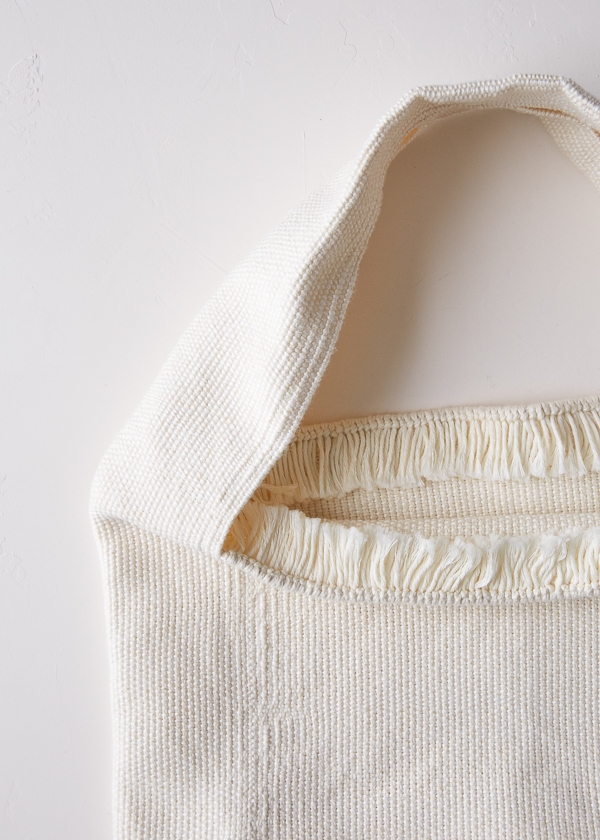
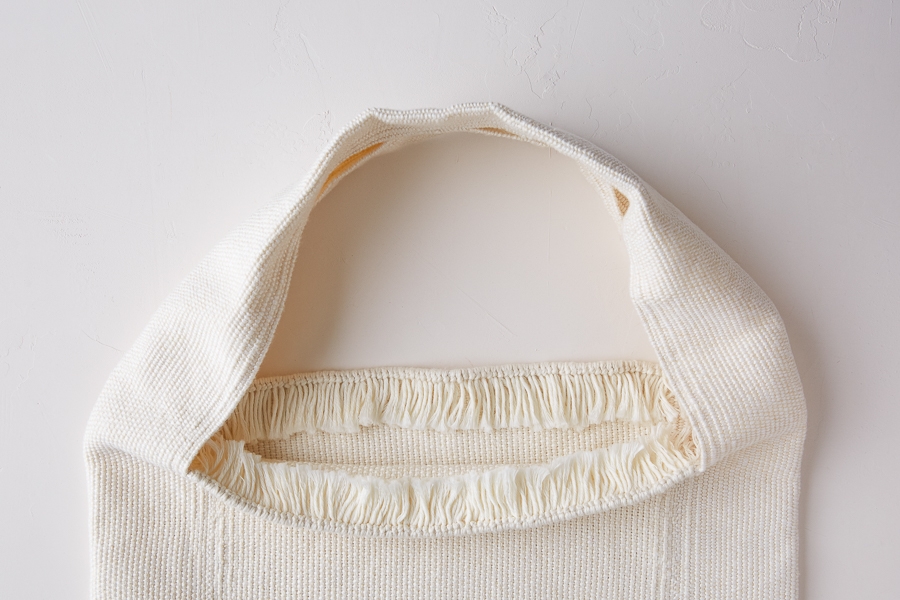
With its seriously chic shape and pretty fringe detail on the inside lip, we love the freshness and originality of this little beauty. It’s also pretty amazing what you can make with your own two hands!
Share your progress and connect with the community by tagging your pics with #PurlSoho, #PurlSohoBusyHands, #PurlSohoTwoPieceWovenBag, #PurlSohoCottonPure, and #PurlSohoFieldLinen. We can’t wait to see what you make!
Designed by Purl Soho designer, Jake Canton. Click here to see even more of Jake’s designs!
Materials
To weave your very own Two-Piece Woven Bag, you will need…
- Warp Yarn: 2 skeins of Purl Soho’s Cotton Pure, 100% organically grown cotton. We used Egret White.
- Weft Yarn: 1 skein of Purl Soho’s Field Linen, 100% linen. We used Queen Anne’s Lace.
We’ve also put together two other pretty palettes for inspiration…
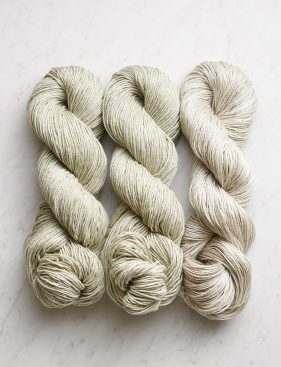
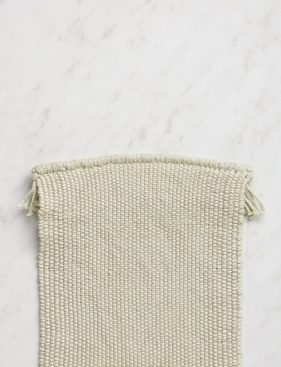
Salt Marsh
Warp Yarn: Cotton Pure in Silver Fern
Weft Yarn: Field Linen in Silver Thistle
Black Sand
Warp Yarn: Cotton Pure in Black Sand
Weft Yarn: Field Linen in Black Willow
You may also need…
- Schacht Spindle Co’s 15-inch Cricket Loom (and the 8-dent, 15-inch Reed that comes with it)
- A tapestry needle. We used John James size 20 tapestry needle.
- A needle threader. We used Muriel Yarn Needle Threader.
- Schacht Spindle Co’s Tapestry Beater
Structure
Weft-Faced Plain Weave
Warp For Front + Back Panel
Warp Length: 52 inches
Warp Ends: 86
Width in Reed: 10 ¾ inches
Ends Per Inch (E.P.I.): 9 ½
Picks Per Inch (P.P.I.): 12
Warp For Strap Panel
Warp Length: 65 inches
Warp Ends: 48
Width in Reed: 6 inches
Ends Per Inch (E.P.I.): 9 ½
Picks Per Inch (P.P.I.): 12
Size
- Finished Dimensions of Woven Strips:
- Front + Back Panel: 9 inches wide x 25 inches long
- Strap Panel: 5 inches wide x 37 inches long
- Finished Dimensions of Bag:
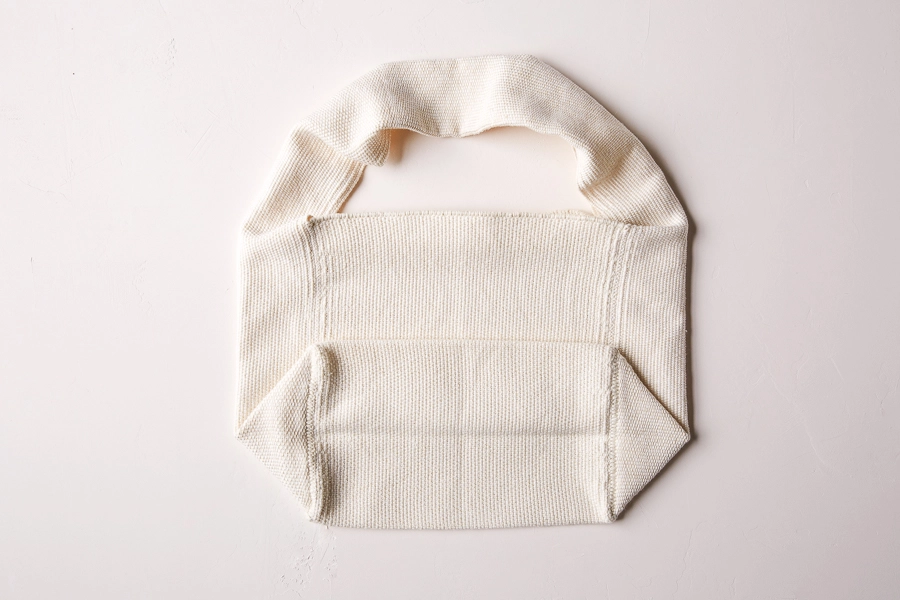
- Front/Back Panel of Bag: 9 inches wide x 10 inches high
- Base of Bag: 9 inches wide x 5 inches deep
- Side Panels: 5 inches deep x 10 inches high
- Straps: 5 inches wide x 17 inches long, with an 8 ½-inch handle drop
Notes
Construction
You will weave this bag in two panels that will each require its own warp.
Fabric
The fabric for this bag is very tightly woven. To achieve such a dense fabric beat each row two or three times, using more force than usual. The weft threads in the middle of the woven panel may require some manual beating to keep the threads aligned. Use your fingers or a Tapestry Beater to beat down the weft in the center of the panel as needed.
Cricket Loom Tips
Cricket Looms come with a very user-friendly instructional booklet that walks you through every step of the weaving process, from assembling the loom to tying the fringe. For even more guidance, check out our Cricket Loom Tips.
Pattern
Front + Back Panel
Warp The Loom
NOTE: One warp end refers to two strands of the Warp Yarn. When warping the loom, thread the warp through every slat and every hole of the reed. The two strands of yarn are treated as one warp end throughout the weaving.
Set up the warping peg 52 inches from the back of the loom. Note that, at this point, the back of the loom is clamped to the far edge of the table and so is the side farther away from the warping peg.
Using the 8-dent reed that comes with the Cricket Loom and the Warp Yarn, begin threading the heddle by pulling the first loop of yarn through the 8th slat from the right end of the reed.
Working from right to left, thread the Warp Yarn through the next hole of the dent. Continue to thread every slat and every hole of the reed until you have a total of 86 warp ends, i.e. 43 slats and 43 holes, each threaded with 2 strands of yarn.
Follow the Cricket Loom instructions to wind the warp onto the back beam and tie on. Ignore the instructions for threading the warp through the reed. For this project, there is no need to do this step since you already threaded the reed. To finish, tie the warp onto the front apron bar, leaving about 12 inches of loom waste yarn for finishing.
Weave
With scrap yarn, weave a couple of inches until the warp threads are evenly spread out.
Beginning with the reed in the up position, pass the shuttle through the shed from left to right. (There is no need to leave a long tail for finishing.)
Continuing with the Weft Yarn, weave in weft-faced plain weave for 25 inches, beating each row with extra vigor two or three times to create a weft dominant plain weave (see Notes).
Cut the Weft Yarn, leaving a 15-inch tail for finishing.
Cut the Warp off the loom leaving at least 12 inches of warp for finishing.
Strap Panel
Warp The Loom
NOTE: As for the Front + Back Panel, one warp end refers to two strands of the Warp Yarn. When warping the loom, thread the warp through every slat and every hole of the reed. The two strands of yarn are treated as one warp end throughout the weaving.
Set up the warping peg 65 inches from the back of the loom. Note that, at this point, the back of the loom is clamped to the far edge of the table and so is the side farther away from the warping peg.
Using the 8-dent reed that comes with the Cricket Loom and the Warp Yarn, begin threading the heddle by pulling the first loop of yarn through the 18th slat from the right end of the reed.
Working from right to left, thread the Warp Yarn through the next hole of the dent. Continue to thread every slat and every hole of the reed until you have a total of 48 warp ends, i.e. 24 slats and 24 holes, each threaded with two strands of yarn.
Follow the Cricket Loom instructions to wind the warp onto the back beam and tie on. Omit the instructions for threading the warp through the reed, then tie onto the front apron bar, leaving about 12 inches of loom waste yarn for finishing.
Weave
Weave as you did the Front + Back Panel for 37-inches.
Cut the Warp off the loom leaving at least 12 inches of warp for finishing.
Finish
Hem The Woven Panels
First establish which side of the Strap Panel will be the outside of the bag, i.e. the right side, and which will be in the inside of the bag, i.e. the wrong side.
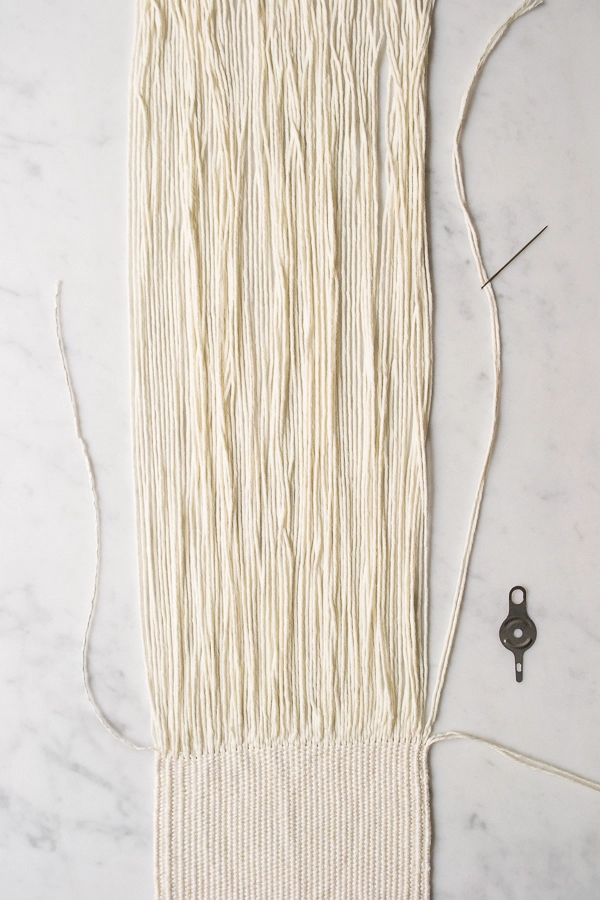
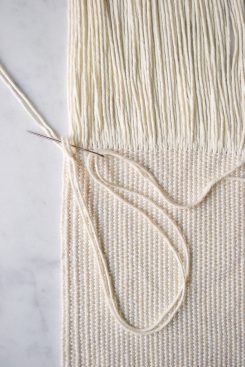
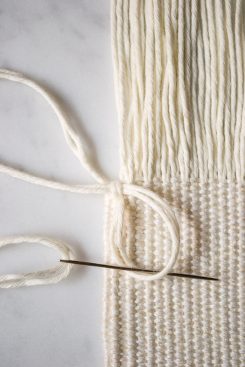
Thread a tapestry needle with the second warp end from the right (remember that this is 2 strands of the Warp Yarn).
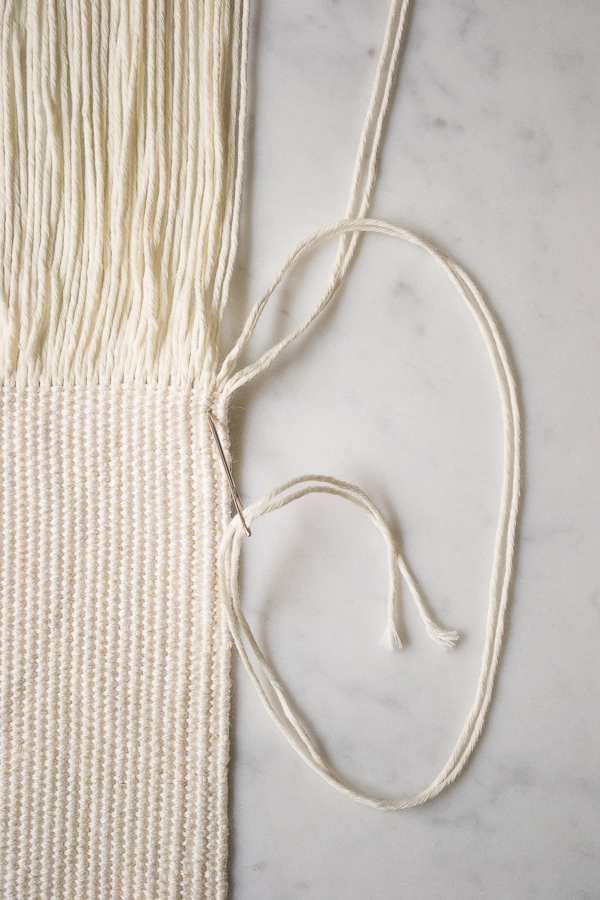
With the right side facing you and orienting the Strap Panel vertically, insert the tapestry needle, from right to wrong side, 6 weft rows down and in line with the threaded warp end.
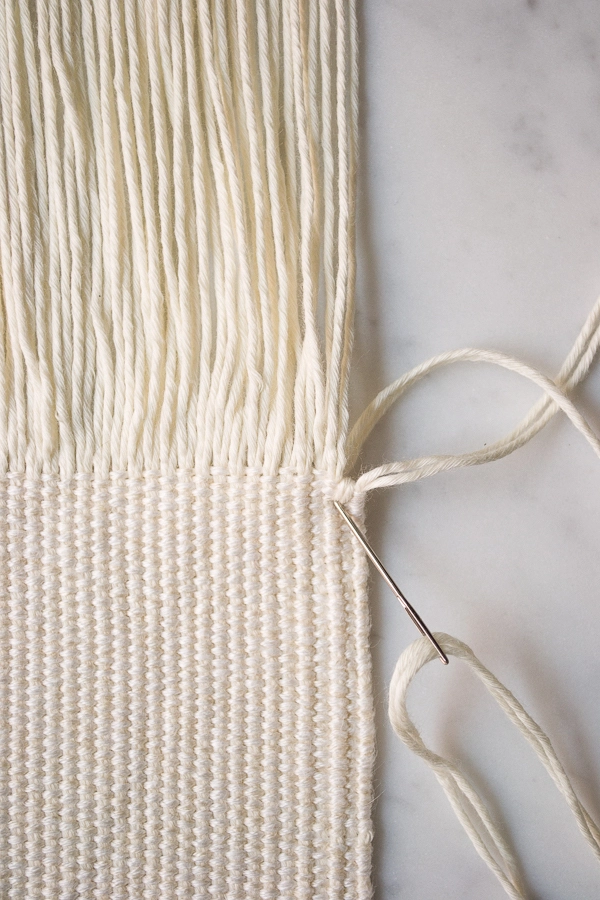
Bring the tapestry needle, from wrong to right side, up over the top of the Strap Panel and insert it back into the same spot as the previous step. Make sure the 2 strands of Warp Yarn are neat and untwisted, and do not pull them tight. Instead, leave a small loop.
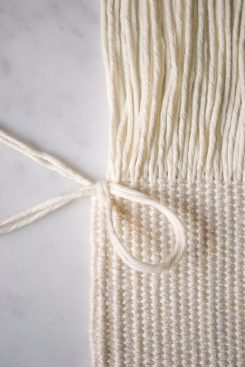
Turn the Panel over, and insert the needle from right to left through the loop you just created and pull through, leaving another small loop. Pull on the second loop to tighten the first one.
Now thread the tapestry needle through the remaining loop and pull tightly to create a small knot. If the knot is sticking out a little, pull each strand of the Warp Yarn individually to tighten up the knot so it’s nice and tidy.
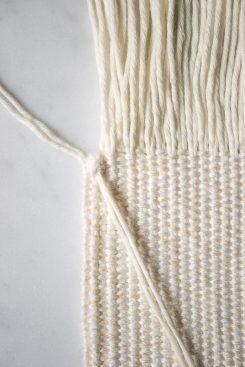
Flip the Strap Panel over, right side facing you, and continue wrapping and tying each warp end, moving from right to left until the last warp end. Now all the warp ends are secure except the first and last ends.
For the first and last warp end, repeat the knotting technique, but instead of bringing the needle over the top of the Panel, bring it around the selvage side.
Weave in the Weft Yarn tail.
Repeat this process with the other end of the Strap Panel and with both ends of the Front + Back Panel.
Once all edges of the Panels are finished, soak the Panels in warm water for about 15 minutes, squeeze out the excess water, and lay them flat to dry.
Cut the warp ends, leaving a 1-inch fringe.
Seam The Bag
Attach One End Of The Strap Panel
Lay the Front+ Back Panel flat with the right side facing you, oriented vertically. Place a safety pin or stitch marker 10 inches from the top edge on both the right and left selvages. Then do the same 10 inches from the bottom edge.This marks 5 inches at the center of the Panel, which will become the base of the bag.
With the right side of the fabric facing you, align one end of the Strap Panel with the 5-inch center space of the Front + Back Panel at the right selvage.
Mattress Stitch the end of the Strap Panel to the 5-inch space. Here’s how…
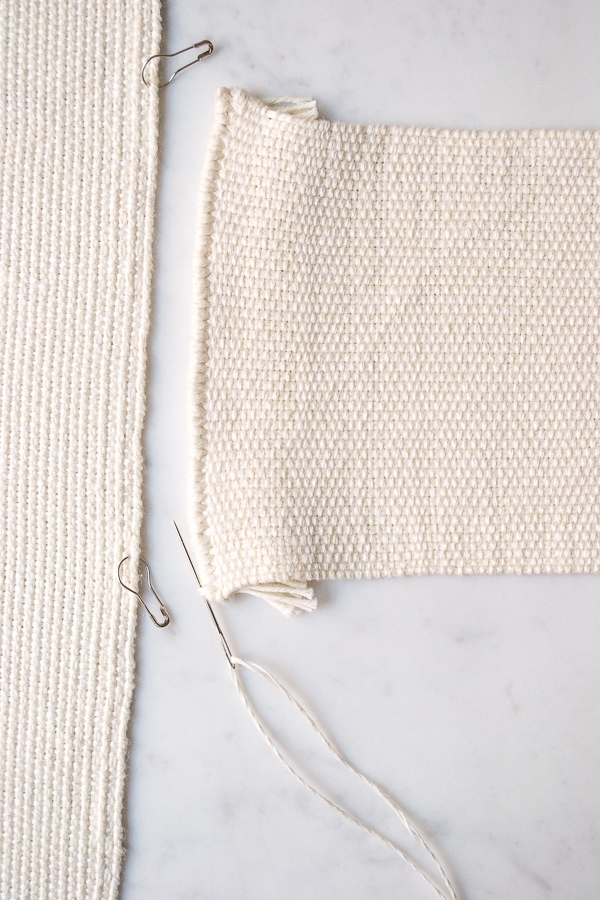
Step 1: Thread a 2-yard piece of Weft Yarn onto a tapestry needle. Sew the needle through the first wrap end at the bottom edge of the Strap Panel. Leave a 30-inch tail for seaming later.
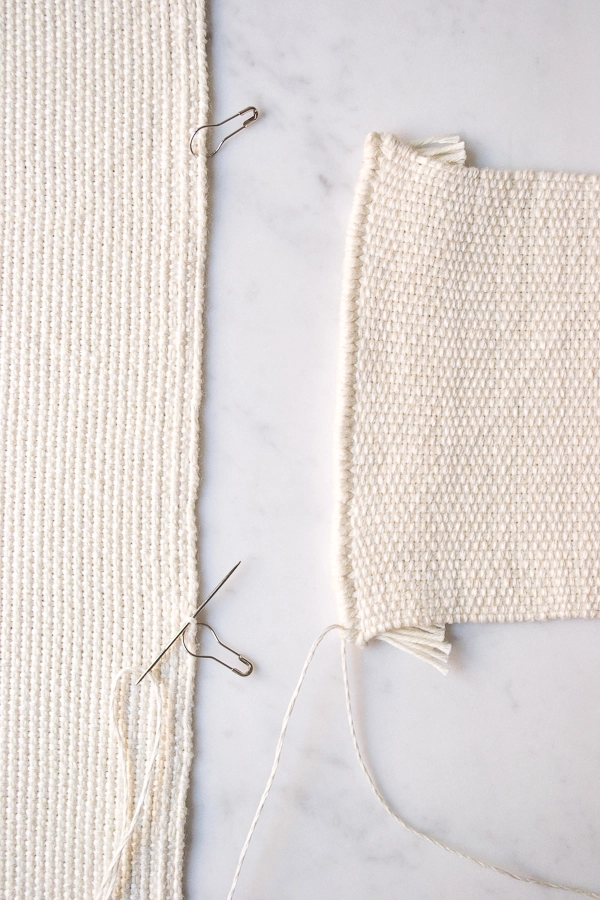
Step 2: Sew the needle through the first selvage stitch directly above the marker on the right edge of the Front + Back Panel.
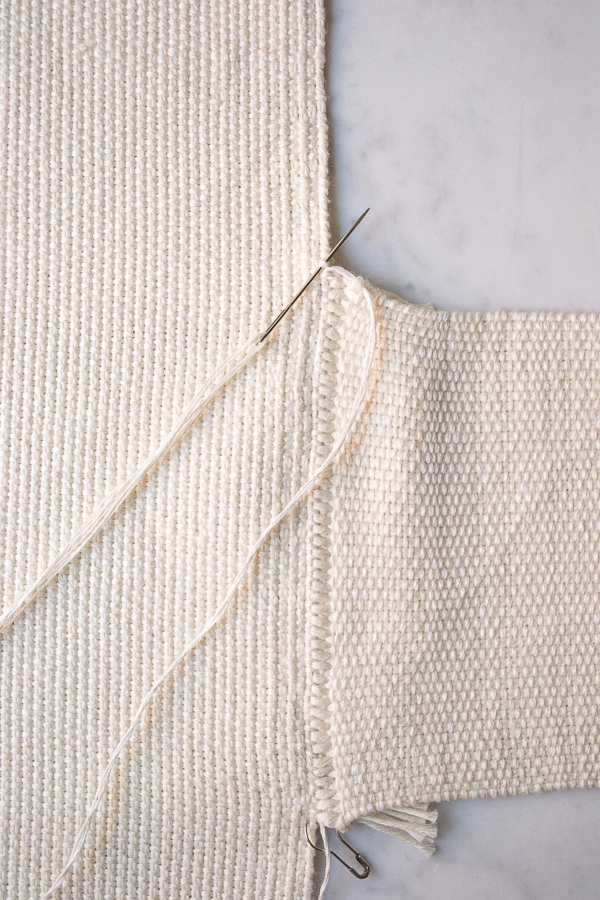
Step 3: Sew the needle through the next wrap end on the Strap Panel, directly above the one from Step 1.
Continue seaming the two Panels back and forth like this until you have seamed across the entire end of the Strap Panel. Do not cut the yarn.
NOTE: Just like mattress stitch seam in knitting, the seaming can be left loose and then pulled tight periodically as you progress.
Turn The First Corner
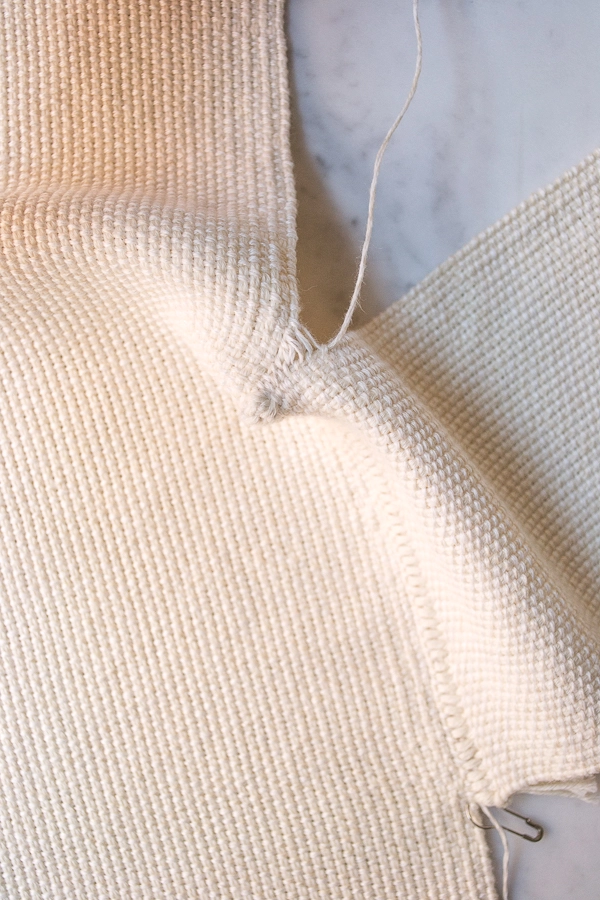
With the same yarn threaded on the tapestry needle, continue by mattress stitching the top edge of the Strap Panel to the right selvage of the Front + Back Panel. This will create a crease that becomes a corner.
Once you reach the top of the Front + Back Panel, stitch through the top corner 2 or 3 times to tack it down. Then insert the tapestry needle into the warp ends at the top inside edge of the bag, leaving a small loop. Insert your tapestry needle though the loop and pull tight to create a knot, the same way you created the knots for the warp ends. Weave the end into the seam.
Turn The Second Corner
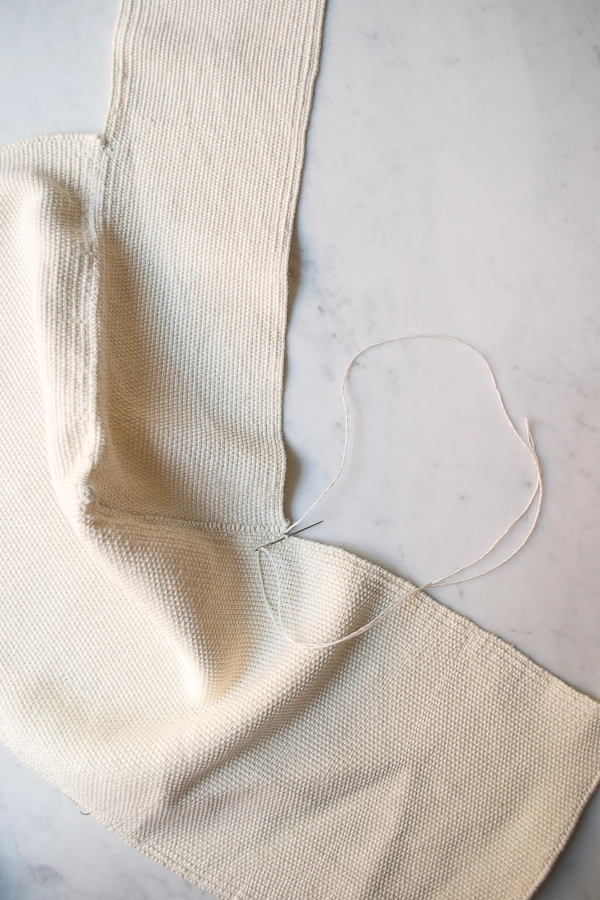
Thread the 30-inch tail that was left at the start of the Strap Panel seam onto a tapestry needle. As for the first corner, mattress stitch the bottom of the Strap Panel to the remaining right selvage of the Front + Back Panel. Finish as before.
One side of the bag is now seamed!
Repeat
Align the other end of the Strap Panel with the 5-inch center space on the left selvage of the Front + Back Panel. Be careful not to twist the Strap Panel!
Repeat as for the right selvage, seaming first the end of the Strap Panel, then turning the first corner and seaming to the top, then turning the second corner and seaming to the top.
Tack Down The Strap
Cut a 12-inch piece of the Weft Yarn and thread it onto a tapestry needle. Find the top center of the Strap Panel (about 8 1/2 inches from the top of the bag) and place a marker. Fold the Strap inward at this point, aligning its edges. Starting 1 inch from the marker, whipstitch the two edges together for 2 inches. This makes a folded section at the center of the Strap that is half as wide as the rest of the Strap.
Tidy Up
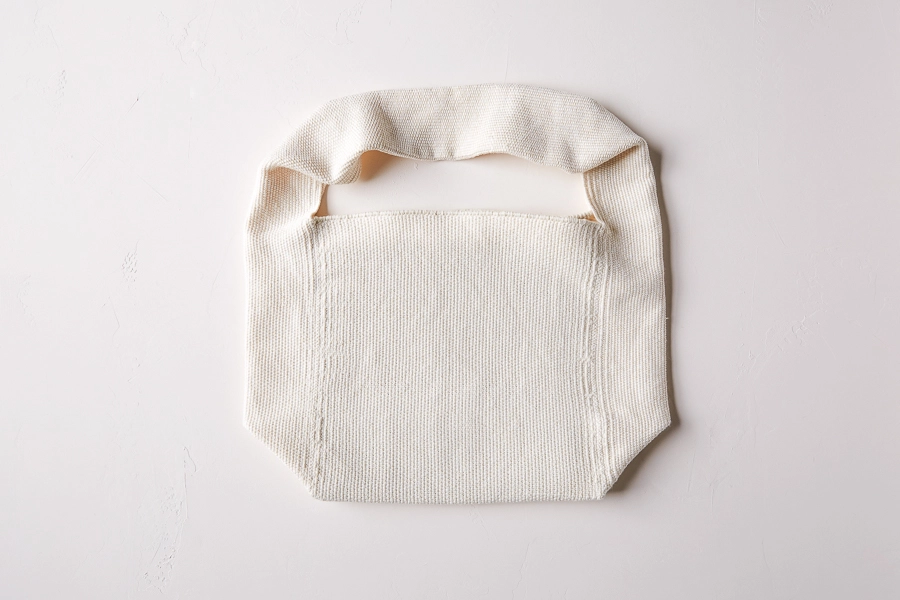
Weave in all remaining ends, then give the bag a second blocking to straighten out the seam, as well as relax the fabric. All done!






How ’bout a knitted version?
Hi Veronica,
Thanks for reaching out! We do not have a knitted version of this bag but we will keep your request in mind for the future! Although it is a different style of bag, if you would like to knit a tote out of either Field Linen or Cotton Pure, you might like our Knit Tote pattern.
Best,
Julianna
Would love to see this style of tote in fabric form!
Hi Jordan,
Thanks for writing in! I actually think it would be quite easy to adapt this for use with a heavyweight fabric such as canvas or denim! If you check the “Size” section of the instructions, you will see the finished measurements of each woven panel of the bag. You could cut rectangles to match these dimensions plus a seam allowance from your fabric, hem the long edges of the strap panel and top edges of the front and back panels, and then assemble the bag following the rest of our instructions. Our Apple Picking Tote is assembled in a similar fashion and may give you some more ideas!
I hope that helps!
Julianna
I love the idea of sewing this! I think I will try it with a cotton liner on the inside – thank you for your beautiful inspirations, and I look forward to visiting your shop again on my next NYC trip!
Can you do pattern in knit vs weave
Hi Susan,
Unfortunately we don’t have a knitting pattern for this at the moment but we will keep your request in mind for the future! Although it is a different style of bag, if you would like to knit a tote out of either Field Linen or Cotton Pure, you might like our Knit Tote pattern. Thanks for your interest in the pattern and for writing in!
Best,
Julianna
Wonderful bag! Will weave it on my 30 in floor loom. Wow!
Wonderful bag! Will try it on my 30 in floor loom! WOw!
I would like to make this bag in denim blue. Would it work if I wove it with Cotton Pure for both warp and weft?
Hi Haydee,
Thanks for reaching out! You can certainly use Cotton Pure for both the warp and the weft but it will take a bit of work to make the pattern work for this combination! The fabric made using the Cotton Pure as warp and Field Linen as weft allows the Field Linen to pack down due to it being thinner and thus makes the densely packed fabric of the bag. By substituting either the warp or weft with the other yarn it might make it harder to pack down creating a slightly more open weave or possibly a tighter weave. It would be hard to say without trying it first. The other thing to consider is that altering the warp or the weft yarn will most probably alter the width of the panels. Again, it would be hard to say by how much without weaving up a sample to see the quality of the fabric.
I hope that this helps!
Cassy
I love all of your patterns and this looks like the perfect challenge for me. What is the total amount of yarn used?
Thank you
Jess
Hello Jess,
Thank you for reaching out! We used approximately 526 yards of Cotton Pure and 295 yards of Field Linen.
I hope this helps and let us know if you have any further question!
Warmly,
Marilla
I couldn’t resist sewing the bag with a remnant upholstery fabric. I didn’t think ahead to add seam allowances to your original dimensions so the bag is somewhat small. I did a lot of seam edge finishing and some top stitching to make a very nice bag. Will likely use it to tote knitting projects. I would add a photo if it were possible.
Thanks for the pattern!
Hi,
Could the weft be done in linen as well?
Thx,
B
Hi,
Thanks for reaching out! You can certainly use Field Linen for both the warp and the weft but it will take a bit of work to make the pattern work for this combination! The fabric made using the Cotton Pure as warp and Field Linen as weft allows the Field Linen to pack down due to it being thinner and thus makes the densely packed fabric of the bag. By substituting either the warp or weft with the other yarn it might make it harder to pack down creating a slightly more open weave or possibly a tighter weave. It would be hard to say without trying it first. The other thing to consider is that altering the warp or the weft yarn will most probably alter the width of the panels. Again, it would be hard to say by how much without weaving up a sample to see the quality of the fabric.
I hope that this helps!
Cassy
Hello. I am very excited about this pattern and purchased the kit. I am a brand new weaver and I have the 15″ Schacht loom. Do you by any chance have any more detailed advice of accomplishing the ‘double warp’ properly? I am really struggling with that step as I have just made stash scarves thus far 🙂 Kind thanks for any advice!
am
Hi Anne,
Thanks for writing in! For the warp of this lovely bag, you will want to warp in a very similar fashion to how you would warp your loom for a standard weave. However, instead of pulling the yarn through just the slats and then cutting the warp and pulling the second thread through each hole, you will be pulling the yarn through each slat and each hole as you warp. It actually ends up being a little less work than traditional warping as all of the work is done up front!
I hope that this helps!
Cassy
Does it matter if I end up with more than 12 picks per inch?
Hi Rebecca,
Thanks for reaching out! More picks per inch will result in a stiffer fabric and will use more yarn. The fabric here is already on the stiffer side but if you do like the feeling of the stiffer fabric and have a bit more yarn, you can certainly work with more pick per inch!
Best,
Cassy
I am getting ready to warp my loom for this project and have a question about measuring for the warp length. I see in your instructions to measure the 52″ from the side of the loom at the front. I have always measured from the back apron. Was this taken into account for this particular project? Just want to make sure i have enough to make it properly.
Thank you!
Hi Nancy,
Thank you so much for reaching out! In large part due to your question, we have updated the pattern to be a bit clearer! The directions now read “Set up the warping peg 52 inches from the front of the loom, which is at the front edge of the table.”
I hope that this clears things up!
Cassy
I’m having trouble understanding the directions for hem finishing for the panels and strap. Does this type of finishing have a name so I can check on line for a demonstration. It appears to have a nice clean look.
I’m looking forward to completing the bag.
Thanks for your help.
Karen
Hi Karen,
Thanks for reaching out! I am not sure that there is a name for the full instructions for this section. We are using, essentially, a mattress stitch here but using the it in a bit of a different fashion. I find that when I am struggling with a new technique that it helps to talk through it out loud. While I feel a bit silly, I find it to be so helpful!
I hope that this helps!
Cassy
I’m in process of weaving this lovely purse. I can’t seem to find instructions for finishing (hemming) the woven panels. Should I follow the same instructions as for the strap panels?
Thank you!
Hi Judy,
Thanks for reaching out! Yes, you should hem the front and back panels in the same manner as the strap panels. The instructions to do so are located towards the end of the “Hem the Woven Panels” section of the pattern, but it is just one sentence that is easy to miss!
Best,
Julianna
I would like to learn how to weave. Can you suggest the best way for me to do that?
Hello Sally,
How exciting! The best way to learn is to take a class. If you are local to our New York store you can check out our class schedule here. If you are not in the New York City area I would suggest doing a quick google search to see if there are any local weaving classes in your area. There are also lots of books and youtube videos that are very useful for getting you started. My favorite book for learning how to weave on a Rigid Heddle Loom is Inventive Weaving on a Little Loom By Syne Mitchell.
I hope this helps and happy weaving!
-Marilla
It looks like the yarn required for this project is not available at Purl Soho any longer. Will you be getting more in, or can you suggest alternative yarns for this project?
Hi Clarissa,
Thanks for writing in! Although we no longer stock bundles for this project, we do still carry Field Linen and Cotton Pure! Cotton Pure was recently re-released and some of the color names have changed, but Heirloom White should still be a wonderful yarn to combine with Field Linen in Queen Anne’s Lace.
I hope that helps!
Julianna
I would like to do this in the red for the pure cotton, I cannot tell from switching back and forth which of the linen quill would look best with this….I was looking for the on sale colors as I am ordering quite a bit this time around. Can you help me with color choices? I wouldn’t mind a bit of a difference in colors – like the butterscotch linen quill? I think that is one of the colors.
Thank you,
Stephanie
Hi Stephanie,
Thanks for writing in! We used Cotton Pure and Field Linen to weave this bag, but you could substitute Linen Quill for the Field Linen if you prefer! The fabric of the bag will be a little thinner and you will probably need more yardage, however. I think Butterscotch Yellow would look lovely with Rosy Red!
Best,
Julianna
I love this bag. I do have 2 questions
1. To begin warping the loom I’d like to begin by going in the 8th hole from the right of the reed & then the slot to the left & continue across – this makes it easier to grab the yarn below the apron rod going through the slot & going through the hole to grab the yarn above the apron rob – would this make a difference in the finished product?
2 My habit in Weaving is inserting the stick shuttle from right to left in the shaft when the reed is in the up position- you state otherwise – does this make a difference in the finished product?
I’m so excited to make this bag – I actually plan to make several. Thank you for your reply!!
Hi Marilyn,
Thanks for reaching out! I reached out to Jake, our in-house weaving expert who designed this bag, and he thinks both your planned modifications won’t make too much of a difference in the finished piece. The warping change might affect the selvage edge slightly but since this bag is seamed it should be fine in the end. It also shouldn’t matter if you weave from right to left with the reed in the up position. It might result in the yarn tail on a different side than he did, which could slightly affect the technique for finishing off the edges but if you have weaving experience you should be able to accommodate those changes fairly easily!
I hope that helps!
Julianna
Help! My selvedges are sloppy. What am I doing wrong? Can I address this problem once the entire length is woven and the piece is off the loom? (Like a knitter blocks out a finished piece?) Thanks for tips or links to online help. I’m using Purl Linen and Cotton Pure as directed and following Cricket directions.
Hi Cristina,
Thanks for reaching out! This should be something you can easily fix by blocking the finished piece! My best guess is that when you are weaving your pulling the yarn either too loose or too tight causing the selvedges to not be even, using a consistent tension and being very mindful of the edges should help keep them nice and even!
Warmly,
Gianna
Woul it be possible to make this bag longer? Same width but a bit longer?
Thanks,
Susan
Hi Susan,
Thanks for your question! You can absolutely make your Two-Piece Woven Bag longer simply by weaving more inches! The dimensions of the bag are written to be 9″ wide x 10″ tall, but by weaving more rows for the main fabric you will be lengthening the height while the width remains the same. You can also adjust the length of the strap the same way!
I hope this helps!
All the best,
Carly