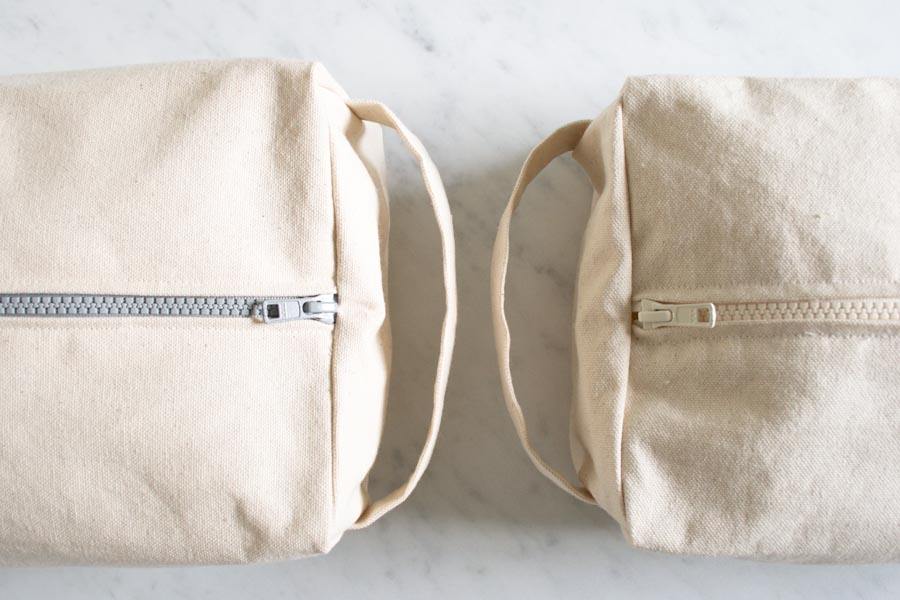
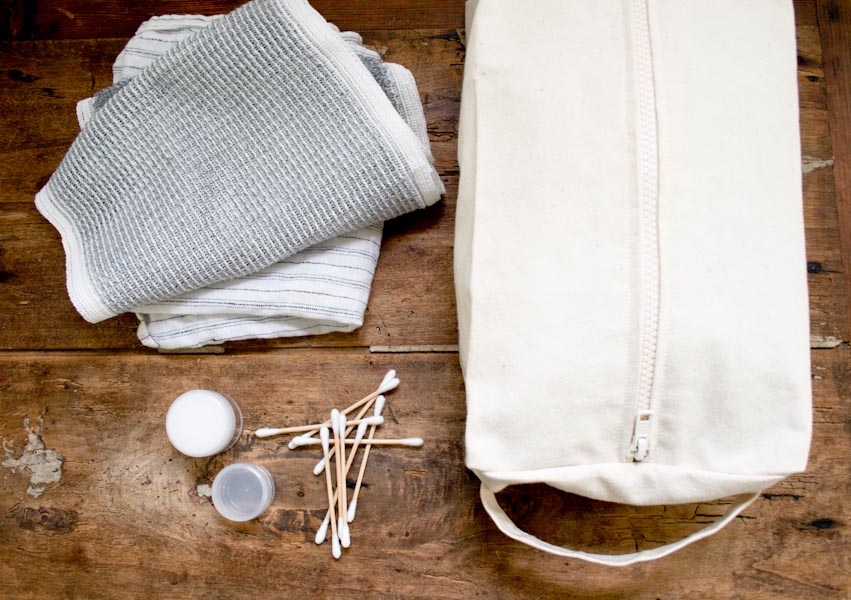
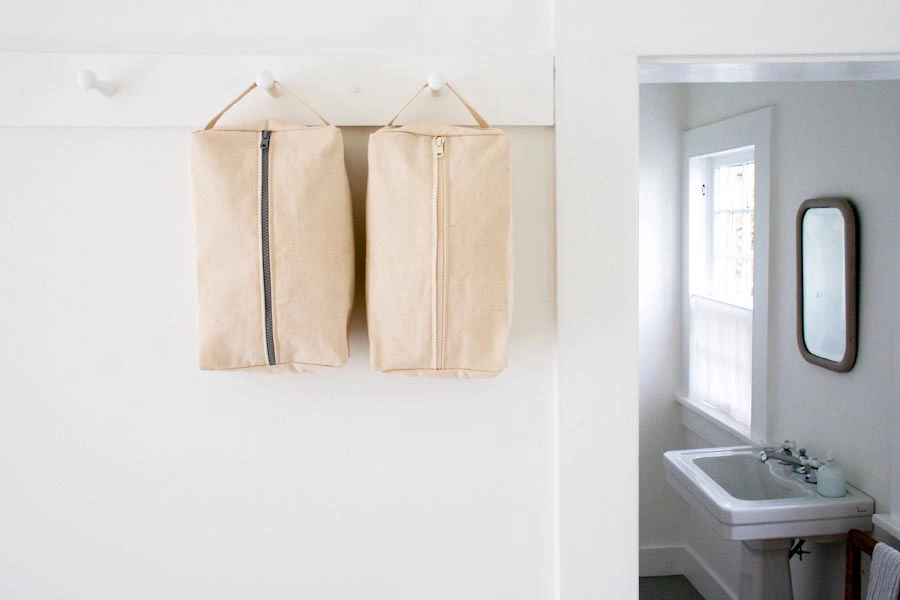
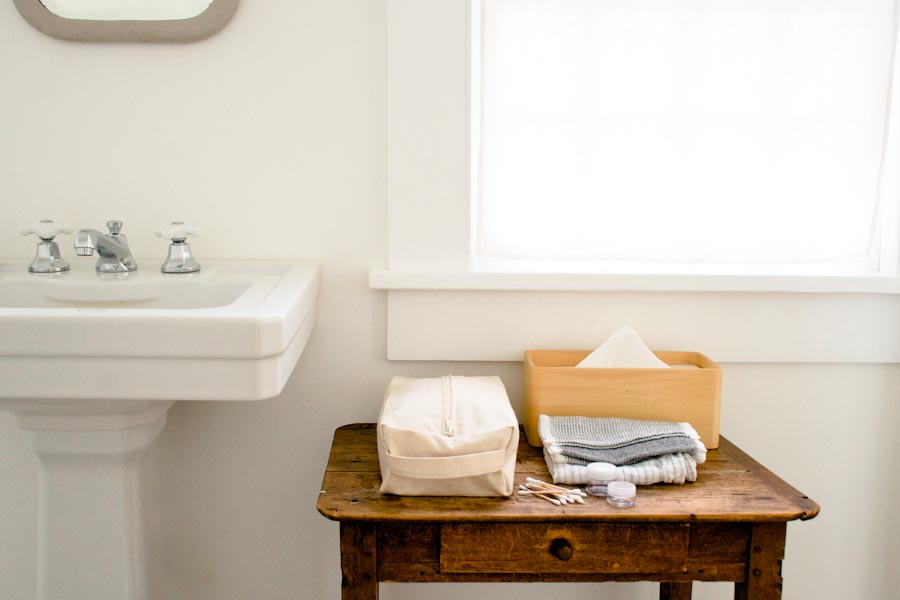

Zippered Dopp Kit
There is beauty in the basic. Take this Zippered Dopp Kit. It is just a no-nonsense sturdy space to stash your travel toiletries, but there is something lovely in its utter simplicity. And in heavy-duty cotton canvas with a chunky plastic zipper, not only is my Dopp Kit spare and elegant, it’s strong and resilient as well!
 The way you sew the Zippered Dopp Kit celebrates this elemental simplicity. I made it with just one piece of fabric that’s folded and sewn together in a way that’s clever but not too tricky. The process is straightforward but never boring, just like the finished Dopp Kit itself! — Molly
Materials

To make one Zippered Dopp Kit you’ll need…
- ¾ yard of Big Duck Canvas in Natural
- A Purl Soho 12-inch Separating Zipper; I used color 204 (Grey) and 122 (Ivory).
- A 110-yard spool of Gutermann’s Cotton Thread in color 1040
- 3 yards of Purl Soho’s Bias Tape by the Yard in Natural
- A fabric marker
- A heavy “jeans” machine needle
- A zipper foot for your sewing machine
Size
Finished Dimensions: 12 ½ inches long X 7 inches wide X 3 inches high
Note
Prewash and dry the fabric.
Pattern
Cut
From the bias tape cut the following:
- Two 8-inch lengths. These are Bias Tape A pieces.
- Four 4-inch lengths. These are Bias Tape B pieces.
- Four 4 ½-inch lengths. These are Bias Tape C pieces.
- Two 12 ½-inch lengths. These are Bias Tape D pieces.
Put all of these pieces aside for now.
From the fabric cut a strip 9 inches by 2 ½ inches. This is the Handle. Put it aside for now.

Also from the fabric cut a rectangle 22 ½ inches X 19 ½ inches.
Then from each corner, cut a rectangle 7 1/4 inches X 3 ½ inches, as shown above.

In the pattern the sides will be referred to by letters A-D, as shown above. With the piece oriented horizontally, the 8-inch horizontal top and bottom sides are A. The 3 ½-inch vertical sides to the left and right of A are B. The Horizontal 7 ¼-inch sides are C. The 12-½ inch vertical sides on the far left and right are D.
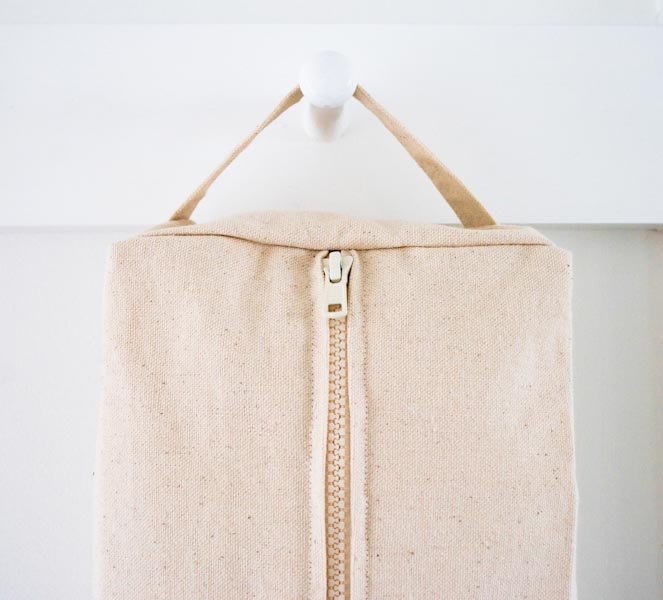
Prepare Handle

Press the long sides of the Handle ¼ inch towards the wrong sides of the fabric.

Press the Handle in half lengthwise so that the two folded sides meet up, right sides facing out. Pin in place and edgestitch the folded sides together.
Sew Sides
Pin the Bias Tape A pieces onto both of the A sides, encasing their raw edges. Sew together with an edgestitch.

Fold the fabric so that one side B aligns with its adjacent side C. (By doing this, side A will be parallel to D.)
Place the Handle between the B and C layers, aligning one of the Handle’s short sides with the raw edges of B and C, 1 inch below the bottom edge of the bias tape.
Pin all three layers together along side B.

Starting at the corner where B meets C, sew the sides together (along with the Handle) with a ½-inch seam allowance, stopping just below the bias tape.
Make a ½-inch horizontal snip through the seam allowances of both layers of fabric directly below and parallel to the bias tape. Do not cut into the previously sewn seam. This snip is indicated in pink in the photo above.

Pin together the opposite B and C sides in the same manner, with the second raw short edge of the Handle lined up with B and C’s raw edges, 1 inch from the bottom corner.
Sew these sides together in the same manner, stopping right before the bias tape and making a horizontal snip directly below the bias tape.
The snip is now called Point 1.

Sew the remaining un-sewn side Bs to their adjacent side Cs in the same manner (this time without the Handle).
Make sure to cut the ½-inch snips into the sides. They are also called Point 1.
Once all four of these sides are sewn you should have a box shape like in the photo above. The two unsewn D sides are now the Top Flaps.
Attach the Zipper

Before you attach the zipper you have to square up the Top Flaps: Make a straight fold from Point 1 at the top of one Flap to Point 1 at the bottom of the same Flap. (This fold is indicated by the dark gray line in the photo above.)
Mark a line (indicated by the pink line above) exactly 4 inches to the right of the fold and then cut side D of the Top Flap along this line so that you have a perfect 4-inch wide rectangle.

Sew a Bias Tape D piece around side D of the Left Flap.
Along the right side (i.e. outside) of the bias tape, mark a line that runs ¼ inch from and parallel to the Flap’s edge, indicated by the dark gray line, above.

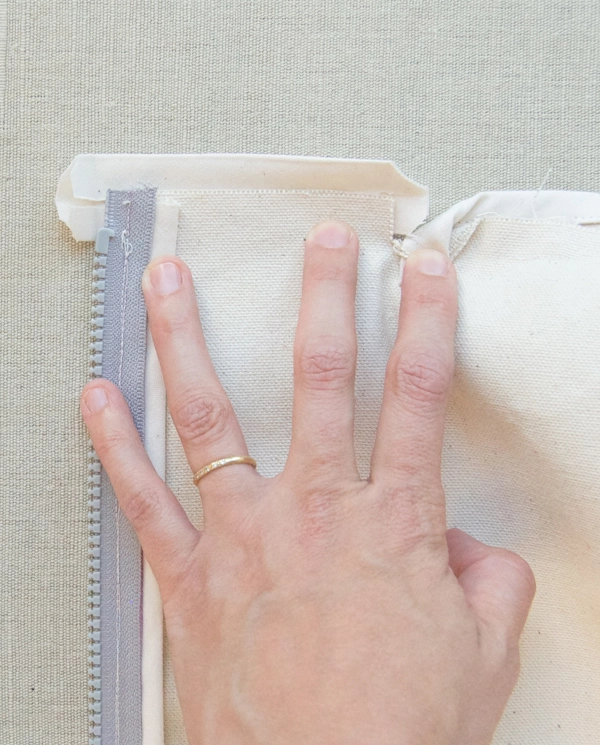
Separate the zipper. On the half of the zipper with the pull, mark a line on the wrong side that is ¼ inch from and parallel to the zipper’s smooth edge, indicated by the pink line, above.
With the right sides together, line up the bottom of the zipper with the Bottom raw edge of the Left Flap. Pin the zipper to the Left Flap by lining up the smooth edge of the zipper with the line you previously marked on the bias tape.
Using a zipper foot, sew down the zipper along the line marked down the length of the zipper.

With the right side of the Left Flap facing up, fold the smooth edge of the zipper under the fabric so that the teeth of the zipper face out. Press the fabric down so that just the teeth of the zipper are showing and then, using your zipper foot, top stitch the fabric at the edge of the fold, as shown above.
Sew the other half of the zipper to the other Top Flap in the same manner, being careful to line up the bottom of the zipper with the Bottom raw edge of the Flap.
Sew Together

You will now use the Bias Tape C pieces to encase the raw edges of the Top Flaps. Here’s how:
For the Top edges of the Top Flaps: Place the bias tape along one short raw edge so that the bias tape extends beyond the left and right sides.

Tuck the bias tape’s raw edges under and pin the tape over the fabric edge.

Edgestitch the bias tape into place, making sure to catch both sides as you sew.

For the Bottom edges of the Top Flaps: Attach the bias tape in the same way, but this time, make sure that when you fold under the bias tape end closest to the zipper, the zipper catch is left uncovered.

Close the zipper and turn the Dopp Kit wrong sides out. Make sure the zipper is exactly in the center of Side A at the Top and Bottom of the Kit. Then keeping the zipper centered, pin the short sides of the Top Flaps to Side A at the Top and Bottom.

At the Bottom edge where the zipper begins, use a generous ½-inch seam allowance to sew across the pinned edge of one Front Flap, across the zipper and then along the second Front Flap. Make sure not to sew into either bias tape.

To sew the Top edge together unzip the zipper a bit so the pull is out of the way and then sew all the way across the pinned edge with a ½-inch seam allowance. Avoid sewing into the zipper teeth and make sure to not sew into either bias tape.
If you’re worried about breaking your needle along the zipper you can turn the machine wheel by hand when you get to the zipper, allowing you to maneuver around the teeth.

Using the Bias Tape B pieces, encase the four remaining raw edges in bias tape. Tuck and pin the bias tape ends under themselves. Pin the seam allowance of the Bias Tape A pieces inside the Bias Tape B pieces as well, so that Side A folds down a bit, as shown above.
Edgestitch these bias tape pieces down, turn the Dopp Kit right side out, and you’re done!


Hi,
I love this bag, but am having trouble with parts of the pattern. I can’t see instructions for attaching bias binding, yet its referenced as having been done in the 2nd para of Sew Sides.
In the first para of Sew Sides, I think A is parallel to D, not C.
Or am I totally wrong?
Thanks
Hi Mary-
You are correct! I am so sorry that that bit of information about the bias tape was left out and that the parallel sides were wrong! I have edited the pattern. Thanks so much for letting me know about this. I really apologize for any confusion it caused!
Best-
Molly
Is a separating zipper necessary? Can a regular zipper be used?
What is the advantage of the separating zipper? It doesn’t seem like a separating zipper is needed, like in a jacket.
tks.
Hi Sandra-
You could probably use a regular zipper without modifying the pattern too much. I found using the separating zipper to be more straight forward for this particular project. Since this bag is sewn with one piece of fabric attaching the zipper can get a bit crowded in the machine if you don’t have a separating zipper. But if you have a lot of experience with zippers it probably won’t be a problem!
Thanks for getting in touch!
Molly
Thanks!
Molly
Thank you for the free pattern! Something that may be really helpful is if you specify when you should be sewing/folding/etc on the right or wrong side of the fabric. Since the right and wrong look the same in the pictures it’s hard to tell sometimes!
I just whipped up one of these, it only took two hours! (And that long only because I realized I’d put the zipper in upside down and had to rip it out and do it again. Oops!) Thanks for the easy tutorial!
Thank you so much for this amazing pattern! I’m a newbie and I find your instructions so clear and helpful.
Thanks you for sharing this! I tried to make bag on my own and I made the saddest inside-out pouch ever. XD
Love these bags! I made a couple for Christmas presents and they were a hit. My only complaint is that I needed a little more than 2 yards of bias tape (maybe I measured wrong?). I don’t live in NYC anymore, so I was unable to get more in time for gift giving. My projects now look incomplete on the inside. I suggest ordering slightly more than 2 yards (I needed about 4 more inches).
Hi. Thank you for this tutorial. I have been searching for one for years and now I’ll treasure it. Do you think it is possible to do the bag in two sided pre-quilted fabric? Thanks again for your your time and generosity.
Hi Migdalia-
Sure, that sounds like it could be beautiful!
Thanks for your question!
Molly
I love this pattern but found the pictures a bit hard to see
being a light color. I will see if I can figure it out.
Thank you for sharing your design.
🙂
I love this pattern! I just whipped one out last night as I’m leaving for summer camp today and wanted a nice dopp kit (I usually use a big ziploc bag!) The pattern was mostly easy to follow, although I would have one suggestion: in the materials list, give the size of bias tape needed. The kind I bought was too narrow, so some of the seam allowances didn’t line up.
Thanks for the fun project!
It’s fantastic that you have come up with this pattern. I’ve wanted to make a dopp kit for years. My father, a Navy captain, had a leather one that got dragged all over the world. After he died, I asked my stepmother if I could have it, and she said, “Oh, that ratty old thing? I threw it out.” (Other than that, I love my stepmother.)
Using canvas rather than leather, I would strengthen the body pieces by using a bag facing; this will help it stand up like a box, making it easy to get into, especially after you’ve dragged it all over the world and the canvas has lost some of its stiffness.
And now that I think of it, a solid base for the bag would be good, too. Cut a piece of heavy plastic, or even very thin plywood (cardboard will bend eventually), to fit the bottom, then cover with canvas (stitch or glue it), and just lay it in the bottom. Take it out to wash the bag — which, if you’ve been all over the world, you’ll want to do occasionally.
Hello there, thank you so much for sharing so many wonderful patterns. I am sorry, this is probably a really silly question, but I am using a 9″ zipper and would like to adjust my bag to finish at 9 ½ inches long X 6 inches wide X 3 inches high. Will this just mean that I take 3 inches away from the initial length and 1 inch from the width?
Thank you in advance,
Krista
Hi Krista,
Thanks for writing in! You seem to have it! You would take 3 inches off of the total length (19 1/2 inches becomes 16 1/2 inches) and 1 inch off of the total width (22 1/2 inches becomes 21 1/2 inches). Measurement D will be 9 1/2 inches and measurement C will be 6 1/4 inches. All else will remain as noted and you should be all set!
Happy sewing!
Cassy
Would this pattern work in leather? I’m dreaming up a nice masculine Christmas present for my dad and for my husband!
Hi Stephanie,
Thanks for writing in! I have never worked with leather, so I am not sure how it behaves as opposed to woven fabrics like we used here. The only issues that I could foresee may be bulk along the seems but if you have worked with leather before, I’d check out the the seems of the pattern as see if you could see any issues at these points.
Best,
Cassy
Hi there 🙂
I found this pattern via pinterest and I really like the dopp bag.But I have some questions:
Do you have a special reason why you suggest using a separating zipper? I use zipper by the yard for almost all my projects and it works just fine. Also, imho, you chose a rather complicated way to assemble the bag. I would first sew closed all the seams and then cover them with bias tape, which would also reduce any bulk. Did you have a special reason for doing it the way you did?
Thank you for the free pattern anyways, it still helps a LOT to have alle the measurements 🙂
Best wishes,
Silke
Hi Silke,
Thanks for reaching out! The great thing about crafting is that there are many ways to do things! For this project, we like the separating zipper because installing a zipper can sometimes be tricky and here, we find being able to fully separate the zipper makes the installation a fair bit easier! Regarding the seams, we do not find them to be too bulky here as most of them are just single seams covered with bias tape. That said, if you are a more experienced sewist you can always use whatever way works best for you to make this little bag!
Thanks again for reaching out!
Cassy
OMG…. the tedium of bias tape, but it looks good. Love the zipper tut. I have never had one look SO good. Full disclosure, I have only put in about 7 zippers total, so far. I”ll link a photo to my pinterest page.
Though my response is very late coming, I feel this pattern would be easier to follow by noting all the edges names in each and every photo.
Normally when reading patterns, I find them easy to follow. Not this one.
Great pattern otherwise. Cannot wait to test it in the flesh.
Thank you for the pattern and for the ‘name noting’, if you choose to update the pattern.
Hi MJ,
Thank you so much for the feedback – I will certainly pass your suggestion along to the design team!
All the best,
Julianna
Thank you Julianna (lovely name!). I appreciate you passing my suggestion along. Perhaps it will help others, too.