

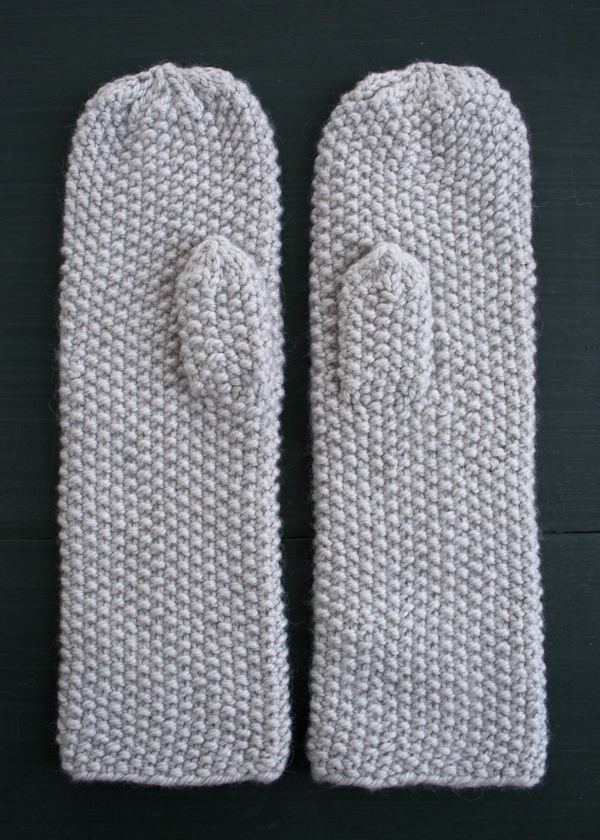
Seed Stitch Mittens + Hand Warmers

Many of us would agree, I think, that seed stitch is one of knitting’s most refined patterns, as elegant as Grace Kelly and as classic as argyle. But what may go a little under appreciated is the feel of seed stitch.
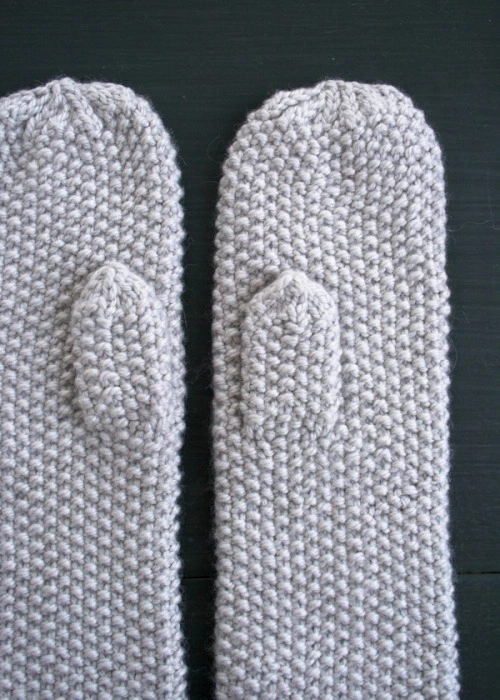
A firm seed stitch has a wonderfully satisfying texture, like warm pebbles on a garden path or like crisp kernels on a sweet cob of corn. In the dark, I’d take a swatch of seed stitch over stockinette any day! And so I thought, why not put the feeling of seed stitch literally at my fingertips?
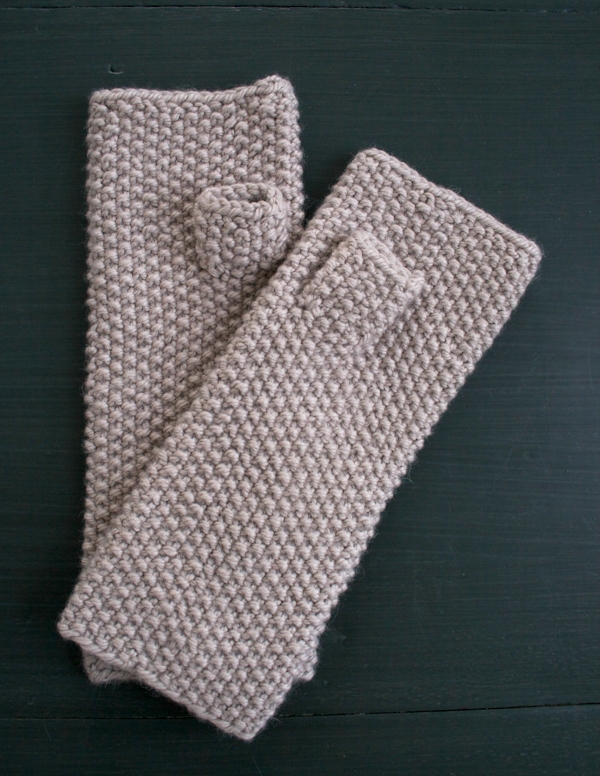
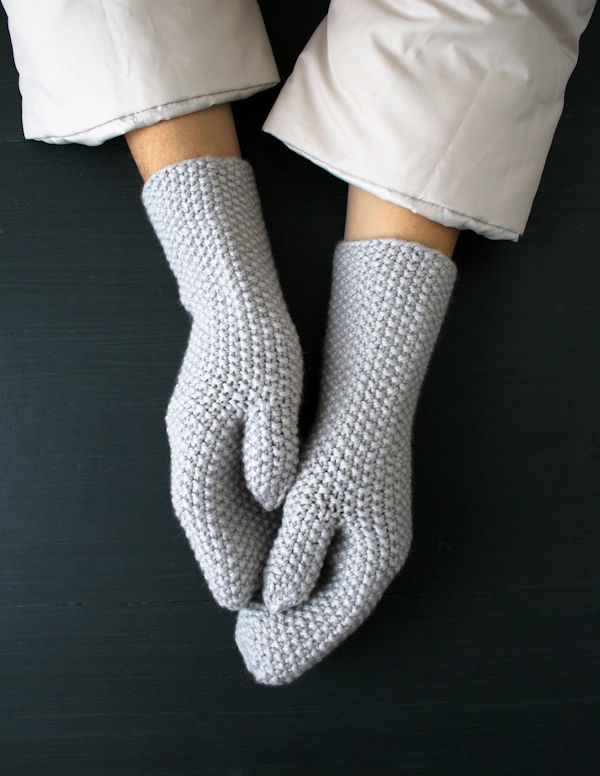
In Purl Soho’s Alpaca Pure, seed stitch couldn’t really feel any better. Soft and cozy, dense and hefty, Alpaca Pure seriously ups the pleasure ante on these Seed Stitch Mittens and Hand Warmers!

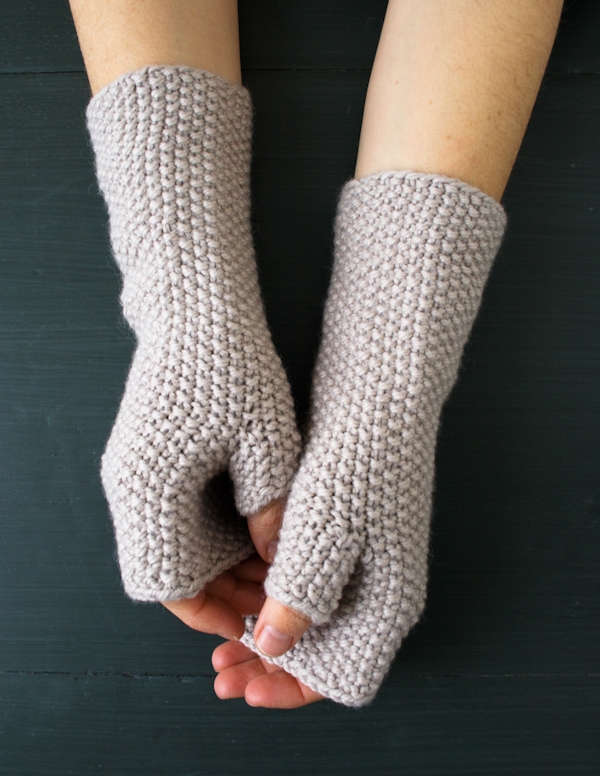
Finger-hugging mittens for the frigid cold and finger-liberating hand warmers for the milder months of early spring, both are super easy to make and both feel absolutely incredible! -Whitney
Designed by Purl Soho designer, Whitney Van Nes.
Share your progress and connect with the community by tagging your pics with #PurlSoho, #PurlSohoBusyHands, and #PurlSohoSeedStitchMittensAndHandWarmers. We can’t wait to see what you make!
Materials

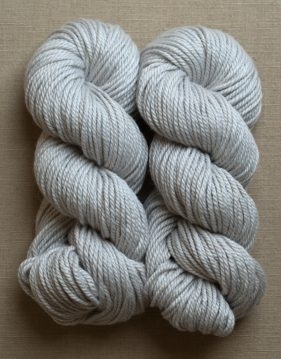
- 2 skeins of Purl Soho’s Alpaca Pure, 100% alpaca. Approximately 180 (218) yards required for a pair of Mittens or Hand Warmers. We used the colors Sea Salt and Oyster Gray. (NOTE: We no longer offer Alpaca Pure, but choose from one of our other worsted weight yarns.)
- A set of US 6 (4 mm) double pointed needles
- A yard of scrap yarn
Gauge
18 stitches = 4 inches in seed stitch
Sizes
Women’s Small/Medium (Medium/Large)
- Finished circumference around cuff and palm: 7⅓ (8¼) inches
- Finished length from Mitten hem to Mitten top: 12 (13½) inches (adjustable)
- Finished length from Hand Warmer hem to Hand Warmer top: 9½ (11) inches (adjustable)
Mittens Pattern
(Note: The photos in this pattern show the size Small/Medium.)
Cuff
Cast 33 (37) stitches onto three double pointed needles. We used a basic Long Tail Cast On.
Place a marker and join for working the round, being careful to not twist the stitches.
Round 1: *K1, p1, repeat from * to last stitch, k1.
Round 2: *P1, k1, repeat from * to last stitch, p1.
Repeat Rounds 1 and 2 until piece measures 6 1/2 (7 1/2) inches from cast on edge, ending with Round 1.
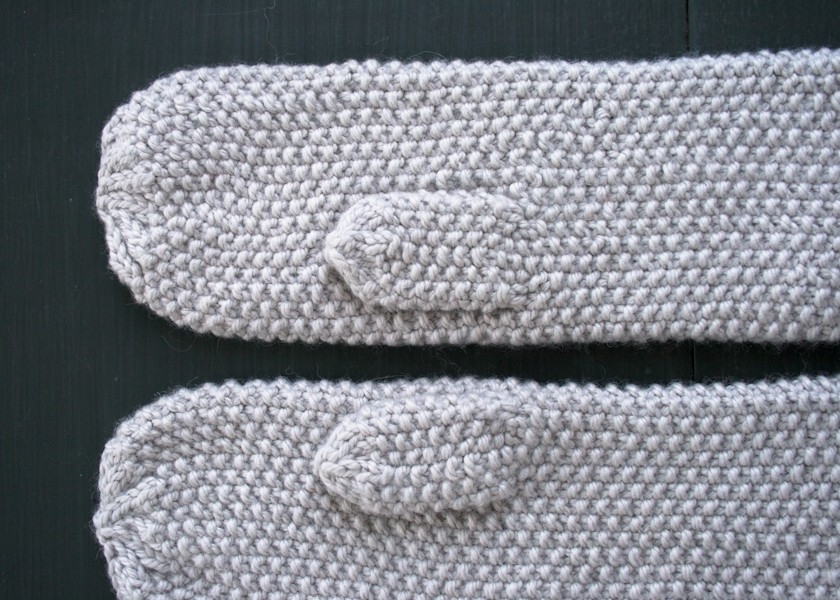
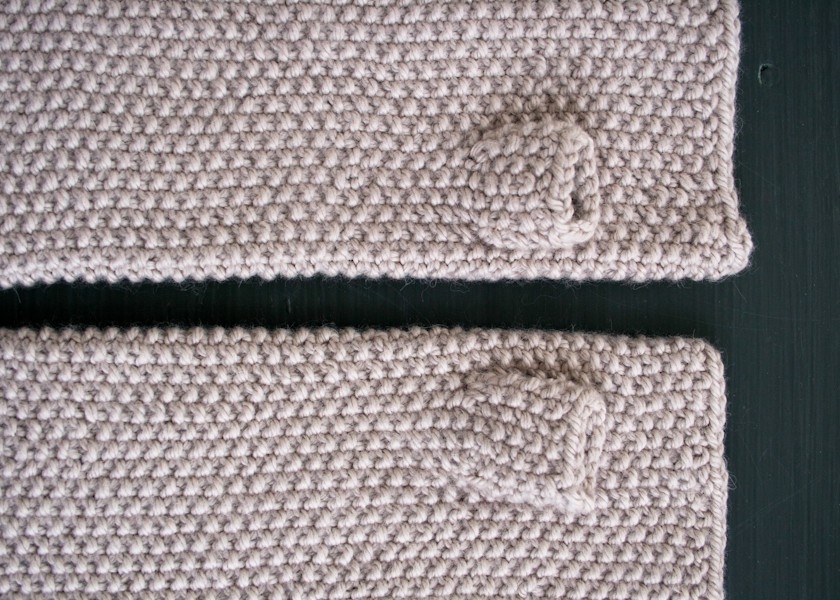
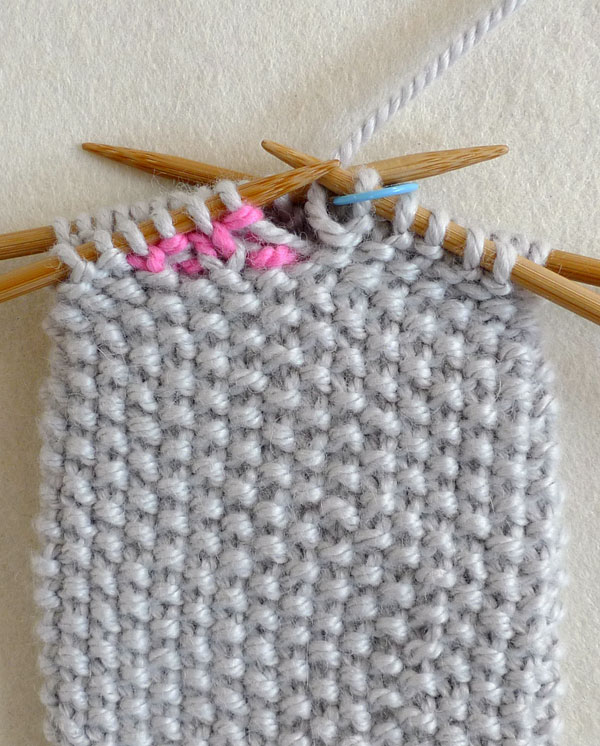
Thumb Hole
Next Round: With scrap yarn, [p1, k1] 2 times, p0 (1), cut scrap yarn.
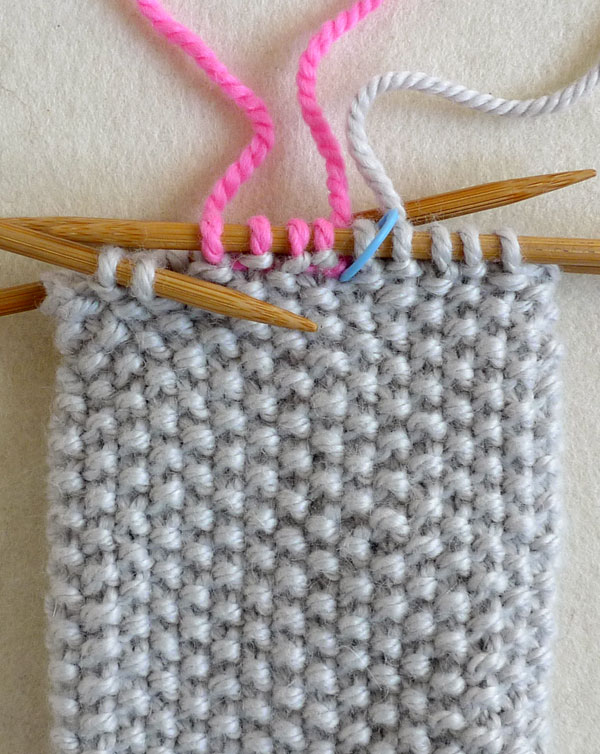
Slip 4 (5) scrap yarn stitches back to left needle.

With the working yarn, work Round 2.
Palm and Top
Continue to repeat Rounds 1 and 2 until piece measures 4 3/4 (5 1/4) inches from thumb hole (or until mitten fits to right below tip of middle finger), ending with either round.
Next Round: Knit.
Next Round: K0 (1), *k1, k2tog, repeat from * to end of round. [22 (25) stitches]
Next Round: K0 (1), *k2tog, repeat from * to end of round. [11 (13) stitches]
Next Round: [K2tog] 5 (6) times, k1. [6 (7) stitches]
Cut yarn, leaving a 12-inch tail. Thread the tail onto a tapestry needle and sew it through the remaining stitches. Pull tight and bring the tail to the inside of the mitten.
Thumb
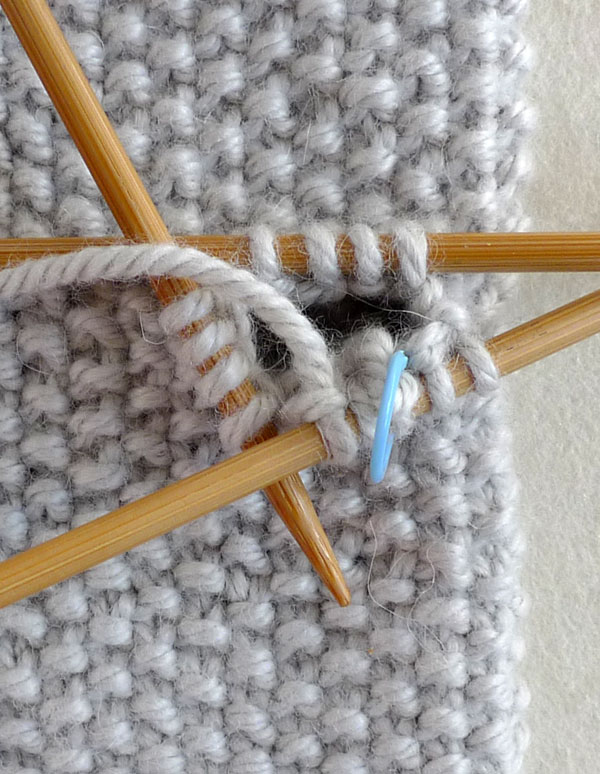
Slip a double pointed needle under the right legs of the 4 (5) stitches right below the scrap yarn.

Turn the piece upside down and slip a second double pointed needle under the right legs of the 4 (5) stitches that are now right below the scrap yarn.
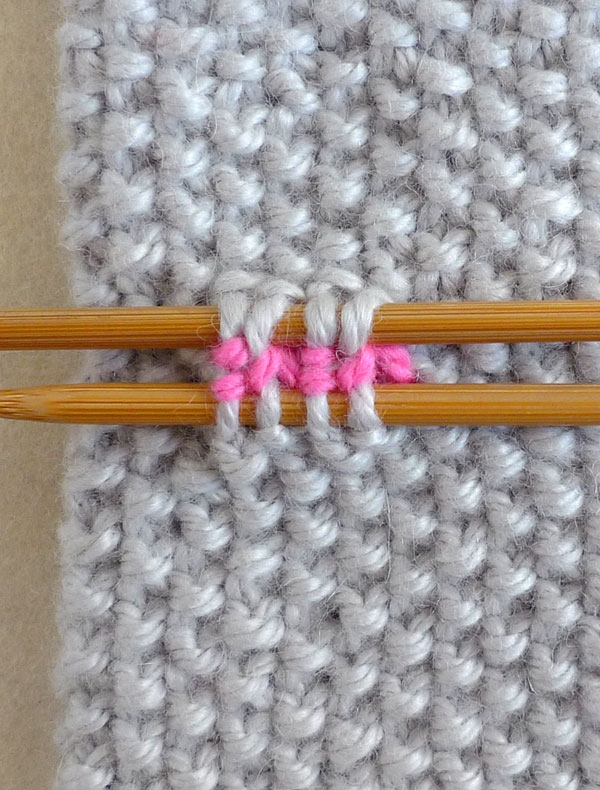
Remove the scrap yarn and turn the piece right side up again.

Set-Up Round: With a new needle and joining new yarn to the bottom stitches, [p1, k1] 2 x, p0 (1).
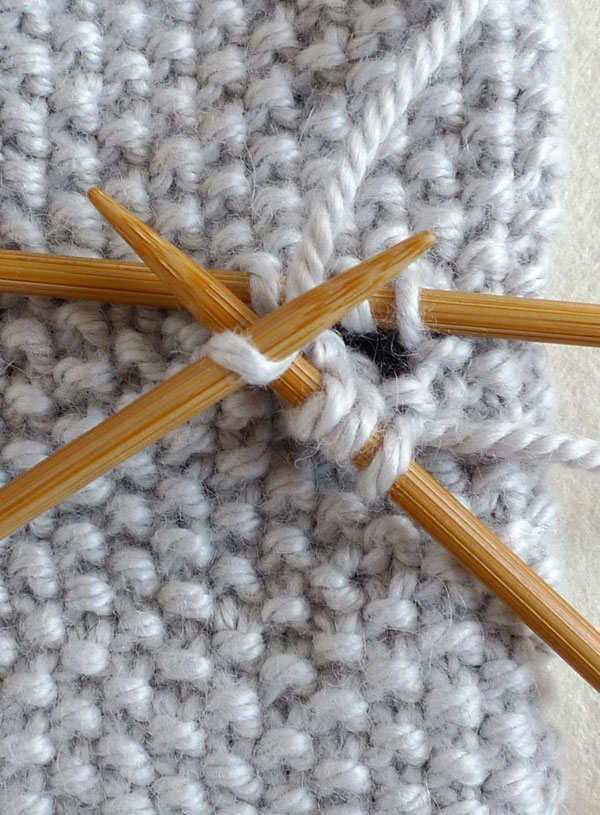
With the right side facing you and using the bottom needle, pick up three stitches between the bottom needle and the top needle.


With a new needle and the right side facing you (which means flipping the mitten upside down), work the top 4 (5) stitches…
For Size Small/ Medium
…[K1, p1] 2 times.
For Size Medium/ Large
…[P1, k1] 2 times, p1.
Both Sizes
With a new needle and the right side facing you, pick up two stitches from between the top and bottom needles. [13 (15) total stitches]

Place a marker and with the same needle k1, p1, k1 from the first needle. The stitches are now evenly distributed [4-4-5 (5-5-5)] and ready to work in the round.
Finish Set-Up Round: *P1, k1, repeat from * to end of round.
Round 1: *P1, k1, repeat from * to last stitch, p1.
Round 2: *K1, p1, repeat from * to last stitch, k1. **
Repeat Rounds 1 and 2 until thumb measures 2 1/8 (2 3/8) inches (or until thumb is 3/8 inch shorter than the actual thumb), ending with either round.
Next Round: Knit.
Next Round: [K1, k2tog] 4 (5) times, k1 (0). [9 (10) stitches]
Next Round: [K2tog] 4 (5) times, k1 (0). [5 (5) stitches]
Cut the yarn, thread it onto a tapestry needle and sew the tail through the remaining stitches.
Bring the tail to the inside of the thumb and weave in the end.
Weave in any remaining ends and make a second identical mitten!
Hand Warmers Pattern
Cuff and Thumb Hole
Work the Mittens pattern from the Cuff section through the Thumb Hole section.
Palm
Continue to repeat Rounds 1 and 2 until piece measures 3 (3 1/2) inches from the Thumb Hole (or until the Palm reaches your middle finger’s knuckle), ending with either round.
Cast off loosely in knit stitch.
Thumb
Work the Thumb section of the Mittens to the **.
Repeat Rounds 1 and 2 until thumb measures 1 1/4 (1 1/2) inches from the thumb pick up (or until thumb reaches the middle of your actual thumb’s knuckle), ending with either round.
Bind off loosely in knit.
Weave in the ends and make a second identical hand warmer!


Nevermind, I think I figured it out. THanks!
Hello,
I love this pattern. Can I use your Good Wool to make these? Do I have to make changes?
Thanks for your help.
Hi Carol,
Thanks for reaching out. Good Wool on its own is too light for this pattern, since it’s sportweight, rather than worsted weight. But I think you may be able to get the correct gauge holding two strands of Good Wool at once! I’d highly recommend swatching beforehand to make sure. Hope this helps!
All the best,
Lili
I really like this pattern. It’s beginner-friendly, easy to follow, and results in a luxurious pair of mittens or hand-warmers. Thanks for creating such an accessible, practical pattern for us to enjoy!
Hi Emma,
I’m so glad to hear that you enjoyed making this pattern! I hope that your new mittens or hand-warmers keep you warm this winter!
All the best,
Lili
Hello,
those mittens are beautiful, thanks for the pattern. <3
After finishing PALM and TOP – do you turn the mitten inside out and then knit the THUMB? It is not written to do so, but looking at the picture and comparing it to the knitted piece in my hands it looks this is how it should be done. I would appreciate your answer. Kind regards. Airashii
Hi Airashii,
Thanks for reaching out! No, you will not need to turn the mitten inside out to knit the thumb. Just slip the stitches that are attached to the scrap yarn onto your DPNs, and you can begin knitting from there. Hope this helps!
All the best,
Lili
This pattern is beautiful but for the life of me I cannot understand the thumb hole. Ive tried it so many times, but I don’t understand it based on the images provided or what I am picking up for the 3 stitches. Can you please do a short video? Thank you so much.
Hi Ash,
I’m sorry to hear that you’re having difficulty figuring out how to knit the thumb of these mittens! I’m afraid that we do not have the time and resources to make a video tutorial on this pattern specifically, but I’m eager to help you move forward. Can you please let me know what you find confusing about the thumb hole? Is it just where to pick up the 3 stitches, or did you have other questions as well? We’re happy to help answer them here, or by email!
All the best,
Lili
Thank you for generously sharing this pattern. The instructions are really well done. I’m very happy with the two pairs of mittens I’ve made – they fit great and look stylish. It was a great way to use up some of my stash. Thank you!
Hi Tania,
Thank you so much for your kind review! We always welcome feedback of any kind and this was wonderful to read!
Happy knitting,
Gavriella