Felted Wool Wrist Warmers
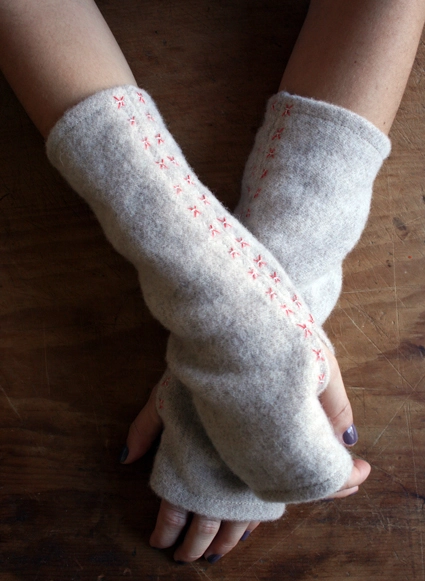
Year after year as the weather turns cold, knitted and crocheted hand warmers start popping up all over the city and on the Purl Bee. After years of feeling a little left out, I decided that it was time for us sewists to get in on the action, and so these soft and cozy Felted Wool Wrist Warmers were born!

Mary Flanagan Felted Wool is the ideal fabric for gorgeous winter accessories. It’s lovely, rustic, and oh-so-warm. In addition to this soft oatmeal color, it comes in a glorious hand-dyed rainbow of colors, from bright turquoise to deep pumpkin orange. For a festive holiday touch, I also used brightly colored cotton embroidery floss accented by a shimmer of metallic thread.

These are beyond quick to sew, making them an even more last-minute holiday gift than the more traditional knitted and crocheted versions (score one for the sewists!). In fact, if you skipped the embroidery you could make a pair in under 20 minutes. Even with the embroidery you’ll clock in under an hour! These Wrist Warmers are beautiful worn on their own, or wear them over gloves for an extra layer of warmth and style.
Happy Holiday Sewing!– Molly
Designed by Purl Soho designer, Molly Schnick. Click here to see even more of Molly’s work!
Materials
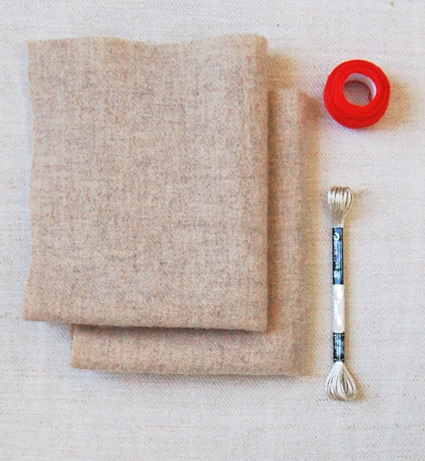
- Two pieces of Mary Flanagan felted wool in Oatmeal
- A ball of DMC pearl cotton thread in color 606
- Metallic Embroidery Floss in Silver
- 100% cotton thread to match the felted wool, I used color 1240
- A Felted Wool Wrist Warmer template, available for free download here, printed, cut out, and taped together as directed.
Size
11-inches long to fit most women
Pattern
Cutting and Sewing

Press one of the wool pieces in half lengthwise. Cut the template shape from the wool as directed on the template.

Unfold the cut piece. Fold over and pin the top and bottom edges a 1/2-inch towards the wrong side. (The wool itself does not have a right or a wrong side you are making this the wrong side by folding the raw edges onto it.)
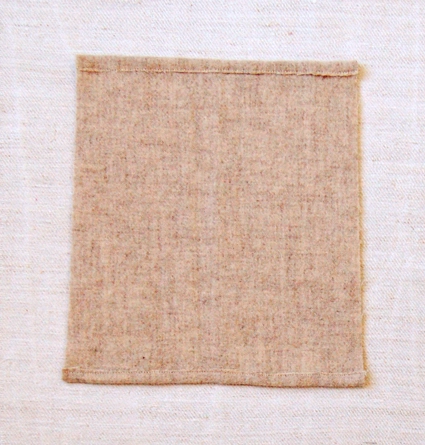
Edge stitch the folds down using the matching cotton thread.

Fold the hemmed piece back in half lengthwise with the wrong side facing out. Pin it together along the long side marking the thumb gap from the template. Make sure to keep in mind that you have hemmed the top and bottom of the wrist warmer so to mark the thumb gap you will be measuring from inside the dashed hem lines of the template.
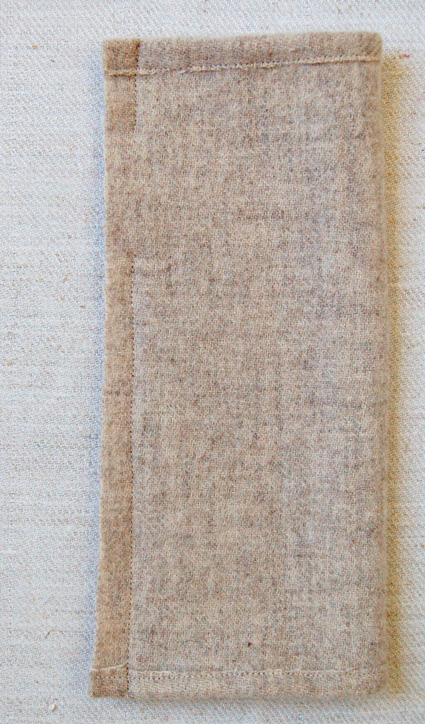
Sew the pinned side together with a 1/2-inch seam allowance in two sections, before and after the thumb gap. Do not sew the thumb gap closed. Make sure to back stitch at the beginning and end of each of these two seams.

Press the 1/2-inch seam allowance open. Tuck and pin the raw beginnings and ends of the seams under the seam allowance as shown above.

Turn the wrist warmer right side out. Note the open thumb hole.
Embroidery- First Level
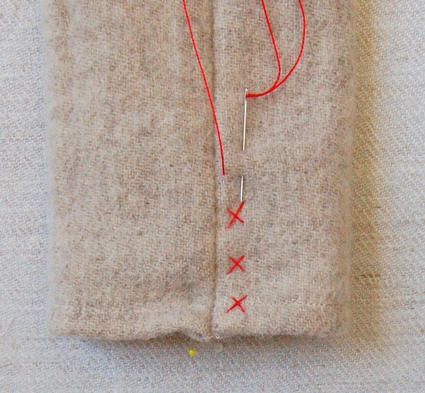
Working from the front sew a cross stitch vertically up the right hand side of the seam sewing down the right hand side of pressed open seam on the inside of the wrist warmer in the process. Also make sure to sew down the tucked and pinned beginning and ending edges with these cross stitches.

Sew along the entire right hand side of the seam making sure to catch the inside of the seam in the process. Be very careful as you sew past the thumb gap.
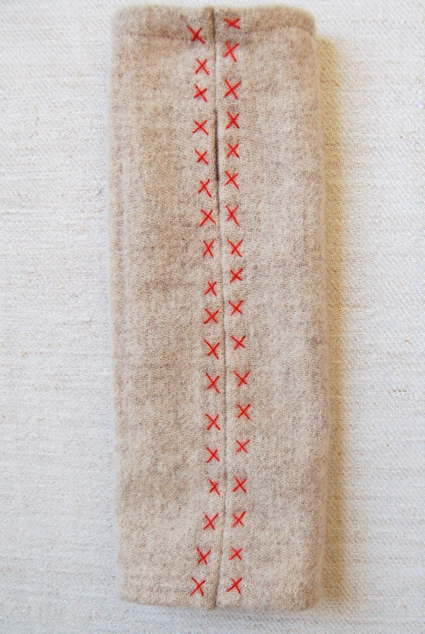
Repeat for the left hand side of the seam.

The inside of the wrist warmer should look like this with the two sides of the open seam sewn down by the neat, non-crossed reverse of the cross stitch embroidery.
Embroidery- Second Level

Using two strands of the metallic thread, on the right hand side of the seam, embroider a smaller cross over the “X” shape of the first embroidery level and then make a running stitch in between each crossed stitch.
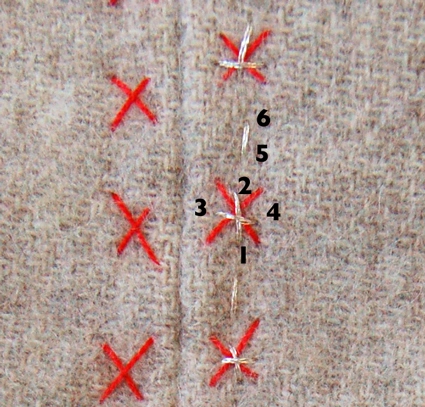
You can follow the diagram above to ensure the embroidery is nice and neat. The odd numbers are needle exit points and the even numbers are needle entrance points.

Repeat this for the left side of the seam.
Repeat all steps for a second wrist warmer and you’re all done!



These are adorable. How should they be cleaned?
Hi Karen-
They should be hand washed in a mild cleanser such as Soak (which you can find here: https://www.purlsoho.com/purl/products/105-notions-tools-accessories?company=240) and then dried flat, just as you would for a hand knit item.
Thanks so much for your question!
Molly
Thank you so much for sharing this wonderful tutorial! I love the finished wrist warmers, and the hand embroidered detail adds such a beautifully unique detail.
they are absolutely adorable. wish i could buy them cos i'll never have the patience to make them — i suck at DIY.
If we skip the embroidery, how should we deal with the inside seams? Love this project!
Hi Nancy-
Great question! It would still probably be easiest to hand stitch them down, but you could just do a running stitch. It would probably take about 30 seconds on each side. And it would be cute if you used a contrasting thread!
Thanks!
Molly
Thanks for all your great ideas! My felt and thread arrived Friday. Cross my finger mine turn out half as well as yours!
Could you give us the fabric dimensions? Sounds like 12x what?
Hi Bea-
Each felt piece is 13-inches by 15-inches before cutting.
The final wrist warmers are 10.75-inches long, 8-inches in diameter at the top, and 9-inches in diameter at the bottom.
Thank you for your question!
Molly
Just wondering if you can sew the side seam first and then hem the wrist and arm openings of if it has to be done the other way around? Thanks!
This was so fast and easy, and turned out so cute. Wearing them to a wreath making party in a cold old barn on Sunday. Thank you.
they would work with fleece too – I am going to try it
Hello! Thank you for this lovely gift idea. I just treated myself to a sewing machine upgrade, and it has lots of embroidery features so I’d love to incorporate it into this project. How would I add the embroidery feature with my machine/is it possible?
thank you once again…
Hi Melissa,
Thank you so much for your kind words and what an exciting upgrade! Unfortunately, I am not familiar with embroidery machines and thus cannot be of help there! I do think that it would be difficult as I can’t see a way to get a narrow tube through a machine at the angle this embroidery is achieved at. You may want to mark where you would fold for the seem. Then embroider through the machine before sewing them together.
I hope that this helps and enjoy your new machine!
Cassy
I love this idea! Thanks for sharing. I’m wondering if you could possibly give me the dimensions of the pattern as I’ve no computer or printer to download and print it out, pretty please with sugar on. Thanks.
Hello H,
Thank you for reaching out!
Each felt piece is 13-inches by 15-inches before cutting.
The final wrist warmers are 10.75-inches long, 8-inches in diameter at the top, and 9-inches in diameter at the bottom.
Happy sewing,
Marilla
Hello,
The felted wool wrist warmers. Is it possible to kit this item? I see the oatmeal color Mary Flanagan is not showing on your sight.
Can you please advise.
Would love to make these.
Hi Cindy,
Thanks for reaching out! Unfortunately we no longer sell Mary Flanagan felted wool, in its place I would recommend using WOLLFILZ Wool Felt!
Warmly,
Gianna