Bunny Finger Puppets!
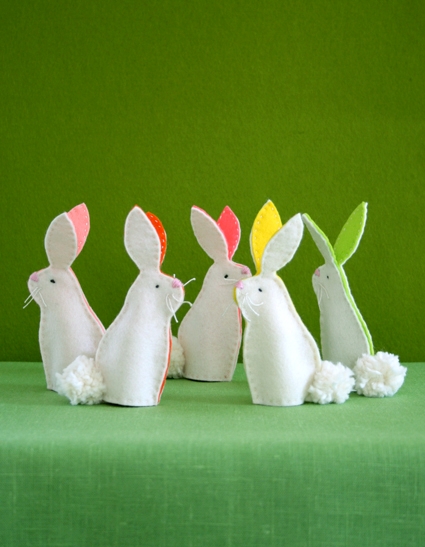
Besides being adorable, these little puppets are a snap to make. You could make the whole set of five (or more) in one evening with time to spare. I think little handmade touches like these really make an Easter basket all the more special. -Molly
Designed by Purl Soho designer, Molly Schnick. Click here to see even more of Molly’s work!
Materials
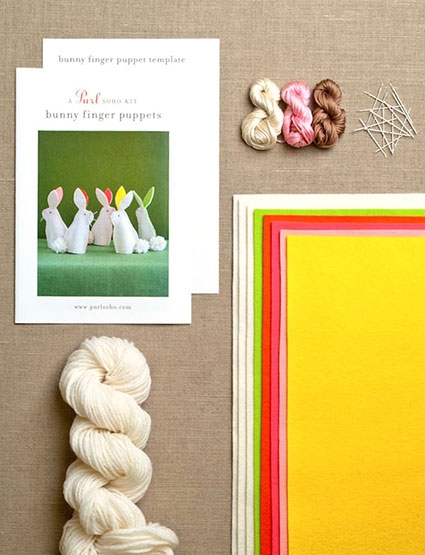
To make a set of five (or more!) bunny finger puppets, you will need….
- Eight Wollfilz’s Wool Felt Pieces, 1mm, 8 x 12 inches.
- 3 skeins of DMC’s Embroidery Floss in three colors
- A pack of embroidery needles
- A hank of ecru yarn (for pom pom tails)
- A Bunny Finger Puppets Pattern, including full-size templates (both also available for free, the pattern follows and the free template download is here.)
You will also need:
- A water-soluble fabric marker
Cut
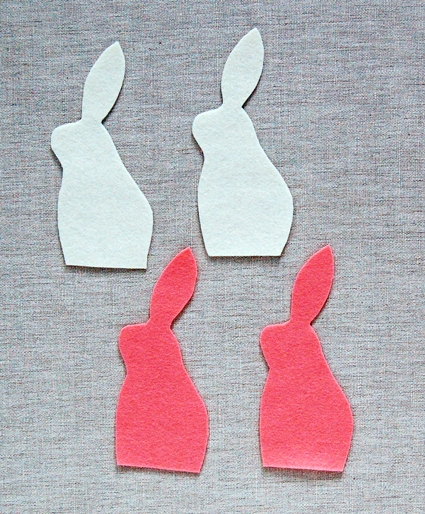
Using the template, cut two bunnies from the white felt and two from one of the bright colors.
Sew
Note: Use three strands of the embroidery floss for all of the sewing and embroidery in this project.
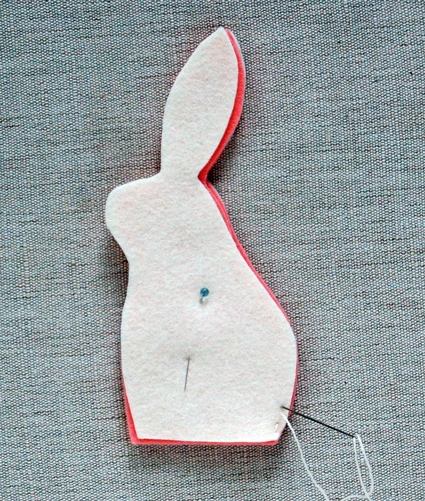
Sandwich all four pieces together with the two white pieces on the outside and the two bright pieces inside. Pin them together.
Using the cream embroidery floss and starting at a bottom corner sew through all four layers right along the edge with a small running stitch.
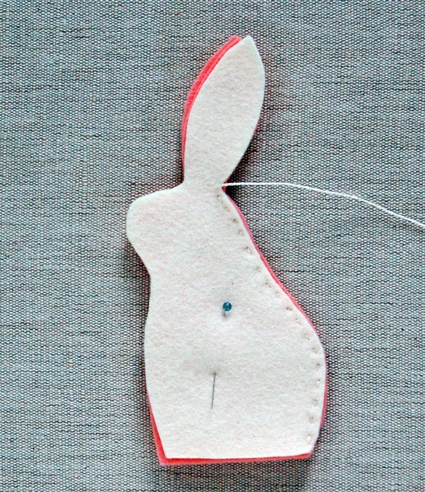
Sew in this manner along the first side, stopping at the base of the ear.
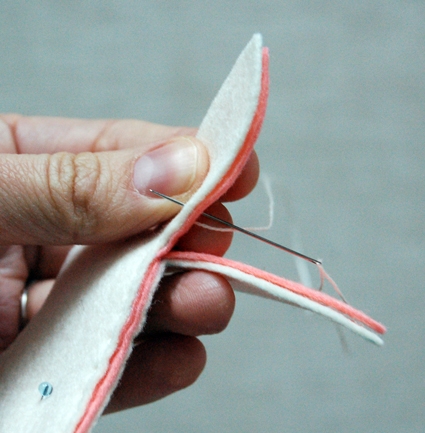
Divide the felt into two ears each consisting of two layers of felt (one white and one bright color). Sew through only the first ear along its edges. Leave the other ear un-sewn for now.

Resume sewing through all four layers of felt once you get back to the head of the bunny as shown above.
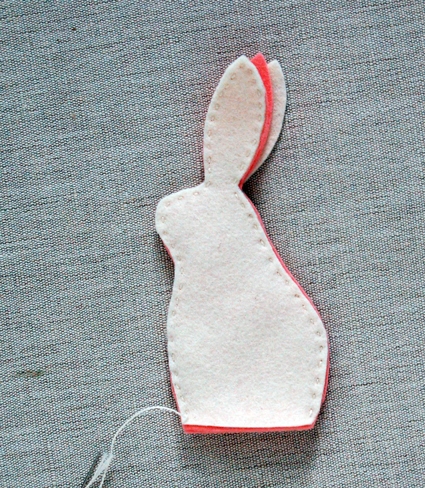
Keep sewing in this manner until you get to the bottom edge of the body.

Open up the bottom of the shape so the bright felt is on the inside of the opening. Sew through only two layers (the white and the bright felt) of the bottom edge of the puppet. Then continue on sewing along the opposite side through just the other two layers. This will form the finger opening.

Once you’re done sewing the body, sew the second ear together along the perimeter with a small running stitch.

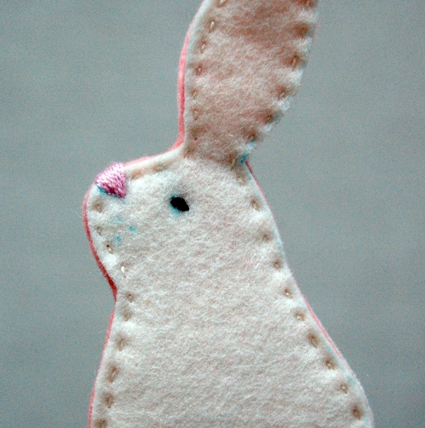
The Bunny’s body is now done and ready to be embroidered.
Embroider the Face
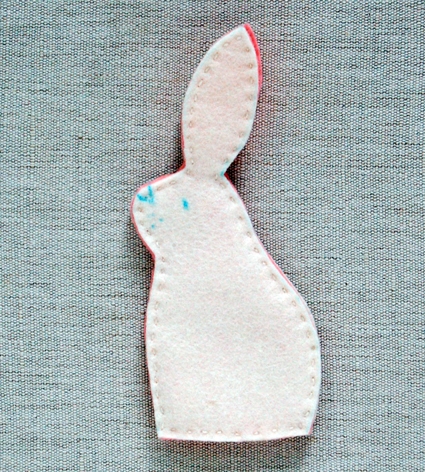
Draw a face on the bunny as shown on the template.

Using the pink embroidery thread and a satin stitch, embroider the nose.
Embroider the eye with a couple of back stitches.
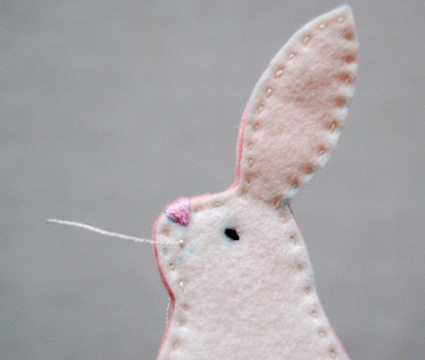
To make the whiskers, tie a little knot leaving an inch long tail in the cream embroidery floss. Pull the floss though one of the whisker markings.
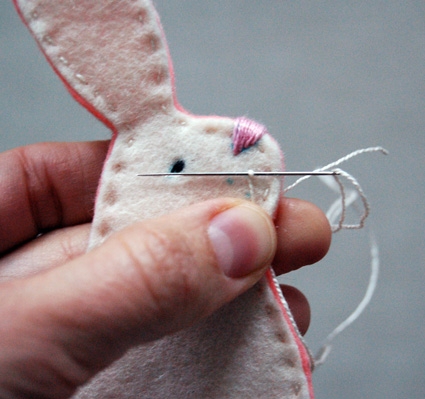
On the opposite side wrap the thread once around the needle. Pull the needle through this wrap, forming a small French Knot, and then trim the embroidery thread.
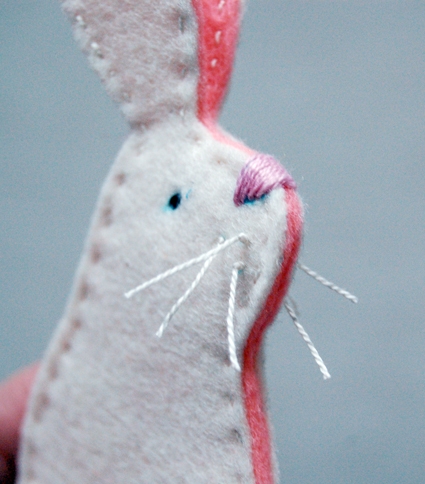
Repeat this for the two other whiskers and trim them so they are all about the same length.
Spray the puppet with water to get rid of the fabric marker markings.
Make the Pom Pom

Wrap the yarn around two of your fingers several times.

Pull these loops of yarn off of your fingers, and wrap the yarn’s tail tightly around the middle of the loops. Tie a little knot.

Cut the loops to form a pom pom.
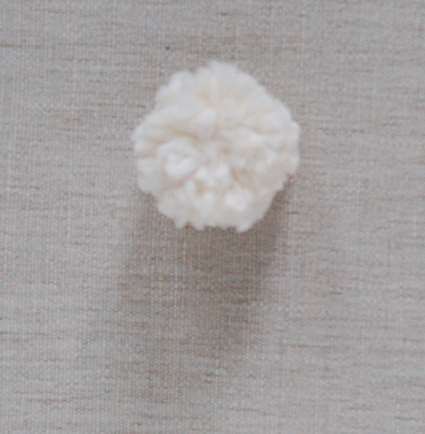
Trim the pom pom so it’s fluffy and round.

Using the cream colored embroidery floss, sew the pom pom tail onto the puppet.
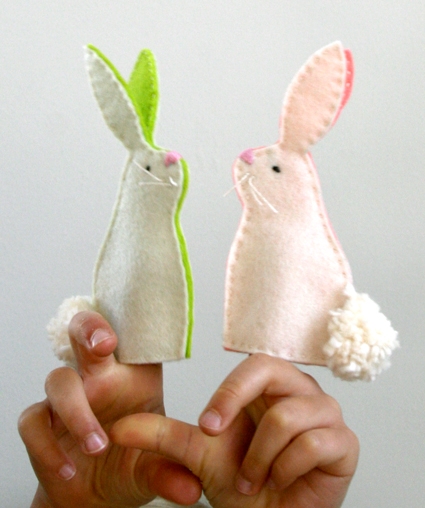
Repeat these steps to make one little bunny in each of the bright colors and have a Hoppy Easter!


These finger puppets are ADORABLE! I linked back to your blog in my post featuring cute finger puppet patterns and plan to make my daughter a set of these very soon!
http://www.feltwithlovedesigns.com/2013/07/21/links-with-love-free-finger-puppet-patterns/
Thank you for the great patterns!
So cute! I am going to make one for my daugther's basket. She loves bunnies.
Nossa,que fofinho!Vou fazer como enfeite de uma cestinha de vime,com guloseimas de chocolate,e dar de lembrana pr toda famlia!Parabns pela linda ideia!…
great bunny. Thanks for share how to do it :-). I must try to do it
Hi,
I am making a lot of these and they are so lovely. But how do you do the satin stitch on the nose without the knot showing?
Many thanks,
A
Hi AB-
Once you're done satin stitching tie a small overhand knot at the base of the nose. Then pull your needle in between the felt layers and out the tip of the nose and trim the thread directly at the exit point to hide the tail.
Thanks for getting in touch!
Molly
Hello:
I just love your site.
I am in the process of making these cute little finger puppets for my 20 mth old granddaughter.
I have a question about sewing them together. Do I use the Appleton Tapestry yarn to sew them together? And is wash cloth cotton yarn ok to make the tails? How many times did you wrap the yarn around when tying off the bunny tail?
Looking forward to hearing back from you.
Sincerely
Kathleen
I have a similar question to AB's–how do you manage the eyes without a knot showing? With only a couple of stitches there, I found it hard to hide the knots.
Thank you! This is such a wonderful tutorial!
Hi Misku-
Please see my response to AB above your comment. You can hide the knot at the eye in the same manner.
Thank you!
Molly
Hi Kathleen-
The Appleton Yarn is used to make the tail (although if you'd like to use another yarn almost anything would work!) The embroidery floss is used to sew the pieces together and do the embroidery. The materials were a little unclear so I can see where your confusion came from- I've edited the pattern so hopefully it makes more sense.
I think I probably wrapped the yarn about 12 times but it's really up to you and how fluffy you want your tails to be.
Thanks for writing in!
Molly
A few months ago, I saw these cute little finger puppets in Martha Stewart Living. I immediately loved them and used the pattern to create egg warmers. I have mentioned your website in my blog post ( in Dutch): http://www.etenmetiris.nl/foodswap-prima-pasen/
Thank you for the idea and pattern!
I love these bunnies, I made them two years ago and keep them in my easter box. I stand them on the table with corks to keep them upright.
Thank you for the great idea.
Amei! vou fazer nessa pascoa para presentear!
I made some of these for Easter a couple of years ago. They are adorable. I teach 3 year olds Sunday School at church and am making them again for my class for Easter this year. Thanks again for such an easy and fun Easter craft!
Lovely, bunnies so Fresh and spring like,just the pressie for Easter.x
Thankyoux