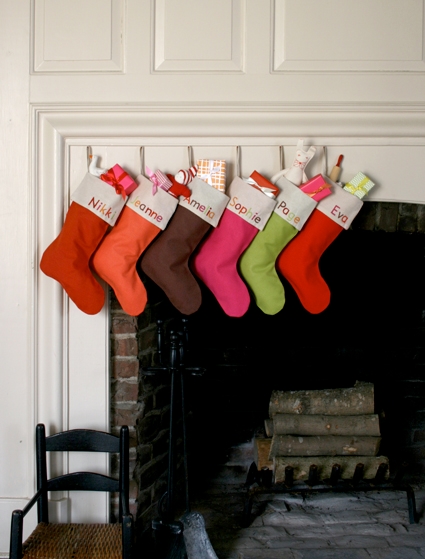
Simple Embroidered Stockings
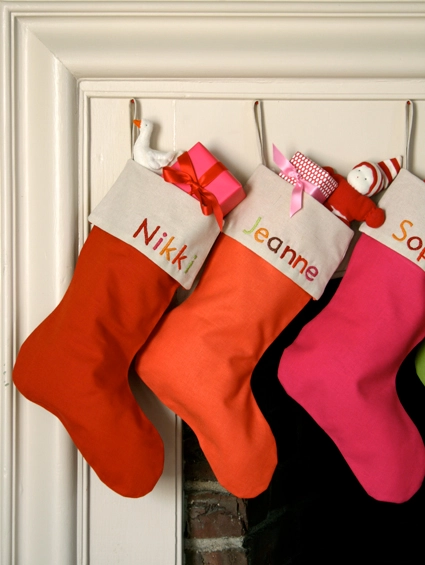
These stockings are designed to be a quick project. You can make one for each member of your family and still have time to be together and enjoy the holiday! They are made with the rich, gloriously colored solids from Kaufman, Essex and Kona Cotton as the base, and the simply beautiful natural Essex as the lining. There is something so sweet about seeing everyone’s stocking hung on the mantle in anticipation of the goodies that will soon fill them!
Designed by Purl Soho designer, Molly Schnick. Click here to see even more of Molly’s work!
Materials

To make six stockings. If you’d like to make more or less just buy a 1/2 yard of a colored solid and a 1/2 yard of the natural Essex for each stocking.
- Six 1/2 yards of solid fabrics in a pretty holiday range. I used Essex in Red, Hot Pink, Brown, Lime, and Orange, and Tangerine Kona Cotton. If you are using bright reds or pinks we highly recommend laundering your fabric before you use it so it doesn’t bleed. (Please Note: We no longer carry the full range of Essex colors or Kona Cotton. Visit our Spectrum Cotton for a full palette of choices here!)
- 1 3/4 yards Essex for lining. I used Natural.
- 25mm bias tape maker
- Six colors of embroidery thread in the same range as the solid fabrics.
- A water soluble fabric marker
- An Iron on Transfer Pencil
- Tracing Paper
- A Reverse Alphabet, available for free download here, printed out
- A Simple Embroidered Stocking Template, available for free download here, printed, cut out, and taped together.
Cutting and Preparation

Iron one of the colored solid fabrics selvage to selvage and trace the stocking template onto it.
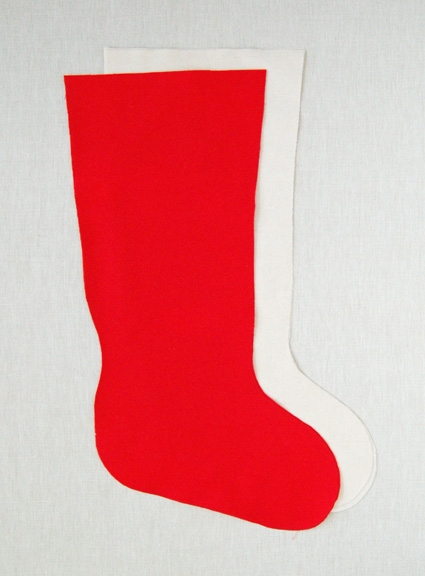
Cut out the stocking shape, cutting through both layers of the fabric at the same time. You will have two colored stocking shaped pieces.
Repeat this with the natural colored Essex.
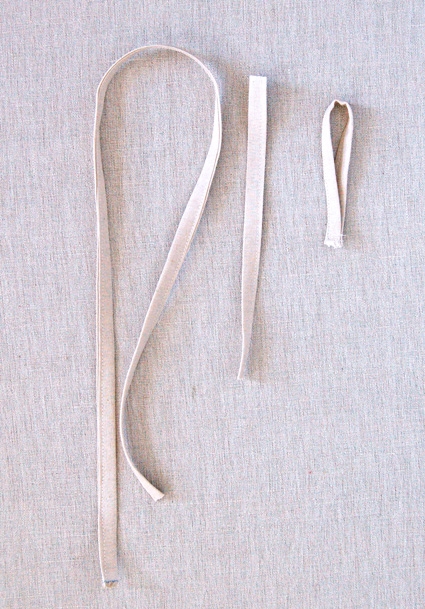
Cut two 2-inch strips from the 44-inch width of the natural fabric. Press these strips into binding tape as per the instructions on the 25mm bias tape maker.
Sew the binding tape shut with a 1/8-inch seam allowance.
Cut six 8-inch strips from these sewn pieces of binding tape. Sew their ends together 1/4-inch from their raw edges so that they each form a loop. These are now called the Loop Pieces.
Sewing the Stockings
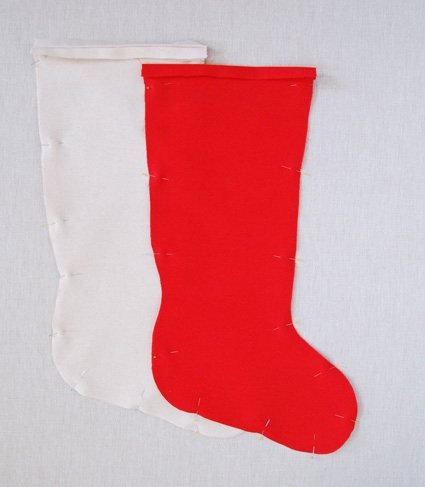
Pin the colored stocking pieces together leaving the top open. Fold the raw edge of each top piece down a 1/2-inch towards the outside of the pinned pieces.
Repeat this for the natural colored stocking pieces.

Sew the colored stocking pieces together with a 1/4-inch seam allowance. Start and stop your sewing at top folds but do not sew the folds down.
Sew the natural stocking pieces together with a 1/2-inch seam allowance. Start and stop your sewing at top folds but do not sew the folds down.
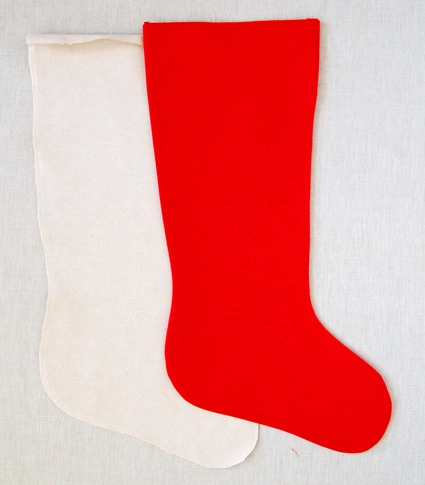
Turn the colored stocking piece right sides out, tucking the top folds inside. Press the colored stocking like this.
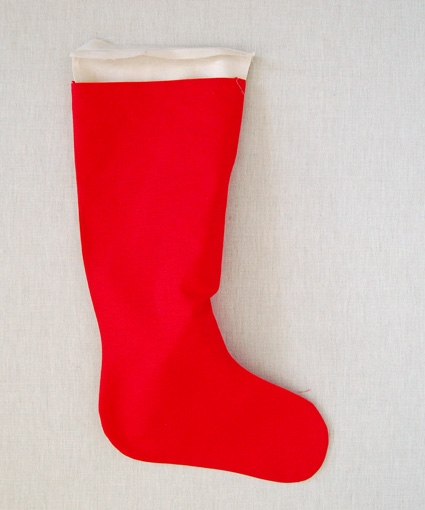
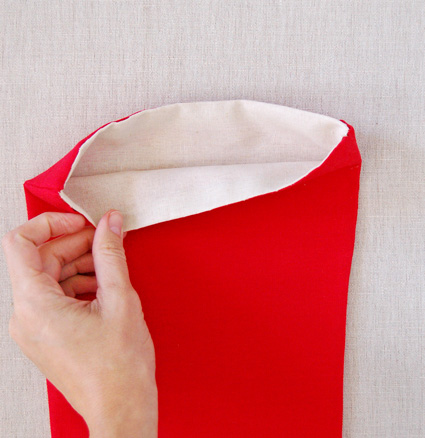
Slide the natural stocking piece inside the colored piece. Push it all the way into the colored piece so it fits snuggly inside and tuck the top folds of the natural piece neatly in between the colored and the natural pieces. Press the pieces together this way.
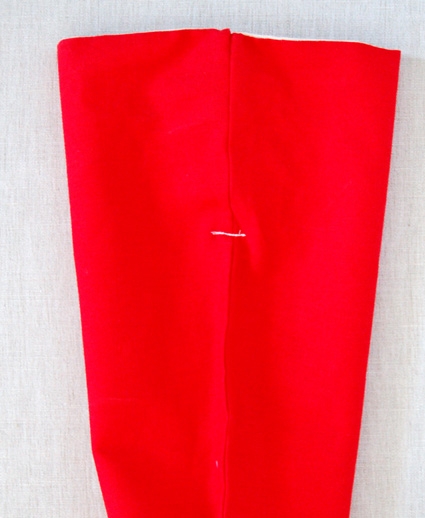
Pin the tops of the pieces together making sure that the side seams meet and the folds are neatly encased inside.
Sew the tops together with a slip stitch.
Adding the Loop

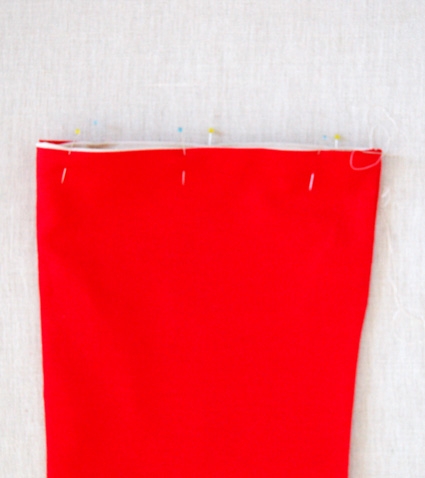
Turn the stocking inside out and pin the bottom of one of the loop pieces to the outer side seam (the seam along the heel side) 4 1/2-inches from the top.
Attach the loop on to stocking by sewing across the bottom of the loop a few times, perpendicular to the side seam. Make sure the lining and outside of the stocking are flat as you do this so they don’t get folded on themseleves as you are sewing.
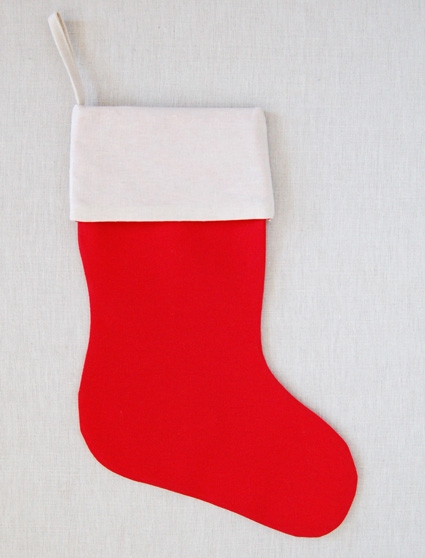
Turn the stocking right side out and fold the top down 4-inches. Press this fold down.
Embroidering the Names

Using a piece of tracing paper draw a horizontal line using a pencil. Then trace the name you’re using along this line using the Reverse Alphabet and the Iron on Transfer Pencil.
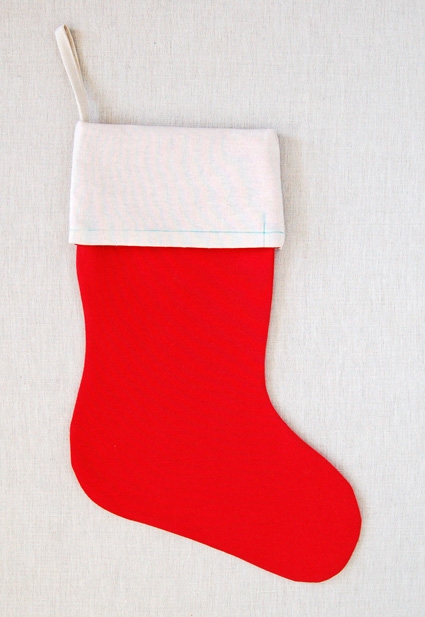
Meanwhile orient your stocking as shown above, with the toe facing to the right. Using the water soluable fabric pen, make a horizontal mark 1/2-inch from the bottom of the stockings fold. Make a vertical mark 3/4-inch to the left of the right edge of the fold.
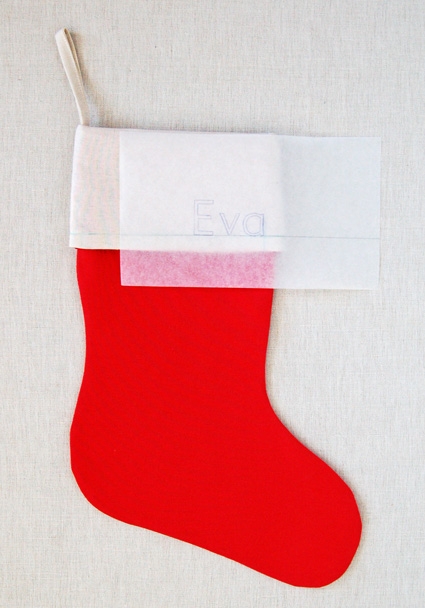
Place your traced name along the marked horizontal line so that the last letter of the name meets the vertical marking. Make sure you have flipped the tracing paper around so the letters are going the correct direction and the iron on pencil marks are meeting the fabric.

Using a very hot iron press the traced name onto the fabric in this orientation. Be very careful not to move the name while you’re ironing. If you need more help with this step please click here and scroll down to “transfer pencils”.

Pick one color of the embroidery thread. Using a small backstitch embroider around the edge of the first letter.

Then, using the same color embroidery thread, fill in the inside of the letter using a satin stitch.
If you need help with backstitch or satin stitch please check out our embroidery tutorial here.

Embroider each letter of the name in the same manner, using a different color of embroidery thread for each letter.
The stocking is all done and ready to be hung by the fire!


ohhh. i love these! i’ve been wanting to make christmas stockings!
What a great blog! I just made some stockings and was trying to decide how to embellish them. I think I’ll try your embroidered name idea (and thanks for the elementary help with embroidery, since I actually don’t know what I’m doing!).
Keep up the great work.
I’m attempting 3 of these right now. I’m crossing my fingers that they turn out half as lovely as yours! Thank-you so much for this tutorial and the patterns, you are truly a lifesaver. Love your shop! xo
http://www.tenacious-dee.blogspot.com
Thanks for this great idea! I have just made these for my nephews. Rather than the letters you suggest I traced their ‘signature’ onto the stocking. Hopefully they will keep them for years.
I made two of these for a niece and nephew, of course they weren’t exactly the same but I was only able to do the things that made them my own because you had done all the foundation work for me. I haven’t embroidered for years and I loved it. Thank you for the idea, the pattern and the advice. I would heartily encourage anyone who’s thinking about this project to do it.
I was looking for some ideas on how to embroider my son's name onto a name tag for his halloween costume (he's an Imagination Mover) and this is perfect! Thanks for all the excellent tutorials (and inspiration!) you provide.
These are cute – I would LOVE to see a modern take on a knit stocking for this year! Anything like this in the works there?
If I need 1/2 yard of the natural essex per stocking wouldn’t I need to purchase 3 yards to make 6 stockings? the tutorial says to buy 1 3/4 yard of natural and 6 1/2 yards of colored to make 6, maybe I’m reading something wrong. Thank you for all of your amazing tutorials!
Hi Tracie-
I can see why this is confusing but the materials list is correct. If you arrange the template pieces close to one another and stagger them so that you cut one right side up and the next one upside down you can get 6 stockings from 1 3/4-yards of fabric. It’s just if you are making the stockings individually that you need to get a 1/2-yard per stocking. If you wanted to do six stockings all in one color you could get 1 3/4 yards each of the lining and the outer fabrics.
Thanks for getting in touch and please let us know if you have any more questions!
Molly
I am looking for Christmas stocking patterns that are either crocheted or a very simple knit one that I can embroider on. I have trouble switching yarns for complicated knit ones. I like this one but want to personalize it even more for my 2 granddaughters. One has to have a gingerbread man and the other one could be anything else. I really need to get going on this. It has to be special for the to keep. I would even be open to quilting them but need to have their names. Help please.
Hi Linda-
I’m afraid we don’t have any embroidery patterns with gingerbread men on them. But we do have some other cute embroidery transfer patterns that you could use to embellish this if you like: https://www.purlsoho.com/purl/products/23-embroidery-transfer-patterns
I hope this helps. Please let us know if you have any more questions!
Best-
Molly
Hi! I’m planning to make this stocking, but would like the cuff and lining of the stocking to be different fabrics. For the lining, then, I will:
1. cut the cuff from fabric A
2. cut the body and foot from fabric B
This means I’ll need to add a seam allowance to the bottom of the cuff and the top of the body, correct? To allow me to sew them together?
Thanks in advance for your help – I’m a beginner sewer so deviating from the instructions is new for me!!
Hi Sara,
Yes that is correct, you will want to add seam allowance to the body of the cuff and the top of the body.
Enjoy,
Melissa
Hi,
the link to the stocking template and reverse alphabet don’t seem to be working? thank you!
Hi Namita,
Thank you for reaching out! We’re noticing some issues on our website because of a recent update and are still ironing out some residual kinks. We’re aware of this problem now and are urgently looking into it, so thank you for bringing this to our attention! I’m sure this is frustrating, so we appreciate your patience as we troubleshoot in the meantime. We hope to have the photos back up again soon!
All the best,
Gianna
Hello! I’ve sewn these for my whole family and this spring we added to our family- I’d love to sew another but the link to the pattern isn’t working. Am I doing it wrong?! Thanks!
Hi Renae,
Thank you for reaching out! We’re noticing some issues on our website because of a recent update and we are still working out some issues. We’re aware of this problem now and are urgently looking into it, so thank you for bringing this to our attention! I’m sure this is frustrating, so we appreciate your patience as we troubleshoot in the meantime. We hope to have the photos back as soon as possible!
All the best,
Gianna
Hi Gianna,
Any progress on this issue?
Many thanks!
Sarah
Hi Sarah,
Thanks for reaching out again! Yes, as of yesterday afternoon the template and pictures have been restored!
All the best,
Gianna
What is the finished size of these stockings?
Hi Jami,
Thanks for reaching out! The stockings are approximately 12″ tall and 6″ at the widest point!
Warmly,
Gianna