Chain Piecing Tutorial
Chain piecing is an indispensable quilt-making technique! It is a quick and efficient way to piece together a pile of quilt pieces, one after another. Here’s a how you do it…
Start chain piecing with a piece of scrap fabric, called the “lead fabric.” You start with the lead fabric so that potential tangles and knots are on scrap fabric rather than on your actual quilt top. Using a lead fabric also enables you to begin sewing exactly on the edge of your actual piece, so your seam will be perfectly finished.

Sew across the lead fabric, then without lifting the presser foot or cutting the thread, place the first pair of pinned pieces in front of the presser foot and sew across their pinned edge. At the end of that seam, place the next pair of pieces in front of the presser foot, and repeat the process. (Between the two pairs, you can expect a short length of stitches that don’t go into any fabric at all.)
Continue like this until you’ve joined all of your pinned pieces.

Take the pieces out of the machine and observe that they are joined together along one side, like a banner.

Snip the threads connecting the pieces, discard the lead fabric (or save it for next time!), and continue on with your pattern!
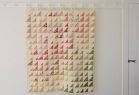
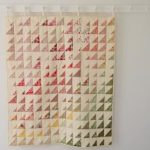
P.S. The photos in this tutorial come from the free pattern for our Tiny Tile Quilt.