Your basket is empty.
Continue Shopping
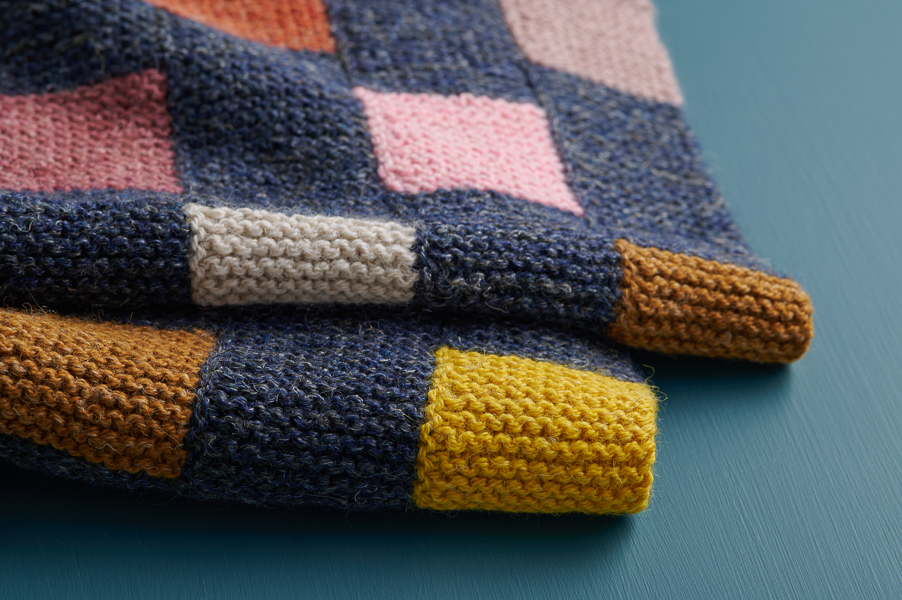
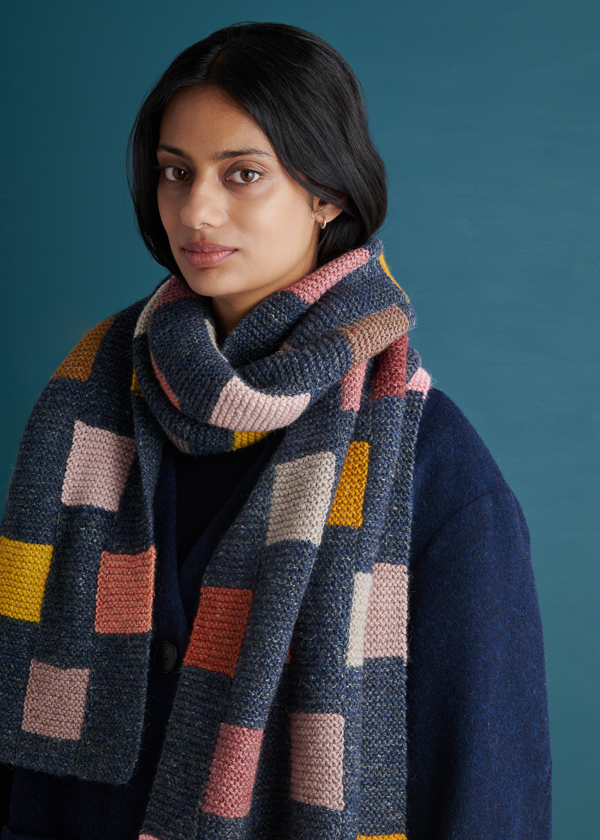
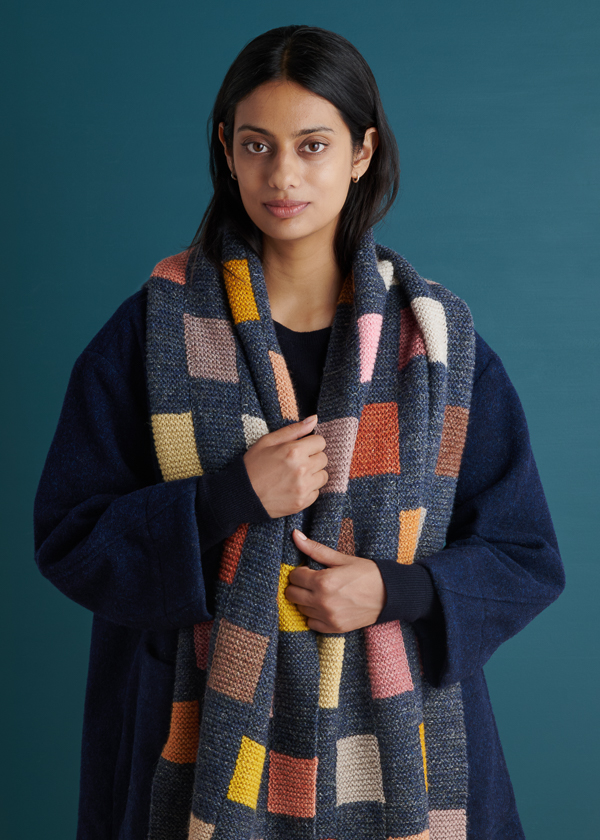
Lantern Light Wrap
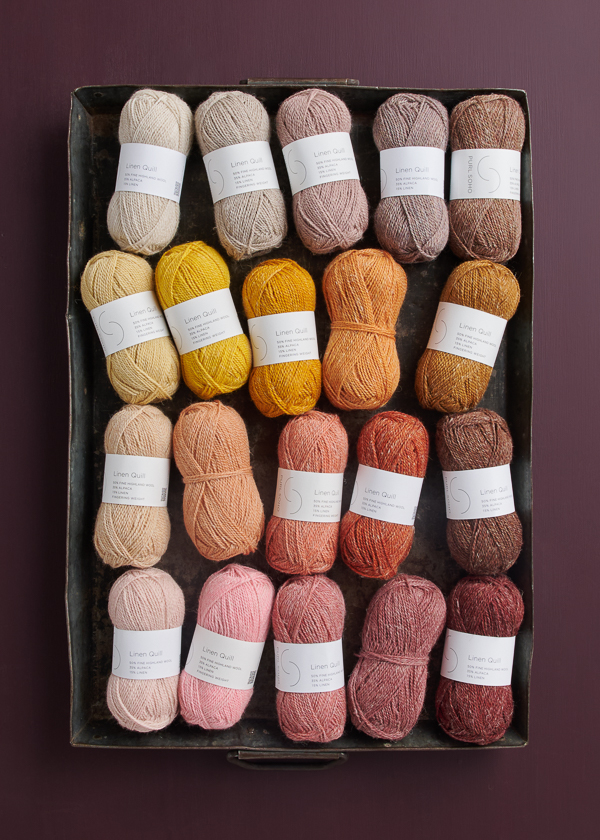
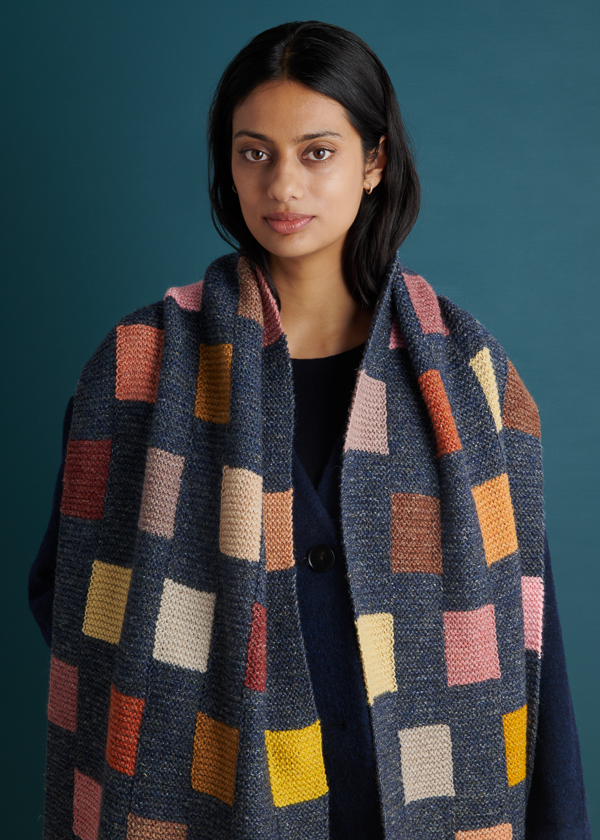
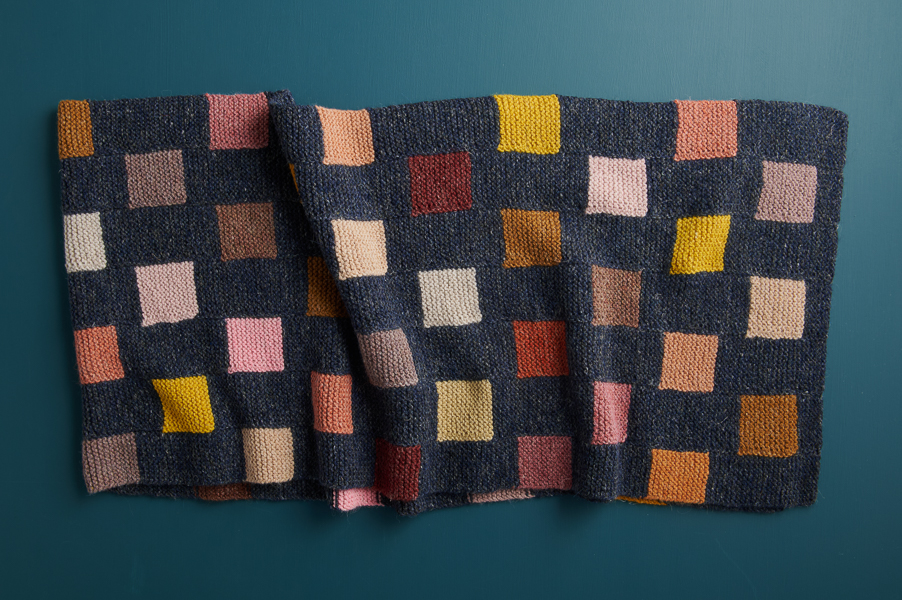
Set the darkness aglow with our Lantern Light Wrap pattern! It is illuminated by our Linen Quill Minis’ new Stone Fruit palette, bursting with juicy, sun-warmed colors. Every Mini gets to shine in this project, luminous as a paper lantern against a rich night-sky background!
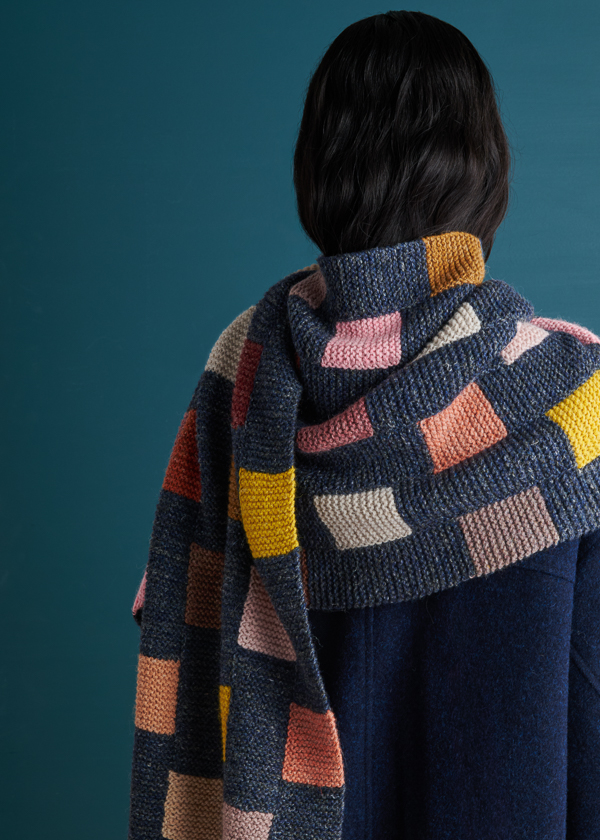
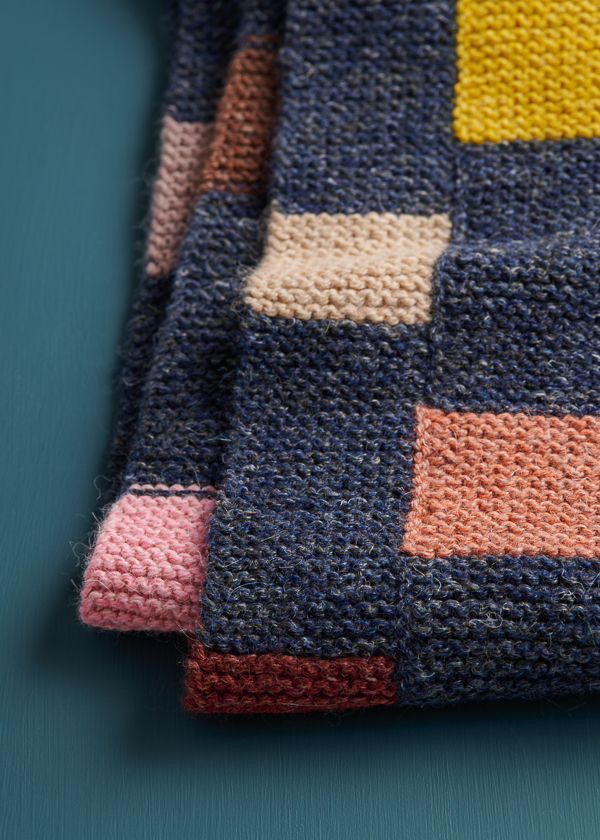
You work this elegant wrap in long garter stitch columns that alternate between background and blocks of color, picking up stitches along the edge of the previous column for a satisfying no-sew join. We left our color order to chance, and we invite you to do the same by selecting each Mini at random and letting it take its naturally harmonious place among the others. The knitting is surprisingly quick with the yarn held double throughout… You’ll find yourself just floating along to the next glowing Mini!
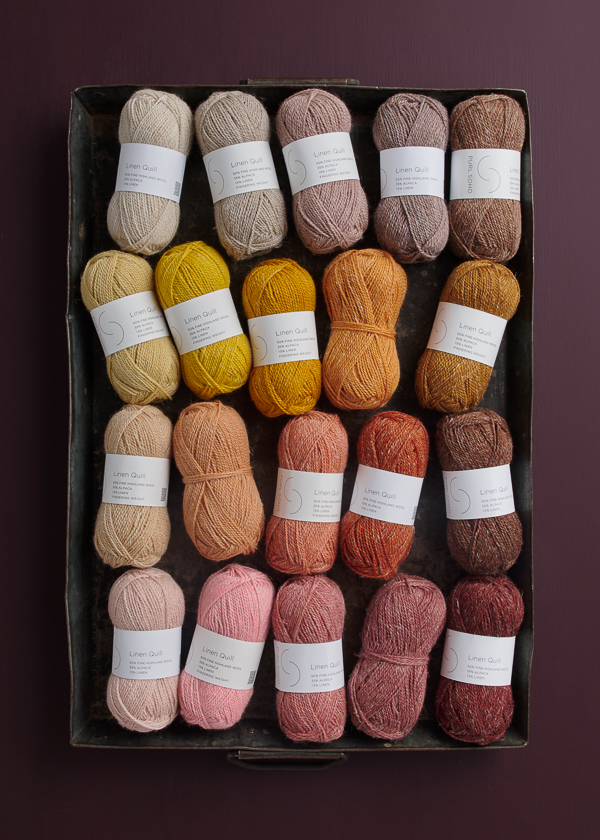
Linen Quill’s radiant colors are naturally complex, a result of the way each fiber in the mix—Andean highland wool, alpaca, and linen—takes the dye a little differently. From golden nectarine to rosy lychee, our new Stone Fruit palette includes twenty 25-gram balls of this fingering-weight yarn.
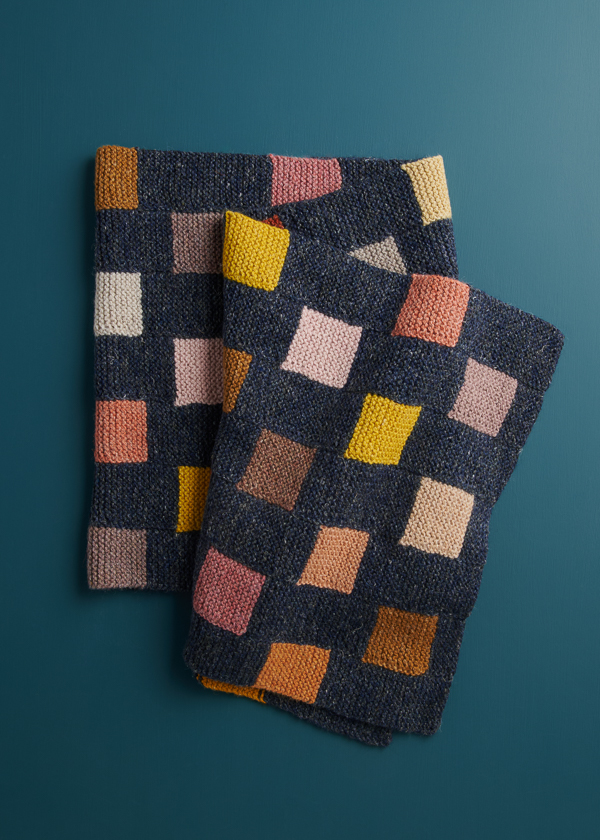
You’ll need just one 20-color bundle to make the wrap—either new Stone Fruit or perennial favorite, Beach Walk—plus 6 full-size Linen Quill skeins: 3 skeins of each color you combine for the background. We chose Dark Denim and Stillwater Blue for the perfect midnight shade!
Pick up your palette, cast on, and fill the sky with light!
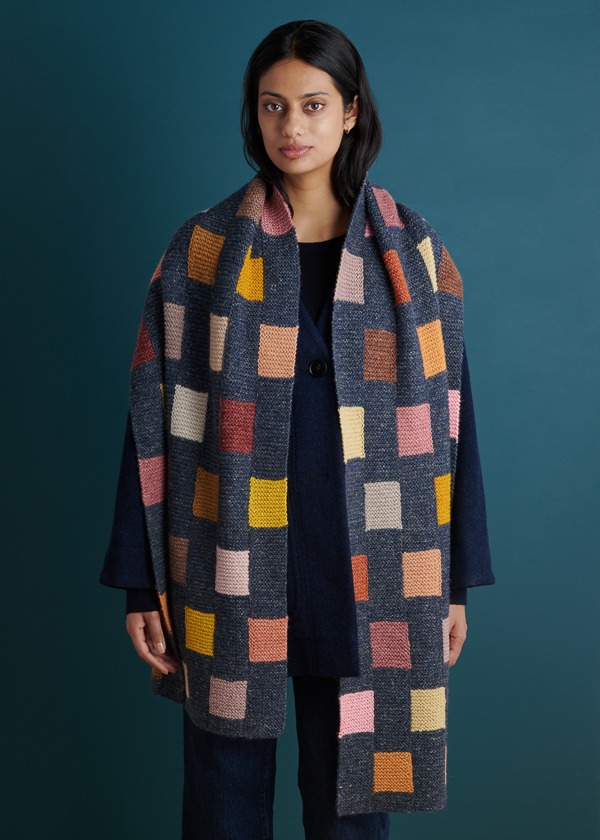
Pattern designed and written by Purl Soho designer, Gianna Mueller. See even more of Gianna’s work on her Instagram!
Story written by Andrea Lotz for Purl Soho.
Want to print this pattern? On desktop, find the “print” icon in the right margin, and on mobile, scroll to the end of the pattern for it. Use the on-screen instructions to remove anything you don’t want to print!
Materials
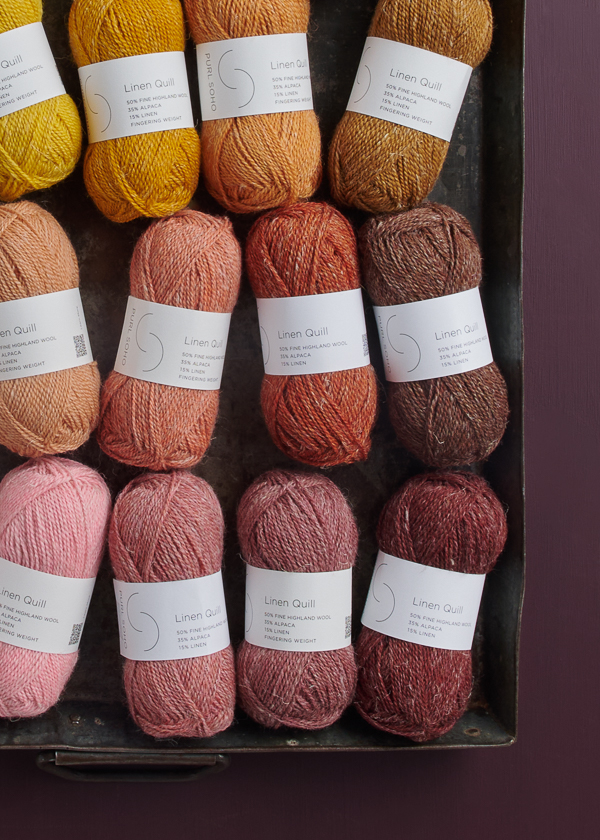
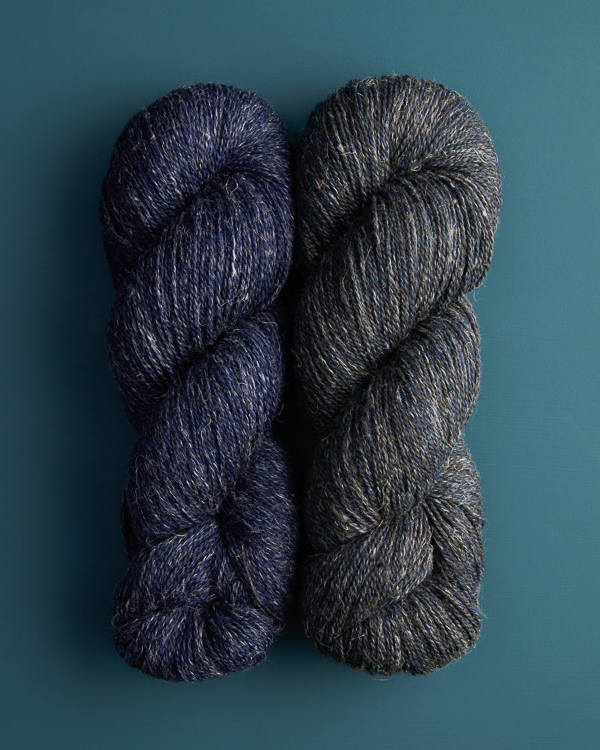
- Main Color (MC): Six 100-gram skeins Purl Soho’s Linen Quill, 50% fine highland wool, 35% alpaca, and 15% linen. Each skein of this fingering-weight yarn is 439 yards/ 100 grams. Hold a strand of each of these colors together for MC…
- Stillwater Blue: 3 skeins; approximately 1000 total yards required.
- Dark Denim: 3 skeins; approximately 1000 total yards required.
- Contrast Color (CC): 1 of Purl Soho’s 20-color Linen Quill Minis bundles, 50% highland wool, 35% alpaca, and 15% linen. Each bundle of this fingering-weight yarn includes 2180 yards/ 500 grams; approximately 1000 total yards required. We used the Stone Fruit palette. Hold two strands of a single color together for CC.
- US 7 (4.5 mm), 24-inch circular knitting needles
- A stitch marker
GAUGE
20 stitches and 40 rows (20 ridges) = 4 inches in garter stitch with yarn doubled (see Notes)
SIZE
Finished Dimensions: 17½ inches wide x 69½ inches long
NOTES
YARN HELD DOUBLE
Throughout this pattern, you will work with two strands held together. For Main Color (MC), hold one strand of each of the two MC colors together. For Contrast Colors (CC), hold two strands of the same CC together, pulling one strand from the inside and one strand from the outside of each ball.
RANDOM COLOR ORDER
Grab two vessels (we used paper bags) and place all 20 Contrast Colors into one bag. Now, close your eyes and randomly select one color from the bag. After using that color, place it into the second bag. Repeat this process until you have emptied the bag, then do it all again until your wrap is complete (you will end up using 14 Contrast Colors 3 times and 6 Contrast Colors 4 times). Trust the process!
GARTER RIDGE
A “garter ridge” equals two rows of garter stitch. It looks like a prominent horizontal ridge and is an easy way to count rows.
WEAVING IN ENDS AS YOU GO
To spare yourself weaving in dozens and dozens of tails, we recommend weaving them in every time you join a new color. Our video tutorial shows you how to do this, or here is a brief explanation…
To weave in ends as you go, *hold the tails of the new and old color together, bring them over the working yarn at the wrong side of the work and knit next stitch, drop tails and knit next stitch as normal, repeat from * for approximately 1 inch.
PATTERN
COLUMN 1
With Main Color (MC, see Notes, Yarn Held Double), use a basic Long Tail Cast On to cast on 12 stitches.
Placing a removable marker or piece of scrap yarn on next row to indicate wrong side, knit every row until you have 24 ridges of MC on the right side, ending with a wrong-side row.
Cut MC.
*Join Contrast Color (CC, see Notes, Random Color Order).
With CC, holding yarn double and weaving in ends as you go (see Notes), knit every row until you have 12 ridges of CC on the right side, ending with a wrong-side row.
Cut CC.
With MC and weaving in ends as you go, knit every row until you have 24 ridges of MC on the right side, ending with a wrong-side row.
Cut MC.
Repeat from * 8 more times, except do not cut MC after last row. [19 blocks; 348 garter ridges]
With right side facing you, bind off all stitches.
Cut MC.
COLUMN 2
NOTE: For help picking up stitches, please visit our Picking Up Stitches Tutorial and scroll down to the Along A Vertical Edge: Garter Stitch, Between Ridges video.
With MC, use a basic Long Tail Cast On to cast on 12 stitches, then pick up and knit 6 stitches along right selvage of first block of previous column. Be sure to start picking up between cast-on row and first garter ridge. [18 total stitches]
Set-Up Row (wrong side): K7, place marker (pm), knit to end of row.
Row 1 (right side): Knit to marker, slip marker (sm), knit 2 together (k2tog), turn work. [1 stitch decreased]
Row 2 (wrong side): Knit to end of row, slipping marker as you come to it.
Repeat Rows 1 and 2 four more times until you have 6 ridges in MC, ending with Row 2. [13 stitches remain: 11 stitches to right of marker and 2 stitches to left of marker with right side facing you]
Cut MC.
**With CC and weaving in ends as you go, knit to marker, sm, k2tog, pick up and knit 12 stitches from right selvage of previous column, beginning one ridge above where you finished picking up last time. [24 total stitches]
Beginning with Row 2, repeat Rows 1 and 2 until you have 12 ridges in CC, ending with Row 2. [13 stitches remain: 11 stitches to right of marker and 2 stitches to left of marker with right side facing you]
Cut CC.***
With MC and weaving in ends as you go, knit to marker, sm, k2tog, pick up and knit 24 stitches from right selvage of previous column, beginning one ridge above where you finished picking up last time. [36 total stitches]
Beginning with Row 2, repeat Rows 1 and 2 until you have 24 ridges in MC, ending with Row 2. [13 stitches remain: 11 stitches to right of marker and 2 stitches to left of marker with right side facing you]
Cut MC.
Repeat from ** 8 more times, then repeat from ** to *** one more time.
With MC and weaving in ends as you go, knit to marker, sm, k2tog, pick up and knit 6 stitches from right selvage of previous column, beginning one ridge above where you finished picking up last time. [18 total stitches]
Beginning with Row 2, repeat Rows 1 and 2 until you have 6 ridges in MC, ending with Row 2. [13 stitches remain: 11 stitches to right of marker and 2 stitches to left of marker with right side facing you]
With right side facing you, bind off to marker, remove marker, k2tog, bind off remaining stitch.
Cut MC.
COLUMN 3
With MC, use a basic Long Tail Cast On to cast on 12 stitches, then pick up and knit 24 stitches along right selvage of first block of previous column. Be sure to start picking up between cast-on row and first garter ridge. [36 total stitches]
Set-Up Row (wrong side): K25, pm, knit to end of row.
Row 1 (right side): Knit to marker, sm, k2tog, turn work. [1 stitch decreased]
Row 2 (wrong side): Knit to end of row, slipping marker as you come to it.
Repeat Rows 1 and 2 twenty-two more times until you have 24 ridges in MC, ending with Row 2. [13 stitches remain: 11 stitches to right of marker and 2 stitches to left of marker with right side facing you]
Cut MC.
****With CC and weaving in ends as you go, knit to marker, sm, k2tog, pick up and knit 12 stitches from right selvage of previous column, beginning one ridge above where you finished picking up last time. [24 total stitches]
Beginning with Row 2, repeat Rows 1 and 2 until you have 12 ridges in CC, ending with Row 2. [13 stitches remain: 11 stitches to right of marker and 2 stitches to left of marker with right side facing you]
Cut CC.
With MC and weaving in ends as you go, knit to marker, sm, k2tog, pick up and knit 24 stitches from right selvage of previous column, beginning one ridge above where you finished picking up last time. [36 total stitches]
Beginning with Row 2, repeat Rows 1 and 2 until you have 24 ridges in MC, ending with Row 2. [13 stitches remain: 11 stitches to right of marker and 2 stitches to left of marker with right side facing you]
Cut MC.
Repeat from **** 8 more times, except do not cut MC after last row.
With right side facing you, bind off to marker, remove marker, k2tog, bind off remaining stitch.
Cut MC.
CONTINUE
Continuing to work in Random Color Order, repeat Columns 2 and 3 two more times until you have 7 columns total.
FINISHING
Weave in remaining ends and gently wet block to finished dimensions.
Share your progress and connect with the community by tagging your pics with #PurlSoho. We can’t wait to see what you make!
LEARN ABOUT LINEN QUILL MINIS + ALL OUR BEAUTIFUL YARNS
Express your love of color with Linen Quill Minis! A unique opportunity to play, these 25-gram balls are mini versions of our super popular Linen Quill, a fingering-weight yarn that is a wonderful blend of 50% wool, 35% alpaca, and 15% linen. Pick up our spectacular 40-Color Bundle or one of our breathtaking 20-Color Bundles and go wild! Be sure to also read our article, Linen Quill: A Closer Look At Our Most-Loved Yarn, to learn all about what makes it so special.
More Knitting Patterns
- Be sure to explore our growing collection of (mostly free!) Linen Quill knitting patterns and cast on!
More Fingering-Weight Yarns
- Shop our entire collection of fingering-weight yarns (What does fingering-weight yarn mean, really? Our guide to fingering-weight yarn will answer your questions and more!)
- If you want to use a different yarn, be sure to take the time to get the correct gauge. Need help? Check our All About Gauge Tutorial, our Yarn Substitution article, and our Complete Guide To Yarn for lots of helpful information.
More Yarns With Similar Fibers
- Shop wool yarn
- Shop alpaca yarn
- Shop linen yarn
Looking for more inspiration? Explore all of our knitting patterns (including tons of free knitting patterns) and knitting tutorials, buy one of our many knitting kits and yarn bundles, and shop for beautiful yarn. We have over 55 gorgeous natural fiber yarns in 1,000s of magnificent colors, designed to bring integrity, beauty, and joy to your next knitting project and only available at Purl Soho!

Similar Posts You Might Enjoy:

This is such a lovely pattern (as all of your patterns btw)! I wonder if this could also be knitted in intarsia technique? Or is there a specific reason why you chose not to do so?
Best
Frieda
Hello Frieda,
Thank you so much for writing in with your comment! We’re so glad to see you’re loving the Lantern Light Wrap as much as we are!
If we were to knit the blanket all in one continuous piece from start to finish, using intarsia would be a fantastic way to add those colorful blocks…great idea! Since this blanket is made in vertical columns (12 stitches wide), each new column is started by picking up stitches. That way, we can work without tricky color techniques that some folks can find bothersome. Plus, this method creates a nice, sturdy garter ridge each time you pick up stitches for a new column.
We really love projects that have a simple yet thoughtful design, and we hope you’ll enjoy it just as much! Please feel free to reach out anytime with any other questions you might have!
Happy knitting,
Hills
I love this pattern!
However, I find knitting with two strands … frustrating (I still have unfinished projects)
Can you suggest a yarn I can substitute with similar “beauty” colors?
Thank you
Hi Jennifer,
Thank you so much for reaching out! I’m so glad you’re considering the Lantern Light Wrap…we’re so excited for this pattern release and thrilled to see you love it.
Two strands of Linen Quill held together should work up to a DK/light-worsted. Cashmere Merino Bloom or Plein Air would be great choices. You might also consider taking a look at Note!
I would always suggest knitting (and blocking!) a gauge swatch, but it’s particularly helpful when substituting yarns! It’s the perfect chance to change your needles to reach the pattern’s gauge (which we list for blocked swatches), and to ensure you love the look and feel of the fabric you’re making.
I hope you find the perfect yarn for you! If you have any other questions, please feel free to reach back out anytime!
Happy knitting,
Hills
I want to order the suggested yarn, but I can’t find the Linen Quill Stillwater Blue color. Can you suggested another color, or two other colors? Thank you!!
Hello Merry,
Thank you so much for reaching out! I’m so glad to read that the Lantern Light Wrap caught your eye, and I’m happy to help.
It looks like Stillwater Blue is available and can be found between Dark Denim and Peach Stone on the dropdown menu for Linen Quill. You may need to click “see all” below the photo grid to find it by eye. Dark Denim would actually be a great substitute for Stillwater Blue, though! I think another great substitute could be Nighttime Blue.
If you’d like some help placing an order, please feel free to email us at [email protected]. We’d love to help you get started!
All the best,
Hills
I love the new pattern, but the fabric knit with Linen Quill held doubled is a little heavier than I’d like. Would it be possible to knit this as a single strand fingering weight project? I know I would need to use a smaller needle (maybe 3 or 4) and the guage would change, but would the overall yardage required be all that different? Obviously, the background would use one color, not two. But otherwise, might it work? Thanks.
Hi Nelle,
Thank you so much for reaching out. I’m so glad to see the Lantern Light Wrap is on your radar. I think this is a really fun idea, and I’m happy to help you brainstorm!
If you were to knit this pattern in a fingering weight, you would end up with a much smaller wrap than our sample. It might make a lovely scarf that way! Just be sure to knit a gauge swatch, and block it, as finished swatches are the best way to get a feel for your final fabric. Swatching will also be the perfect time to see which needles you’re most comfortable with.
Sadly, I can’t really make a super solid yardage estimate this way. We did use Linen Quill held single for the Banner Scarf in garter stitch… we used 430 yards to make a scarf that measures 7 inches wide x 46 inches long at the points. Hopefully this gives you a great starting point!
We can’t wait to see what you make!
Happy knitting,
Hills
I am confused about the direction I am knitting after the first column. Is the second column knit in 90 degrees from the first? Is this similar to the Good Morning Blanket where you are knitting in different directions? For some reason I am struggling to understand the direction for column 2 and subsequent.
Hi Arjuna,
I’m sorry to read that you’ve run into a bit of trouble with the construction of the Lantern Light Wrap, and I’m happy to help!
It looks like the construction is more similar to that of the Color Brick Road Blanket. You’ll be starting column 2 by casting on stitches and picking up stitches (from the right selvage edge of column 1) to make the bottom “brick” of color. As you work up the column, you’ll be picking up stitches for the next “brick” of color from the right selvage edge of column 1.
I hope this helps, but if you’re still running into trouble, please send us an email to [email protected]. We’re eager to get you back on track!
All the best,
Hills
While the wrap is beautiful, I’m searching for a quicker project. How would I adapt this pattern to a scarf?
Hi Jenn,
Great question! The wrap is actually knit in columns of 12 stitches each… 7 total to be exact. If you would like to make it more of a scarf, you could simply omit a few of the columns once you’ve reached your desired width.
I hope this helps, and happy knitting!
All the best,
Mia