Fold-Up Market Tote
Reusable shopping bags are so much better than paper or plastic: They’re more ergonomic, better for the environment, neater to store, and they’re way cuter!

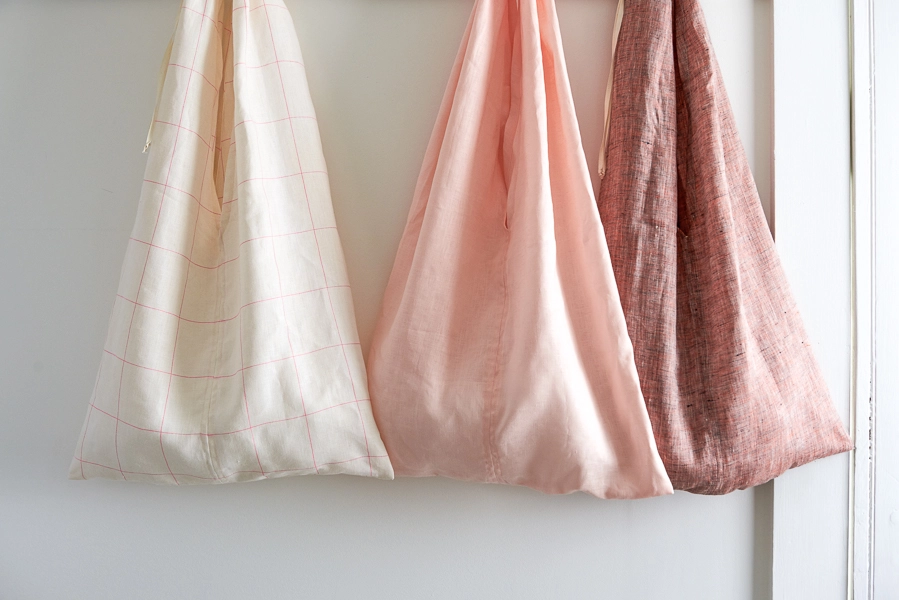
Our Fold-Up Market Tote checks off all these boxes, plus they are super fun to sew. They are cleverly put together with only two pieces of fabric, four totally self-encased seams, and a nice cotton ribbon to tie the whole thing up.
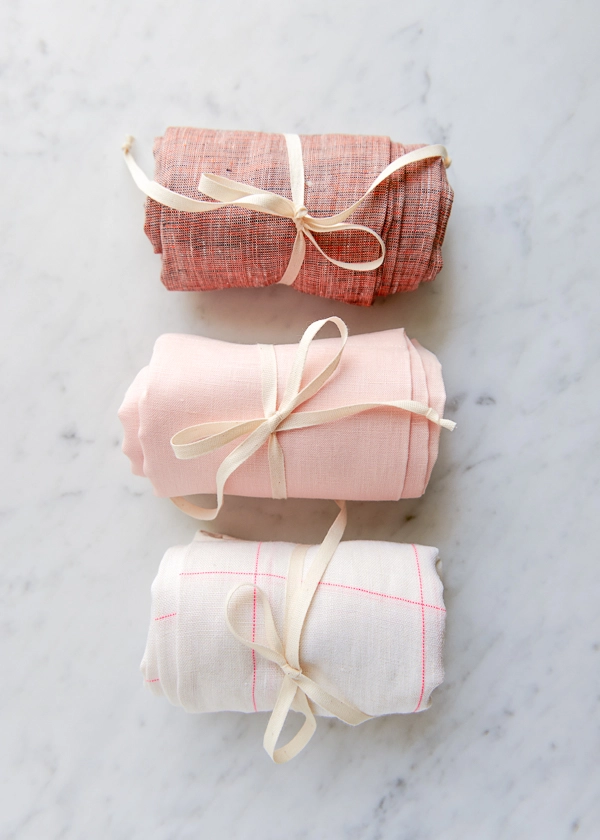
Making a trio requires only a few materials: some thread, cotton ribbon, and three of Purl Soho’s beautiful linen fabrics: Linen Grid, Watercolor Linen, and Handkerchief Linen, making them strong, pretty, and ready for action! -Molly

Update: Now in Spectrum Cotton!
June 2019
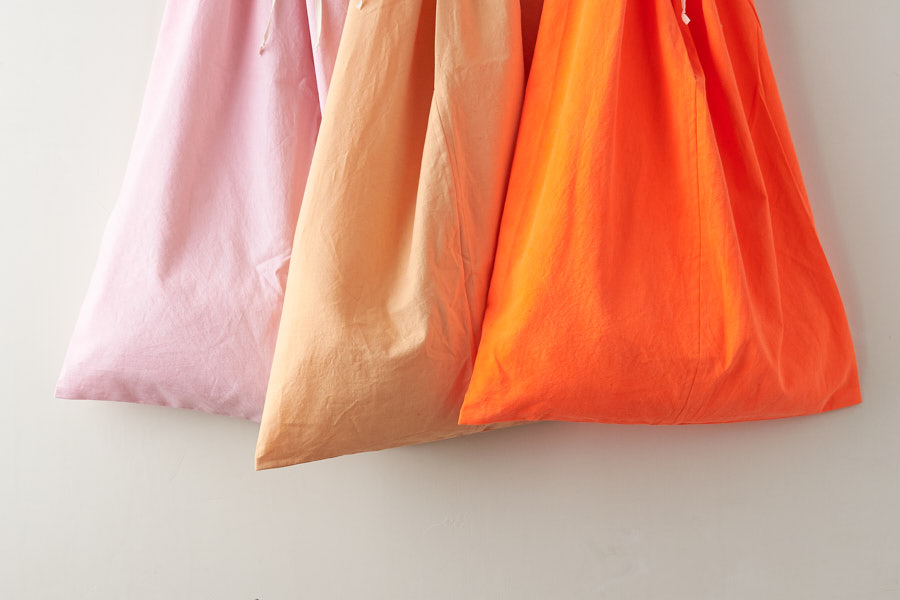
Maybe you’ve seen our Fold-Up Market Totes before, but never like this! We made this batch in Purl Soho’s newest fabric: our gloriously colorful, spectacularly soft, stunningly gorgeous Spectrum Cotton! In 46 shades, Spectrum Cotton is a candy store of color! To see the updated versions of our Fold-Up Market Totes, click here!
Materials
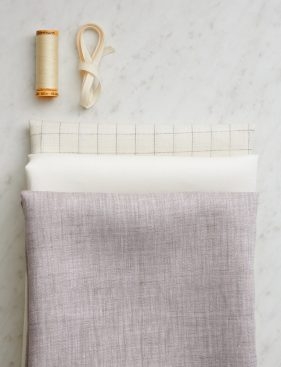
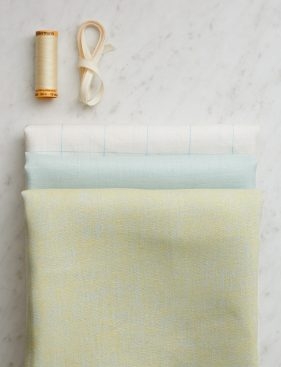
Three yards of fabric is enough material for a trio of bags and we’ve chosen three lovely palettes for inspiration: Pink (pictured above), Gray (pictured below, left), and Mint (pictured below, right). Each one uses…
- 1 yard of Purl Soho’s Handkerchief Linen
- 1 yard of Purl Soho’s Watercolor Linen
- 1 yard of Purl Soho’s Linen Grid
- Please note: We have sold every last bit of our limited-release Linen Grid. As substitutes, we encourage you try our Daily Linen or Watercolor Linen, all suitable in weight and in a stunning palette of colors!
- 3 yards of Studio Carta’s Fettuccia Ribbon, 1/4 inch in Natural
- A 110-yard spool of Gutermann’s Cotton Sewing Thread in color 1040
You will also need…
Size
Finished Dimensions: 18 ¾ inches wide X 15 inches tall, plus a 16-inch handle drop
Note
Machine wash and dry all the fabrics, but not the ribbon, before beginning.
The fabrics we used do not have a clear right or wrong side, so just assign the sides before beginning.
Backstitch at the beginning and end of each seam.
Pattern
Cut + Prepare
From the ribbon cut…
- A 30-inch length.
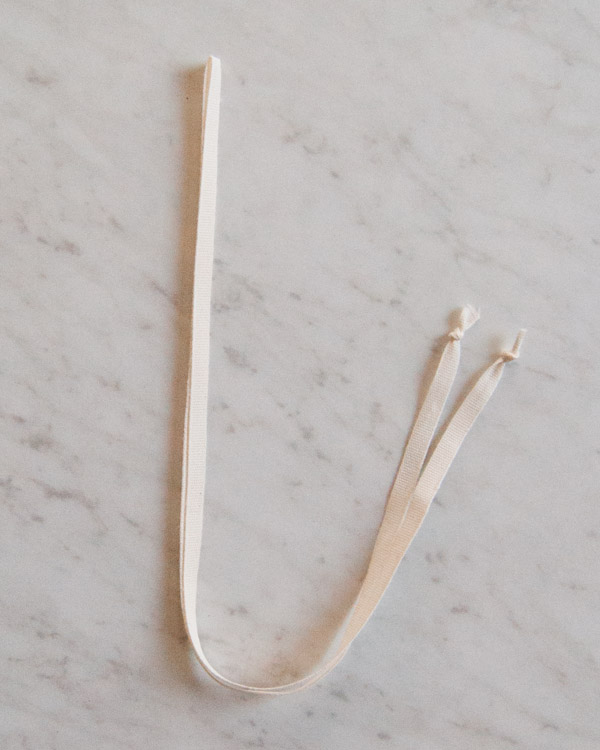
Fold this length in half and tie each end with a simple overhand knot. This is the Tie. Put it aside for now.
From the fabric cut…
- Two 20 x 33-inch rectangles.
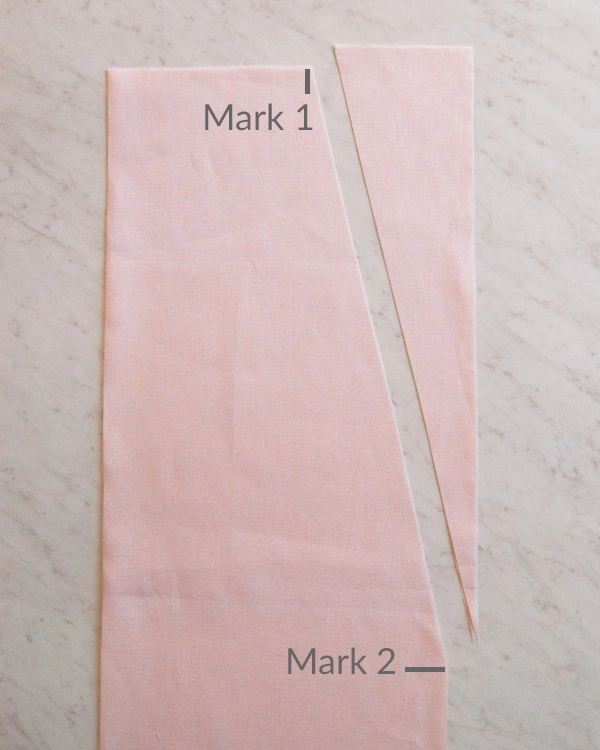
Fold and press one of the rectangles in half lengthwise, wrong sides together, so that the two long sides meet. This pressed fold is called the Long Fold.
Orient the piece so that the Long Fold is on the left and the two raw sides are on the right.
Make a small mark at the top raw edge 6 inches to the right of the Fold. This is Mark 1. Then make a second mark (Mark 2) on the right raw edge, 17 inches below the top right corner. Cut a diagonal line from Mark 1 to Mark 2, cutting off the top right corner in a long triangle shape, as shown above.
Repeat this for the second rectangle.
Assemble
Sew the Center Seams
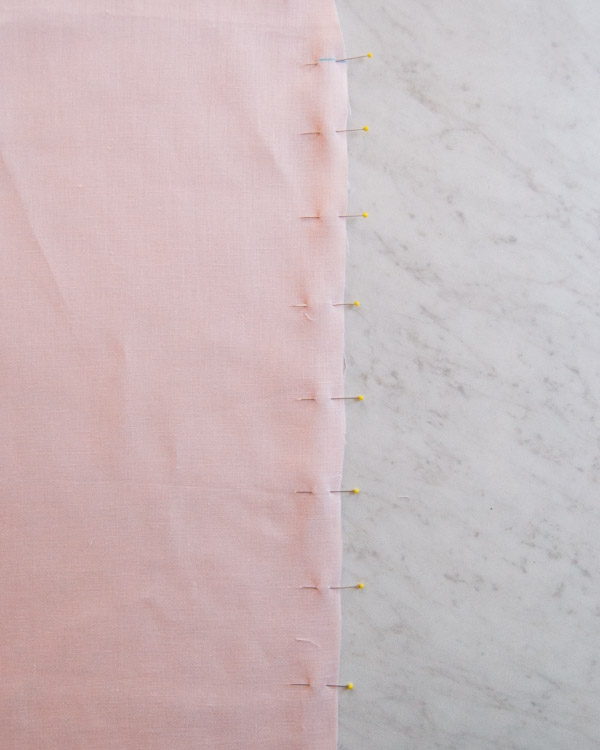
Unfold the fabric pieces and orient them so that each one’s Long Fold is running vertically and raw diagonal sides are at the left and right. With right sides together, pin the two pieces together along the straight right-hand side that runs below Mark 2.

Starting at Mark 2, sew these pinned sides together with a 3/4-inch seam allowance. Backstitch at the beginning and end of this seam.
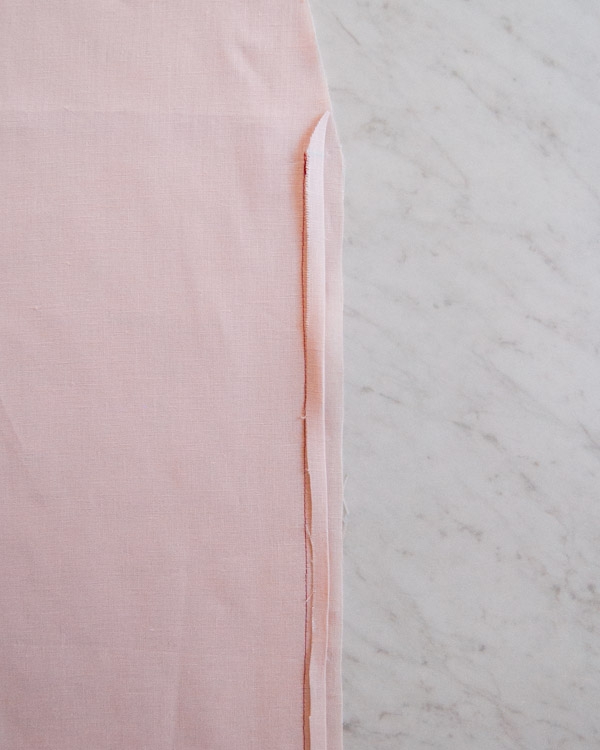
Press the top raw edge of the seam allowance 3/8-inch towards the wrong side of the fabric, so that the raw edge meets up with the seam.
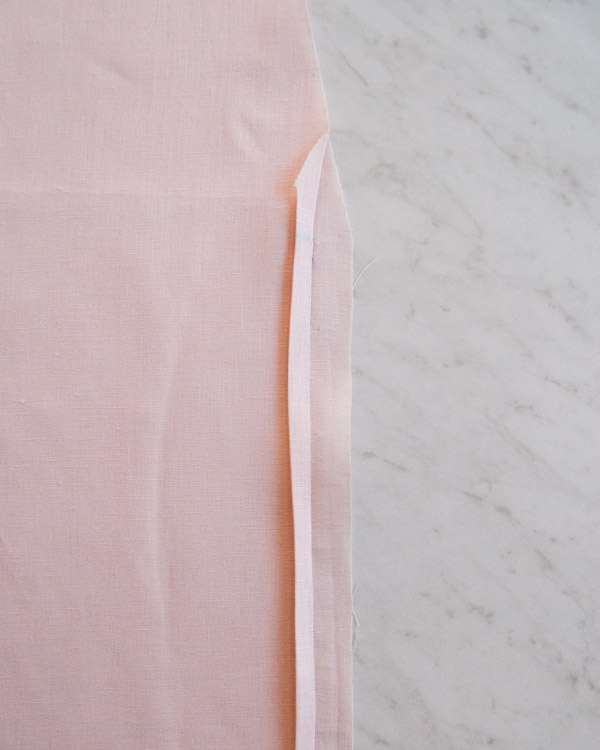
Press this side of the seam allowance over once more, towards the wrong side and along the seam, thus hiding the raw edge of the seam allowance.

Next, fold and press the raw diagonal edge that is above the straight folded edge ¼ inch towards the wrong side.

Then, fold and press the diagonal edge ½ inch over, thus hiding its raw edge. Pin both of these folded sides down. Only pin through the top fabric layer, not through to the second fabric piece underneath.
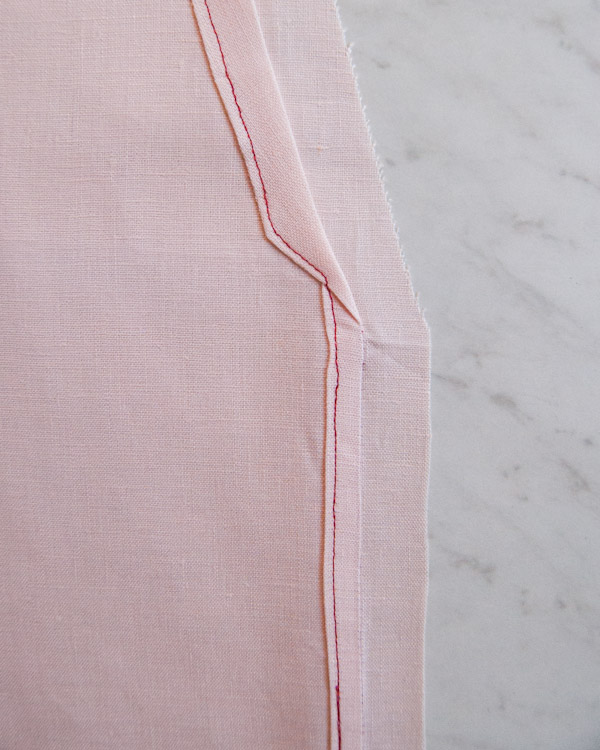
Edgestitch these folded edges down, following along the angles of the fold. You will have to open up the bag along the seam so that you are only sewing into one side of the bag.

Flip the bag over and repeat this process for the remaining seam allowance and raw diagonal edge. The resulting seam is called the Center Seam.
Repeat all of these steps for the left-hand raw sides.
Sew the Bottom
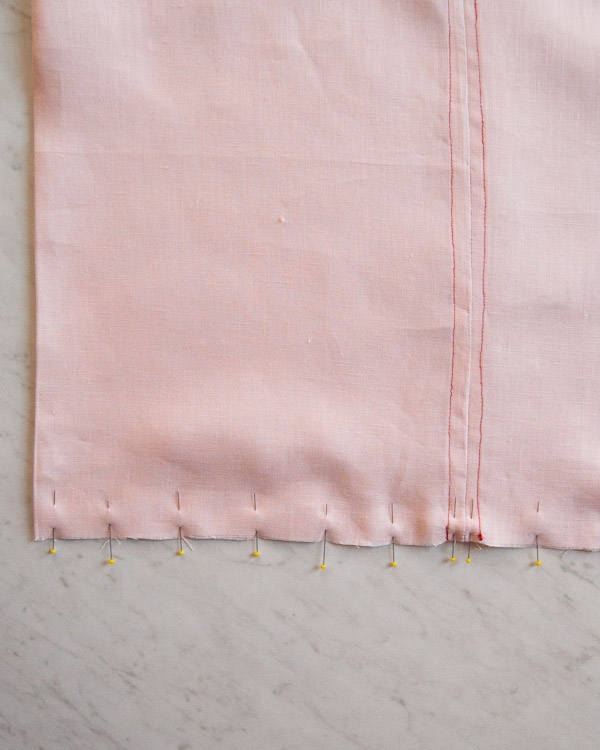
Turn the piece so that the right sides are facing out. Repress the Long Folds and line up both Center Seams so they are on top of each other. Pin the bottom raw edges together, being careful to keep the Center Seams directly on top of one another.

Sew this pinned edge together with a ¼-inch seam allowance.

Turn the piece wrong sides out. Press the bottom seam flat and then pin it once again.
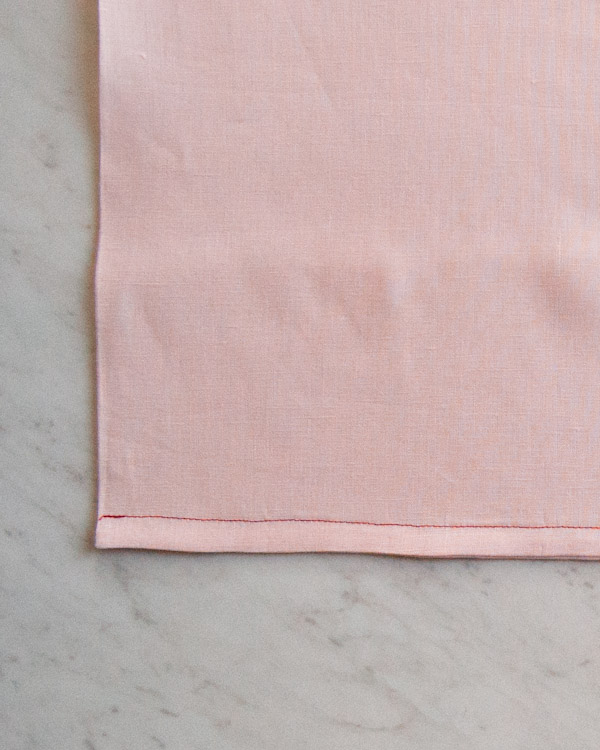
Sew along this pinned edge with a ½-inch seam allowance. You have just sewn a French Seam, which encases the seam’s raw edges.
Sew the Handle
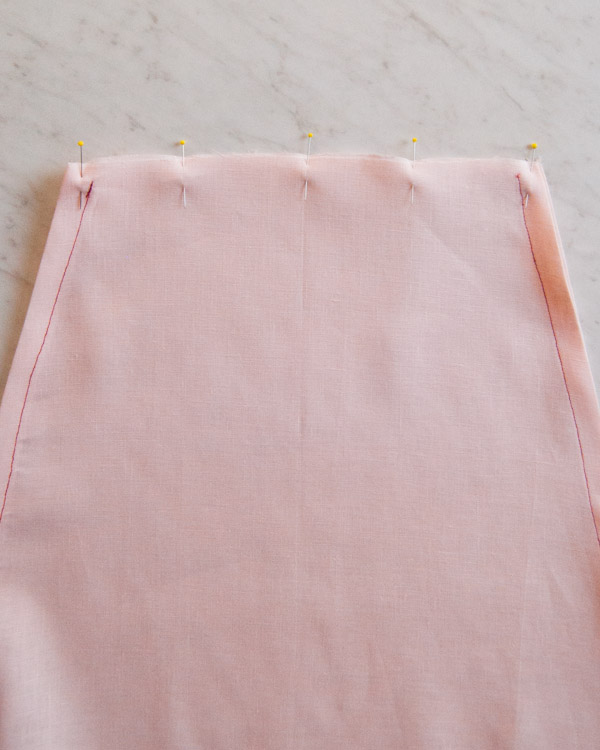
Turn the bag right sides out again. You will now sew a French Seam at the top of the handle. Pin together the top raw edges (the only raw edges remaining on the bag), wrong sides together.

Sew this pinned edge with a ½-inch seam allowance.

Turn the bag wrong sides out again and press the handle seam flat.
Make a mark along the handle’s top edge, 2 ½ inches from its left side. Slip the Tie in between the two layers of the handle and place the Tie’s folded edge under the mark.
Pin the handle’s top edge together, pinning the Tie in place as you do.

Sew this edge with a 1-inch seam allowance, thus sewing the Tie into place.
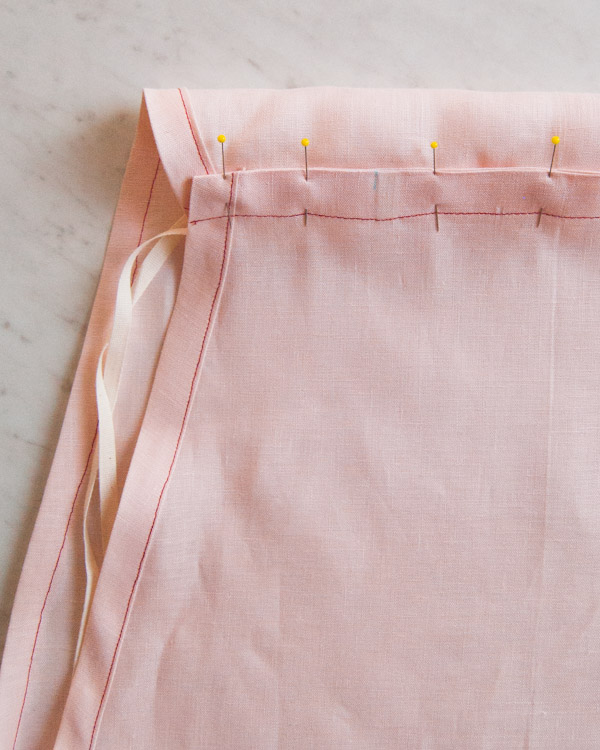
Press and pin this 1-inch seam allowance flat to one side.

Edgestitch this fold down.

Turn the bag right sides out and you’re all done. Now it’s time to fold up your Fold-Up Market Tote…
Fold

First, fold the bag in half lengthwise along the Center Seams so that the Long Folds meet one another.
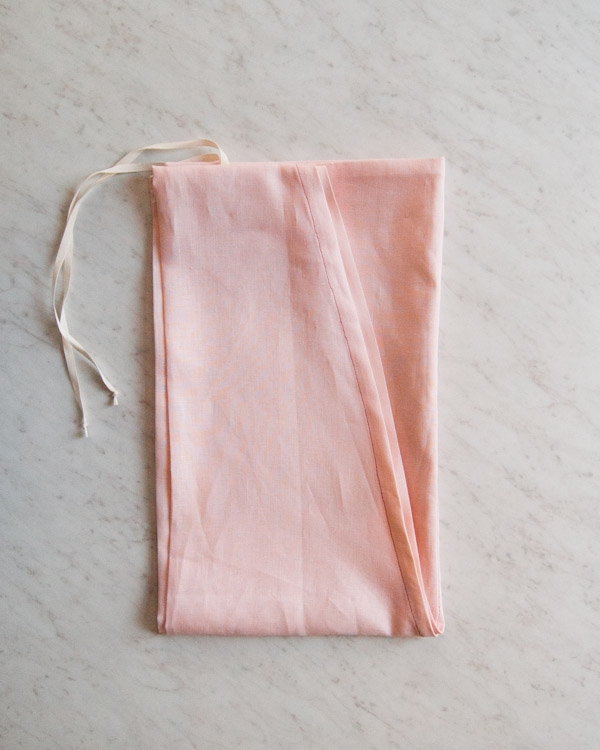
Then fold so that the top edge of the handle meets the bottom edge of the Tote.

Then fold in half lengthwise so that the Center Seams meet the Long Folds.

And then starting at the bottom, roll towards the Tie…

And use the Tie to secure the whole thing with a bow!

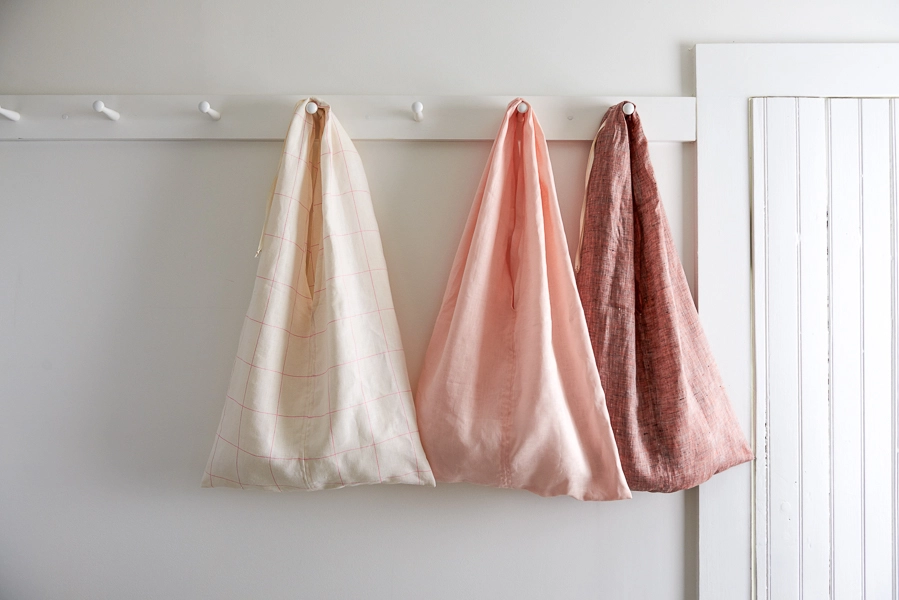
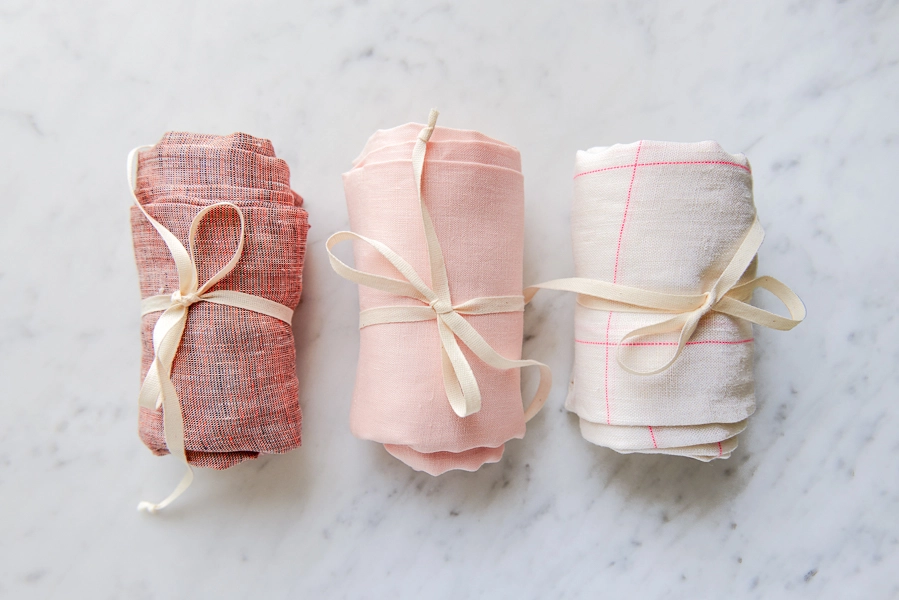
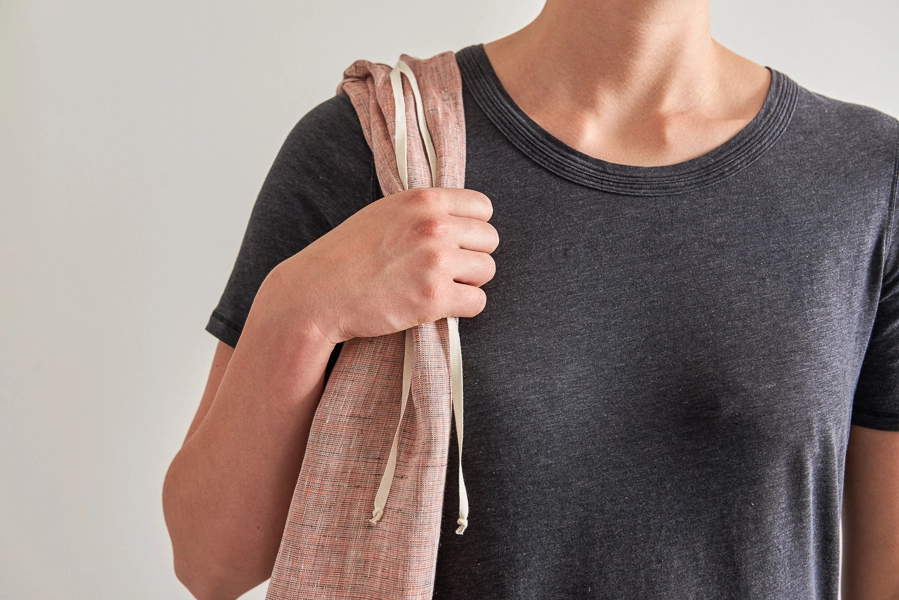







It’s adorable, but won’t hold much more than a can of tuna.
Hi Goldie-
This bag is actually quite roomy and can fit a bunch of groceries! It’s 18 3/4 X 15 -inches which is wider and taller than a standard plastic shopping bag and the thick handle makes it much easier to carry. If you have any questions please let us know!
Best-
Molly
You have just posted the most perfect bag ever! I’m going to make these to replace gift wrap and one for me!! Thank you, thank you!!
Julie
I was looking at your color choices and fell in love with the grey kit. But I fell in love with it thinking it was lavender… Does it have a purple hint to it? Or is it a true grey? Thanks!
Hi Mindi-
The Gray bundle has three fabrics, one white, one white with a gray grid, and one lavender/ gray semi solid Watercolor linen. The color is called Lilac Bark and you can see it on the bolt here: https://www.purlsoho.com/purl-soho-goods/purl-soho-fabric/watercolor-linen.html It is definitely a light purple shade, not a true gray. If you have any more questions please let me know!
Molly
Why do I need three yards of ribbon? Only 30″ are used for the tie, or is it assumed I am making three bags? Probably even more!
Hi Barbara-
The materials listed here are what is contained in our pre-cut bundles which is indeed enough for three bags (one in each fabric.) If you are using your own fabric you will just need 30″ of ribbon.
Thanks!
Molly
I think you must mean that if you are making only one bag, you will need 10″ of ribbon rather than what you stated 30″ of ribbon for the three bags that come in the bundle.
Hi Georgia,
Thanks for writing in! I am happy to clarify! You will need 30″ of ribbon for each bag! The original bundle came with 3 yards of ribbon to use for the the 3 bags!
Best,
Cassy
I can see making quite a few of these for the holidays and for myself. Thanks for the pattern!!
thanks so much for this beautiful bag pattern! In your beautiful linnen it looks stunning! I just made one in leftover fabric I had, and it’s perfect to go into the suitcase for the holidays to have a bag on standby for beach, pool, shopping, knitting … will make for sure some more soon. Cécile
What a wonderful way to encase a precious gift for a friend. A ‘two in one’ gift! Thank you so much for the easy pattern. Market bags are always, always needed.
I love when the wrapping is part of the gift. And I don’t know anyone that would be unable to find a use for this little bag, of course I will need a more ‘manly’ fabric for the men in my life. Thank you! Les
you mention 1 yard of fabric per bag. Is this from a yard that measures 45″ in width?
Hi Thatiana-
The fabric we used is actually 60-inches wide but this would work fine with 45″ wide fabric as well. You need to cut two rectangles 20″ X 33″.
Thanks for your question!
Molly
A very nice pattern to give as a gift.
I’d like the handle at top to be narrower. Do I just move Mark 1? Any other adjustments?
Hi Susan-
You’ve got it… just move Mark 1 closer to the fold. Please let us know if you have any more questions!
Molly
I wanted a thinner handle, but I still wanted it to feel nice and sturdy, so I folded in the edges of the handle to meet in the middle and tacked it down with two rows of stitches. It is just as strong as before, but now is half as wide at the shoulder. I didn’t use the tie–you would probably have to adjust its location if you change the handle.
Hi Judith,
What a great modification! Thanks for sharing!
Best,
Cassy
so glad I saw this! this was my first EVER sewing project, and i thought i did something wrong because the handle is SO wide without the ribbon! I’ll use your suggestion, along with the seam ripper.
My daughter and I made these totes for holiday gifts and I posted about our experience on my Appleton Dance weblog.
Has anyone tried using another fabric other than linen? Just looking at pricing and wondering if there is a more cost effective fabric that could be used. Thanks!
Just made this shopping bag. It was very easy (very clear instructions -thank you) and the hem finishings are so neat. Turned out exactly as in your photographs. It is a HUGE bag. Could easily double as an apron in a pinch
Thanks for the lovely pattern. I have also made a few of your Easy Easier Easiest totes, they’d are brilliant.
Has anyone tried making this pattern with a more durable fabric, i.e. oilcloth or, dare I say, Kraft-Tex Paper Fabric?
Hi Kathy,
Thanks for writing in and what a great suggestion! I have not seen one personally but think that a thicker fabric would work very well here. Just be sure that you are able to roll up the fabric easily for ease of transport and you should be good to go!
Happy sewing!
Cassy
I used Home dec fabric, and lined it with a contrasting home dec. it was too thick at the bottom middle to complete the french seam, so i’ll attach a tassel. i’m not sure i did the lining correctly – just basted it to the outer fabric and sewed as if there was just one fabric. This was an easy and fun pattern! glad i bought 3 different fabrics
It is so nice!!
I love this DIY, because it is perfect for a present.
http://rocotalove.blogspot.com.es/
Hi there,
Thank you for this pattern and directions. Do you by chance have a video tutorial of this? I am a little confused on a few of the steps. Please let me know, thanks!
Abby
Hi Abby,
Thanks for writing in! We do not have a video to accompany this project. I would be happy to try to help answer any questions that you may have!
Best,
Cassy
Lovely, even someone like me who can barely sew can do this!
For a lighter but very sturdy bag, use rip stop fabric. I have made several with a similar pattern. I always have at least one in my purse. They last forever,
Thank you for the lovely pattern Ali, I have just made a wedding shawl for my daughter. I wanted to put the shawl into something special, your bag is just that, simple and beautiful. Thank you.
I had to make this pattern so simple easy and ekegant. There was a bit too much fabric in the shoulder for me so I cut the initial angle at 6 inches fronm the corner not fiom the fold. Also folded the strap in 3 at the shoulder and tacked it down. I boxed out the bottom corners 2.5 in as I don’t like a flat bag. This bag sits very nicely on my shoulder and I will be making more. Thank you for the pattern.
Hi Kate,
Thank you so much for sharing your modifications and for the kind words! We’re sure that lots of other readers will thank you, too!
Best,
Julianna
Hello,
I was wondering if I have to use linen to make these bags. What would I do if I wanted to make them smaller?
Thanks, Gracie
Hi Gracie,
Thanks for writing in! Linen is quite a strong fiber even at lighter weights, so if you would prefer a cotton fabric and plan on carrying anything heavy in the bag, I would suggest using something in a heavier bottom weight such as a denim or light canvas, though this will result in a bag that will not pack down quite as small as ours. The size of the bag should be quite easy to adjust! When cutting your rectangles, you can make any changes you like to the height and width, and then adjust the placement of your diagonal cut to make sure the top of the handles isn’t too narrow and the bottom of the bag is deep enough.
I hope that helps!
Julianna
Cutting the rectangles: the first Mark is 6″ to right of the fold. Mark 2 is 17″ below mark 1. How many inches is mark 2 away from the fold?
HI Isabell,
Thanks for reaching out! Mark 2 is all the way on the raw edge. So for the piece of fabric that you have folded, the edge should be 10 inches from the fold!
I hope that this helps!
Cassy
Love your soft color choices! And the sweet, elegant designs.
🙂
I am somewhat addicted to linen.
merci pour ces jolis sacs de course solides
I can’t wait to try this!! How elegant and absolutely useful!
thank you
Thank you for using a solid color and thread that can be seen easily. It makes it so much easier to see what is going on with the project.
I’ve been through your site over & over and can’t find the actual pattern. That is the cutting & sewing directions fit the fabric.
Am I too stupid to navigate your site?
Hi Toni,
Thanks for reaching out! I am happy to help! The pattern and instructions for this Tote can be found on this page above! If you would like to make them using our new Spectrum Cotton, the materials list can be found here but you will use the directions on this page. Please also note that this is not a traditional tissue pattern but rather there are instructions above as to how to cut the fabric!
I hope that this helps!
Cassy
I’m thinking of the triangular piece you first cut off the fabric. If you would cut that triangle in TWO lengthwise, and, snuggly rolled it from the small point to the opposite side, you would make two buds. Each is tacked onto a sturdy (like denim, twill, etc.) circular disk and then sewed to the bag (or some other item). That’s how fabric flowers are created. For an extra step you can find online how to make fabric leaves, which are a cinch to make and can be tacked under the flower before it’s tacked to the disk.
Your linen fabrics are gorgeous colors and weights. Debra
I made this bag but it seems way too wide at the bottom. The store clerk looked at me like I was crazy when I handed it to him. Must have been the largest bag he had ever seen.
Am I not folding it right for shopping?
Thanks,
Kathy
Hi Kathy,
Thanks for reaching out! This bag is quite roomy and can fit a bunch of groceries! It’s 18 3/4 X 15 -inches which is wider and taller than a standard plastic shopping bag and the thick handle makes it much easier to carry. We have pictures at the bottom of the pattern page here that will show you how to roll it up and tie it between uses. I hope this helps!
Best
Jessica
Hi,
I am planning on making a lined version of this bag but would like to add a pocket. Any advice on doing so?
Thank you!
Hi Olivia,
Thanks for reaching out, and what a wonderful idea! Adding a lining to this bag will make it even sturdier and creates so many possibilities for customization by adding a second color! I would recommend creating a lining by sewing a second bag just like the first, and instead of finishing the raw edges of the handles, sew the two bags together along the handle openings with the right sides together. You could add patch pockets to either (or both!) layers before sewing them together!
I hope that helps, and please do let us know how it turns out!
Julianna
I would love to make this but I cant seem to find the PDF of the pattern. Can someone please send it to me?
Thanks!
Hi Emily,
Thanks for writing in! If you’re looking for a printable template or pattern piece for this tote, the pattern is so simple that there isn’t one! You can find the dimensions of the rectangles to cut and instructions for tapering them in the section above titled “Cut + Prepare.” If you would like to save a PDF of the instructions, you can use our print function to do so. On a desktop version of the site, you will find a “print” icon in the right column just below the date and tags, or on a mobile version of the site, you will find a “print” icon below the pattern and above the comments.
Follow the easy on-screen instructions to delete whichever parts of the pattern you don’t want to print or save. For example, you may decide to shorten the pattern by omitting certain images or the list of materials. To remove images, click the drop down next to the image icon and change from 100% to 0%.
I hope that helps, and happy sewing!
Julianna
Hi! Just wanted to say thank you for this pattern! It was super easy to follow, and I absolutely love my bag!
I don’t have a sewing machine. Would this bag be difficult to sew up by hand?
Hi Tracey,
Thanks for writing in! If you’re already familiar with hand sewing, I think this bag would be quite easy to whip up, as there are only a few seams! I would recommend using a sturdy stitch, like a backstitch, to make sure your bag will be up to the task of toting your groceries.
I hope that helps!
Julianna
Thank you, Juliana! These bags are lovely and making one would be a good exercise in patience for me.
Julianna, apologies for misspelling your name in my previous post.
Hi Tracey,
It’s really no problem at all! I hope you share your handsewn totes with us – we would love to see them!
Best,
Julianna
I just found your tutorial for the lovely linen bag this weekend. I plan to make one soon, as I have some lovely pink handkerchief linen that hasn’t yet found a use. Thank you so much for sharing your instructions.
Your timing is perfect. My daughter just asked me the other day if I could make her a couple of fold up re- usable shopping bags. This pattern looks perfect l
Would something like a quilting Cotton work well for this bag??
Hi Pamela,
Thanks for reaching out! I think cotton would be great for this bag!
Please let us know how it turns out!
Gianna
Hello
I have been up and down this Tote bag page 90 times and can’t see where to download the pattern?
Hi San,
Thanks for reaching out. The pattern is available on this page, and you can download the page by clicking the “PRINT” button and following the steps for downloading! There is no template for this pattern though, since the instructions guide you through all the cuts you’ll need to make to the fabric. Hope this helps clarify things!
All the best,
Lili