
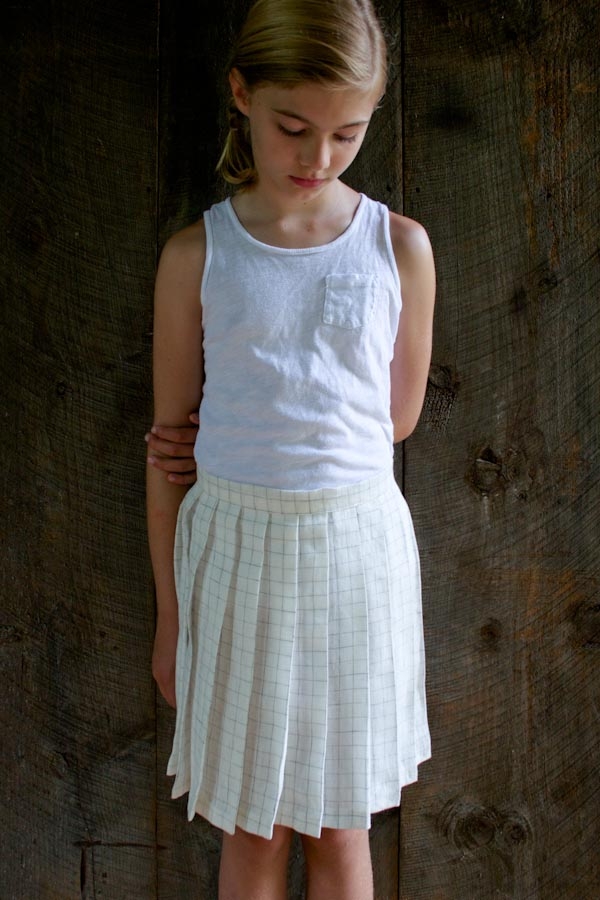


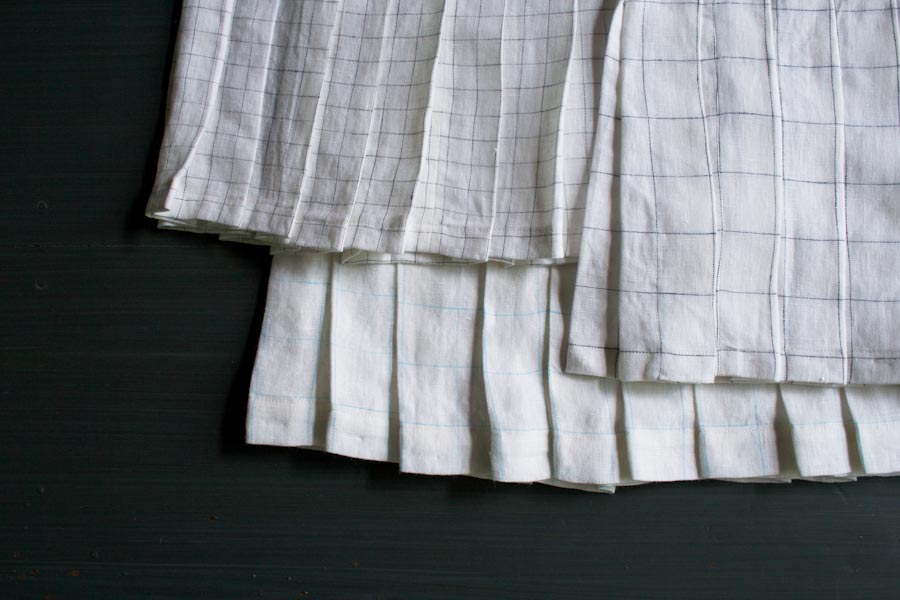


Pleated Skirt in Linen Grid
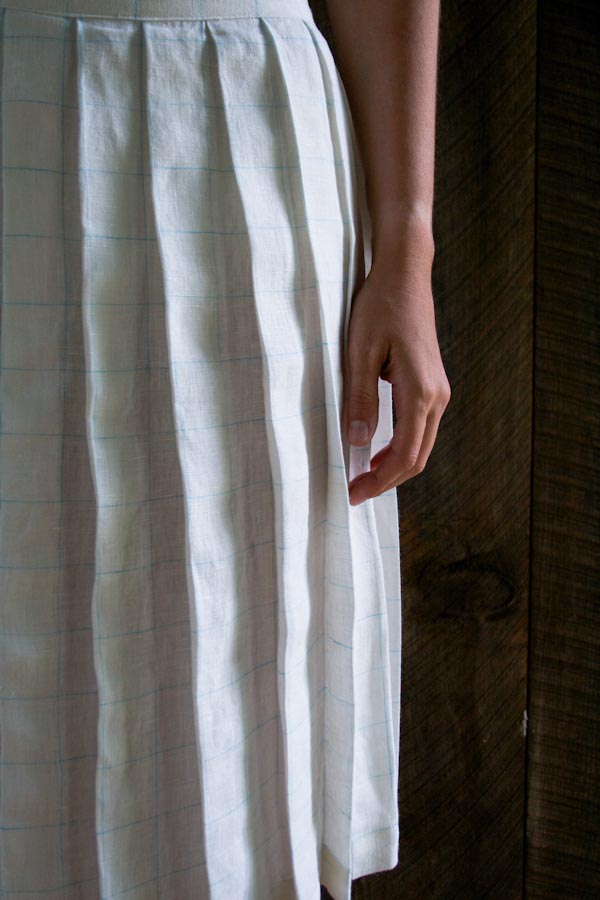
Pleats are such a classic way to add body to a skirt, but I always assumed they’d be too much of a hassle to sew myself. So when I was recently playing around with a swatch of our Linen Grid fabric, I was pretty excited to have an a-ha moment. It turns out, when you have a woven-in-guide, like the “grid” of our Linen Grid, pleating is a breeze!

As a matter of fact, “breezy” is a good way to describe this entire project. I don’t mean that it’s super easy (it’s more of an advanced beginner/ intermediate project), but rather that every step, from pleating to sewing in the invisible zipper (which is NOT HARD… I swear!), is much simpler than I expected. Plus, the resulting Pleated Skirt is airy, light, and beautiful. It’s a wonderful (and breezy) summer sew!

Materials

- 1 (1, 1 ½, 1 ½, 1 ½, 1 ½, 1 ¾, 1 ¾) yards of Purl Soho’s Linen Grid. Use the color Silver Gray for 1 ¼-inch pleats; or use the colors Glacier Blue or Dark Graphite for 1 ½-inch pleats.
- Please note: We have sold every last bit of our limited-release Linen Grid. As substitutes, we encourage you try our Daily Linen, Handkerchief Linen or Watercolor Linen, all suitable in weight and in a stunning palette of colors!
- A 110-yard spool of Gutermann’s Cotton Thread in color 1040
- Purl Soho’s 7-inch Invisible Zipper in Ivory
- One package of Dritz’s Hooks, Eyes and Loops in Nickel. (You will need 2 hooks and 2 straight eyes total.)
You will also need an invisible zipper foot and a regular zipper foot for your machine.
Sizes
Child 2-4 (child 5-7, child 8-10, 28, 30, 33, 36, 39, 42)
- Finished Waist Circumference: 19 (22, 25, 28, 30, 33, 36, 39, 42) inches
- Finished Length: 12 (13, 15, 23, 24, 24, 24, 25, 25) inches
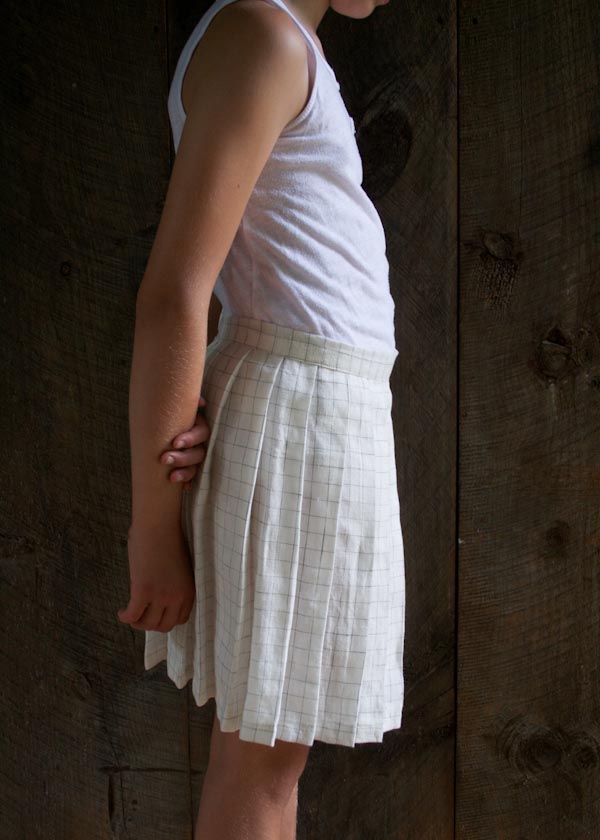
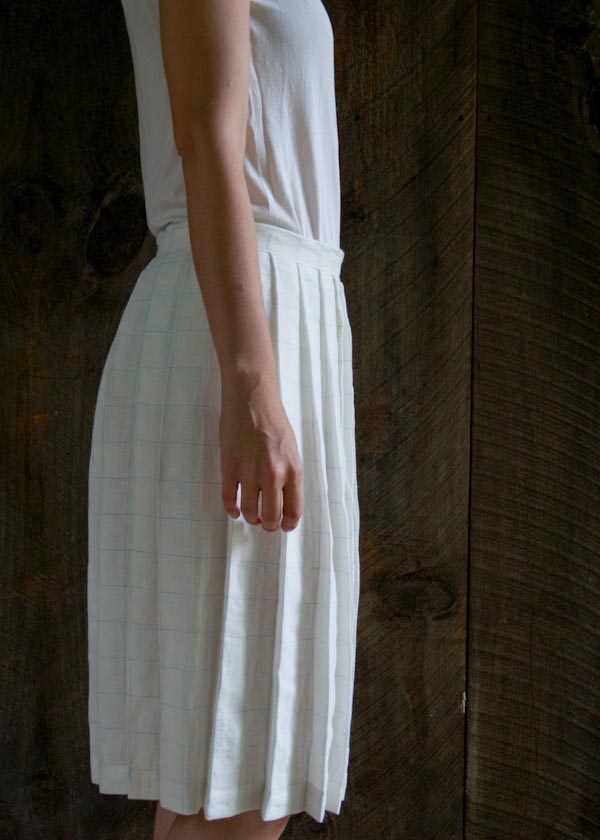
SAMPLES: Shown here in sizes child 5-7 (in Dark Graphite), child 8-10 (in Silver Gray, on the model), and 30 (in Glacier Blue, on the model)
Note
Prewash, dry, and press the fabric before starting.
This pattern is very specific to Linen Grid, since we use the woven grid of the fabric to measure the pleats. If you would like to use another fabric, mark the top edge of the Skirt Panel every 1 ½ or 1 ¼ inches before the beginning the “Pleat” section.
Pattern
Cut
Skirt Panels
Cutting along the grid of the fabric, cut two 29 X 13 (32 X 14, 36 X 16, 40 X 24, 43 X 25, 47 X 25, 51 X 25, 55 X 26, 59 X 26)-inch rectangles. Cut slightly larger, if need be, to make sure that you are cutting right along the grid of the fabric.
Waistband
Cut one strip 3 X 21 (24, 27, 30, 32, 35, 38, 41, 44) inches.
Sew the Panels Together
The Linen Grid fabric doesn’t have a right or wrong side, so assign sides by making a mark on the wrong side with a fabric marker.
Zigzag stitch along one short side of both of the Skirt Panels.
Next, you need to crease one of these zigzagged sides to be a guide for sewing the two Panels together. Here’s how….
If you’re using the Silver Gray color (which has a smaller grid)…
With wrong sides together, fold the zigzagged edge of one Side Panel at the middle of the second row of squares, folding that row in half. Press the fold, then finger press it open. This is the Join Crease. Repeat for the other Skirt Panel.
If you’re using the Glacier Blue or Dark Graphite (which have larger grids)…
With wrong sides together, fold the zigzagged edge of a Side Panel at the middle of the first row of squares, folding that row in half. Press the fold, then finger press it open. This is the Join Crease. Repeat for the other Skirt Panel.

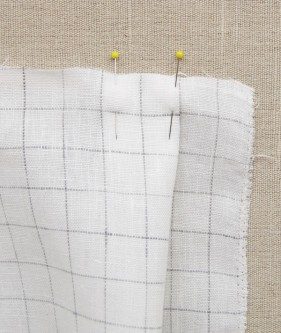
With right sides together, pin the creased end of one Skirt Panel to the zigzagged end of the other Skirt Panel. Line up the grid by placing a pin through the Join Crease at each vertical line of the grid and then into the corresponding line of the grid on the other Panel piece. The photo above shows both size of grids with their Join Creases (in pink) pinned to the other Skirt Panel piece.
Sew the two Panels together along the Join Crease. Press the seam allowances open. From the right side this seam should be almost invisible.
This is the Skirt Panel.
Pleat
With the Skirt Panel facing right side up and the short sides on the left and right, zigzag stitch along the right short edge. You will start pleating at this right hand edge.
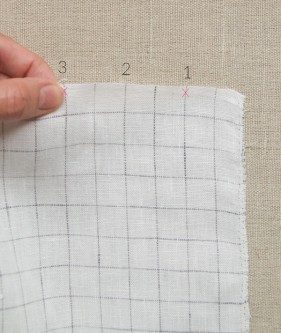
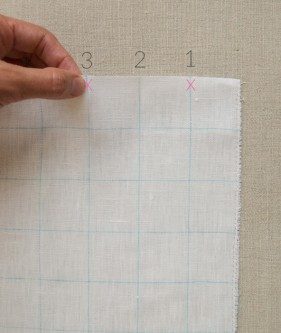
Use the vertical lines of the grid to pleat the skirt. For the Silver Gray grid (above, left), count every other vertical line as one unit. These pleats will measure 1 ¼ inch. For the Glacier Blue or Dark Graphite grids (above, right), every vertical line is one unit. These pleats will measure 1 ½ inch.
Starting at the top right corner, count three units to the left, as shown above. Fold point 3 on top of point 1 (matching up the pink Xs in the photos, above).

Point 2 forms a crease under the pleat.

Pin this first pleat in place at its left and right edges (Silver Gray above, left, and Glacier Blue/ Dark Graphite above, right). Notice that the right edge of the Skirt Panel starts with one un-pleated unit.
Continue pleating in this manner across the whole length of the Skirt Panel. Here’s how…

The point 2 crease of the previous pleat becomes Point 1 of the new pleat, and the next units to the left are Points 2 and 3.

Bring Point 3 on top of Point 1, folding along Point 2.

Pin this pleat into place. Keep folding and pinning pleats into place across the top edge of the Skirt Panel.

Once you have pleated to the left edge of the fabric, measure along the top pleated edge (starting from the right hand side), and make a mark at 20 (23, 26, 29, 31, 34, 37, 40, 43) inches. The left edge must end with at least one un-pleated unit (as shown above), so if necessary, un-pleat the last few inches, re-measure and carefully cut the excess left edge. This cut does not have to be directly along the grid; the important thing is that the measurement is correct and that the cut is straight.
Zigzag stitch the left edge.

Lightly press just the tops of the pinned pleats into place and then, with a ¼-inch seam allowance, sew down the pleats along the pinned edge, being careful to keep the pleats neatly folded as you go.
Sew in the Zipper

Flip the Skirt Panel so the wrong side is facing up and press the right-hand zigzagged side 5/8 inch towards the wrong side. This is Side Crease 1.

Flip the Panel so the right side is now facing up and the Side Crease 1 is on the left-hand side. Finger press open the Side Crease 1.
Unzip the zipper all the way so the pull is at the bottom. With the zipper’s wrong side facing up, pin the left side of the zipper to the left edge of the Skirt Panel, right sides together, lining up the edge of the zipper’s teeth with the Side Crease 1. Pin from the top of the zipper all the way to the zipper pull at the bottom.
Attach the invisible zipper foot to your machine.

Notice that the invisible zipper foot has two little grooves on its underside. Starting at the top of the zipper, feed the nylon teeth of the zipper into the right hand groove. The teeth should go into the groove pretty automatically, allowing the needle to sew down the zipper directly next to the teeth.

Sew down the side of the zipper until you reach the zipper pull. Backstitch and cut the thread.

Now, fold the opposite zigzagged edge of the Skirt Panel 5/8 inch towards the wrong side to create Side Crease 2. Finger press the Crease open.
With right sides together, pin the other side of the zipper to the Skirt Panel in the same manner as you did for the first. Make sure the edge of the teeth line up with Side Crease 2.

Starting at the top of the zipper, sew on this side of the zipper by feeding its teeth under the left groove of the invisible zipper foot.
Again, stop sewing at the zipper pull. Backstitch, and cut the thread.

Now that both sides of the zipper are in place, you need to sew together the Panel edges below the zipper. Here’s how…
Zip the zipper up so the pull is at the top. With right sides together, pin together the two side edges of the Skirt Panel. Pin along the Side Creases, being careful to line up the grid. At the zipper’s bottom, pull the loose tails of the zipper away from the fabric so you can pin as close to the zipper as possible.

Now attach your machine’s regular zipper foot and orient it to the left (as shown above). Starting just above where the previous zipper seams ended, sew the pinned edges together along the Side Crease.

Press this seam open, and then sew the last inch of the zipper tape to the right side of the seam allowance, using your zipper foot, as shown above.

Repeat for the left side to tack the bottom down and help keep the zipper flat.

Turn the skirt right sides out and make sure the zipper looks good and is working well.
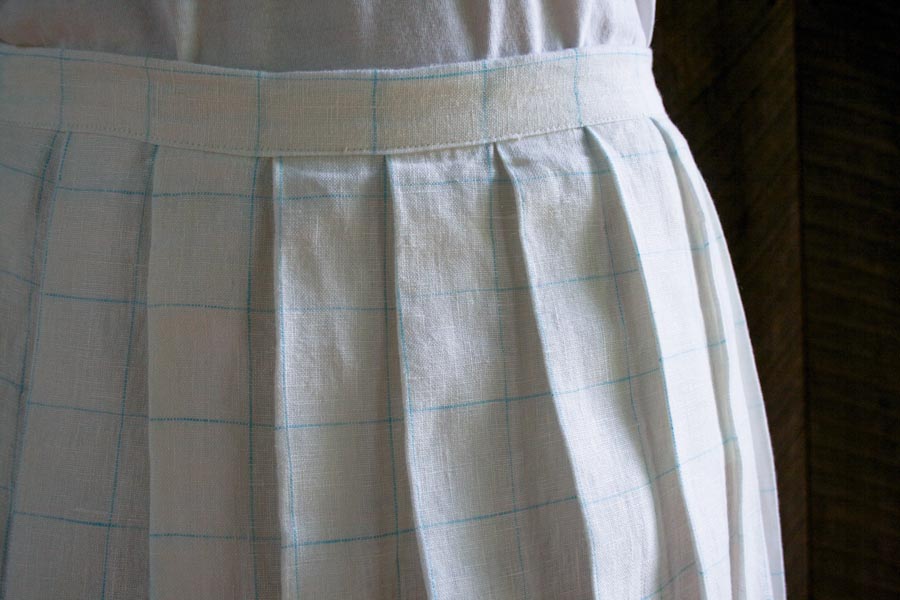
Attach the Waistband

Press both long edges of the Waistband ½ inch towards the wrong side. These creases are the Waistband Creases. Finger press one Crease open.

Turn the skirt wrong sides out and open the zipper. Beginning at the right-hand side of the zipper opening and with the Waistband’s wrong side facing up, align the open long edge of the Waistband to the top raw edge of the skirt. Leaving a ½-inch overhang of Waistband at the beginning (as shown above), pin the Waistband in place.

Pin across the whole top raw side of the skirt until you reach the other side of the zipper, being careful to keep both sides of the pleats neatly in place as you pin. When you get to the other end, you should have a 1 ½-inch overhang of Waistband.

Sew the pinned edge along the Waistband Crease.

Turn the skirt right side facing out. Pull the Waistband up above the top of the skirt. Unfold the Waistband Crease and finger press the ½-inch overhang ½ inch towards the wrong side, so it is flush with the outer edge of the zipper. Refold the Crease.

Do the same for the 1 ½-inch overhang, folding it ½ inch towards the wrong side to hide the raw end.

Now fold the Waistband over towards the skirt’s right side and pin the Waistband to the front of the skirt through the fold of the Waistband Crease. Pin it so that it is just a hair lower than your previously sewn seam. Keep both sides of the pleats neatly in place as you pin. Pin all the way across the width of the skirt. The short ends of the Waistband will be folded neatly with no raw edges showing.

Edgestitch the Waistband down by starting at the upper left hand corner of the Waistband, sewing down the short-end fold, and then sewing along the pinned edge. Make sure this seam is very neat and that none of the pleats are folded as you sew. When you get to the opposite end, edgestitch up the other short-end fold.

The zipper and waistband should look like the photo above, with a 1-inch overhanging flap on the right-hand side.
Finish the Skirt

Hand-sew two hooks to the wrong side of the 1-inch overhang, 1/8 inch from the edge.
Use a fabric marker or chalk to mark on the other end of the Waistband where the eyes will go.

Orient the straight eyes vertically and hand-sew them to their marked locations.
To hem the skirt, press and pin the bottom raw edge ½ inch twice towards the wrong side and edgestitch the fold down.

You are now done sewing, but if you’d like to press your pleats sharp, here’s how…

Following along the grid and using the top of the pleats to guide you, pin the pleats into place along the bottom hemmed edge of the skirt.

Then, working from right to left press the pleats into place. Pull the Waistband away from you to tauten the pleats as you iron.

Your skirt is ready to wear!


I love the look of this pattern and can’t wait to make it!
I have purchased some linen grid for another project and find it to be fairly sheer. Do you have any suggestions for lining the skirt?
Hi Sarah-
The first skirt I made actually did have a lining but it added a lot of weight and bulk that I didn’t care for. I also found that the unlined skirts were not as sheer as I’d feared because the pleats create a triple layer of fabric at the top of the skirt. So I would recommend making this project as is and if you find it a bit sheer I’d wear a slip or a pair of biker shorts underneath.
However, if these two options don’t appeal to you here is how I’d make a lining:
Cut a panel that is double the width and 2-inches shorter than the finished skirt’s measurements. Zig Zag stitch the two short sides of this lining panel. Gather the top edge of the lining panel so that it is the width of the final skirt plus 1-inch. (So for example, for the size 30 that would be 31-inches.)
After you sewn in the zipper, but before you attach the waistband, sew the gathered edge of the lining to the wrong side of the skirt’s pleated edge with a 1/4-inch seam allowance. Tuck the zig zagged edges at the two ends of the lining panel under the zipper’s seam allowances. Sew the lining panels zig zagged edges together under the bottom end of the zipper. Hand stitch the lining into under the zipper’s seam allowance. Hem the lining panel by folding it 1/2 twice towards the wrong side. Then continue the pattern as written, making sure to sew the lining in with the waistband.
I hope this helps! Please let us know if you have any more questions!
Molly
ps- Here is the fabric I would use for a lining: https://www.purlsoho.com/purl/products/item/8615-Robert-Kaufman-Organic-Voile
And here is a tutorial I found online about gathering fabric (in case you haven’t done it before): http://www.instructables.com/id/how-to-gather-fabric/
If you want the pleats more defined, do a straight machine sewing stitch down the ‘pressed’ edge.
It’s been a long time since I made and/or wore a skirt. This fabric looks very nice, as does the pattern how-to.
TY for a wonderful website.
Awesome, thanks
I love this! Thank you so much. I do have a perfect linen with a grid on it already in my stash and this looks like so much fun!