
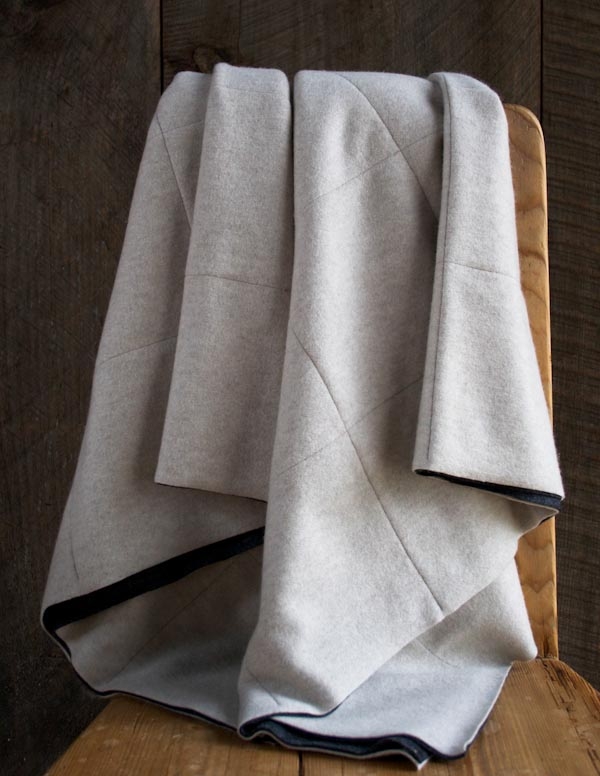

Wholecloth Wool Quilt
When I first touched our extraordinary Lana Cotta Canberra felted wool fabric my head began to dance with ideas of wool everything: wool shorts, wool tee shirts and wool tablecloths. But before I got too far ahead of myself (are wool napkins a thing?), I decided to make something simple, straightforward and essential: a beautiful throw blanket.

My Wholecloth Wool Quilt uses this favorite fabric as it’s meant to be, without fuss or over-manipulation. I just quilted together two contrasting colors in a clean and modern grid. Mark, baste and sew! Before you know it, you have an incredibly soft and lovely throw, just in time for the holiday gift crunch! Now off to sew those wool shorts… -Molly

Materials
To make one quilt you’ll need…

- Light Piece: 1 ½ yards of Lanecardate’s Lana Cotta Canberra in Oatmeal
- Dark Piece: 1 ½ yards of Lanecardate’s Lana Cotta Canberra in Dark Gray
- A 110-yard spool of Gutermann’s Cotton Thread in color 3400
- Curved Safety Pins
- A Blue Water Soluble Choco Pen with Eraser
You will also need masking tape, a rotary cutter, a long rotary cutter ruler, a quilting foot for your machine, and a clean section of hard floor (without rugs or carpet) at least 60 inches square.
Size
Finished dimensions: 48 ½ inches square
Pattern
NOTE: This pattern is available as a printer-friendly PDF! Just click here.
Mark
Press the Dark Piece of fabric and then lay it down flat on a clean, hard surface, like the kitchen floor.
Using the masking tape, tape the Dark Piece down to the floor around all four sides, pulling it taut as you tape. First tack down the centers of the opposite sides and then tape along each side, from the center out.
Once the Dark Piece is taped down, fold and press the Light Piece into quarters so there are two perpendicular crease marks that meet in the center. These are the Horizontal and Vertical Center Lines.
Lay the Light Piece flush on top of the Dark Piece. Do not tape down the Light Piece but do make sure that it’s flat and smooth and that you can see the Center Lines clearly.
Using a long ruler so that your lines are very straight, use the water-soluble pen to mark the entire length of the Horizontal and Vertical Center Lines. Make sure that they are totally perpendicular to one another.
This is important because they will be your guides for all of the marking.
You will now mark the Light Piece with a 6-inch grid.

To begin the grid, mark a line 6 inches above and parallel to the Horizontal Center Line across the whole width of the fabric. Then mark another line 6 inches above and parallel to this line. Repeat until there are four parallel lines above the Horizontal Center Line, each 6 inches from the line below it.
Then, below the Horizontal Center Line, mark four parallel lines, each 6 inches from the line above it.
To mark the vertical lines of the grid proceed in the same manner, moving outwards from the Vertical Center Line as you mark. First make four parallel lines 6 inches apart from one another to the right of the Vertical Center Line and then four parallel lines 6 inches apart from one another to the left.
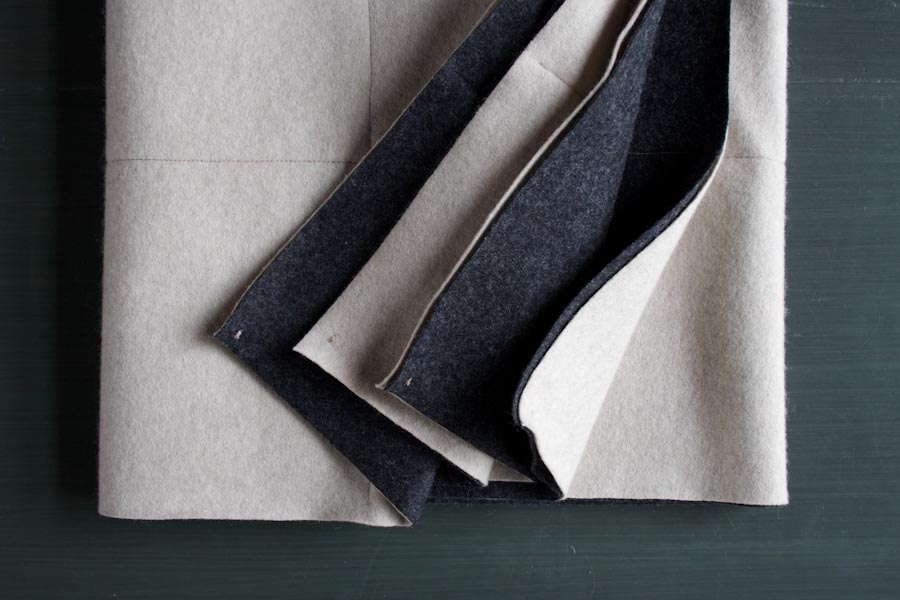
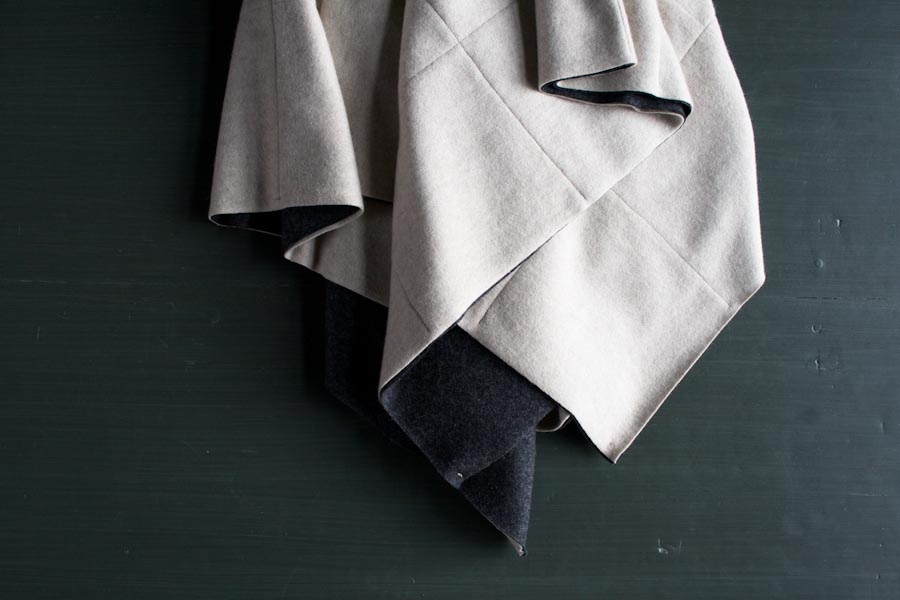
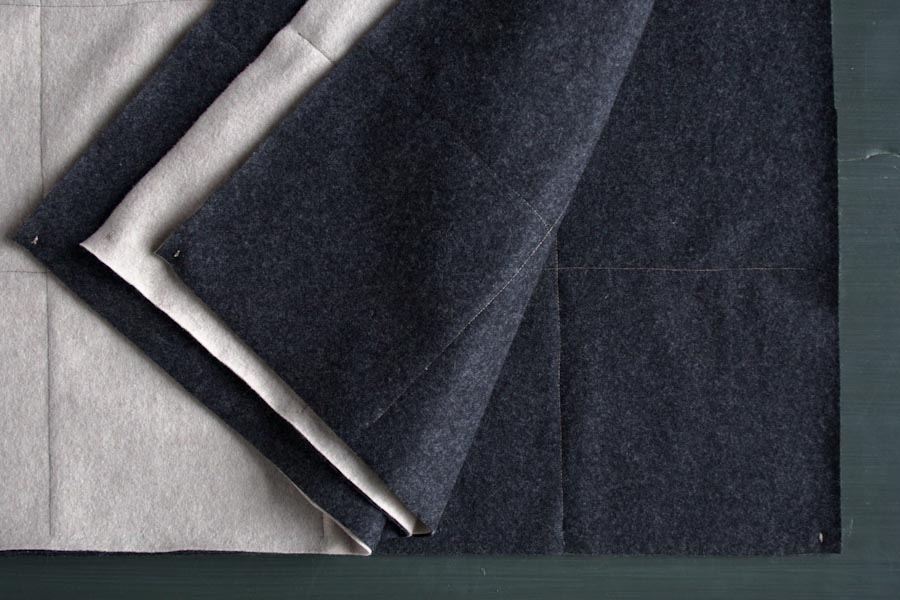
The Light Piece is now marked with a 6-inch grid of 9 vertical lines and 9 horizontal lines. The very outside lines (shown in pink in the diagram) are now called the Border Lines. It will be mentioned again, but it’s very important to note that you will not be quilting the Border Lines; they are just a guide and will remain unsewn.
Baste
Using the curved safety pins, pin the two Pieces every 3-4 inches, starting in the center and working your way outward. Pin only inside of the grid squares and avoid pinning on any of the marked lines. Make sure that the Light Piece remains flat and smooth on top of the Dark Piece as you go.
When the entire piece is basted remove the tape and take it off of the floor.
Quilt
You will now quilt the two pieces together along the marked lines, first sewing all the vertical lines and then all the horizontal lines. Remember, you will not quilt the Border Lines. Use your machine’s quilting foot and the Cotton Thread to do all of the sewing.

Start with the Vertical Center Line: You will begin at the point where the Vertical Center Line intersects with the bottom Border Line. Begin by sewing along the line with a very, very small stitch length for ½ an inch. (This avoids having to backstitch to secure the line of sewing.) Then with a regular stitch length, continue sewing carefully along the line all the way to ½ inch before the opposite Border Line. Switch to the small stitch length again, sew until you reach the Border line and then stop.
To sew the next line pick up your foot and needle but do not cut the thread. Rotate the quilt 180 degrees and then sew along the vertical line to the left of the previously sewn line in the same manner, with ½ inch of very small stitching at the beginning and end. Make sure to start and stop exactly at the Border Lines.
Continue to sew along the remaining vertical lines in the same manner: Pick up your foot and needle but do not cut the thread, rotate the entire blanket 180 degrees and sew along the next vertical line to the left, starting and stopping with a ½ inch of very small stitches. (Alternating the direction you’re sewing in like this will keep the quilting from pulling in one direction.)
Sew all of the vertical lines on one side of the Vertical Center Line and then sew the vertical lines on the other side in the same manner. (Remember, do not sew the Border Lines!)

Now clip off all the lengths of thread connecting the beginning and end of each line Trim them right at the border lines and trim any other extra threads too.
Next, quilt all of the Horizontal lines in the same manner: Alternate directions and first sew across the three lines to one side of the Center Line and then across the three lines on the other side. Trim all of the Horizontal threads and remove all the curved safety pins.
When you are done sewing over all of the lines, the quilting will look like a big game of tic-tac-toe, a grid without a border around it.
Spray water over all of the marked lines to make them disappear.
Cut and Finish

Using a rotary cutter and rotary cutting ruler, cut all four sides of the quilt ¼ inch outside the Border Lines. Do this slowly and carefully because this will be the final finished edge of your quilt.
To secure the corners make a ¼-inch tacking stitch at each of the quilt’s four corners, ¼ inch from both edges.


Love the new print option! Fantastic pattern as well!!
Lovely, but why do you not sew the edges together.
And is this wool washable or dry clean only?
Debbi
Hi Debbi-
We liked the spareness and simplicity of the un-sewn edges. It also makes the whole blanket drape a bit more freely. However, you can certainly sew the edges together. You would just sew along what I call the “Boarder Lines” in the pattern.
We recommend handwashing or drycleaning this wool. However, if you really want to make something that is machine washable you can prewash and dry it before you sew with it. It will continue to felt a bit every time you wash it but it won’t be too noticeable and actually the slight puckering can look nice!
Thanks for getting in touch and please let us know if you have any more questions!
Best-
Molly
I was lucky to be gifted this gorgeous, gorgeous wool for Christmas, and used most of it to make a similar version of this quilt, with heavyweight flannel for the backing. I bound the edges with contrasting Line Weight wool yarn, using the buttonhole stitch. I cannot believe how really luxurious this wool feels! It’s just beautiful and has such a great hand to it!
Hi Liz-
Wow, your project sounds gorgeous! We’d love to see a picture if you’re able to post one on Instagram (and tag @purlsoho) or on Facebook or Twitter.
Thank you so much for getting in touch!
Molly
Hello! Do you still stock the lana cotta canberra felted wool? When I click on the link to the material, it doesn’t bring up the fabric.
I would love to make this quilt! Thank you!
Hi Maureen,
Thanks for reaching out! Unfortunately, we no longer carry Lanecardate’s Lana Cotta Canberra. In its place I would recommend using DORR MILL Wool Yardage!
Warmly,
Gianna
Same questions as above as the previous replacement recommendation appears to no longer to offered. Do you have a recommendation for a similar wool fabric? Thank you!!
Hi Molly,
Thanks for reaching out about this. I’m so sorry to say that we no longer carry any fabric that’s a close match to Lana Cotta Canberra felted wool. We’re sorry for the inconvenience! Since this fabric was made by a third party company, you may be able to find it, or a similar fabric, from another source though.
All the best,
Lili