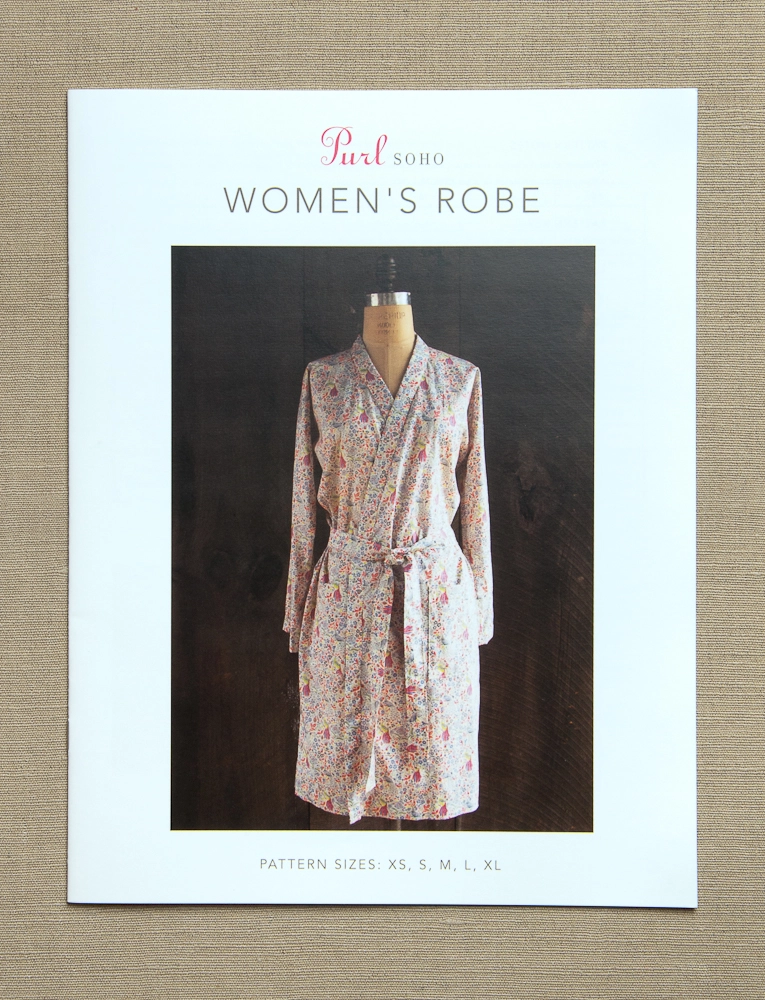
Women’s Robe
A few months ago, when I made the Kid’s Robe, the response was unanimous: “One in my size too, please!” We couldn’t have agreed more! So, thanks to your great advice, we introduce… the Purl Soho Women’s Robe!
I knew immediately that I was going to like this project, but once I started, I fell in actual love. I didn’t know my life was missing this robe, but then, I couldn’t believe I had gone so long without one. I began to keep a mental tally of all the people who would be getting a handmade robe from me (first on the list: happy Mother’s Day, mom!).
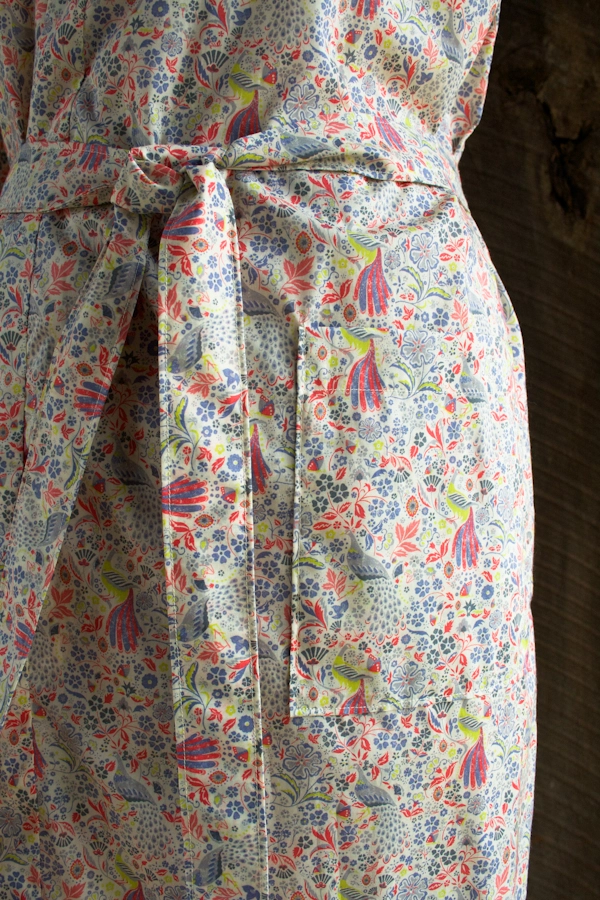
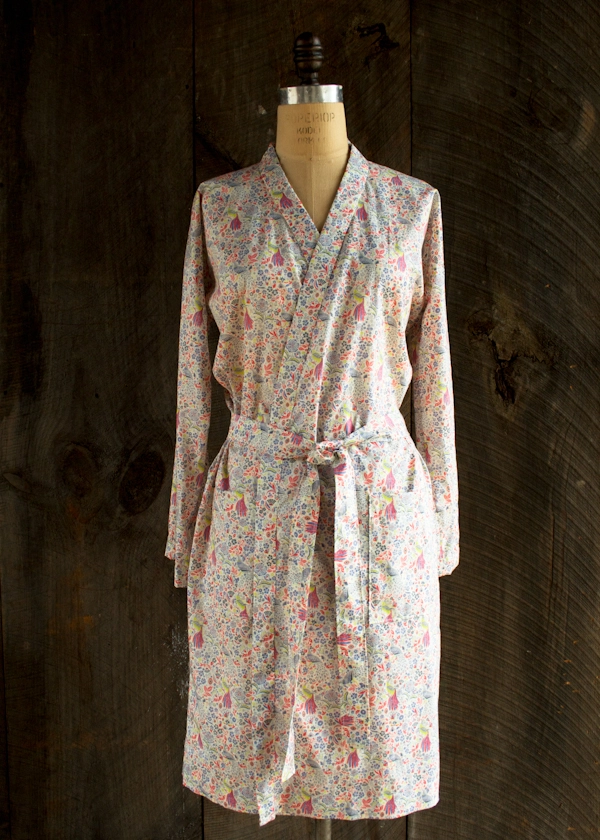
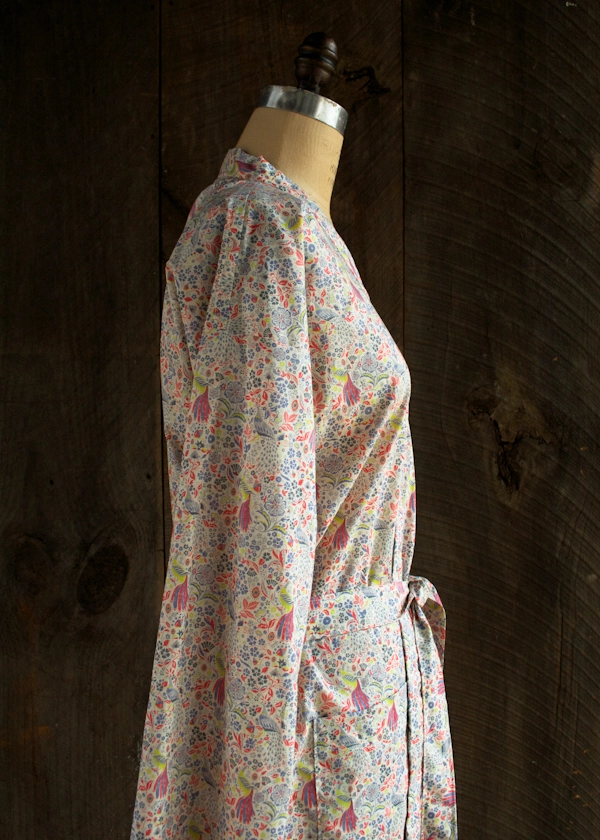
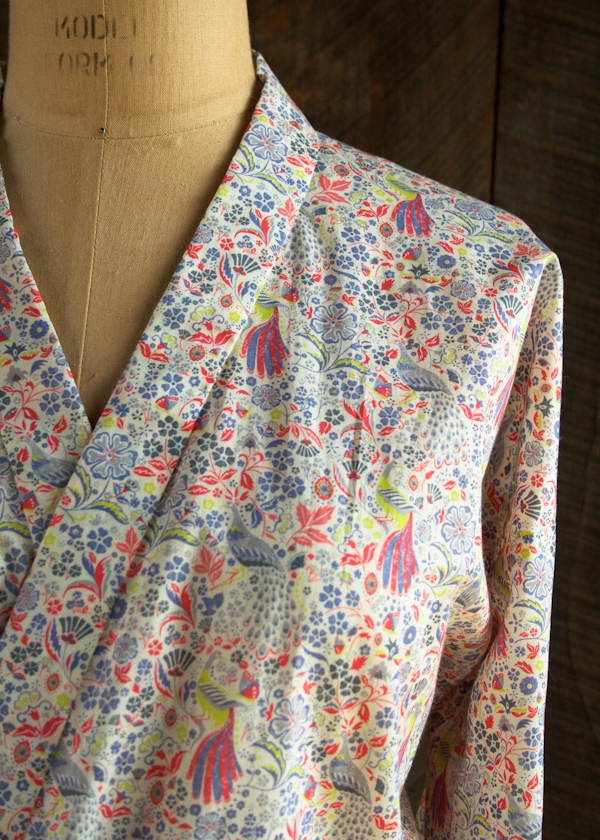
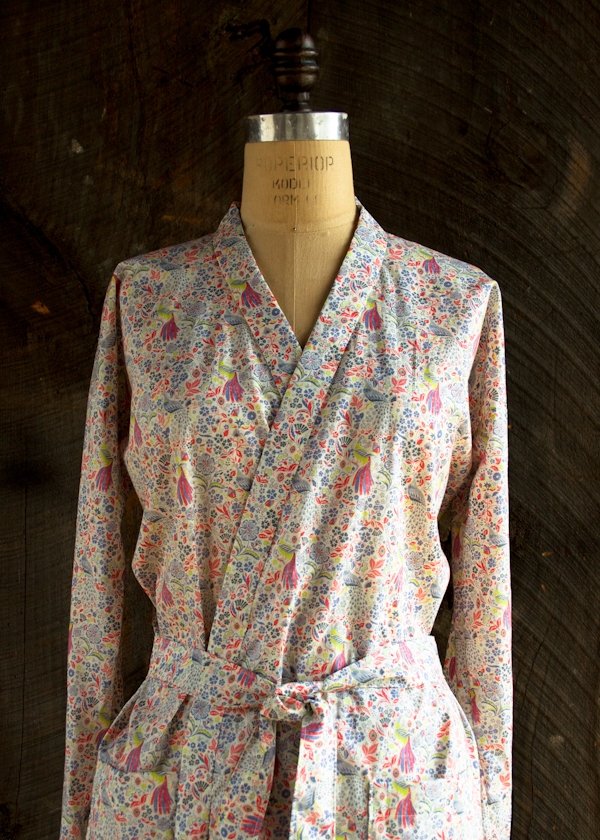
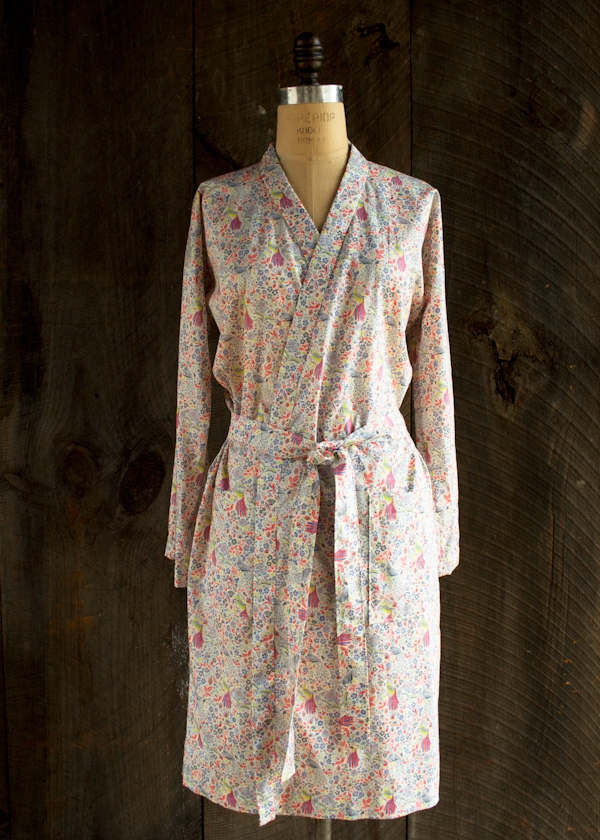
I designed the Purl Soho Women’s Robe to be roomy but not bulky, classic but not prim, comfy but not sloppy. Although you can make yours in any light or mid-weight cotton, linen or flannel, I love the breezy look and feel of Liberty of London’s gorgeous Tana Lawn. I used the Seasonal print Junos Garden Pastel.
The Purl Soho Women’s Robe Pattern walks you through every step of the process with detailed photographs and tons of helpful tips. It includes sizes from Extra Small to Extra Large, in both above-the-knee and below-the-knee lengths. Pick up a copy of the PDF right here!
Thank you, dear readers, for inspiring me to make this wholly satisfying robe. And keep those suggestions coming! -Corinne
Materials
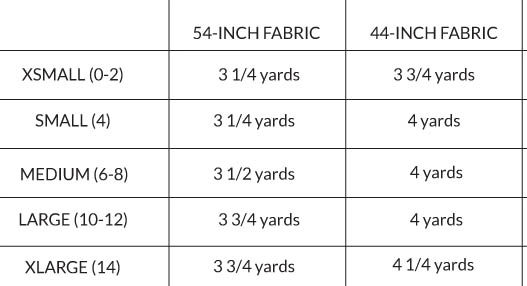
- Lightweight Cotton, Medium Weight Cotton, Flannel or Linen Fabric. We used Liberty of London’s Seasonal print Junos Garden Pastel. See chart (below) for quantities.
- One 274-yard spool of Gutermann’s Cotton Sewing Thread, color 1040
- For our Women’s Robe Pattern, please email customerservice@purlsoho.com and we’ll send a free PDF right over to you!
Update 2024: You can explore our current collection of beautiful fabrics and supplies on our page of Sewing Tools + Notions!
Update: New Fabric
September 18, 2014
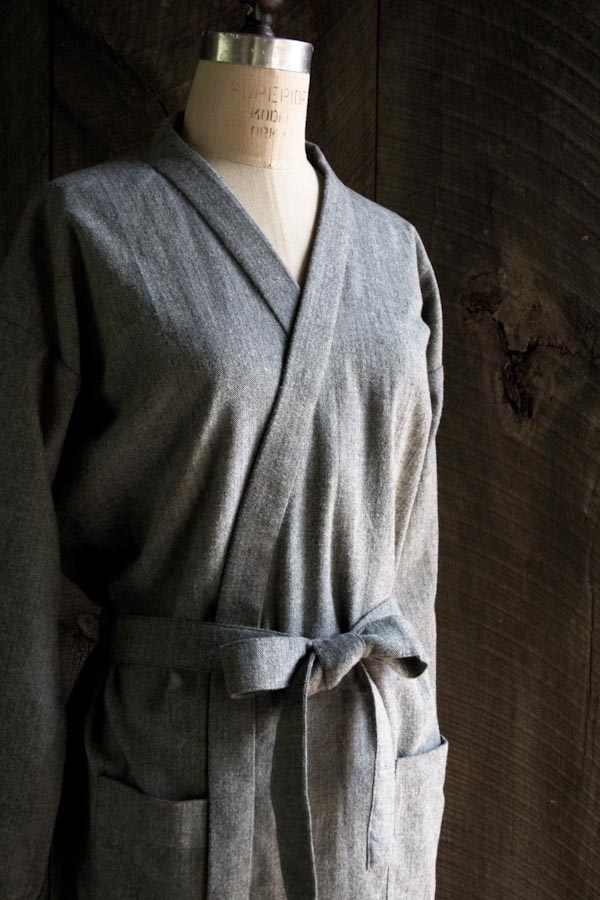
And what about when the chilly winds start to blow? Check out our cold-weather version, the Women’s Robe in Cozy Flannel!
Update: New Fabric + Bias Details
June 13, 2016
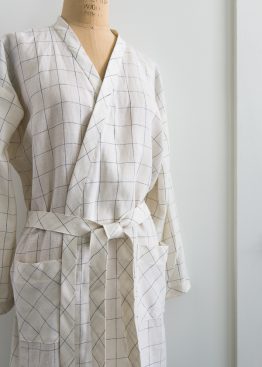
We’ve made our classic Women’s Robe in Purl Soho’s lovely Linen Grid and added a few twists and turns along the way! To see this handsome new garment with new bias details, check out our Women’s Robe in Linen Grid story!
Sizes
XSmall (Small, Medium, Large, XLarge)
Update: Adding Room to the Sleeve and Shoulder Seam
June 30, 2016
Some of our readers (but not all!) have found that the Sleeve and Shoulder seams of this Robe can feel a little tight, particularly when working with heavier weight fabrics. If you’re worried that the Sleeves might be too tight for you, please follow these suggestions!
If you haven’t yet cut out your fabric pieces…
We suggest adding 1 ½ to 2 inches to the Shoulder Edge of the Sleeves (this is the shorter side of the Sleeve rectangle). You will also need to increase the size of the Sleeve Binding by the same amount. Follow the cutting chart to cut out the remaining pieces in your size and follow the pattern as printed.
If you’ve finished your Robe and find that the Sleeves are too tight…
You can extend the width in the underarm by adding a Gusset. Here’s how…
Cut two diamond shapes from your fabric, 6 inches tall and 3 inches wide. These are the Gusset pieces.
Using a fabric marker, on the wrong side of each Gusset draw lines ¼ inch from and parallel to each edge. Make sure that the points where these lines intersect are clear. These are the Corners.
Rip out one underarm seam of the Robe, 2 ½ inches along the Sleeve and 2 ½ inches along the side seam.
With right sides facing each other, sew the Gusset into the underarm of the Robe. Here’s how …
Orient the Gusset so that the long axis runs from the Sleeve seam to the side seam. Pin one edge of the Gusset to one raw edge of the Sleeve. The top Corner of the Gusset should meet the Sleeve seam, and one side Corner of the Gusset should meet the right angle of the underarm.
Set your machine with a short stitch length and sew along the pinned line with a ¼-inch seam allowance, using the marked line as your guide. Start and stop the seam at the marked Corners.
Now, pin the Gusset to one raw edge of the Robe’s side. The bottom Corner of the Gusset should meet the side seam of the Robe.
Sew along the pinned line as described above.
Repeat with the remaining two sides of the Gusset.
Sew along all raw edges of the seam allowances with a zigzag stitch.
The Gusset is complete, and you have a roomier Robe!
Wouldn't cotton wrinkle really quickly?
I love this! Is there any reason the pattern can't be used for a man as well? I'm thinking my husband would love one… If not, you guys should get on a coordinating men's robe! 😉
This looks wonderful! I love the look of the Liberty fabric! The Nani Iro brushed cottons would be lovely too! Long ago I made my son a lined robe with some Nani Iro and terrycloth. The Cotton Sherpa you carry looks like it would be lovely for this. Does the pattern include directions for adding a lining? Would adding a lining make it too "stiff"? What do you think?
http://runciblebin.blogspot.com/search?q=Kimono+robe
Hi Ruth –
The Liberty of London Tana Lawn is a very fine, silky cotton and it doesn't wrinkle any more than a cotton shirt or dress would.
Thank you for writing in!
-Corinne
Hi Hannah –
This is a great question! I don't see any reason the pattern couldn't be adapted for a man.
As a general sizing rule, a women's Large is a men's Small, and the Extra Large would be similar to a men's medium. The one change I would recommend is in the Belt measurements. The Belt is sewn onto the body of the Robe with a women's waistline in mind. This may need to be adjusted for a more masculine fit.
I hope this helps!
-Corinne
Hi Annhb –
Thank you for writing in!
Your son's robe looks great! The Nani Iro brushed cottons would be excellent fabrics for this Robe too.
Here are the prints that we have available right now:
https://www.purlsoho.com/purl/products/item/9383-Kokka-Fabrics-Nani-Iro-Brushed-Cotton
And
https://www.purlsoho.com/purl/products/item/9049-Kokka-Fabrics-Nani-Iro-Brushed-Cotton
The Purl Soho Kid's Robe that inspired this project was lined with the Organic Cotton Sherpa, which is incredibly soft and lush. Unfortunately, it is also very heavy, too heavy to use on a full sized women's robe. So, we opted to leave this robe unlined. That said, it could be lovely lined with a lighter-weight flannel or terry. Instructions to line the robe are not included in the pattern, but if you would like to give it a try, I would be happy to help you with any questions you have about it here!
I hope this helps!
-Corinne
this is really beautiful. i would wear it all of the time.
This looks great. I'm so in love with linen I think I will get some for this project (and also push it to the top of my list of things to do) then I will wash it like mad and wear it for the rest of my life!
Is this pattern easy enough for a beginner sewer to try?
Hello Holly –
This is a great question!
All of the sewing in this project is pretty straight forward and the pattern booklet is very thorough. There are a few challenging bits (for example, attaching the binding at the curve of the neck can get a bit tricky), but nothing that a little bit of patience can't solve!
And, of course, we are always here to help if you run into problems along the way!
-Corinne
I just ordered my pattern and checked out the PDF. Very interesting construction and I just love the detailed instructions and the pictures. I struggle with traditional patterns and am tossing my botched attempt at another robe. I am hopeful for this attempt and excited to pick out some silky Liberty cotton!!!
Looks so nice! Since you asked for further suggestions: I'd love to see the Liberty fabric used to make some pretty elasticized/drawstring women's pajama bottoms.
HI!
I have a question about the cutting guide. I'm making a medium robe, and the specified measurement for the belt is 6X74" (i.e. 7a, 7b). My fabric is only 44" wide, so I'm wondering why the belt pieces are oriented horizontally on the cutting guide? Am I missing something?
Thank you!
Kate
What do you think about making this up in silk, any drawbacks?
Hi,
I am interested in making the women's robe, since I have been looking for a good cotton robe for quite some time with no luck. However, I am puzzled… The purchase option of PDF or hard copy makes me concerned about the pattern construction. Is it not a traditional tissue pattern? How could one download a PDF and piece together all the shapes needed? Thanks. Ann
Hello Kate –
Thank you for bringing this to our attention. The numbers on the chart are listed incorrectly. The Belt pieces should be cut to half of the length given (i.e. 6 by 35, 6 by 36, etc.) and are then pieced together later in the pattern to create one long strip for the Belt. So, if you are making the size Medium, you should cut them to 6 inches by 37 inches. At this shorter length, they should fit horizontally on your fabric without a problem.
We are in the process of updating the pdf now and the correction is listed on the errata page.
Thank you for writing in!
-Corinne
Hello Genevieve –
That's a great suggestion! I think that this Robe would look lovely in silk.
Thank you for writing in!
-Corinne
Hello Ann –
This is a great question! It is not a traditional tissue paper pattern. The Robe is constructed using simple cut rectangles. A Cutting Chart with a full list of dimensions is included as well as a Cutting Guide for proper layout on your fabric.
I hope this helps. Please let us know if you have any other questions!
-Corinne
When selecting a size, can I go by the size I would buy for myself in a retail clothing store?
Lovely pattern! I downloaded a copy to make the robe for myself.
I'm so excited to make this robe! I'm a beginner sewer so I hope I'll be able to manage the pattern. I chose the Charley Harper cardinal fabric and I can't wait to start. I would really like to line it in terry or fleece. Could you recommend a fleece that would be lightweight enough to use for lining? Would the Michelle Miller Organic Fleece be appropriate? Thanks!
Hey there,
Isn't there the possibility to pay via PayPal? It's the only way I could possibly pay since I live in Germany and don't own a credit card.
Thanks in advance, you have a great blog!
Love, Mara
Hi Mara,
Sorry, at this time we are not set up to take paypal. We hope to add it in the future.
Thanks,
Jen
Hello Taylor –
This is a great question! We use the Craft Yarn Council sizing standards when building our patterns. Here is a rough guide to how the sizes correspond to chest measurements:
XSmall – 28 to 30-inch bust
Small – 32 to 34-inch bust
Medium – 36 to 38-inch bust
Large – 40 to 42-inch bust
XLarge – 44 – 46-inch bust
I hope this helps!
-Corinne
Hello KMG –
Lining the Robe with fleece is a lovely idea! The Michael Miller Organic Fleece could be a great option. It is super cozy, but light weight enough that you won't get weighed down in a full size robe. It will add a bit of bulk to the garment though, so I would suggest going up a size from what your measurements call for.
https://www.purlsoho.com/purl/products/item/3726-Michael-Miller-Organic-Fleece
Be sure to wash and dry the Fleece before you start as it can shrink up quite a bit.
I hope this helps! And, please let us know if you have any other questions as you work on the project!
-Corinne
What a stunning robe! It looks perfect for warmer weather, and I love the deep pockets.
Hi-
I just downloaded the PDF version of this pattern, and I don’t see the actual pattern. Out of the 16 pages I only have the suggested layout for cutting out the pieces and directions. Help please. Thanks. 🙂
Hi Laura –
Thanks for writing in! This is a great question. The Robe pattern is not a traditional tissue paper pattern. The Robe is constructed using simple cut rectangles. A Cutting Chart with a full list of dimensions is included in the pattern booklet with the Cutting Guide.
I hope this helps. Please let us know if you have any other questions!
-Corinne
Hello,
I’d like to make a fleece-lined version for my boyfriend but don’t know quite how to go about it. Do I make the same pattern for the lining and sew all the pieces together with both lining and top fabric?
I’m using a Tana lawn print for the outer fabric and planning Michael Miller fleece for the lining. I know you say in a previous answer to go one size up as it could get bulky but worried it’ll end up being too big for him! Any way I can alter it after or any key measurements to make sure I get the right fit?
Only one more question! How much extra yardage of fleece do I need to get in order to allow for shrinkage when I wash it before starting out?
Any help much appreciated. Many thanks, Jo
Hi Jo –
These are great questions! It is possible to make the Robe with a fleece lining, but there are a few adjustments that I would suggest:
1: I would make the robe in one size larger than the measurements call for. I understand your concern about the Robe getting too bulky, but it is designed to have a relatively close fit, and I am afraid the added layer of the fleece lining could make it too small. For the best fit, I would recommend making the fleece lining first and have your boyfriend try that on. Any adjustments to the fit can be made relatively easily at that point. Then, you can use whatever changes you make as a guide when sewing the Tana Lawn.
2: In the pattern, the shoulder seams and sleeves are sewn with a french seam. I would not recommend doing this with a bulky fleece. Instead, sew these seams with a 3/4-inch seam allowance and trim the seams as desired.
3. To attach the Lining once both the Outer Robe and the Lining are finished, with the right sides together, sew the Outer Robe to the Lining along the bottom edge. Then, fold the Robe along this bottom edge so that the wrong sides are now facing and press the bottom seam flat. Tuck the Sleeves of the Lining into the Sleeves of the Outer Robe. With wrong sides still facing, use a basting stitch and a 1/2-inch seam allowance to sew the Lining and Outer Robe together along the Front and Sleeve edges. Attach the binding along the Front edge and Sleeves as described in the pattern.
Finally, I recommend buying 1/4 yard extra of the fleece to accommodate for shrinkage.
I hope this is all clear. Of course if you come into any problems along the way, or if it seems I have missed any steps, you are welcome to get in touch for more help!
-Corinne
What a disappointment, I remember being able to download this-for free! Fifteen dollars? Yes, these are fantastic patterns on this site, but now ones that I can only admire.
Hi Molly-
This particular pattern was never available for free but we do have many free knitting sewing and crochet pattens, in fact most of our projects and patterns are free! While we would love it if we could offer everything for free we have started charging for some of the more complicated and involved patterns because of the amount of time and energy they take to produce. We hope you understand!
Thanks for getting in touch!
Molly
I intend to make this a winter robe with a fleece fabric, in a size XL, but I was like it to be ankle length, and I am 5’9″. How much fabric should I purchase over and above the listed requirements? The fabric I will use is 58″ wide. Many thanks for your help!
Hi Norma –
This sounds so wonderfully cozy!
The length of the robe runs along the grain of the fabric, so assuming you’ll add an additional 10-12 inches or so to the front and back pieces, you’ll need to accommodate an additional 2 feet in the yardage. So, to make sure that you have enough fabric I would advise getting an additional 3/4 yard.
Thanks!
Corinne
Dear PurlBee,
I feel like a real dunce because I am having huge woes with the sleeves! I don’t know what I am doing/not doing, but I can’t seem to sew the sleeves to the body of the robe without some serious puckers and gathers. Which I”ve now unpicked, on my Liberty of London fabric. (Cue wailing). Do you have any suggestions or tips?
Many thanks for the pattern and inspiration, however.
Your site is lovely,
Giulietta, South Africa.
Hello Giulietta –
Thank you for writing in! I am sorry that you are having a hard time getting a smooth seam on the sleeves. Because the Liberty of London Tana Lawn is such a lightweight fabric, it is very sensitive to any tension issues you may have with your machine. My guess is that this is what is causing the puckering. As a first step, I would change the needle in your machine. I am always surprised by what a difference a new, sharp needle makes. If that doesn’t help, consult your machine’s manual to adjust the tension.
I hope this helps!
Please let us know if you have any other questions as you work on this project!
-Corinne
Thank you for my first free download pattern for the robe – but do I now need to spend $15 to buy the layout pattern?
Hi Penny –
Thanks for writing in! This is a great question. You are not missing any pieces, nor do you need to spend any additional money!
The Robe pattern is not a traditional tissue paper pattern. The Robe is constructed using simple cut rectangles. A Cutting Chart with a full list of dimensions is included in the pattern booklet with the Cutting Guide.
I hope this helps. Please let us know if you have any other questions!
-Corinne
I found the sleeves to be very narrow (after I cut them out and had used all of my fabric), so I ended up turning the sleeves sideways and hemming them rather than using a facing. With the fuller sleeves I like them short (about elbow length) so they are out of the way when I cook.
Other than that, the patter was easy to follow and came together really quickly. So nice to just cut big rectangles (which made it possible to reorient the sleeves).
Hi Colleen –
Thank you for writing in, and for your kind words about our pattern. I’m so glad you found it easy to follow, and it sounds like you came up with a great solution for adjusting the fit!
Happy sewing – and cooking!
-Corinne
I’m planning to make this robe with a flannel lining. Should o make two compete robes and then attach them, or do I just do one binding? Any help and tips would be much appreciated.
Thank you.
Hi Bree –
This Robe will be lovely with a flannel lining!
You will only need to cut one Neck Binding, one set of Sleeve Bindings and one Tie. You will cut double of everything else, one in the Outer Fabric and one in the Lining. Piece the Fronts, Back and Sleeves of the Outer Fabric and Lining separately, and then join them with the Bindings.
I also recommend cutting the Sleeves of both the Outer Fabric and the Lining following the dimensions one or two sizes larger than the rest of the body. You will want the extra room to accommodate the additional layer of fabric.
I hope this helps!
Please let me know if you have any other questions as you work on your project!
-Corinne
I love this pattern, however I too found that the sleeves are far too narrow. In the arms and body the fit is fine, but the problem arises around the shoulders/armpits…the robe itself is generously large (possibly even too large…even with the Small size the top panel folds almost entirely over the pocket on the bottom panel) but the shoulders and armpits are way too tight for a rectangular construction, causing the fabric to bunch up in that area in an uncomfortable way when the finished robe is worn. I would suggest that folks add at least a few inches to the width of the sleeves to prevent this issue. The other way to fix this with less fabric would be to adjust the construction of the sleeves to be set-in sleeves or something like that, but that would definitely make the project a lot more challenging! A big part of its appeal is the simple rectangles.
Hi Hannah –
Thank you so much for your thoughtful comments! I am sorry you’re not happy with the fit of your Robe. We understand that the fit of the sleeves has been an issue for some of our readers, and we are currently working on a pattern update that will hopefully help! We should have it up here on the site within the next week!
Thank you again for your comments and suggestions!
-Corinne
I am a beginner at sewing and with the help of a friend was able to make this robe. She really did a lot of the sewing, but I believe I could have done it. I love the finished object. It fits really well… I love how the belt is attached and it cradles the fabric to the body.
All over a super pattern with very nice finished details. I will make another, on my own and see how it goes.
Hi! If I were wanting to line this in something lighter than a fleece, what would you recommend? a flannel, or a knit of some type? i was hoping for something soft and somewhat absorbent.
thanks!
Hi Kalle –
I think a flannel could make a wonderful lining for this Robe. Though I do recommend going one size up if you choose to line it to add room for any extra bulk in the fabric.
I hope this helps!
-Corinne
Thanks for a fantastic pattern. I decided to ‘attempt’ to make one for each of my girlfriends for this Christmas, 3 down, 2 to go. I’m so happy with the results and I know they will be thrilled. I do have a question. I’ve made the small 8-10, Med 10-12 and a large 14-16, would like to make one for a special friend who is (I’m guessing) about a size 20. Do you think if I increased each piece by another 1/2 it could work?
Hi Deidre –
What a thoughtful and generous gift for your friends! I am sure they will love their new robes!
In sizing the robe up for your friend, I think the increase you suggest sounds good. For assistance in getting the measurements right, here is a link to the women’s size chart from the Craft Yarn Council. These are the sizing guides we use for our patterns and can be very helpful when trying to determine the details of arm length, sleeve depth, etc.
http://www.craftyarncouncil.com/womansize.html
While you’re making your increases, I do suggest erring the larger side of the measurements. Also, as you may have seen in the comments, some of our readers have found the armholes of the robe a little tight, for this larger size, I suggest adding in a little bit of additional room to accommodate this.
I hope this is helpful!
Please let me know if you have any other questions along the way.
-Corinne
Hi again, I did it 4 robes for 4 friends, they loved them.
Thank you.
Hello! Are the sizes in your chart UK sizes or US?
I only ask as size 10 in the UK isn’t what I’d call large by any stretch of the imagination!
Hi Rach –
Thanks for writing in. This is a great question!
We use all US sizing for our garments. The Large/Size 10 here is designed to fit a 40 – 42- inch hip measurement.
I hope this helps! Please let me know if you have any other questions.
-Corinne
I did it, 4 robes for 4 friends, they were thrilled.
Thanks for a great pattern and an amazing site.
Hello! I’m struggling to find a maternity robe that I really like – have long had an eye on this one. I’m thinking it wouldn’t be too complicated to accommodate an expanding belly? I run a size XS/S typically, and would love your suggestions for how to adapt the pattern. Thanks!
Hello Meg –
Adapting this pattern for maternity wear is such a sweet idea. There are some straight forward adjustments that you could make, but I’m not sure if they would make the Robe a perfect fit. There is the obvious alteration to accommodate your growing belly, but as I am sure you’ve already discovered, the body changes in many mysterious ways during pregnancy, beyond an expanding waistline. I particularly wonder about the slope of the front neckline and the placement of the waist strap. These adjustments are not impossible to make, but it is difficult to give exact alterations without your specific measurements.
If you feel comfortable taking this on, here are some tips to get you started!
First, I recommend using the higher end of your measurements to chose which size to use as your base (for example, if your bust fits in one size range, but your hips in another, go with the larger size of the two). Cut out all the pieces as described in the pattern for that size, except for the two Front pieces. Cut these to the length given, but adjust the width to accommodate your growing belly (you may want to add anywhere between 6-12 inches to the width).
Then, I would make a small incision into the top edge of the front pieces at point A as it is described in the pattern for your size, but do not cut the full slope of the neckline.
Piece the Front, Back and Sleeve pieces of the Robe as described in the pattern. Once you are able to try the Robe on you will get a good sense of where and how you would like the slope of the neckline to fall. Trim the front pieces as desired at this point.
Finish the Robe as described in the pattern, however be sure to try it on again before you attach the ties for proper placement.
I hope this all helps, and congratulations!
-Corinne
Hello,
I see that you were planning on making adjustments to the sleeves of this pattern. Have those changes been made already to the pattern currently available as the free download when signing up for the newsletter?
Thank you
Hi Caroline,
Thanks for your question! We have added additional information about making the sleeves wider above. We included both directions for those who have not yet cut their fabric and for those who may have found the final product too snug.
Happy sewing!
Cassy
Hi! I’ve just purchased the PDF pattern, as I’m in Australia and can’t wait for the hardcopy! I just want to confirm that the easiest way to make a hardcopy pattern would be to draw up rectangles on large paper using the dimensions in the pattern….
Then I essentially have a paper pattern like store bought patterns…. Is this correct?
Hi Ashlea,
Thanks for writing in! This pattern is not a traditional sewing pattern with the pattern printed onto paper. Rather, we provide measurements that you will use as a cutting guide. You can certainly cut out paper pieces to be guide. You can also use a ruler and a chalk marker to mark directly onto the fabric (that is what I did).
I hope that this helps and let us know how it turns out!
Cassy
Hello,
I have just quickly read the pattern for this lovely robe and I would like to make it with the extra room in the sleeves and shoulder. On the website you say: “We suggest adding 1 ½ to 2 inches to the Shoulder Edge of the Sleeves (this is the shorter side of the Sleeve rectangle). Follow the cutting chart to cut out the remaining pieces in your size and follow the pattern as printed.” But I am wondering, do I also need to add 1.5 to 2 inches to the long side of the sleeve binding rectangle (pieces 5a and 5b of the pattern)? Thanks.
Hello, Quynh!
Thank you so much for you question! The gusset creates more space in the shoulder and sleeve by extending the width of the underarm area. The sleeve length is unaffected by this so, you don’t need to add length to the long side of the sleeve binding rectangle. Again, thank you for writing in! Please do let us know if you have further questions!
Happy sewing,
Kumeko
Dear Kumeko,
I see, so the sleeve pieces wouldn’t be perfect rectangles any more. For example, on the XS, instead of being 15×19; it would measure 17x19x15x19. Is that right? The sleeve would then be tapered.
Hi, Quynh!
Yes, you are correct! If you add the gusset the sleeve would then be tapered. If you are concerned about the length of the sleeve coming out too short I recommend making a muslin sleeve just to be sure that the length is exactly as you want it! And if you haven’t already started this project it might be helpful to make a muslin of the entire robe. In doing this you can see where you’d like to make adjustments (if any) so that you’re finished robe is a perfect fit!
Again, thank you for writing in!
Best,
Kumeko
Can I use chenille for this pattern?
Hi, Jeanne!
Thank you for your question! Yes, you can totally use chenille in the Women’s Robe. Please let us know if you have further questions! Again, thank you for writing in!
Best,
Kumeko
Have you thought about a hooded version of this for adults? I see you have one for the kids!
Hi Lori,
Thanks for writing in and for the suggestion! We will certainly keep your request in mind for the future!
Best,
Cassy
The pattern has the yardage for the full length and not the knee length. By chance do you have one handy? Don’t want to buy more fabric than I need to.
Also do you think Sevenberry Petite Foulard would be an ok fabric for the robe?
Hello Danielle,
Thank you for reaching out and my apologies for the delayed response! I think this robe would be beautiful in the Sevenberry Petite Foulard. For the above the knee version of this robe you will need 7 inches less than the longer version. I hope this answers your questions- please let me know if you have any further questions!
Happy Sewing!
-Marilla
Hello,
I’ve just bought Shetland Flannel to make a robe. I’d like to make sure that the sleeves aren’t too tight, so will be following the instructions of adding two inches to the sleeves. What I’m wondering is do I need to increase the size of the sleeve binding, as well? If so, by how much?
Cheers,
Lyndsey
Hi Lyndsey,
Since you are adding two inches to the sleeve, you will also want to add 2 inches to the binding, you can keep the width the same since the only thing you are changing is the length.
Enjoy,
Melissa
Is it possible to use French Seams on the side seams? What do you suggest. Thank you
Hi Rachel,
Great question! While this pattern is not written with french seams, you can certainly add some additional inches on your measurements before cutting the pieces our to make room for your french seams!
Best,
Cassy
Can a hood be added easily to this robe? Looking for advice on how to do that
Hi Steve,
Unfortunately we do not have instructions for adding a hood to this pattern, but I will be sure to pass your request along to the design team!
Best,
Julianna
Can this be made with a heavy weight terry cloth?
If so, are there any recommendations on working with terry cloth?
This is my first time working with terry cloth (making a cozy robe for my girlfriend).
All the best,
Steve
Hi Steve,
Thanks for writing in, and what a lovely and thoughtful gift! Any woven fabric will work for this robe, including terry cloth, though if the terry cloth is very thick or plush, you may want to make the robe one size larger than you would otherwise.
Best of luck, and I hope that helps!
Julianna
Does the pattern include seam allowance?
Hi and thanks for reaching out! Yes, all of our patterns include a seam allowance so you don’t need to add one!
Best,
Julianna
Hi
I just bought your robe pattern and downloaded it. Where is the actual pattern? I assumed that I could print out the pattern pieces and use them like regular paper pattern for this robe?
Thank you for your help.
Kate
Hi Kate,
Thanks for reaching out! Because this robe is comprised entirely of simple rectangles, there are no pattern pieces to print. You can find a cutting chart on page 3 that will tell you the dimensions of each rectangle, as well as a cutting layout on page 2. When cutting out patterns like this, I find it very helpful (and fast!) to use a ruler and chalk to mark out each piece before cutting.
I hope that clears things up!
Julianna
Could you please explain your comment about “adding 1 1/2 to 2 inches to the shoulder edge”? Are you saying that if you want to make the sleeve less tight that one should cut the sleeve 1 1/2 to 2 inches longer? Or cut it 1 1/2 to 2 inches wider. In other words, for medium, the pattern calls for the sleeve to be cut 16 x 19 1/2. Should I cut it 18 x 19 1/2? Or 16 x 21 1/2? Thanks!
Hi Bobbi,
Thanks for reaching out, and I apologize for the confusion! To make the shoulder a little looser, you should cut the sleeve wider, not longer, so your adjusted sleeve will measure 18 by 19.5.
I hope that clears things up!
Julianna
Thanks for your help. Instead of cutting the sleeve piece as a rectangle measuring 16 1/2 x 19 3/4, I cut the sleeve piece as an isosceles trapezoid measuring 22 inches (the shoulder seam), 17 inches (lower arm width), and 19 3/4 inches long from the shoulder seam to the lower arm.
I also made the following changes:
1. I lined with heavy (12 oz) terry cloth. Because of this, and using a previous suggestion, I increased the size I wanted by one (from medium to large).
2. I cut the pockets 9 1/2 x 9 1/2. The given measurement was a little narrow.
3. I made and attached belt loops (similar to the hanging loop) instead of attaching the belt to the robe.
4. Because I lined the robe, I did not put a binding on the sleeves, but instead turned the two cloths toward each other and top stitched. I also did the same on the hem.
I love how this robe turned out. It’s a little heavy with the terry cloth lining, but should be great for cold weather! Thanks Purl Soho
Hi Bobbi,
Thank you so much for sharing your wonderful modifications and tips – this sounds like a wonderfully cozy version of our robe! I’m all this extra information you have so kindly provided will help many other sewists customize their projects!
All the best,
Julianna
I notice you are using French Seams for the shoulder and sleeve seams. Is it not possible to use French Seams for the Side Seams, too?
Hi Diane,
Thanks for reaching out! Since the shoulder seams are sewn first and then the side seams (the underarm seam and side seam) are sewn after, because of this it would be pretty difficult to use a french seam, especially at the underarm point! This is why we use a different method for these seams rather than french seams.
I hope this clears things up!
Gianna
I’ve made this robe three times. I first made it lined with terry cloth. I then made it twice using Liberty of London Tana fabric, without a lining. These two unlined robes are gorgeous and look like they could be sold at high end boutiques! I highly recommend this pattern. THANK YOU PURL SOHO!! The robe is simple, but beautiful in it’s details. The trim band on on the sleeves and around the front and neck, and the enclosed seams give the finished robe a very professional look. I wanted to share a few changes that I made on the two unlined robes which I just completed. I was writing them down for myself and thought I should share them.
1. SLEEVES: In previous comments by Purl Soho, it was suggested to widen the sleeves by 2 inches, or (if you’ve already cut and sewn the sleeves) remove the sleeves and add a gusset. This is what I did:
I added 2 inches to width of the sleeves PLUS I added a right triangle to the top of each sleeve. This gives more room to the arm pit or underarm area. Here’s an explanation of the sleeve pattern I used:
Start with the sleeve measurement for your size. I’ll use size M as an example. The pattern gives a measurement 16 x 19 1/2 inches. Instead start with a rectangle measuring 18 x 19 1/2 inches. At the top edge, the 18 inch edge, extend the width 2 inches on each side (now 22 inches). Then make a mark on the original pattern 5 inches down on each side. Connect the extended 2 inch mark with this 5 inch mark. This will add a right triangle (pointing down) at the top of each side of the sleeve. This gives the wearer more ease in movement in that area.
Also, I chose to line the bottom part of the sleeve. This was easy. I just cut the sleeve 9 inches longer. After the sleeve seam is sewn, just turn this 9 inches inside, fold the edge in 1/2 inch, and hand or machine stitch in place. Note: I still added the sleeve binding because it gives the robe such a professional look.
2. SLEEVES: After following all of the instructions on page 6 for sewing the sleeve pieces on to the body, I repeated steps 8 and 9 for the shoulders (on page 5): Press the seam toward the sleeve and “Sew the seam down with an edge stitch”.
3. SIDESEAMS: I loved that the shoulder seam and the seam attaching the sleeve to the body were enclosed. In a previous comment, someone asked why this wasn’t done with the seam that runs along the sleeve and body side seam. It can’t be done along the entire seam, but it can be done along just the (body) side seam. And this gives a much more “finished” and professional look. Here’s how I did it:
1) Sew just the side seam, following steps 1,2,3 and 5 from the shoulder seam instructions on page 5.
2) With right sides together, sew the sleeve seam. Reinforce the turn where the sleeve meets the side seam by back stitching at this corner.
3) Cut a small diagonal slit into the underarm as instructed in step 4 of the side seam instructions on page 7.
4) Zigzag the sleeve seam, going over the diagonal cut area (to give it added reinforcement).
5). Now complete steps 8 and 9 from the shoulder seam instruction on page 5.
4. POCKETS: The pockets are too narrow. I widened them and I also chose to double the fabric. This is what I suggest:
1) Cut the fabric 19 x 9 1/2 inches.
2) Fold, right sides together, and sew the 3 raw edges, leaving a 2 inch opening to turn.
3) Turn, push corners out, press.
4) Sew a top stitch 3/4 inch down from folded edge. I sewed a second stitch (because I think it gives a nice look) 1/4 inch from the first topstitch.
5) Sew in place (as instructed in the pattern on page 14). After the edge stitch, I added a second finishing stitch 1/4 “ from the edge stitch.
5. I choose to not attach the belt, but to make belt loops instead. Here’s what I did:
1) Cut two pieces of fabric 2 x 5 1/2 inches.
2) Use the instructions for the Hanging Loop on page 9, except, fold in the ends before step 5. Then edge stitch around the edge and one more time down the center. (This gives it more “body”. )
3. Attach to the side seams. I made a mark 4 1/2 inches above the line of the pocket. I turned the belt loop up-side-down and attached the top of the belt loop at the mark on the side seam by sewing about 1/4 inch in from its end. Be sure to reinforce by backstitching. I then placed the bottom of the belt loop in place, turned it under about 1/4 inch and sewed in place on the side seam. (You can do this by carefully pushing the top of the belt loop out of the way and placing the machine foot under the belt loop.)
AS AN ADDED EXTRA, and because I had some extra fabric, I made two terry-lined wash clothes to go with each robe. I used the Purl Soho “Hooded Baby Towel and Washcloth Set.” The pattern and instructions are on their site. These made the gifts complete!
Thanks again PURL SOHO for the wonderful patterns and material!
I think that the measurements for cutting the neckline width are backwards for changing sizes. I have made the robe but the neckline doesn’t hug my neck as closely as I’d like. In planning to make another one with a better fitting neckline, I see that to make a smaller size, (where the neck would presumably fit a smaller person) the measurements from the top outside (shoulder) corner of the robe front to the center front get smaller (making the opening wider). This seems to be an error, or am I misinterpreting it? Thank you.
Hi Sally,
Thank you for your question! We took a look at the pattern and weren’t able to find any errors but wanted to clarify that the shoulder section of this robe adjusts proportionately with the neckline as you go up in size. Looking at the bottom of page 3 in this pattern, the fabric piece showing where to cut from point A and B is where you would adjust to make this fit more closely by moving the position of Point A closer to the right edge of the front piece. Keep in mind you may have to adjust the binding a little longer to account for this change!
If you would like more help visualizing this, feel free to reach out to us at [email protected] where we would be happy to provide you with a diagram demonstrating how to do this!
Hope this helps!
Best,
Margaret
I am getting ready to cut out my pieces for this robe and am curious as to whether the fabric is laying out open or folded in half?
Hello!
Thanks for reaching out to us! The template pieces for this pattern should be cut from fabric that is laying open. There is also a diagram on page 2 of the pattern that includes 2 layout options for how to arrange the pattern pieces before cutting!
I hope this helps! Please let us know if you have any questions.
All the best,
Carly
Hello! Not an experienced sewer and am confused about how to increase the sleeve binding. I cut the sleeves to a trapezoid per another commenter (16 1/2 by 19 3/4 by 22). How now to cut the sleeve binding? 7 by 16 1/2, or 5 by 22?
Thanks!
Hi Jenny,
Thanks for writing in! We compared the numbers you had and the pattern as written and think you shouldn’t have to increase the binding at all.
You mentioned cutting a trapezoid. Can you confirm if the dimensions are 16½ (lower arm width) by 19 3/4 (length) by 22 (shoulder seam)? The binding relates to the lower arm width so it shouldn’t change. That’s why we think you’re good to move ahead as is!
Please let us know if we’re misunderstanding the question though. We’re happy to take another look if needed!
All the best,
Zha Zha