Vintage Tea Towels

A few years ago Page made a beautiful set of Soft Cotton Knit Dishtowels inspired by the subtle nuance of color in her collection of vintage kitchen textiles. Just like her, I am taken with the simple, utilitarian beauty of these classic fabrics; but where Page was inspired by their variety of hues, I am fascinated by their seemingly endless variety of patterns, most of which are created with the humble stripe.

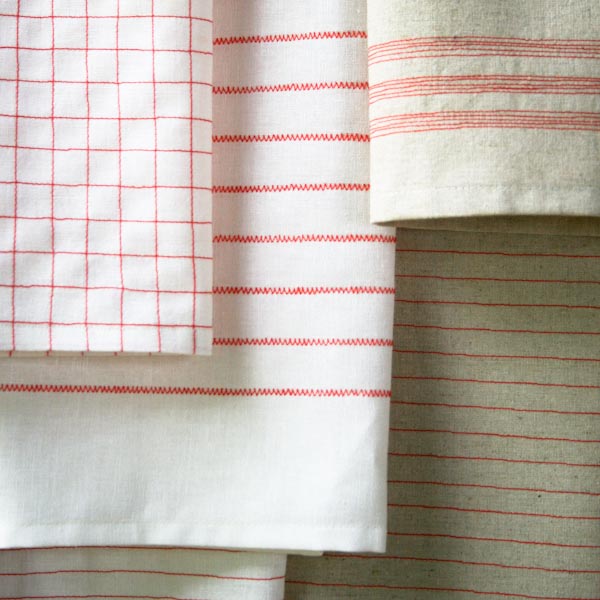
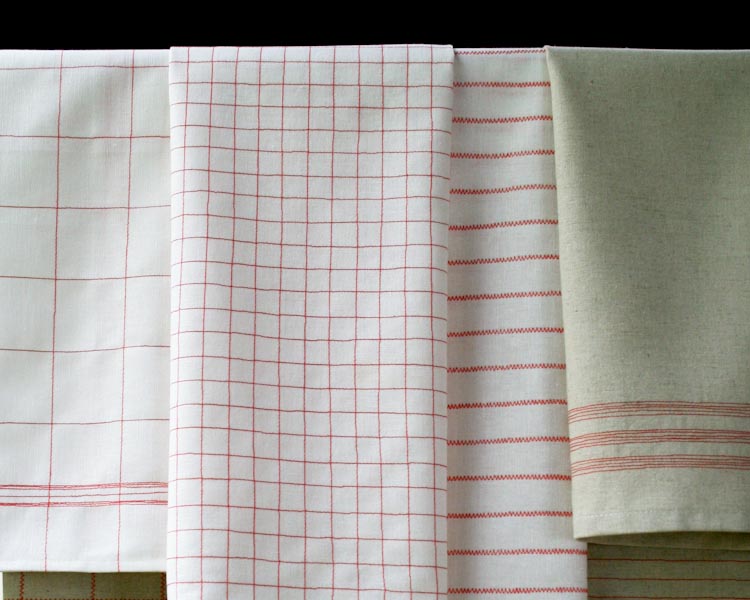
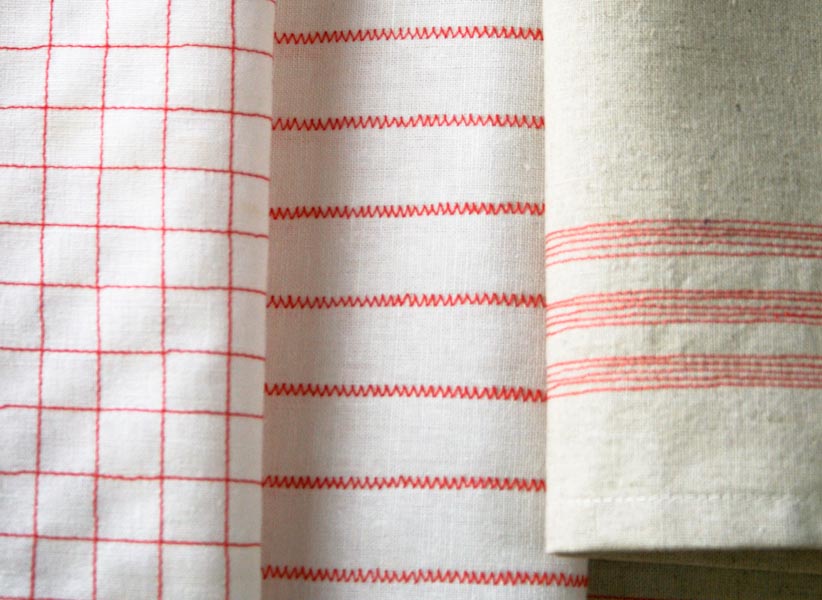
With these timeless beauties in mind, I made these Vintage Tea Towels, each machine-stitched in a bright tomato red with its own pattern of stripes and grids. I had so much fun zooming along on my machine that it was impossible to stop at just two or three, so I made six!
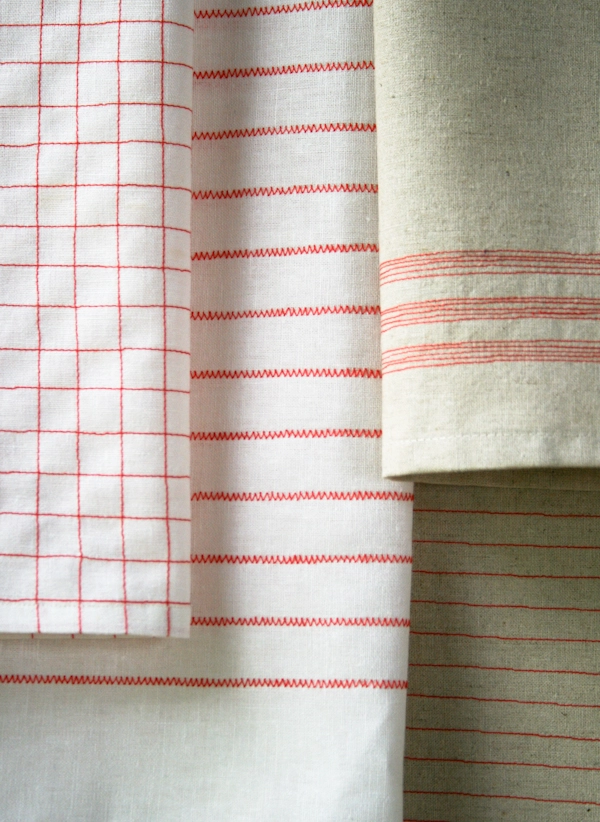
For the fabric itself I used Robert Kaufman’s Essex, a beautiful blend of cotton and linen that makes these towels light, absorbent, and sturdy enough to stand the test of time. Just like the heirlooms that inspired them! -Corinne
Materials
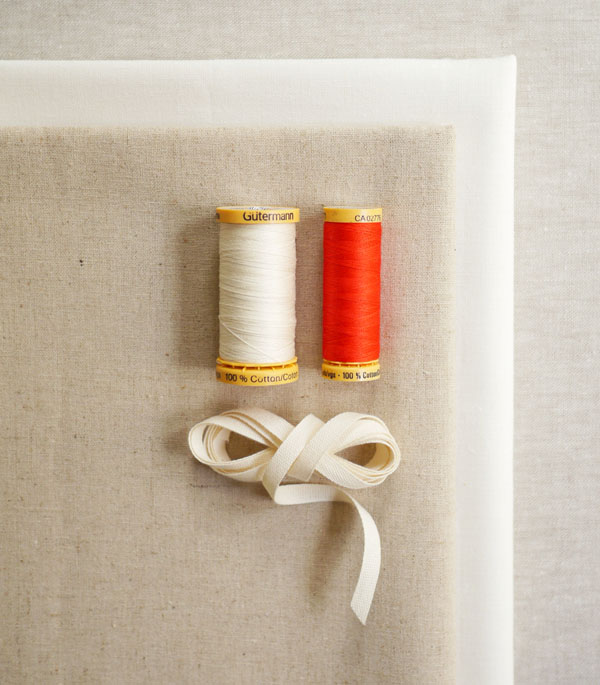
- 1 1/4 yards of Robert Kaufman’s Essex Wide in Natural
- 2 yards of Robert Kaufman’s Essex in Bleached White
- Pattern Thread: 7 spools of 100% cotton thread (110 yards each). We used color 4915
- Towel Thread: 1 spool of 100% cotton thread (274 yards). We used color 1040.
- 1 yard of ¼-inch Fettuccia Ribbon in color Natural
- A fabric marker
These are enough materials to make 6 Vintage Tea Towels.
Another Option
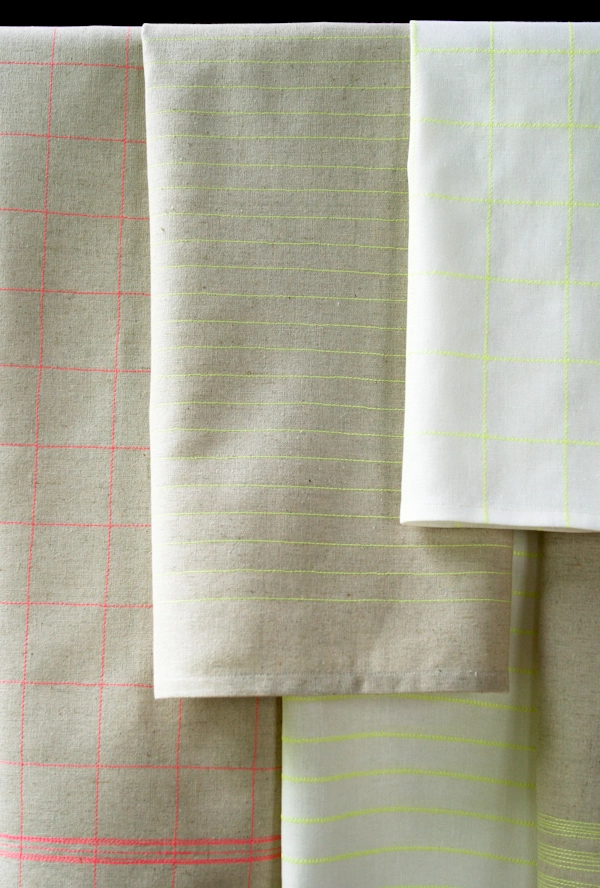
While I was stitching away, I couldn’t resist pairing these classic stitch patterns with the supremely modern Mettler Neon Thread. To make a full set of six towels in the neon, you will need 3 total spools of Mettler Neon Thread (220 yards), shown here in colors Sun and Chrysanthemum. All other materials stay the same.
Notes
Prewash all fabrics before starting.
Pattern
Cut
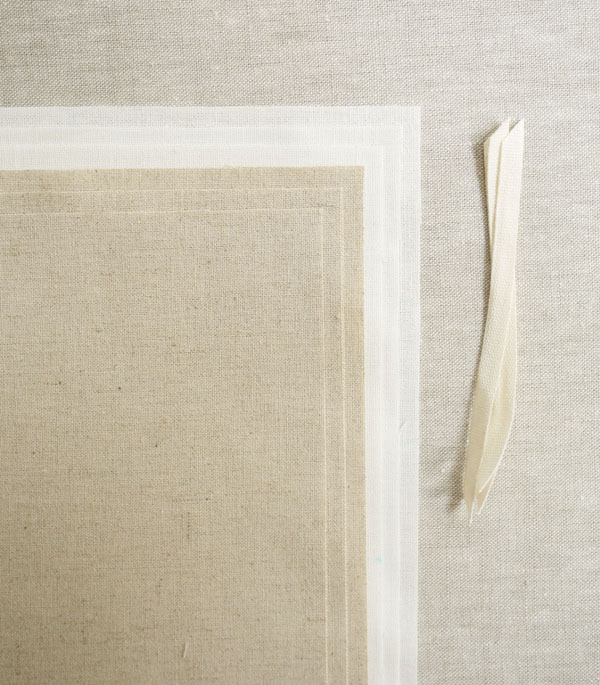
Cut three 18-inch by 31½-inch pieces out of each color of Essex, 6 pieces total.
Note: When cutting simple rectangular shapes for patterns such as this, straight, clean cuts are key. The best way to make these cuts is with a rotary cutter and a non-slip quilting ruler on a self-healing cutting mat. If you have limited experience using a rotary cutter, I recommend visiting our Rotary Cutting Tutorial.
Cut six 4-inch pieces of the ribbon with the edges trimmed at an angle.
Mark and Stitch the Patterns
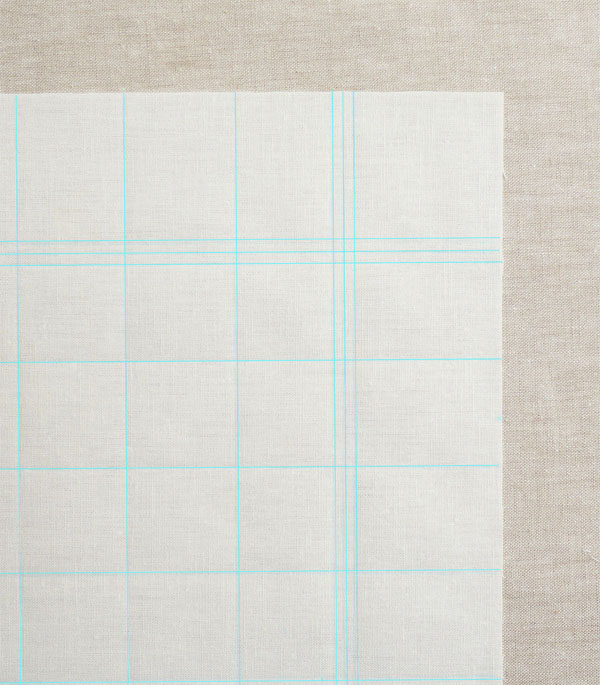
Using the fabric marker and a straight edge ruler, mark out the patterns on each towel.
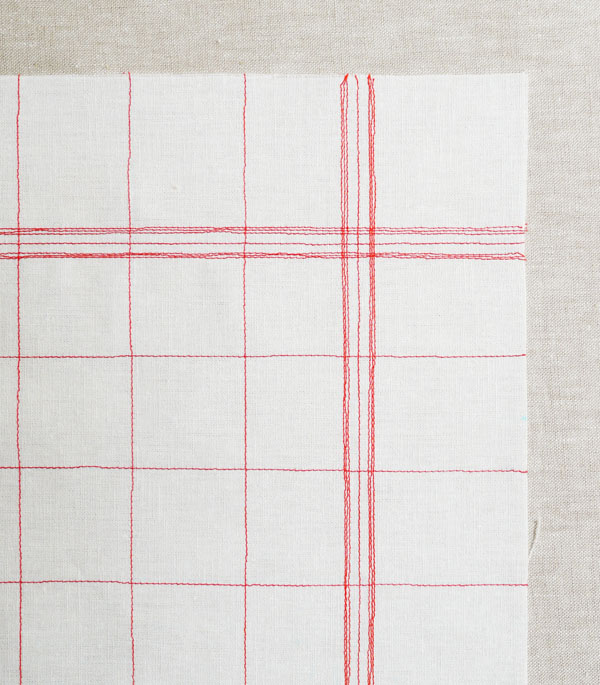
And using the pattern thread, machine stitch along the marked lines with either a straight or zigzag stitch.
Our Stitch Patterns
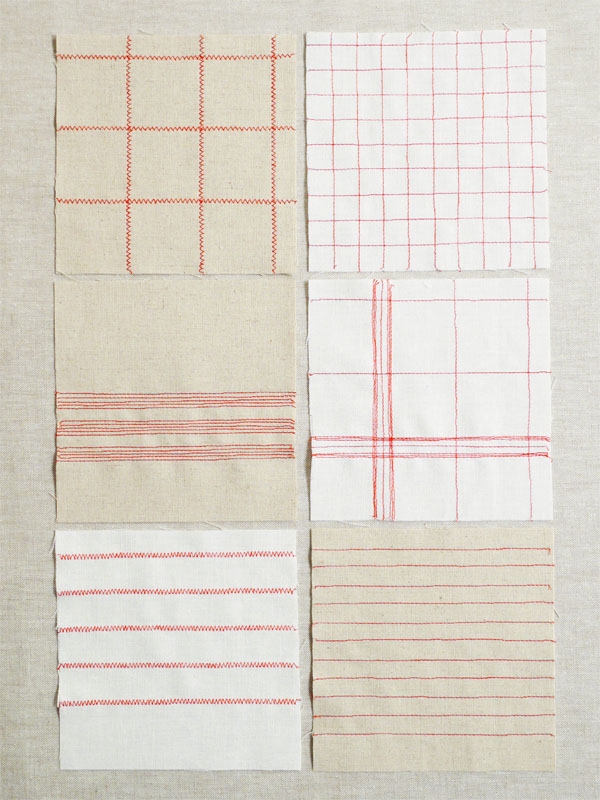
Here’s how to make the same stitch patterns we did!
Zigzag Grid
Mark the first horizontal stripe 2 ¼ inches from the bottom edge. Continue making horizontal lines every 1 ½ inches until 2 ¼ inches from opposite end. Mark the first vertical stripe 2 inches in from one side. Continue making vertical lines every 1 ½ inches until 2 inches from opposite side. Sew along these lines with a zigzag stitch. If your machine allows it, set the stitch at width: 2.5 and length: 1.
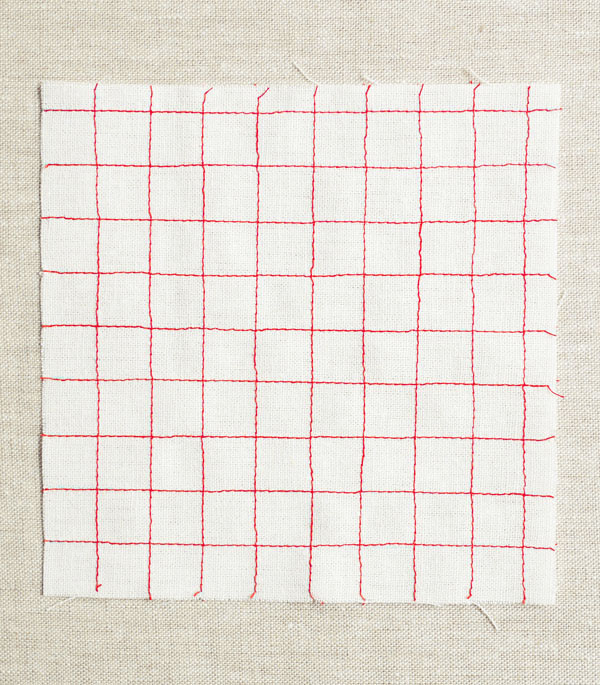
Small Check
Mark the first horizontal stripe ½ inch from the bottom edge. Continue making horizontal stripes every ½ inch until you reach the opposite end. Mark the first vertical stripe ½ inch in from one side. Continue making vertical stripes every ½ inch until you reach the opposite side. Sew along these lines with a straight stitch.
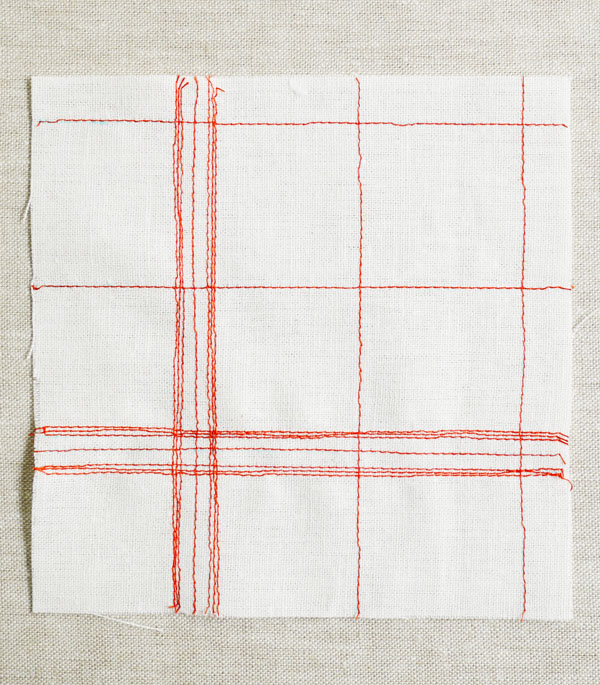
Large Check
Mark the first horizontal stripe 2 ¼ inches from the bottom edge. Continue making horizontal lines every 1 ½ inches until 2 ¼ inches from opposite end. Mark the first vertical stripe 2 inches in from one side. Continue making vertical lines every 1 ½ inches until 2 inches from opposite side. Sew along these lines with a straight stitch.
To create the border, mark 1/8 inch on each side of the first and last horizontal and vertical stripes. Using this line as a starting point, sew a series of three stripes, one right next to the other, to create the illusion if one thick line.
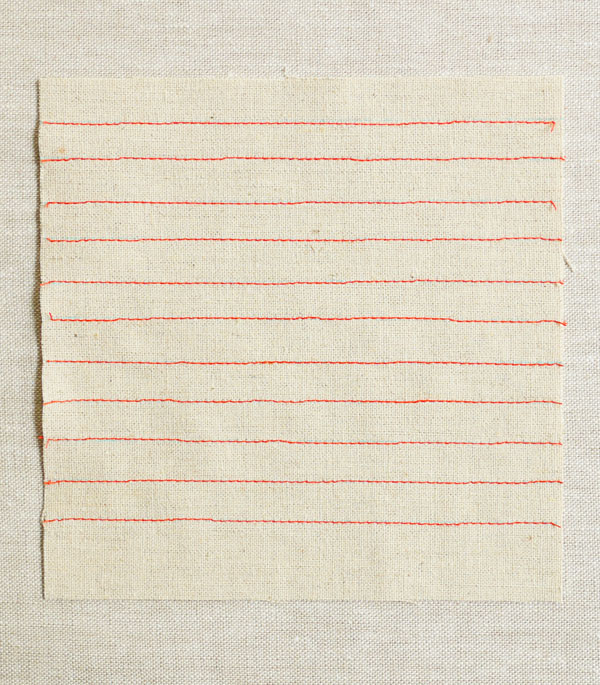
Pin Stripe
Mark the first stripe 1 ¼ inch from the bottom edge. Continue making horizontal lines every 3/8 inch until 1 ¼ inch from opposite end. Sew along these lines with a straight stitch.
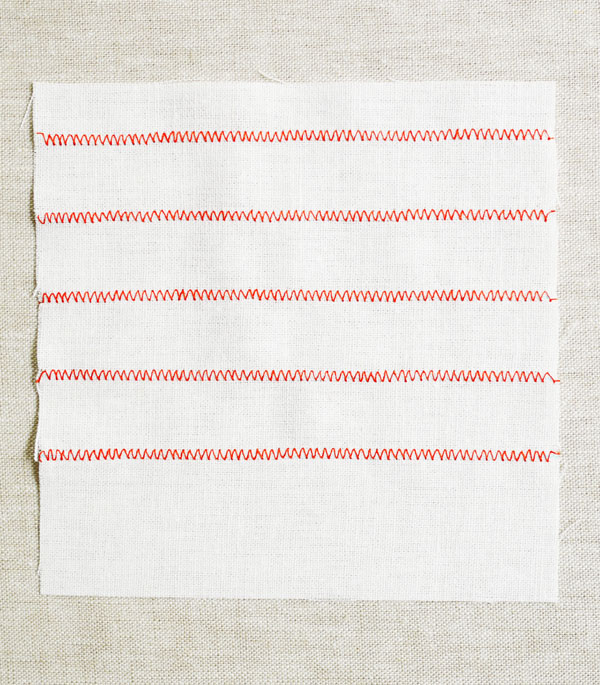
Zigzag Stripe
Mark the first stripe 2 ½ inches from the bottom edge. Continue making horizontal lines every ¾ inch until 2 ½ inches from opposite end. Sew along these lines with a zigzag stitch. If your machine allows it, set the stitch at width: 3 and length: .75.

Three Stripe Border
Mark the first line of the the first stripe 2 1/2 inches from the bottom edge. Mark two more lines 1/8 and 1/4 inch above the first line. Sew along these lines with a straight stitch. Then, sew a line between the first and second stitched lines and another between the second and third stitched lines. There are now five stitched lines, each 1/16 inch apart.
Start the next stripe 1/4 inch from the top of the first one. And make a third stripe 1/4 inch from the top of the second one. Repeat at the opposite end.
Hem the Sides
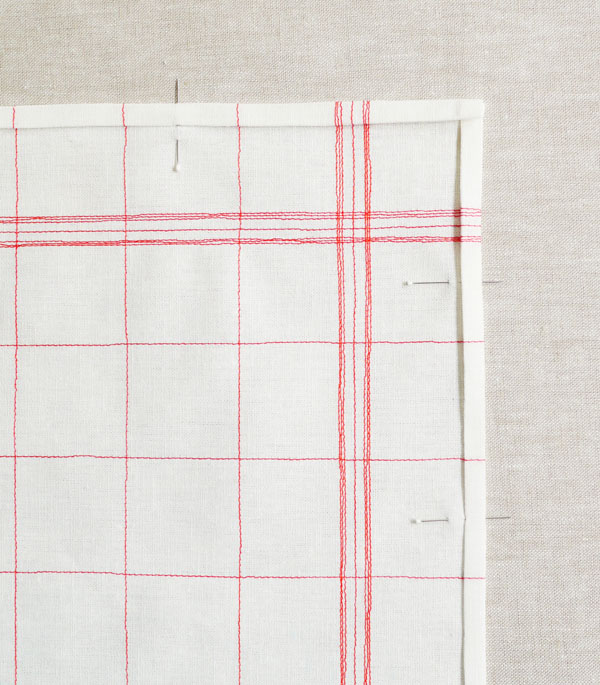
Fold the edges of the long sides of the towel ¼ inch toward the wrong side twice. Press and pin. Repeat with the short sides.
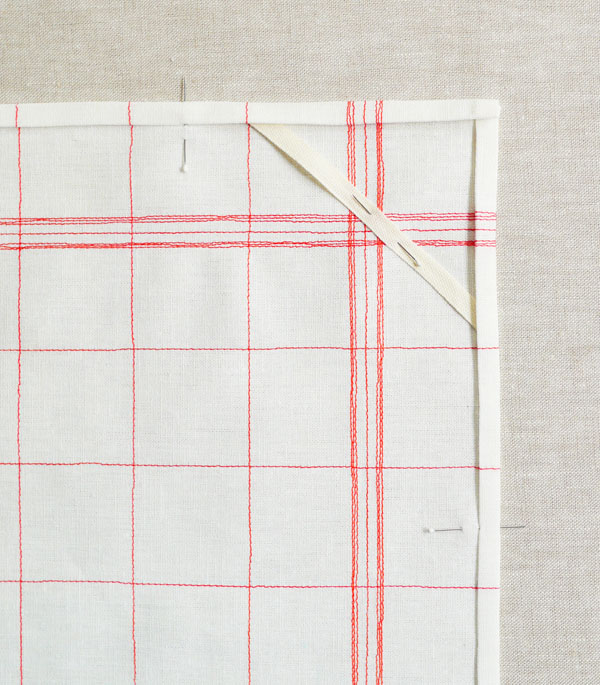
Place the ribbon diagonally in the top right corner on the wrong side of the towel. Tuck the ribbon ends into the folds of the hem and pin into place.
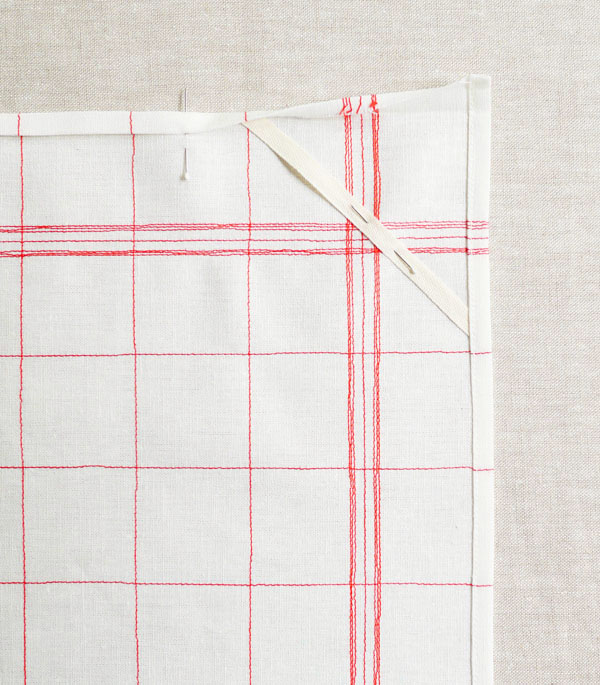
Unfold the short sides’ hems at the corners and edge stitch along the folds on the long sides, from end to end.
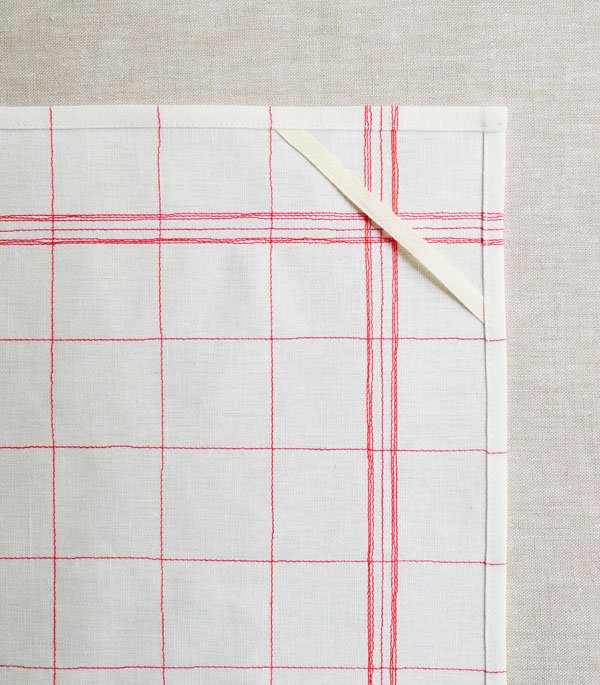
Re-fold the short side hems along crease lines and edge stitch. Backstitch at beginning and end of the seams and you’re all done!




These are crazy cute. You are ambitious, too! I've made my own tea towels and napkins before, but only managed turned edges, no embellishment.
Wow they are amazing. I am just busy making tea towels and you have certainly put them to shame. Thanks for all the very lovely info which I am sure I will try one day soon xo
You didn't mention whether you washed the linen before you started this project. I have used Essex in the past and found that it shrinks quite a bit.
Oh wow, what an absolutely brilliant idea! I love the utilitarian look of them as well, and it never would have occurred to me in a million years to sew lines onto normal fabric! I'm definitely going to have a go myself…
Oh my goodness, this is brilliant! Now you have inspired me, and several others I'm sure, to try this!
My favorite combo is red and white, authentic French linens are not in my future, but now I can create my own masterpieces.
THANK YOU!
Corinne, As a vintage collector of tea towels …amongst many many other things … I appreciate these so much. Lovely in every way. Thank you!
These are amazing! That's how someone who couldn't make crochet or other kind of old embellishment, could make a beautiful tea towel! I love it 🙂 I also like to make it with other types of lines of my machine. Kisses from portugal, sara http://www.infanta.blog.pt
Hi Susan –
Yes, it's always a good idea to pre-wash your fabrics. Sorry not to have mentioned it at the beginning of the pattern!
I have adjusted the quantities of the linens to make sure there is plenty of fabric post-shrinking.
Thank you for writing in!
-Corinne
Wow, great idea!
Simply beautiful!
iyi geceler.blogunuz ok gzel.sevgiler ,,nee
Very nice, thanks for sharing.
It says to prewash all fabrics at the very top of the instruction portion. Brilliant and simple.
I really inspired doing this one, very detailed instruction for ove this
They are certainly pretty to look at, but it seems to me that the lines of thread would make the towels feel lumpy and bumpy when using them.
Call my dumb… but why the diagonal ribbon? I'm a seasoned sewer but I'm not so sure what the ribbon is for.
I've made large loop hooks for big bath towels, sewed it right in the middle so that they can hang on a hook. Made the loop[ from fabric folded over twice, about 8" folded in half.
Hi Alice-
The addition of the diagonal ribbon is a very clean and simple way to hang the dishtowels. Your way would work as well!
Thanks for writing in!
Molly
What a lovely, thoughtful and creative project. Thank you. This is on my soon to do list.
What a great idea! I totally agree with both of you about the beautiful value of utilitarian design. it is so hard to find striped fabric also. at least where I live but even on the internet.
thanks for the inspiring idea – I can’t wait to get started making my own set.