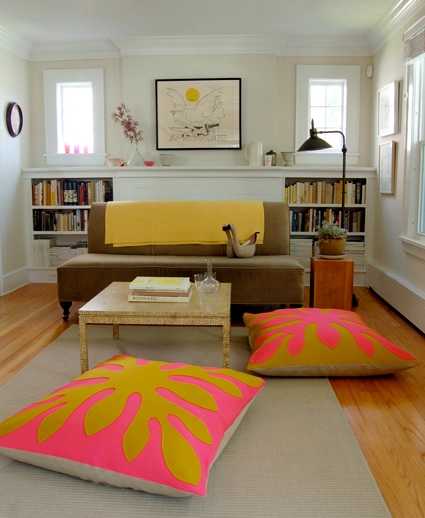
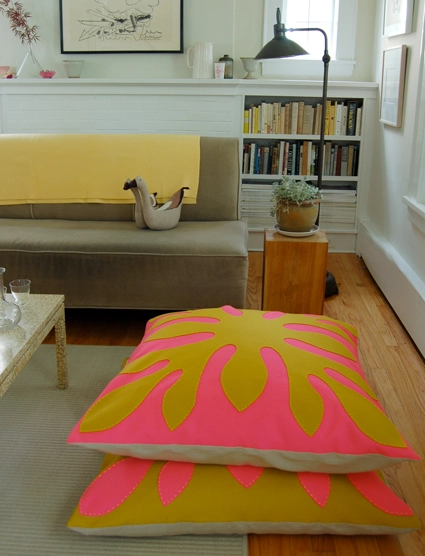
Hawaiian Style Felt Floor Pillows
I have always wanted to make a Hawaiian quilt or pillow, but I find the time consuming process rather daunting! Nonetheless I have always kept making a Hawaiian quilt in the back of my mind as a goal and inspiration. Recently I started thinking about a way to simplify the process and our wool felt popped into my mind. You don’t have to hem felt which cuts out the laborious hand turned appliqué step and we recently started carrying our beautiful wool felt by the yard so I could make my piece as big as I wanted.

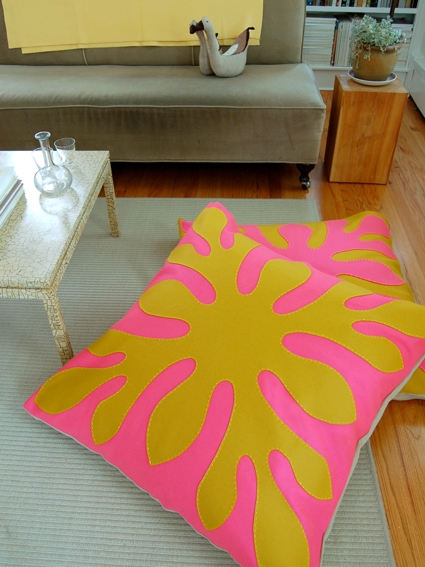
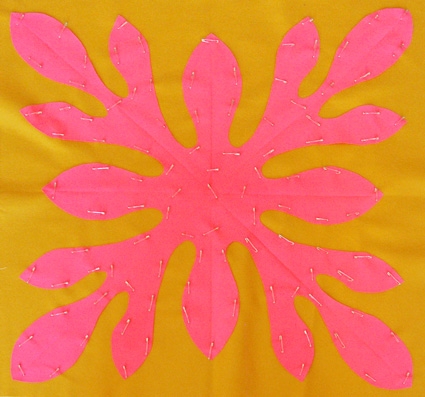
Our 100% wool felt comes in the most luminous, saturated colors and each bolt is two yards wide (yes, two yards wide!). I picked out two of the most vibrant colors I could find and made these two huge floor pillows. The floral shape is stitched onto the background with bright yellow silk and wool Trio needlepoint yarn. Creating these two pillows was so much fun! The felt is beautiful and easy to work with and the whole thing came together so fast. I felt like a painter making big colorful gestures.
Designed by Purl Soho designer, Molly Schnick. Click here to see even more of Molly’s work!
Materials
To make two 36-inch square pillows:
- 1-yard Wool Felt in Bright Pink (Color A)
- 1-yard Wool Felt in Ochre (Color B)
- 2 yards of Global Weave Linen in Natural or (if you’d prefer a brighter backing fabric) 2 yards of Essex Linen Cotton.
- One skien of Trio 50% wool and 50% silk needlepoint yarn in Big Canary
- Blue Tailor’s Chalk
- Bent Arm Safty Pins
- Two 36-inch by 36-inch pillow forms. We found some available here.
- A Hawaiian Pillow Template printed (available for free download here), cut out, and taped together at corresponding numbers.
Cutting out the Shape
 Cut each piece of felt into two 36-inch squares and put one of each color aside to use for the next pillow.
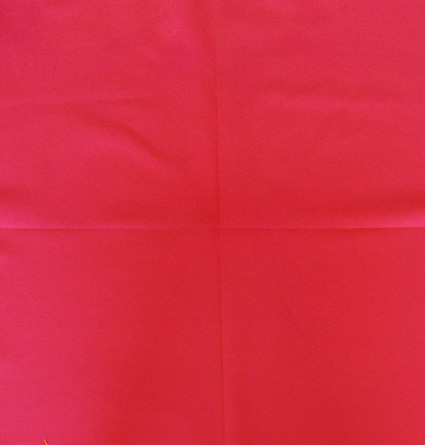
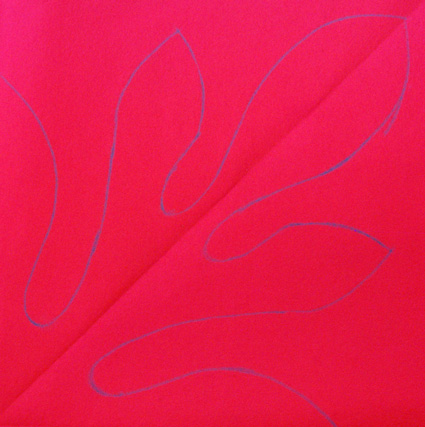
Fold the square of Color A vertically and horizontally into quarters and iron it to mark the creases.
 Unfold it and then fold it into quarters diagonally and press those creases as well. Unfold the piece and lay it flat. It will now have 8 marked segments. If any of the creases are unclear take the time to re-press them before you move on.
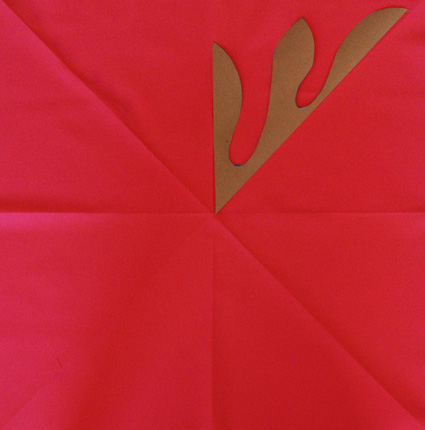
 Hawaiian pillow template. Place the template along the edges of one of the eight marked segments as shown above. The long part of the template should be along the diagonal marking and the short side should be on the vertical middle marking.

 Using the tailor’s chalk trace the template carefully. Then flip the template over and move it clock-wise so that it is now in the next segment with the long part of the template along the diagonal marking and the short side along the horizontal middle marking. Trace the template in its new position.
 Keep flipping the template in this manner until you make it to all of the eight segments.
 Make sure that your piece looks like a cohesive shape before you cut it out.
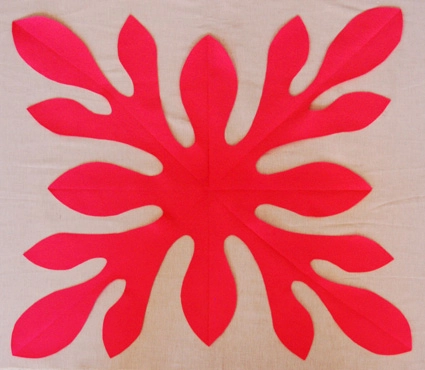
Carefully cut out the marked shape.
Basting
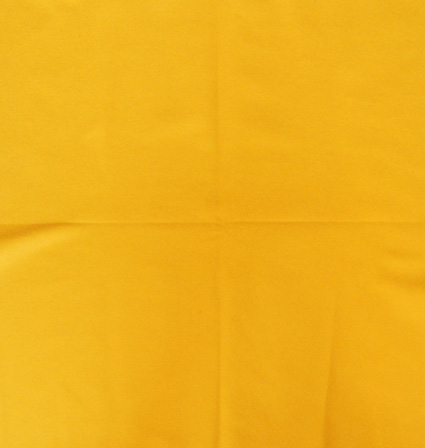
 Fold the square of Color B into quarters just as you did for Color A. You do not need to fold it diagonally as well.
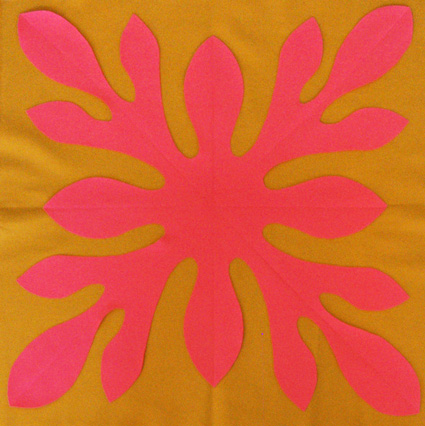
 Place the cut out shape on top of the backing, lining up the horizontal and vertical markings that you pressed into the fabrics. Smooth the top shape so it seems centered and flat. You will need a large area to do this since the entire piece has to be flat (I worked on my kitchen floor!)

Sewing
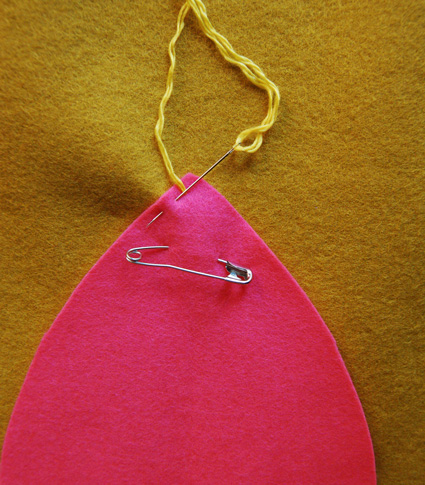
Cut an 18-inch length of the Trio thread. Separate it into three pieces of 2-strands each. You will use 2 strands for all of the hand stitching in this project.
Using a small running stitch sew along the edge of the shape taking out the safety pins as you come to them.
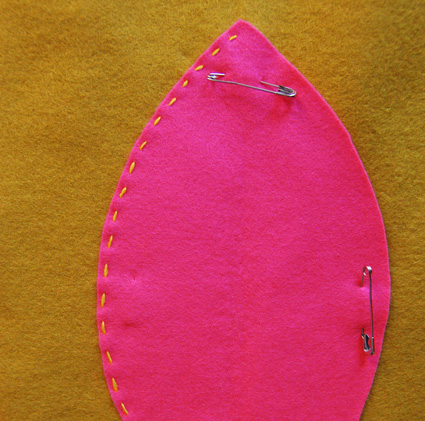
Sew around the entire edge of the shape in this manner and you’ll be done with the top.

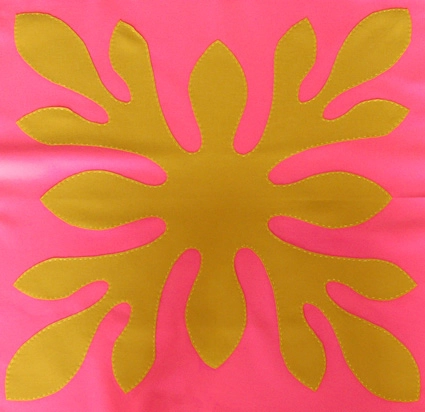
 Repeat all steps for the second pillow but use Color B for the shape and Color A for the background.
Finishing the Pillows
Cut the Linen Cotton into two 36-inch squares.
Pin a linen cotton square to one of the pillow tops, right sides together and then, using a sewing machine, sew them together with a ½-inch seam along three sides.
Turn the pillow case right side out through the open side. Slide the pillow form into the pillow case through the open side and then the sew the open side shut with a slip stitch.
Repeat for the next pillow and enjoy! –Molly


Looking forward to making these! Thanks for the wonderful tutorial. Minor feedback; In finishing the pillow you mention linen cotton but do not list it under materials.
Thanks for catching that Alexandra- it’s been corrected!
wow! those are beautiful! 🙂 I love that they are gigantic!! imagine having a pillow fight with them!!
I like so much!!! The colours are beautiful.
I`m trying!!
Kisses
These are beautiful. I have some wool felt I’ve ordered from The Purl Bee.
Looks like I am going to need some more. These would make great college dorm pillows for my daughter. Thanks
These look fantastic. Can’t wait to try. What did you fill the pillows with?
This is a great tutorial. I love the colors too.
Alma
These are wonderful! I do Hawaiian quilting and these really appeal to me! Can you give me a ballpark estimate about how much they cost to do? Mahalo!
Wow. Gorgeous. And a very clever way to create the templates.
I recently made a felt suzani pillow but did not have the patience to do applique (I just glued the felt on.) Very inspiring.
These are such a great idea, and what a color blast to add into your room!!
These are so pretty! I've always wanted floor pillows but haven't found any in the color and pattern combination that I like – until now!
One question – I don't have a sewing machine – do you think it would work to hand-sew the front and back together? I have no sewing experience so I don't know if hand-sewing would cause a problem as opposed to using a machine.
HI Meredith-
It would be fine to hand sew the front to the back. You can follow the directions in exactly the same manner.
Thanks for your comment!- Molly
Hi –
A question: How do you clean these pillows? It seems that since they are floor pillows they will need to be cleaned at some point.
Thanks!
Put a zipper on one side, and you could clean the covers??
Hi Margaret-
If you attached a zipper or buttons you could hand wash the covers.
Thank you- Molly
Hi Molly,
This isn't related to the pillows, although i love the pillows, but i was wondering about the paint color on your walls. Would you by chance know the name of it? It's beautiful!
Hi Lindsay-
Actually that is Joelle's wall and the paint color is Benjamin Moore, #974. It's one of their old colors, before they had names, but they can still make it.
Thanks for the nice comment- Molly
I really love these pillows! I currently live in Hawaii and would love something like this in my living room. Thanks so much for sharing!
This project addresses a long time idea I've had to have a large size wall hanging of a poppy or other dramatic flower in a vibrant color. Do you have any ideas on how I could make a template like that? Or do you have one? Also what colors does the wool come in?
Love the pillows, this have to be my next project:) How much did it cost you to make these?
Hi Monica-
Links to all the materials I used and their prices are in the materials section. Here is a rundown of the costs:
2 yards of the wool felt at $59.88 a yard is $119.76
2 yards of the linen at $23.50 is $47 (you could also use Essex instead which is $9 per yard)
1 skein of Trio yarn is $5.90
So that would be $172.66 for the fabric and yarn, or $143.66 if you used the Essex as the backing fabric.
If you'd like to make a less expensive version you could use the same basic instructions to make a much pillow, using the 18-inch pre-cut felt available here: https://www.purlsoho.com/purl/products/item/6409-Wollfilz-1-mm-precut-Wool-Felt
Thanks for writing in and please let us know if you have any more questions.
– Molly
These are just beautiful.Thanks for the instructions!
Those floor pillows are very lovey. I was wondering do you have a video tutorial. I know someone asked prior to me but can you actually hand sew the fabric to make a floor pillow. One more thing instead of purchasing cushion can you combine two pillows instead?
Hi AP-
Thanks for the questions!
We don't have a video tutorial for this but I'm happy to help you with the specific questions you have:
You can hand sew these- it just takes a bit longer.
I'm not sure what you mean by combining two pillows? In order for the floor pillow to be nice and flat and look neat it would be best to use just one pillow insert.
Please let me know if you have any more questions!
Molly
I made this pillow for my niece a few years ago as she was going off for college. She absolutely loved it and even brought it with her for a junior year abroad. I'm now making another pillow for my second niece who leaves for college in the fall. (Her request.)
So, in short: Wonderful idea. Great pattern!
Thanks.
Do you sell the finished pillows? I'm not a craft person but I would love to have these.
Hi Tyra-
We don't sell the finished pillows but they really are simple to sew!
Thanks for getting in touch!
Molly
I think this is an amazing idea. Thank you so much and I was just wondering if I would be able to fill them with stuffing rather than a cushion? Xox
Hi Cloudy10-
Sure! That would work fine!
Thanks for getting in touch!
Molly
I love these pillows and wanted to make them for my friend who is moving to Florida, but I did not see the lovely bright colors. will you be getting more in soon? Thank you!
Hi Karen-
Unfortunately we no longer sell felt by the yard in very many colors. I’m so sorry! We do have it in 18-inch square pieces if you’d like to make a smaller version.
Thank you for getting in touch!
Molly
Amazing tutorial.The techniques are really very easy and simple. Really like the gigantic size of the pillow.Looking forward to making this.Thanks a lot for sharing such a thing. 🙂
I am unable to see the images in this tutorial! It’s not my browser (Chrome), because I can see every other tutorial and the thumbnail graphic for the tutorial on the listing page. It looked beautiful, so I hope the internet kink unkinks! Ps. I love this site. <3
Hi Kate,
Thank you so much for writing in and for making us aware of the issue! We have corrected the problem and the images are back up!
Thank you again!
Cassy
the pillow template is missing – it goes to a 404 page 🙁
Hi L,
Thanks for writing in and bringing this to our attention! We recently updated our site and are still ironing out some residual kinks. I have passed this on to our team, and we appreciate your patience while we are working hard to get the template back!
Warmly,
Gianna
Hi!
These floor cushions are so pretty! I also have fallen in love with that sofa! Do you have an information on it?
Thanks,
Alison
Hi Alison,
We’re so thrilled you’re enjoying the cushions! The sofa was from a place called Portico Homes and was actually the personal sofa of one of our owners. We’re not sure if they’re still making it, but hopefully, this helps you in your search!
All the best,
Kelsey