Tooth Fairy Bags
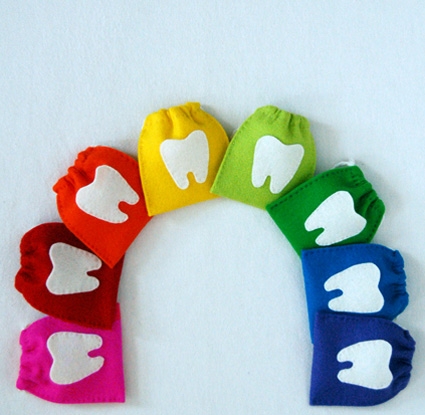
We thought we’d try to make the whole Tooth Fairy ritual a little more fun by making a colorful bag complete with a special tooth-shaped pocket for the baby tooth. The Tooth Fairy can take away the tooth and leave the loot in the bag.
This is a really quick project. So quick that you might want to whip up a few in different colors for the different kids (and teeth!) in your life.
Designed by Purl Soho designer, Molly Schnick. Click here to see even more of Molly’s work!
Materials

To make 1 3-inch x 3-inch bag:
- 1 piece Wool Felt in a bright color of your choice
- 1 piece Wool Felt in Ecru
- Embroidery Thread in Ivory
- Embroidery Thread to match your bright colored felt
- At least 28-inches of a white cotton yarn (I used Blue Sky Alpaca Organic Cotton in Bone)
- One Free Tooth Template, available here, downloaded, printed, and cut out.
Cutting

Trace the tooth template on the ecru felt and cut it out.
Cut the bright felt into a 3-inch x 8-inch rectangle.
Cut the yarn into two 14-inch pieces.
The Top Hems

Fold and pin each short side in 1/2 an inch towards the wrong side.

Using the bright embroidery thread, sew these folds down with a small running stitch. You will later thread the drawstring through the small tube created by these hems, so make sure not to sew them closed.
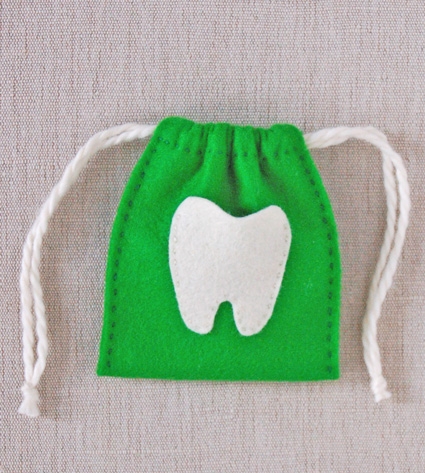
The Tooth

Fold the piece in half right side facing, so the two hems meet up at the top.
Place the tooth shape in the center of the folded piece and pin it down to the top layer of felt.

Using the ivory embroidery thread sew the tooth in place keeping the top open to create a little pocket as shown above.
Sewing up the Sides

Fold the piece in half again with the right side facing out and the top hems matching.
Pin the sides closed.

Using the bright embroidery thread sew both of the sides closed with a small running stitch and stop at the top hem. Do not sew alll the way to the top, leave the tubes created by the top hems open.

Adding the Drawstrings

Thread a large, dull needle point needle with one of the 14-inch pieces of yarn and pull it through one of the top hem tubes.

Then turn around and thread the same length through the opposite tube.

Tie a knot at the end of the length of yarn.
Repeat this on the opposite side of the top hem with the other 14-inch length of yarn.

Trim both of the ends of the yarn drawstrings…
… and you’ll be able tighten the top of the bag by pulling on the opposite drawstrings.
Now all you have to do is wait for the Tooth Fairy!


These are adorable! I can’t wait to make some!
Thank you for sharing 🙂
I love it! Thank you for sharing. 🙂
Lovely idea! Sadly tooth fairy never visited my pillow but I will surely make these for my boy.
My guys are a couple of years away from losing teeth but I think these will do the trick nicely. Thanks so much!
I love this super simle super cool & cute tutorial!! I added to my blog which includes favorite tutorials and finds online, my personal bookmark of what i love 😉 (xboutiquex.blogspot)
My little girl just lost her front tooth a few days ago. I wish I would have had one of these pretties (way better than the sandwich bag *gack* that we used!!)- -well, now I’ll be ready for next time!
Thank you!
how clever and cute are those? I love them thanks for the great tutorial and pictures!
I posted a link to your site on my craft blog so my viewers can hop over to your and get the great tutorial too!
Thanks for sharing
Samantha at TwoHeartsTogether
http://www.twoheartstogether.com/2009/07/30/tooth-fairy-bags/
I’m new to this site, can I sell these once I make them?
Hi Rebekah,
Thank you so much for your interest in our site. All of the projects on this site are copyrighted by purl and purlsoho.com and may not be used for resale. They are here for your personal enjoyment and to give as gifts. Thanks so much for your question.
The Purl Bee.
I’ve never sewn or embroidered … the directions were great which made it an easy project! My little niece just lost her first tooth this week so she’ll have this ready for the other toothies that will follow. I hope her younger sister will also use this little bag. Thank you so much for this great project!
These are too cute. cannot wait to make them!
This is fabulous, my daughter and I just made one. It was so simple she did most of her own stitching. I loved the un-evenness of the stitches and contrasting thread she picked out. Very sweet!
http://growingkiwis.blogspot.com/2010/01/dont-you-know-our-bunny-teeth-bleed.html
Thanks so much. I just made one for my 5 year old who is very excited about his first loose tooth!
Adorei seus trabalhos.abraços
Thanks so much your your cute idea and clear, concise directions. I am not a crafter, but was able to make this easily and was thrilled with the results. I posted a link on my blog to pass along. http://www.vinobaby.blogspot.com
So easy and cute – pics at http://www.flickr.com/photos/iwannabcreative/4940420944/in/photostream/
This pattern is wonderful, just what I was looking for. Simple but beautiful.
http://servingpinklemonade.blogspot.com/2010/11/tooth-pocket.html
Look familiar!
These look great – thanks for the tutorial – thinking that I will have to make one up for my little girl BEFORE she losses her first tooth. Would you mind if I made a few to sell at the school fete? All proceeds go to the school PandC.
Hi Kylie-
Thank you so much for your kind comment and question. We are so flattered that you'd like to sell these at your school sale, however all of our patterns are for non-commercial use only so unfortunately it won't be possible. Good luck with the sale and thanks again for getting in touch.
– Molly
Super cute and super easy too! I'm pretty sure even uncrafty me can handle these. Thanks!
LOVE this! My daughter is getting ready to lose her first tooth anytime. I was happy the materials were so simple (we had them all here) and was pleased I didn't have to lug out my sewing machine to do it. We used fun ribbon instead of string and added some jewels, securing them with hot glue. Now, we are REALLY excited about the tooth fairy coming to visit! Thanks!!!
Simple, effective and we're just waiting for the first tooth to fall out!
I love this! I am featuring it on my blog right now! Thanks for sharing!
Wow this is so wonderful.
Kids will love this!
Great tutorial! Thks Purl Bee! 🙂
je te remercie de nous avoir partager ton tuto
je me suis régaler et j'en ai fait plusieurs que tu trouveras dans mon blog
un grand merci
Hi! Just wanted to let you know that I re-created this bag for my son. Thanks for helping me make his “loose tooth”experience special and for helping make a great blog post too! http://littlebluesroom.blogspot.com/2013/01/from-tooth-fairy.html
such a lovely idea im gonna make some for my gran children thank you ..
Thank you !!! Just made one for my daughter, to be placed in her Advent calendar. So easy, so cute !! Thank you very much for sharing !
Sylvie
Thank you so much for this- I can't wait to make one for my son!
I absolutely love these and recently got to visit your store for the first time and bought the felt to make them for my twin boys! I’ve finsihed the first but I can’t really get the top to gather like a drawstring. Did I do something wrong? Thanks for the adorable project! We love them!
Hi Carrie-
I’m so happy to hear that you made these! I’m wondering if maybe you sewed the yarn into the channel by accident as you were threading it through? Are you able to pull the handles at all? Or maybe the two drawstrings got tangled together? Perhaps the best thing to do is to take out the drawstrings and try adding them again. If that doesn’t work maybe you can send me a photo so I can try to get to the bottom of it… molly@purlsoho.com
Thanks!
Molly
these tooth fairy bags are so neat! the tooth fairy will be visiting
our house a lot now.