Sewing a Button onto Knitwear
Have you ever gotten to the end of a cardigan pattern only to realize that you aren’t quite sure how to sew on the buttons? Sure, you can sew on onto a shirt… But a sweater? Here’s our Sewing A Button Onto Knitwear tutorial where we show you how we do it.
While there are many ways to sew a button onto knitwear, here are two of our favorite methods: one without a backing button and one with. While both methods are very good at securing buttons, a button with a backing button is sturdier and gentler on the fabric. Give both a try and see which one you prefer!
To sew a button onto knitwear, you’ll need…
- A button that fits snuggly through the buttonhole
- A tapestry needle that fits through the holes of the button
- Some thread or fine yarn that fits through the eye of the needle
- A larger tapestry needle for creating the shank
- Scissors
- A fabric marker
- Optional: A smaller button, if you want to sew on a backing button
NOTE: These instructions are for a two-hole button but can be easily applied to a four-hole one!
Click To See Video Transcript
Hello. Today I’m going to show you how to sew a button onto your hand knits. There are many techniques to doing this, but today I’m going to show you two ways. First way is the most basic way, and the second way is really similar, but it has a backing button for more stability. Today, I’m sewing on a two-hole button, but you can apply this technique to a four-hole button. Also, we’re using contrast thread, but you can use thread that matches your knit.
Thread your needle with about a yard of thread, so that one strand is longer than the other. Then take your needle, insert it from the back of the button through to the front, and then from the front to the back and pull through so that one strand pops through to the other side. Next, you’re going to tie a square knot. To do this, you’re going to take the thread in your right hand, cross it over the thread in your left hand, and tie it like you’re tying your shoe. Then you’re going to take the thread in your left hand and cross it over the thread in your right hand and tie that as well and pull down. Repeat that once more. Cut the thread close to the knot. Pick up your needle and orient the knot so that it is close to the back of the button.
So I’ve cut my ends close to the knot, and I’ve oriented the knot, so it’s at the back of the button. I’m going to take the button and I’m going to place it where I want to sew on the button. I’ve marked this with a fabric pen. Now I’m going to insert my needle from the front to the back. I’m going to pull through gently, making sure that knot stays in place. And now I’m going to insert my needle from the back of the swatch to the front, and I’m going to pull through again.
Next, I’m going to pull up on the button, so I create a small space in between the button and the thread, and I’m going to insert a tapestry needle. Now I can pull tight, insert your needle from the front to the back, going through the button eye, and then from the back to the front. You can repeat this a few times. Next, I’m going to insert my needle into the button eye, but I’m not going to come through the fabric. I’m going to exit in between the button and the fabric.
I can now remove my tapestry needle, pull up on the button, and now I’m going to wrap to make the shank. Just wrap around the button four or five times. Now I’m going to secure the neck of the button by making a loop with my thread, inserting my needle into that loop, and then putting that loop around the shank and pulling tight for more stability. You can do this once more. Next, I’m going to insert my needle into the shank, picking up a few threads, and I’m going to repeat that same knot. You can also do this twice. The last step is to insert your needle from the front of the back at the base of the shank, and cut close.
For the button with a backing button. I’ve threaded the needle the same as before, and I’ve oriented the knot so it’s at the back of the button that’s going to be on the face side. I’m going to pick up the button and my needle and place that on my fabric, sew the front. Before I pull the needle all the way through, I’m going to place my backing button onto my needle and then pull through. I’m then going to sew into the next hole, and on the backing button from the back to the front, I’m going to come up through the button on the face side. And now I’m going to insert the tapestry needle just like before by pulling up on the button and inserting the needle in between that space. Holding both buttons together with the tapestry needle, I’m now going to sew them together. Do this a few times, and then tie off the button just like before. That’s how you sew on a button with a backing button.
Sewing On A Button Without A Backing
- Thread the needle and pull the thread, so that one end of the thread is slightly longer than the other. Insert the needle through one of the holes in the button from back to front, then from front to back, and pull the thread until the shorter end pulls clear of the button.
- With the two ends of the thread, make a square knot right near the ends of the threads. Make another knot, then snip the tails near the knot and slide the thread so that the knot is very close to the backside of the button.
- Find the stitch where you’d like to sew the button and mark it with a fabric marker. Place the button on that stitch, making sure the knot stays close to the backside of the button. Insert the needle to one side of the marked stitch from the right side of the fabric to the wrong side and then on the other side of the marked stitch, from wrong side to right side, coming up through the other hole of the button.
- Pull up gently on the button to loosen the thread a little and then slide the extra tapestry needle under the loop of thread at the top of the button. Now tighten the thread.
- Sew back and forth through both holes of the button, from right side to wrong side and wrong side to right side, three or four times. When finished, come up from the wrong side to the right side and then back down through the next hole of the button, but not through the fabric.
- Remove the extra tapestry needle and wrap the thread approximately four times around the bundle of threads under the button (i.e. the shank). Make a loop with the thread, pull the needle through it, and place the loop over the button and pull, creating a knot around the shank . Tighten the knot and repeat it for extra stability.
- Finally, insert the needle into the threads of the shank, pull the needle through the loop of thread to make a simple knot and tighten. Repeat this knot.
- Bring the needle through the fabric to the wrong side, right at the base of the shank. Trim the thread close to the fabric and you’re done!
Sewing On A Button With A Backing Button
- Work as for step 1, above.
- Work as for step 2, above.
- Find the stitch where you’d like to sew the button and mark it with a fabric marker. Place the button on that stitch, making sure the knot stays close to the backside of the button. Insert the needle to one side of the marked stitch from the right side of the fabric to the wrong side, and then through one of the holes of the backing button. Insert the needle through the other hole of the backing button, then through the fabric, from wrong side to right side, coming out on the other side of the marked stitch, and finally, through the second hole of the main button.
- Pull up gently on the main button to loosen the thread a little and slide the extra tapestry needle under the loop of thread at the top of this button. Now tighten the thread.
- Sew through all four holes of the two buttons, from right side to wrong side and wrong side to right side, three or four times. When finished, come up through the main button from wrong side to right side and then insert the needle back down the next hole but not through the fabric.
- – 8. Work as for steps 6-8, above.
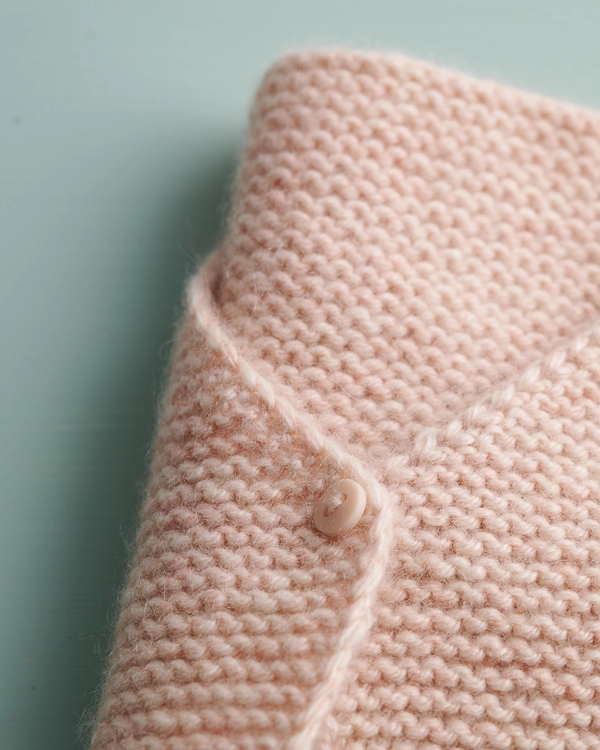
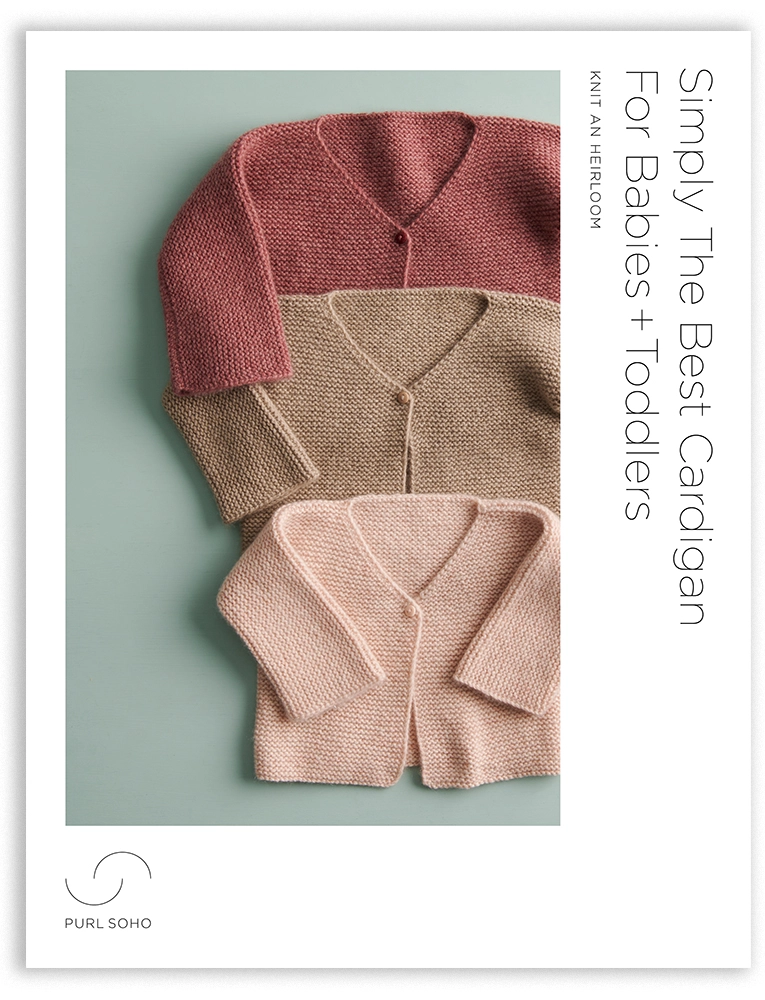
We followed the instructions for sewing a button onto knitwear without a backing to attach this pretty, pink small round 3/8-inch button onto our Simply The Best Cardigan For Babies + Toddlers in our extraordinarily soft 100% Cashmere Nigh DK.
Looking for more inspiration? Explore all of our free knitting patterns and knitting tutorials, buy one of our many knitting kits and yarn bundles, and shop for beautiful yarn. We have over 35 gorgeous natural fiber yarns in 100’s of magnificent colors, designed to bring integrity, beauty, and joy to your next knitting project and only available at Purl Soho!


Excellent demo on sewing on buttons to a knit. I love the idea of a backing button.
I just finished a knitting project except for adding the button. This piece could not be more timely. Thank you.
Thank you for this tutorial. I appreciate how slowly you went through the process. Your method seems much better than what I have done before. I especially like how you create the knot. Given how little I know about sewing and how much I detest it, my previous button attachments were rushed and probably not done well. The button I am attaching now will be well placed!
This demonstration is excellent and my sewing repertoire has advanced greatly…. thank you!
Thanks so much for the tutorials. Extremely helpful as I tackled a bigger project than usual!. Buttonholes, button sewing on, picking up stitches, seaming, better methods of weaving in ends all appreciated!
Hi,
If I have a four hole button, do I repeat the step with the other two holes before creating a shank?
Thanks, this was a great video tutorial!
Hi Natalie,
Thanks for your question! You are correct! For a four-hole button, you will want to repeat the steps for the other two holes before proceeding to the next step!
Feel free to let us know if you have any other questions and we would be happy to help!
Happy making,
Gavriella