Fine Line Log Cabin Quilt
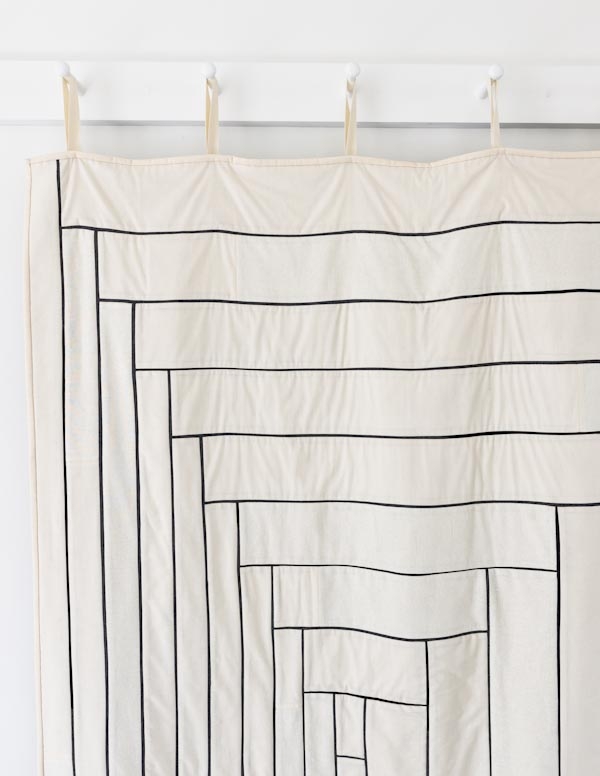
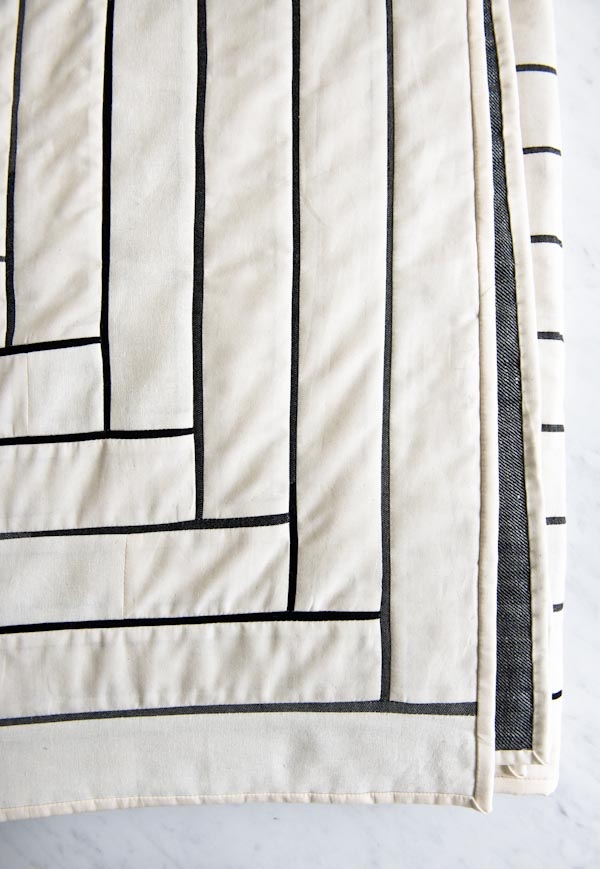
The log cabin quilt block has a rich history, dating back hundreds, if not thousands, of years, but its graphic quality and unexpected turns make it ripe for modern interpretation. In fact, this Fine Line Log Cabin Quilt was probably more inspired by the minimalist masters of the 20th century than by any historic pattern or heirloom quilt.

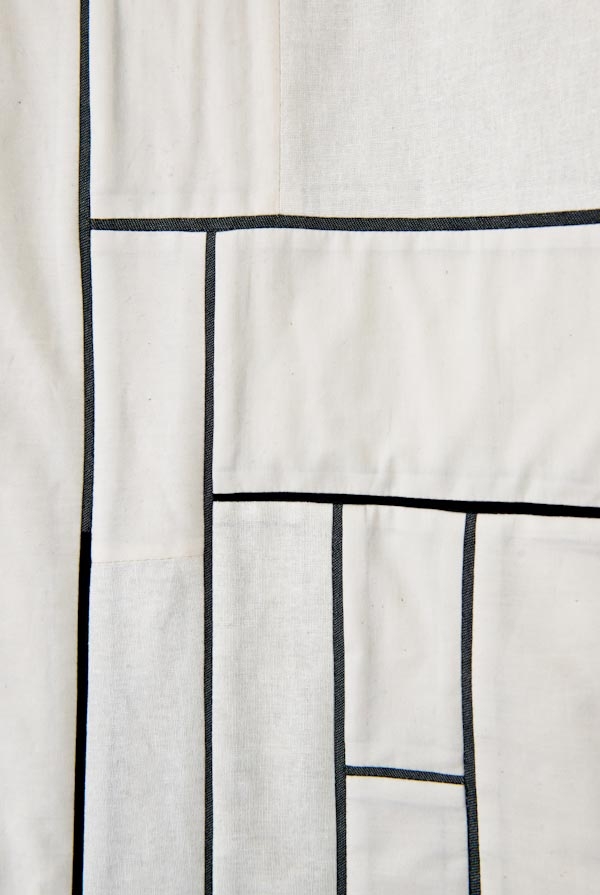
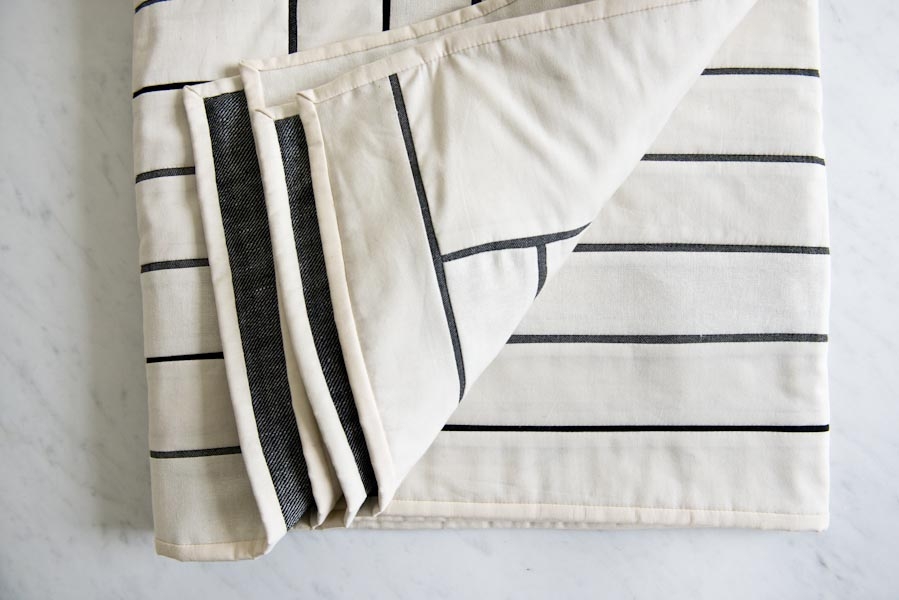
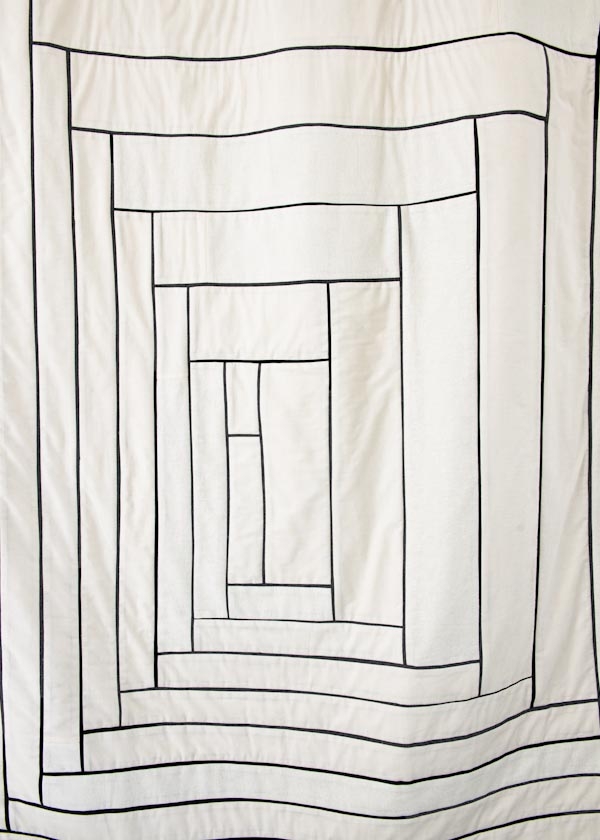
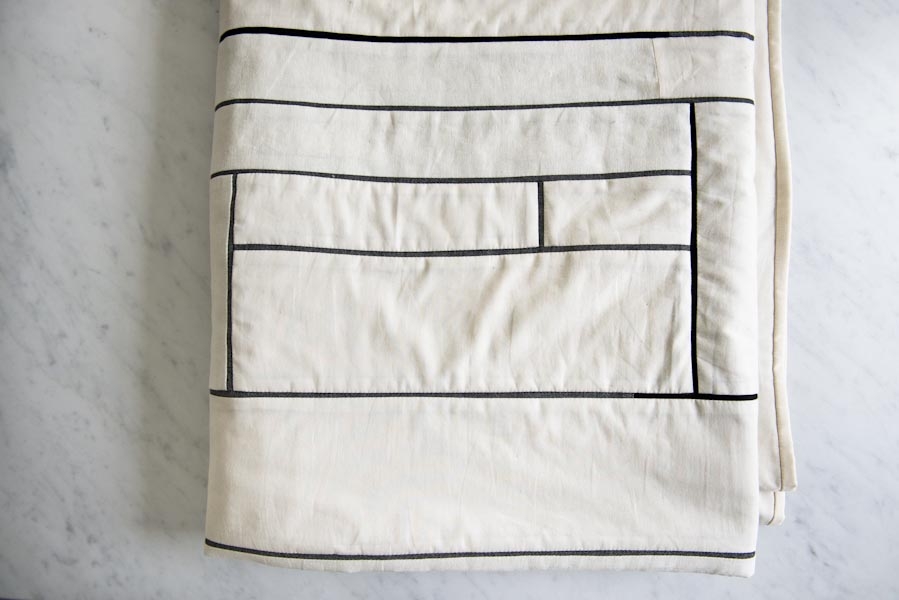
With its graphite-colored pencil-thin lines, this Quilt is like an artist’s sketch come to life. And with a surprising asymmetrical construction, it is equal parts dramatic and subdued, traditional and modern, bold and nuanced.
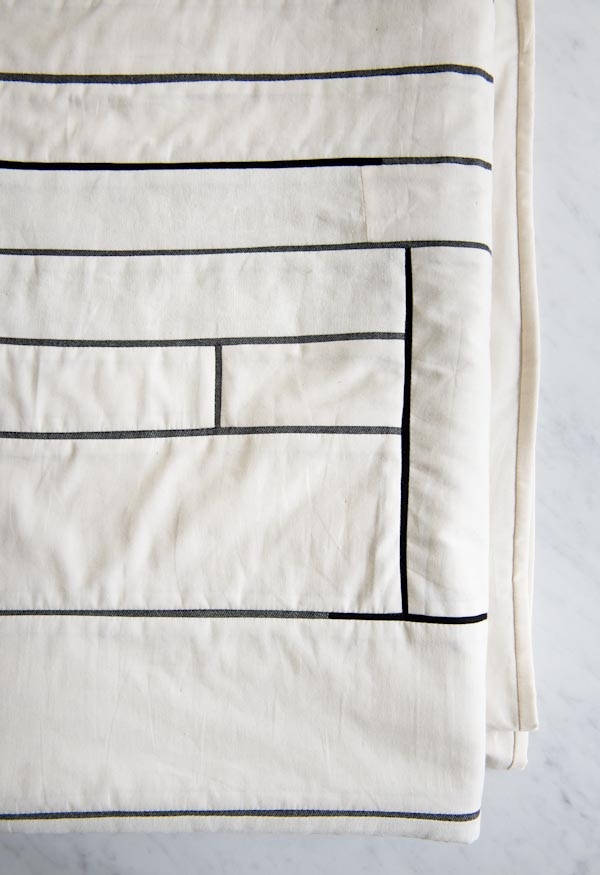
To get started on your own, pick up the below listed materials for our Fine Line Log Cabin Quilt, and make this beautiful quilt that holds the weight of history but that has its feet firmly in the present! -Corinne
Materials

To make your own Fine Line Log Cabin Quilt you will need…
Fabric for the Quilt Top
- Fabric A: 1 ¼ yard of Moda’s Muslin, 200 Count in Natural, 90 inches wide
- Fabric B: 1 yard of Robert Kaufman’s Essex in Ivory, 43 inches wide
- Fabric C: ¼ yard of Robert Kaufman’s Premium Kona Cotton in Jet Black, 44 inches wide
- Fabric D: ½ yard of Robert Kaufman’s Denim, 6.5 Ounce, Black Washed, 56 inches wide
Fabric for the Quilt Back
- Fabric E: 2 yards of Robert Kaufman’s Rustica Chambray in Black, 57 inches wide
Fabric for the Binding
- Fabric A: ¼ yard of Moda’s Muslin, 200 count in Natural, 90 inches wide
Plus
- Two 274-yard spools of Gutermann’s Cotton Sewing Thread in color 1040
- One 274-yard spool of Gutermann’s Cotton Sewing Thread in color 1001
- Quilter’s Dream Cotton Batting, Request loft, Twin size
You will also need …
- Purl Soho’s Rotary Cutting Tool Kit, which includes …
- A rotary cutter
- A self-healing cutting mat
- A 6 ½ x 24 ½ – inch non-slip straight ruler
- A 12 ½ x 12 ½ – inch non-slip square ruler
- A walking foot for your sewing machine
Size
Finished Dimensions: 54 inches wide x 60 inches tall
Notes
Prewash all of the fabric but not the batting.
All seam allowances are ¼ inch.
Unless otherwise noted, press all seam allowances toward the lighter side of the seam.
Pattern
Cut
Note: If you’re new to rotary cutting, please refer to our Rotary Cutting Tutorial before you start.
For the Binding
From Fabric A, cut three 2 ¼-inch strips from selvage to selvage and then trim off the selvages. Put these aside until the Binding section of the pattern.
For the Quilt Top
You will piece the Quilt Top from lots of long strips cut at varying widths. Cut the strips from selvage to selvage and then trim off the selvages. The exact length of each strip will vary from fabric to fabric.
From Fabric A cut …
- Five 4 ½-inch wide strips
- Five 2 ½-inch wide strips
- Trim a 2 ½ x 8 ½-inch piece off of one of the 2 ½-inch strips. This is Piece A (the remaining length of the strip goes along with the rest of the 2 ½-inch wide strips).
From Fabric B cut …
- Five 4 ½-inch wide strips
- Five 2 ½-inch wide strips
From Fabric C cut …
- Four ¾ x 21-inch strips. Cut each of these strips in half width-wise for a total of 8 strips, each measuring ¾ x 10 ½ inches.
From Fabric D cut …
- Twenty ¾ x 55-inch strips. Cut four of these strips in half width-wise for a total of 24 strips, sixteen measuring ¾ x 55 inches and eight measuring ¾ x 27 ½ inches.
Piece the Fabric Strips
Note: You will piece the entire Quilt Top with rights sides together and a precise ¼-inch seam allowance. Use the color 1040 Cotton Thread and your machine’s ¼-inch foot, if you have one.
Sew the 4 ½-Inch Strips
Sew a short end of one 4 ½-inch Fabric A strip to a short end of one 4 ½-inch Fabric B strip, so that you have one very long strip. Press the seam allowances open.
Now sew a short end of another 4 ½-inch Fabric A strip to the Fabric B end of the long strip you just sewed. Press the seam allowances open.
Continue to sew all of the 4 ½-inch strips together in this manner, alternating between Fabric A and Fabric B, until you have sewn together all of the 4 ½-inch wide strips into one long strip.
This strip is the Size 1 Strip.
Sew the 2 ½-Inch Strips
Sew all of the 2 ½-inch strips together in the same manner, seaming across the short ends, alternating between Fabric A and Fabric B, and pressing the seams open. (Do not attach Piece A to this long strip. Keep it set aside for later.)
This strip is the Size 2 Strip.
Sew the 3/4-Inch Strips
Note: We used the lighter side of Fabric D as the right side of the fabric for the long strips and the darker side of Fabric D as the right side for the short strips.
Sew an end of a long ¾-inch Fabric D strip to an end of a short Fabric D strip. Press the seam allowances open.
Sew an end of another long Fabric D strip to the short-strip end of the strip you just sewed together. Press the seam allowances open.
Now sew an end of a Fabric C strip to the end of the most recently attached strip. Press the seam allowances open.
Continue to piece the ¾-inch strips following this pattern: 1 long Fabric D strip, 1 short Fabric D strip, 1 long Fabric D strip, 1 Fabric C strip, until you have sewn together all of the ¾-inch wide pieces.
This is the Accent Strip.
Sew the Size 1 Strip to the Accent Strip
Sew the Size 1 Strip and the Accent Strip together, seaming along their long sides. Trim off the excess length of the Accent Strip. Remember to press the seam allowance toward the lighter side of the fabric.
Sew the Size 2 Strip to the Accent Strip
Sew the Size 2 Strip and the Accent Strip together, seaming along a long side of the Size 2 Strip and the Accent Strip’s remaining long side. Press the seam allowance.
Piece the Quilt Top
Note: After each seam, press seam allowances toward the lighter side of the seam.
Begin


With its right side facing up, lay Piece A out flat so that its short sides run along the top and bottom.
Now with its wrong side facing up and the Accent Strip running along the top, lay the Size 1 Strip on top of Piece A so that their left and top sides are aligned.
Pin the two pieces together along the top and cut the Size 1 Strip to align with the right edge of Piece A.
Sew the two pieces together along the top pinned side.
This is the beginning of the Quilt Top.
Continue

With its right side facing up, orient the Quilt Top as shown above.

With its wrong side facing up and the Accent Strip running along the top, lay the Size 1 Strip on top of the Quilt Top so that their left and top sides are aligned.
Pin the two pieces together along the top and cut the Size 1 Strip to align with the right edge of the Quilt Top.
Sew the two pieces together along the pinned edge.

With its right side facing up, orient the Quilt Top as shown above.

With its wrong side facing up and the Accent Strip running along the bottom, lay the Size 2 Strip on top of the Quilt Top so that their bottom and left sides are aligned.
Pin the two pieces together along the bottom edge and cut the Size 2 Strip to align with the right edge of the Quilt Top.
Sew the two pieces together along the pinned edge.

With its right side facing up, orient the Quilt Top as shown above.

With its wrong side facing up and the Accent Strip running along the left side, lay the Size 2 Strip on top of the Quilt Top so that their top and left sides are aligned.
Pin the two pieces together along the left side and cut the Size 2 Strip to align with the bottom edge of the Quilt Top.
Sew the two pieces together along the pinned edge.

You have now made it all the way around the quilt block once and should be able to see the log cabin shape taking form.
Continue in this manner, always attaching the Size 1 Strip to the top and right side of the block and the Size 2 Strip to the bottom and left sides of the block.

If you lose track of where you are in your rotation of the block, remember that you always attach your next piece on the side that has two seams.

Continue until there are 9 strips pieced out from each side of Piece A.
Baste
Make a quilt sandwich and pin-baste the Backing, batting and Quilt Top together. For instructions on how to do all this, please check out our Pin-Basting Tutorial!
Note: Because of the seaming on this particular Quilt, you may find it helpful to spray the Quilt Top with a light mist of water as you’re basting. This will help make the fabric more flexible as you lay the seams straight and make the edges square.
Quilt
Now it’s time to quilt all the pieces together!
We quilted our Fine Line Log Cabin Quilt “in the ditch” of the seams in a spiral pattern, starting at the center of the Quilt and radiating out on all sides.
Stitching “in the ditch” means to sew right beside the seam on the side without the seam allowances pressed under it, i.e. the lower or “ditch” side. In this case, the ditch of the seam is on the darker fabric.
Using thread color 1001 and your machine’s walking foot attachment, start quilting at the first seam of the log cabin block (the seam joining Piece A to the first strip).

Moving from left to right, sew in the ditch of the seam that runs across the top of Piece A until the quilting line hits the next seam.

With the needle down, lift the presser foot and pivot the quilt so that you are now stitching in the ditch of the seam that runs down the right side of Piece A.
Sew until the quilting line hits the next seam.

Pivot the quilt so that you are now sewing from right to left, along the bottom end of Piece A. Sew until the quilting line hits the next seam.

Pivot the quilt so that you are now sewing up the left side of Piece A. Sew until the quilting line hits the “T” stop of the next perpendicular seam.

Continue to quilt in this manner, creating a continuous spiral that covers the surface of the quilt. Use the illustration above as a guide.
When you’ve finished, trim the batting and Backing along all four sides so that they align with the Quilt Top.
Bind
Use the Binding strips you cut from Fabric A to bind the Quilt with double fold binding. For instructions on how to do this, please check out our Making Double Fold Binding and Sewing on Double Fold Binding tutorials!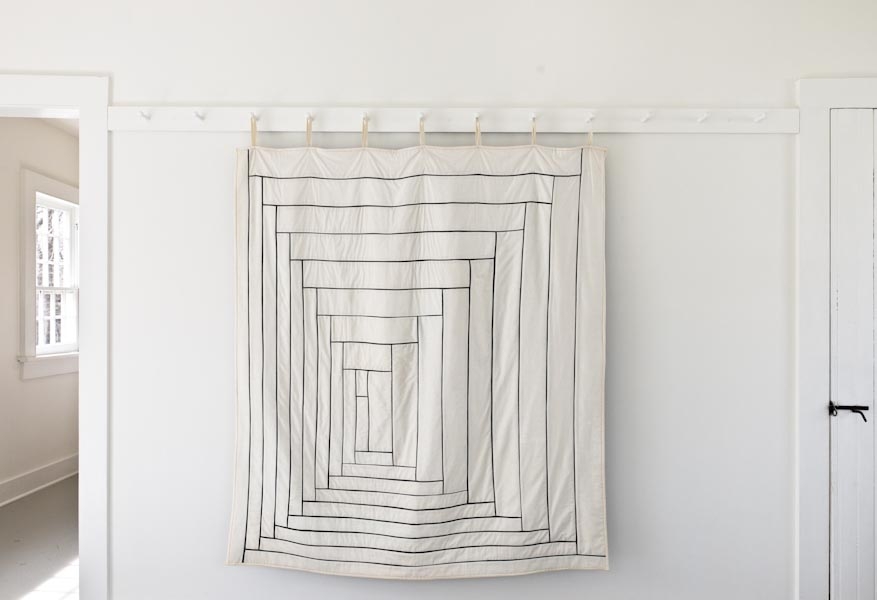








This is beautiful! It would also be gorgeous knitted or crocheted as a blanket! Hope you’ll consider a pattern.
Hi Karen,
Thank you for your kind words and the suggestion! You could certainly modify our existing knit Log Cabin Baby Blanket to be similar to our new sewn quilt. To do so, you would need to knit a smaller section between each of the larger sections of a few garter bumps.
I hope that this helps!
Cassy
Very striking. I wonder though, why the pressing is always done to the light side. This contrary to the standard sewing rule and also I would worry about the black showing through.
Hi Sandra –
This is a great question! We pressed our seam allowances toward the lighter fabric because the strips of darker fabric are particularly narrow. It would not be possible to press the seam allowances from both sides of the strip toward the darker fabric without creating additional bulk. You can see a light shadow of the seam allowance on the right side, but as long as you are careful to trim all stray dark threads I do not think it takes away from the beauty of the overall quilt. I hope you’ll agree!
-Corinne
Beautiful.
This is so beautiful–thanks for sharing with us. I can’t wait to (attempt to) make this.
What level quilter/sewing enthusiast is this pattern is written for?
So beautiful!! Thanks for making this a free pattern project too.
Hi Lynn –
This is a great question!
Sewing this quilt requires a steady straight seam and precision of cuts, but no particular advanced skill. If you are confident with your machine, and able to make clean, straight lines with a rotary cutter, you have all the skills you need to tackle this project!
If you are unsure of your skill level, I recommend using scrap fabric to construct a mini version of the quilt before you begin. This will give you a sense of the techniques and construction before you take on the larger project. And remember, we are always here to answer any questions you have along the way!
I hope this helps!
-Corinne
Do you think I could make this into a duvet cover, Maybe change the muslin for some other material? which fabrics would be the best if this is do-able?
Hello Gwen –
This is a great question. I think this would make a lovely duvet cover! Is there a reason you would not like to use the muslin? It is a lovely 200 count fabric, and I think could be a great choice for this! My only suggestion would be that you may want to finish the seam allowances with a zigzag stitch. This will help diminish any fraying and stray threads.
I hope this helps!
-Corinne
Although the pattern for this quilt makes my head feel like it is coming apart, I am going to attempt it as my next project. However, I would like to make it in double size and although I can easily see how I can just keep going to make it larger, I cannot even begin to figure out how to increase the amount of fabric needed. Can you help with that? I think I would like it to be in the range of 80 x 88. Please help me so that I can place the order for the fabric.
Hi Lauren! Thanks for writing in. Sizing up a quilt may seem like a head scratcher but when you lay out the needed pieces in terms of their bolt widths, it’s a snap! I’ve done the majority of the math for you here but if you aren’t set on the 80 x 88 size, you may want to order an extra quarter of a yard to give yourself some breathing room!
Here’s the suggested list of materials for a full size quilt:
Fabric for the Quilt Top
Fabric A: 3 yards of Moda’s Muslin, 200 Count in Natural, 90 inches wide
Fabric B: 3 yards of Robert Kaufman’s Essex in Ivory, 43 inches wide
Fabric C: 1 yard of Robert Kaufman’s Premium Kona Cotton in Jet Black, 44 inches wide
Fabric D: 1 yard of Robert Kaufman’s Denim, 6.5 Ounce, Black Washed, 56 inches wide
Fabric for the Quilt Back
Fabric E: 4.5 yards of Robert Kaufman’s Rustica Chambray in Black, 57 inches wide
Fabric for the Binding
Fabric A: ½ yard of Moda’s Muslin, 200 count in Natural, 90 inches wide
Plus
Two 274-yard spools of Gutermann’s Cotton Sewing Thread in color 1040
One 274-yard spool of Gutermann’s Cotton Sewing Thread in color 1001
Quilter’s Dream Cotton Batting, Request loft, Double Size
Please send us photos of your upsized quilt! We are always so excited to see our customer’s “improvements!”
Thanks and happy sewing!
Keith
Thanks, Keith. I will order next week. Are you suggesting an extra 1/4 yard of each fabric? I am a firm believer in more is better (especially when cutting the thinner strips. . .), so 1/4 yard more of each seems like a good idea to me.
Me too, Lauren! Exactly – an extra 1/4 yd should do the trick!
Happy Sewing and thanks!
Keith
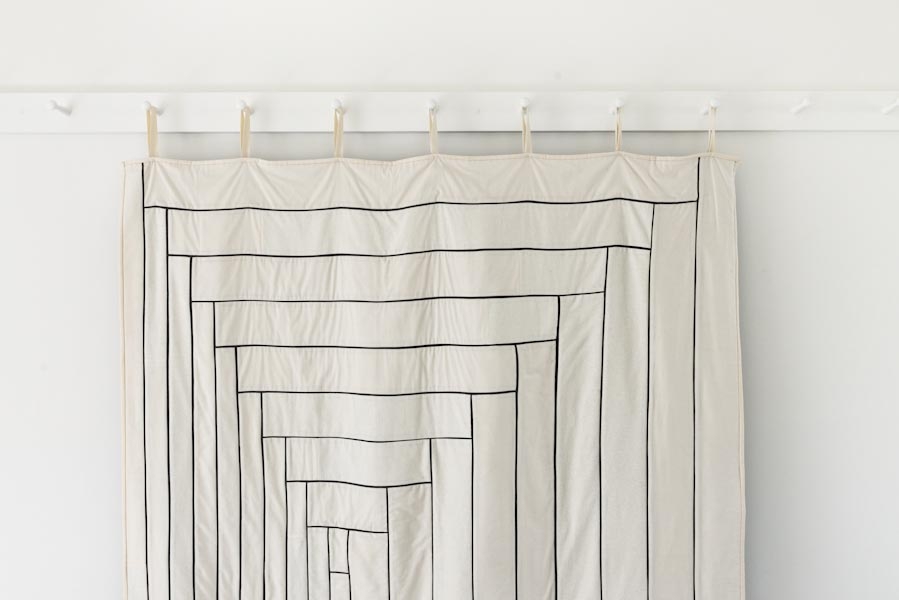
What are the loops you use to hang the quilt on the wall. I would love to make a smaller version to hang on a wall!
Hi Nancy,
Thanks for writing in! Sorry for the late reply — I was trying to get in touch with the designer to figure this one out. Basically we use twill tape and pin the loops to the back of the quilt for photographic purposes only. We don’t recommend hanging a quilt in this way for long periods of time. If you are trying to hang a quilt on a wall, there are many products online that are much like curtain rods. Otherwise, I guess you’d have to sew the loops into the binding. Best of luck!
-Adam
I have purchased one bundle but would like to double the size for a king or at least a queen size bed. Can I just order a whole second bundle?
Thanks,
Robin
Hi Robin,
Thanks for writing us! Doubling your order will definitely leave you with enough fabric for a king size quilt. Best of luck and happy quilting!
-Adam
help!
New sewer here and I have questions regarding the strip size. I understand I’m to cut from selvedge to selvedge. As the pattern calls out the width for each fabric strip, I’m hoping to clarify the height for Fabric Strips A and B.
Thank you!
Hi Jenny,
Thanks for writing in! The selvedges of each fabric can vary. For Fabrics A and B, the selvedges are between 1/2″ and 3/4″. So the Stripes for A will be 89-88.5″ wide. The stripes for B 42-41.5″ wide. This is just an estimate as the selvedges may be slightly wider or narrower.
I hope that this helps!
Cassy
black & white is always a stunning combo. instructions look do able
I love the log cabin pattern and have made a lot of them. This looks very exciting and can’t wait to try. Thanks so much for all your patterns.
I would like to see a photo of the finished top
Hi Linda,
Thanks for writing in! You can photos of the lovely finished quilt at the top of this post and using the slide show at the top of the page.
Best,
Cassy
I am going to make this also but in blues, using dark and ending with a very light color! Thank you for a very exciting pattern…can’t wait to order my fabric!
Yvonne
I love the idea of this is shades of blue. But as a beginner sew-er I have no idea how much of each shade of blue that I’d need. Would you be able to help? Thanks
Hi Heather,
Thanks for writing in! You will only need 3/4 of a yard total of 55″ wide fabric for the contrast stripes. Since most fabrics are sold in increments of 1/4 yard, as long as you are planning on getting at least three different colors, you will only need 1/4 yard of each!
Best,
Julianna
Should the part D fabric cuts be 55” and 27.5”? Pattern says 22 1/2” inches after cutting in half. Thanks! “Twenty ¾ x 55-inch strips. Cut four of these strips in half width-wise for a total of 24 strips, sixteen measuring ¾ x 55 inches and eight measuring ¾ x 22 ½ inches.”
Hi Marianne,
Great catch! 55 inches cut in half does indeed equal 27.5 and we have now updated the pattern; however, since you will be creating quite a long strip of fabrics C and D and the exact length of the strips will be determined by the width of the fabrics, this measurement is not totally crucial. You will have plenty of extra length in this strip!
Best,
Julianna
Beautiful pattern! I am trying to make this and am confused: I thought I was supposed to attach the size 1 and size 2 strips to either long side of the accent strip, but in the photos above as you attach it into a log cabin, it looks like you just have either the size 1 or size 2 strip, separately attached to an accent strip. Was I supposed to have two separate accent strips? Thanks!
Hi Laura,
Thanks for reaching out! When you are piecing the fabric strips, you will first have three different strips – the size 1 strip, the size 2 strip, and the accent strip. There will be only one accent strip; however, it will be quite a bit longer than the other strips! Next, you will piece together the accent strip with the size 1 strip, cut off the excess accent strip, and then piece the remaining accent strip with the size 2 strip, so you will now have two total strips, a size 1 + accent and a size 2 + accent.
I hope that clears things up!
Julianna
I love this quilt, but want to size it up to be a queen size quilt. Are you able to suggest how I size this up? I’m happy to do the maths, just not sure where to start!
Thanks!
Hi Robyn,
Thanks for reaching out! First, decide on the dimensions you want to make the quilt (standard queen is approximately 80″ X 90″.) You can then lengthening each strip of fabric the necessary amount to achieve the length and width you desire for the queen size!
Please let us know how this works!
Gianna
Hi from here in Cornwall, England.
Started to quilt in a small way during lock down. Swore I was never going to chop up pieces of material to sew them back together again.
Your pattern caught my eye so as I am really a novice thought I would give it a try, working on the theory that if I can manage to do this I can do anything.
Wish me luck.
Your pattern instructions are wonderful.
Hi Penny,
Thanks for writing in! I wish you the best of luck on this quilt! If you have any questions along the way don’t hesitate to write in, I am happy to help!
Please let us know how this goes!
All the best,
Gianna