Running Stitch Scarf

The humble running stitch is such a building block of embroidery that it rarely gets a chance to be the star of the show. But why not? The simplicity of this stitch, both in practice and in looks, should be a virtue!

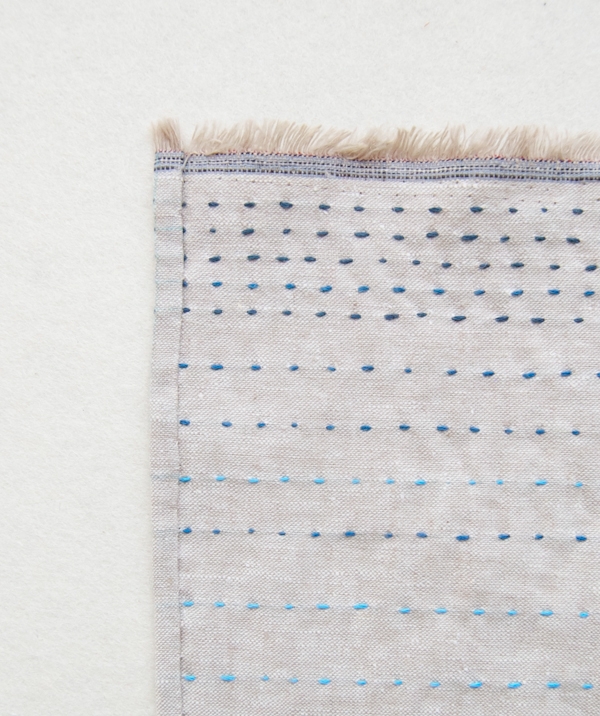
So for an uncomplicated and elegant Mother’s Day gift, I turned to the regular rhythm of the running stitch! A rich spectrum of DMC embroidery floss travels from inky navy to cloudy gray atop a natural flaxen background. And the Essex Yarn Dyed fabric is so simply beautiful that I even left the pretty selvage as is!

Just because it’s super easy to sew, doesn’t mean the Running Stitch Mother’s Day Scarf isn’t very special. Hand-embroidered stitches, a distinctive play of color and cleanly finished side hems make this a wonderful gift, lovely enough even for dear mom!
Materials
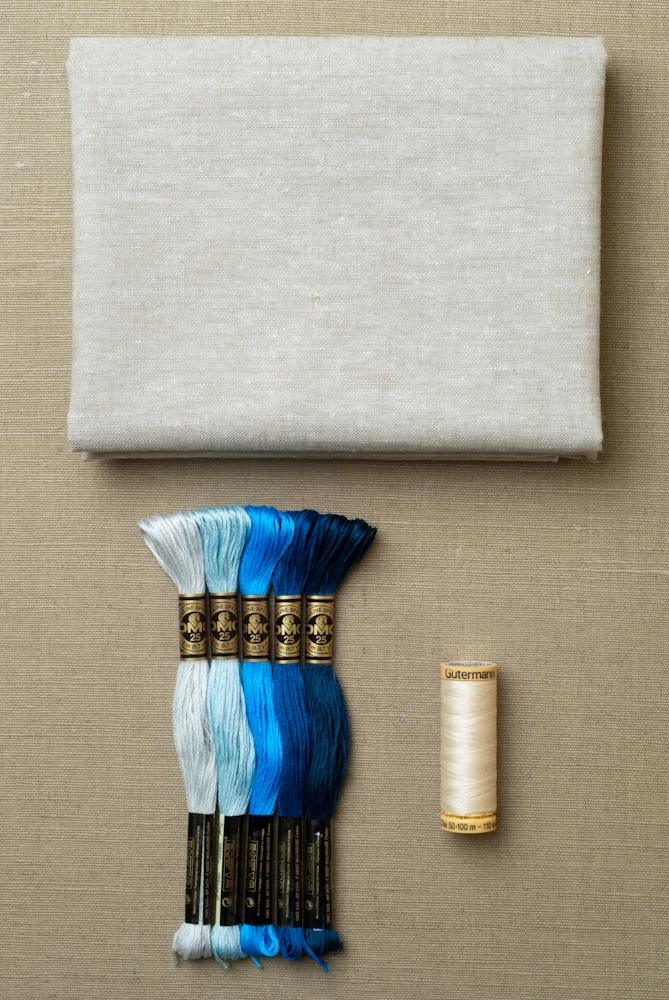
- 1 yard of Essex Yarn Dyed in Flax,
- 100% cotton thread to match the fabric
- 5 colors of DMC embroidery floss (The blue colors are 3750, 3842, 996, 828, and 762; and the peach colors are 543, 3824, 3340, 3341, and 967.)
- A blue Chaco Pen or other temporary fabric marker
Size
17-inch by 85-inches
The Pattern
Cutting
Tear the fabric into two 18-inch wide pieces from selvage to selvage. You want to tear it, rather than cut it because that will make the straightest edge.
Press the two pieces flat.
Cut one selvage off of each piece, so that each piece has a selvage edge and a cut edge.
Seaming

You’ll be sewing the two lengths together into one longer length with a French seam. Pin the pieces wrong sides together along their 18-inch cut edges and sew them with a 1/4-inch seam allowance.

Turn the fabric so that the wrong sides are now facing out. Press and pin the seam flat.
Sew the two sides together with a 1/2-inch seam allowance, thus encasing the raw ends of the previous seam.

Press the 1/2-inch seam to one side and pin it in place.

The hem will be sewn down with a blind stitch. For the example photos we used red thread but you will use the matching sewing thread to make an almost invisible seam.
Blind stitch the hem down to the fabric of the scarf by inserting your needle through the top of the seam and exiting 1/2-inch to the left.

Then take a tiny stitch from the fabric directly above the exit point. Enter the needle again through the top of the seam directly below the exit point of the tiny stitch and again, pull the needle ½-inch through the top of the seam.

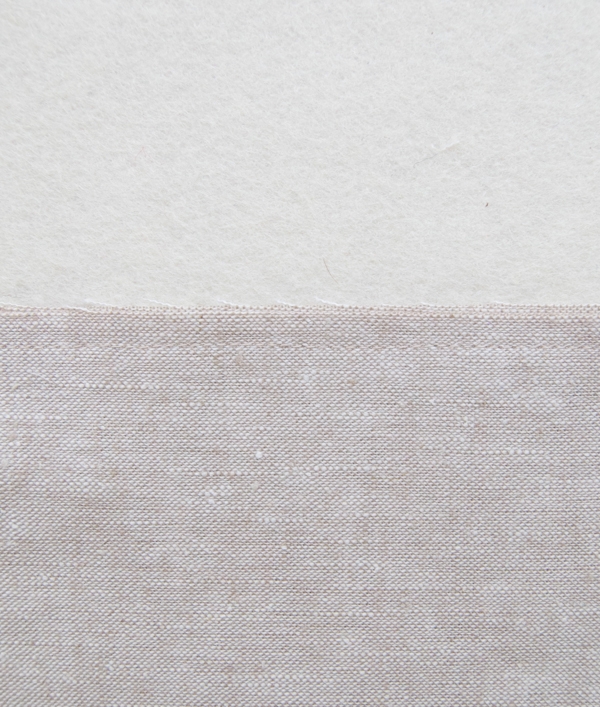
Keep stitching like this to secure the entire seam. The photo above shows the wrong side of the seam.

And above is a photo of the right side of the seam.
Marking for Embroidery

On the right side of the fabric, use the fabric marker to make two vertical lines 1/2-inch from each of the long torn edges. Make the lines from selvage to selvage.
Then, mark the following horizontal lines across the 18-inch width of the scarf, parallel to the selvage. Start 1/4-inch from the selvage:
- lines 1-5: 1/4-inch apart
- lines 6-9: 1/2-inch apart
- lines 10-12: 3/4-inch apart
- lines 13-14: 1-inch apart
- line 15: 1 1/4-inches from line 14
- line 16: 1 1/2-inches from line 15
- line 17: 1 3/4-inches from line 16
Mark the same horizontal lines along the other selvage end.
Embroidery

Arrange your five embroidery floss colors into a pleasing gradient of color and assign each color a letter, A, B, C, D, and E. (Our blue color order is A- 3750, B- 3842, C- 996, D- 828, E- 762; and our peach color order is A-543, B-3824, C-3340, D-3341, and E-967)
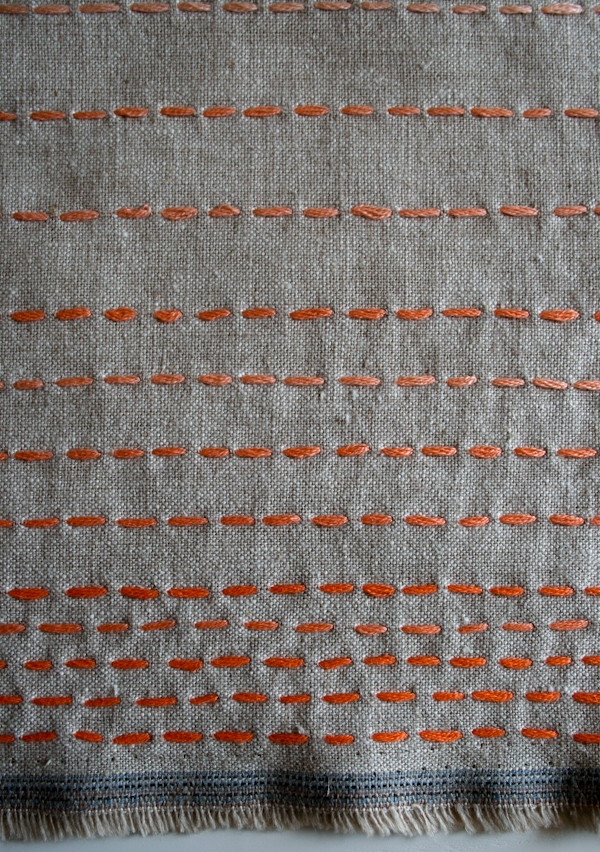
Tie a small knot at the end of a 22-inch length of color A and thread it onto an embroidery needle. Pull the needle from back to front, coming out at the intersection of the first horizontal line and the left vertical side marking. Sew along the horizontal line with a small running stitch. You can take several stitches at a time.

The stitches should be about 3/8-inch on the right side of the fabric and 1/8-inch on the wrong side.
Once you reach the right vertical line, tie a small knot on the wrong side of the fabric.

Stitch along all of the marked horizontal lines in the same manner, in the following color order:
- lines 1-3: color A
- line 4: color B
- line 5: color A
- lines 6-7: color B
- line 8: color C
- line 9: color B
- lines 10-11: color C
- line 12: color D
- line 13: color C
- lines 14-15: color D
- lines 16- 17: color E
Repeat this on the opposite end of the scarf.

Once both ends of the scarf are embroidered, trim all of the knots on the wrong side of the fabric so that their tails are 1/4-inch or less.
Hemming

Press the torn sides over 1/4-inch twice towards the wrong side along the entire length of one of the torn edges thus hiding all of the ends. The 1/2-inch side marking should be along the outside of edge of the fold.
Using the sewing thread sew the fold down using the same blind stitch technique detailed previously.
Sew down the entire side this way and then repeat for the opposite side.

Spray and press the scarf to remove the fabric marker and you’re all done!
Update 2024: You can explore our current collection of beautiful fabrics and supplies on our page of Sewing Tools + Notions!


Totally love this and plan to make it for my mother-in-law and me!
This is so beautiful and I can't wait to get started on it! I have one question… the instructions say 1 yard of linen and the kit says 1/2 yard. Which is correct?
Hi Tina-
It is 1 yard. Thanks so much for catching the typo on the kit description. We will change it as soon as we can.
Thanks for writing in!
Molly
Really lovely scarf, will have to give it a go. Thank you for sharing. Hannapat
I am not fond of sewing, but the colors, gradient and simplicity of this scarf makes me want to try it. Thanks for posting.
Wondering if you recommend pre-washing the fabric?
Hi Megan-
I didn't prewash my fabric because I am excited for the slight shrinkage that will occur after the washing. I think it will look pretty. However, you certainly can pre-wash if you prefer!
Thank you!
Molly
I think the running stitch IS a star, thanks for featuring it and this pretty scarf!
Hey, Molly — this looks easy enough for me to make. And with a few adjustments for the Hawaii humidity (any suggestions on fabric?) it is something that I believe I could actually finish!
Funny that I run into you through “The Good Weekly”
hugs,
Eileen
Eileen!!!
How nice to hear from you! I think a light weight cotton lawn would be great for Hawaii: https://www.purlsoho.com/purl/products/item/8641-Robert-Kaufman-Cambridge-Lawn
Or a super light weight linen: https://www.purlsoho.com/purl/products/item/6616-Globalweave-Textiles-Duo-Woven-Linen-from-India
Hugs to you!
Molly
ps- Lupe says hi!
I purchased two of these kits to give as Mother's Day gifts. Can you tell me what the care instructions are for the fabric? Thanks. They were a big hit!
Hi Britiney-
The fabric can be machine washed and dried. If you are prewashing your fabric wash it on a regular cycle, in warm water.
After the scarf is done you might want to wash it on cold and in a gentle cycle but that is more to keep the embroidery neat since the fabric is very sturdy.
I'm so glad to hear the kits were a hit!
Thank you!
Molly
How many strands of floss did you use?
Did you use an embroidery hoop?
Thanks
Betty
Hi Betty-
We used 6 strands of embroidery floss and we didn’t use a hoop. Thanks for your questions!
Molly
I’ve very recently got hooked on Sashiko and I’ve got a lovely long soft white cotton scarf that my late aunt gave me. I’ve been waiting for inspiration and you’ve given me it. Thank you soooo much x
One of the above comments mentions writer having bought 2 kits. Is this project available in a kit? I couldn’t find one. Thanks for your response.
Hi Jenny,
We no longer offer this project as a kit, but we do still carry Essex Yarn Dyed, and one of our newer products is Embroidery Floss Bundles which would give you a choice of pretty color selections for the project. I hope this helps!
Happy Crafting!
Cassandra
It looks like you don’t have the fabrics mentioned in the pattern or notes anymore (or the links don’t work). Do you have any alternative fabrics that would work for this project?
Hi Jessie,
Thanks for reaching out! It looks like the link to the fabric was broken, but luckily we still carry that fabric and you can find it here: Essex
I hope this helps, happy crafting!
Gianna