Kid’s Gathered Summer Top

As always, the transition from spring to summer has caught me unawares! Over the past couple of weeks the weather here in New York has turned from damp and chilly to hot and sweaty, and I’m suddenly realizing that my poor daughter has nothing to wear!

And so I turned desperately to my sewing machine and whipped up the quickest, simplest summer top I could think of, this breezy Gathered Summer Top. Once I got it on her, I had to do a double take. This easy-as-pie shirt is actually cute. Really cute. So cute I went back to my machine and made more!

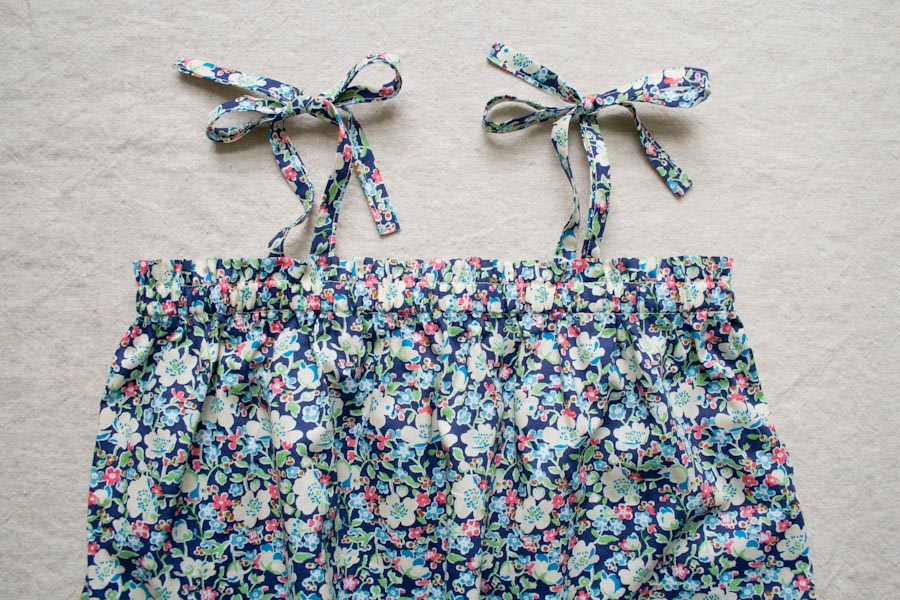
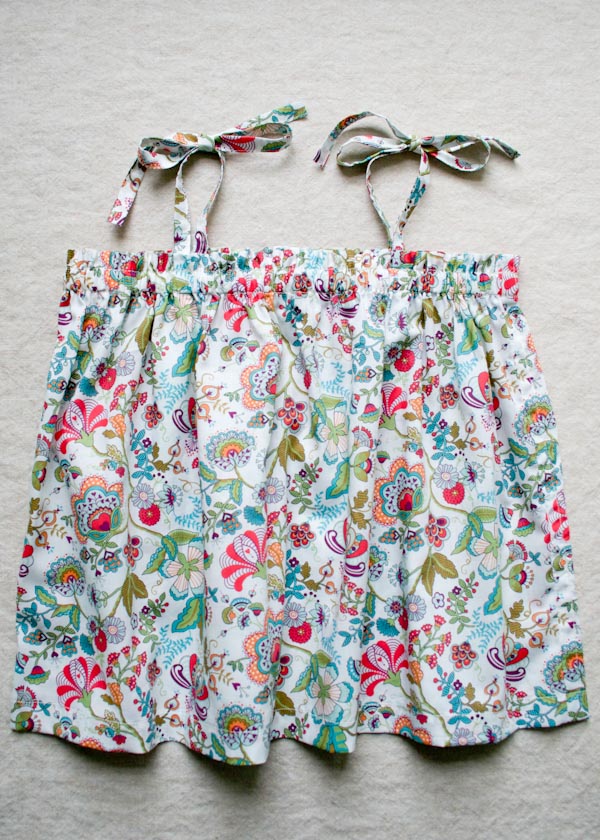
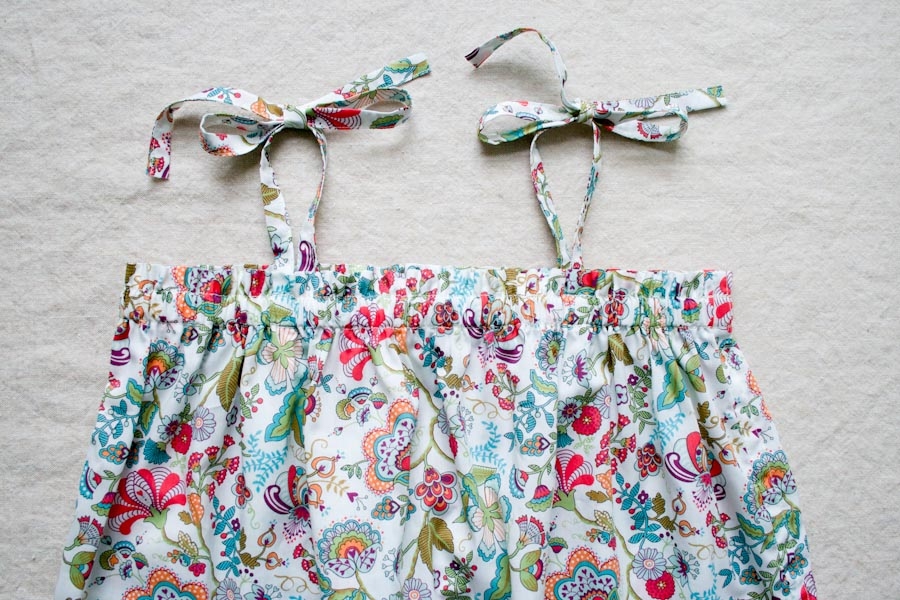
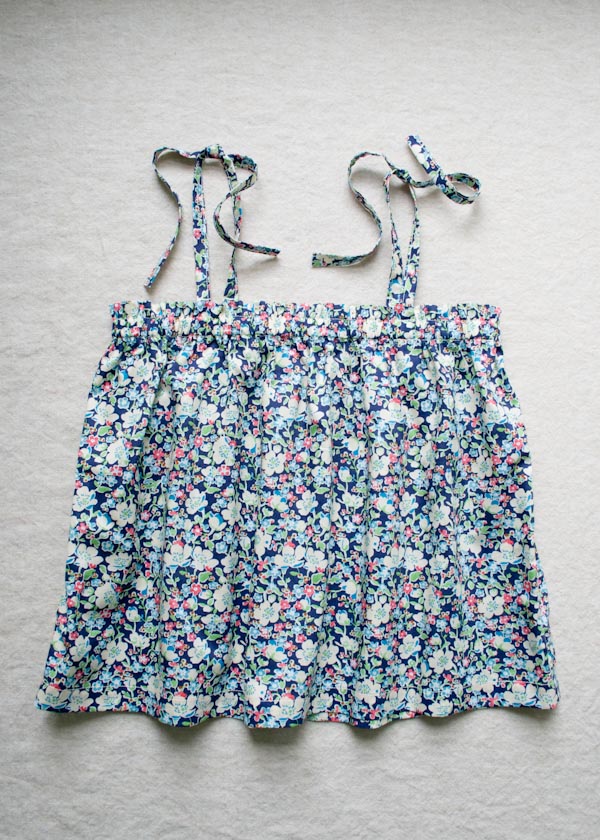
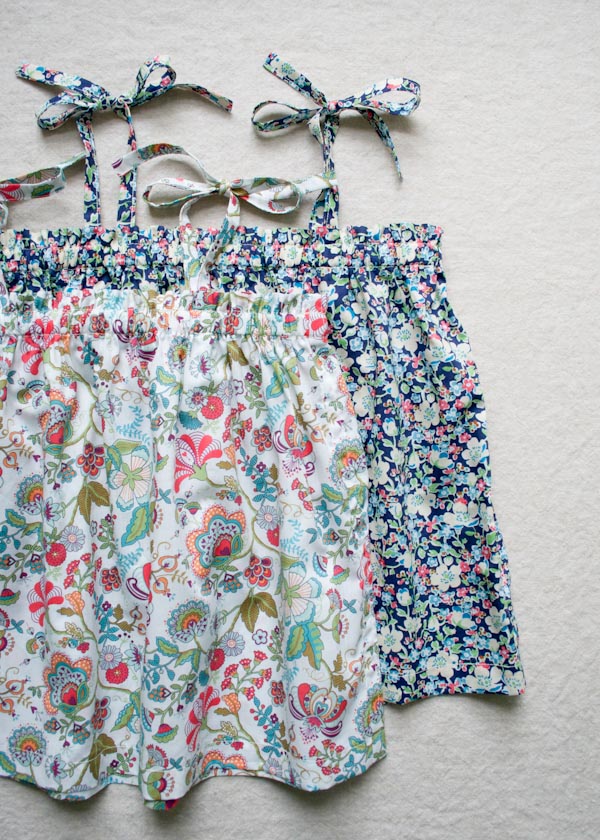
These Gathered Summer Tops are extra special in Liberty of London’s lightweight and silky soft Tana Lawn Classics. And with over 30 gorgeous, new prints recently added to the collection, choosing is more fun (and more difficult!) than ever. I chose the new and unbelievably pretty Navy John for one of my tops (and couldn’t resist an old favorite, Mabelle Turquoise, for the other).

The elastic casing and adjustable straps make these tanks easy to fit and even easier to sew. You can finish a whole shirt in under an hour, from the first cut to the last stitch. And to make sure I’m prepared for next year, I’ve sized the pattern from 1 to 10 years. Sneaky summer won’t catch me off guard again! -Corinne

Materials

To make one Gathered Top for size 1 (2, 3, 4-5, 6-7, 8-9, 10), you will need…
- ½ (½, ½, ¾, ¾, ¾, ¾) yard of Liberty of London’s Tana Lawn Classics or Seasonals. I used the Classics, Mabelle Turquoise (pictured above, top) and Navy John (bottom).
- 1 yard of 3/8-inch Braided Elastic in white
- A spool of Gutermann’s Cotton Thread in color 1040.
- Merchant and Mills’ Bodkin and Threader or a safety pin
- Clover’s 18 mm Bias Tape Maker
Sizes
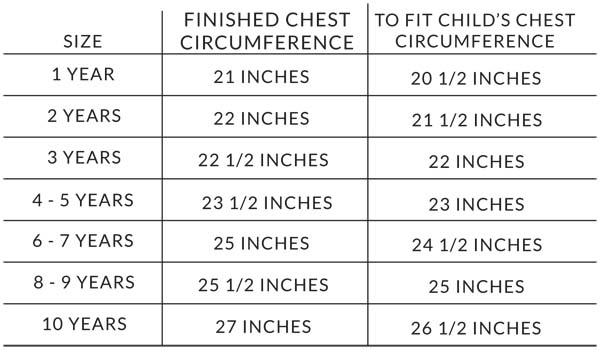
Notes
Prewash all materials before starting.
For the sake of clarity our instructional photos use Robert Kaufman’s Architextures in Tangerine Hatches, a fabric with a clear right and wrong side (instead of the Tana Lawn).
Pattern
Cut
Note: When cutting simple rectangular shapes for patterns such as this, straight, clean cuts are key. The best way to make these cuts is with a rotary cutter and a non-slip quilting ruler on a self-healing cutting mat. If you have limited experience using a rotary cutter, I recommend visiting our Rotary Cutting Tutorial.

Cut two 20 x 12 (21 x 13, 21 ½ x 14 ½, 23 x 16, 24 x 17 ½, 24 ½ x 19, 26 x20 ½)-inch rectangles from the Liberty of London fabric. These are the Body Pieces.
Cut one 1 5/8-inch strip from selvage to selvage. This is the Strap piece.
Cut a 22 (23, 23 ½, 24 ½, 26, 26 ½, 28)-inch length of the elastic.
Prepare the Straps

Following the manufacturer’s instructions, use the 18mm bias tape maker to create single fold tape from the Strap piece. Fold in half lengthwise, encasing the raw edges, and press.
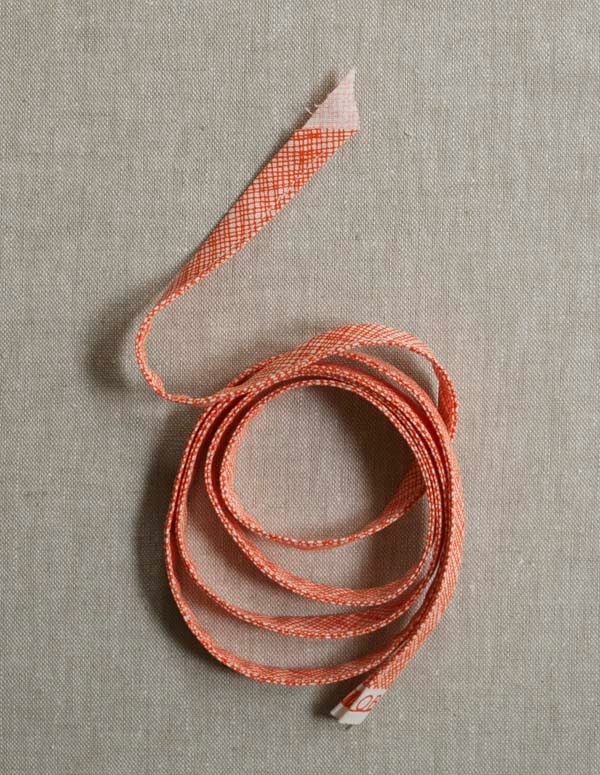
Sew the long open side closed with an edgestitch.

Trims the ends and cut the strip into four equal-length pieces. Set aside.
Piece the Body

With wrong sides facing, stack the two Body pieces on top of each other. Pin along the two short sides.
Sew along the two pinned sides with a ¼-inch seam allowance.
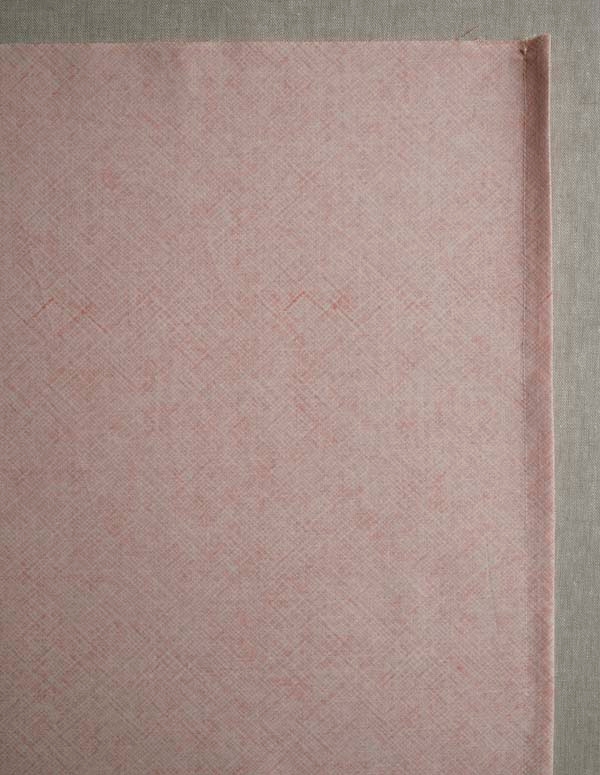
Turn the garment so that the right sides are now facing and press flat along the seams. Sew along the short sides again with a ½-inch seam allowance.

Press the seams to one side and sew down with an edgestitch.
Hem the Bottom Edge
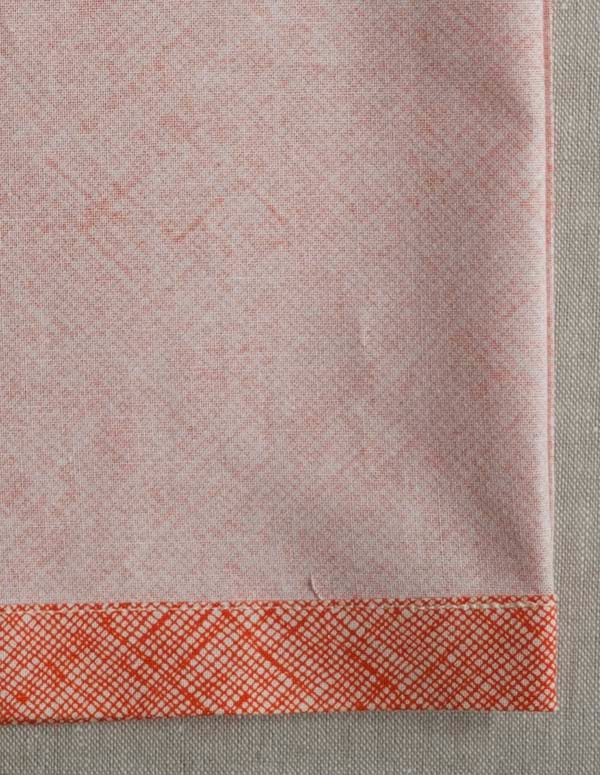
Fold the bottom raw edge of the garment up ¼ inch towards the wrong side and press. Fold the same edge up ¾ inch towards the wrong side, press and pin. Sew the hem down with an edgestitch.
Hem the Top Edge and Attach the Straps
Fold the top raw edge of the garment down ¾ inch towards the wrong side and press. Fold the same edge down 1 1/8 inch towards the wrong side and press.

Lay the garment out flat with the wrong side facing out. Measure 4 ½ (5, 5 ½, 6, 6 ½, 7, 7 ½) inches in along the top edge from one side seam (not the edge stitch). Pin one strap to this spot, aligning one of its ends with the bottom edge of the hem.
Pin the second strap in the same way 4 ½ (5, 5 ½, 6, 6 ½, 7, 7 ½) inches from the other seam.

Flip the piece over and repeat with the remaining two straps.

Sew the top hem down with an edgestitch, leaving a 1-inch gap near one of the side seams. Backstitch over the straps when you reach them.
Sew a second seam ½ inch down from the top edge (and approximately ½ inch up from the previous seam) all the way around the garment. Again, backstitch over the straps when you reach them.

Thread one end of the elastic onto the bodkin (or safety pin).
Push the bodkin into the 1-inch gap. Pull the elastic through the channel, making sure not to pull the other end inside.
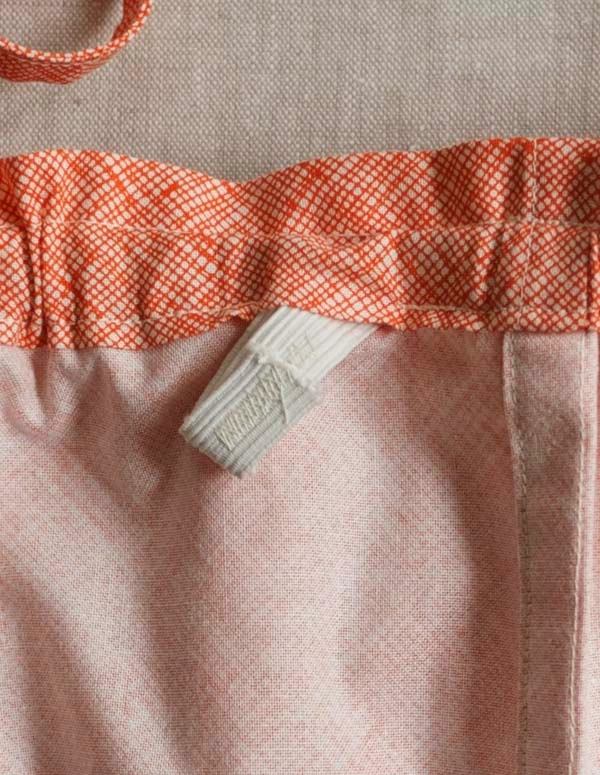
When you have pulled the bodkin all the way through to the other end of the channel, overlap the two ends by ½ inch. Sew the two ends together lengthwise with a zigzag stitch.
Tuck the elastic into the hem and close the gap with an edgestitch.

Turn the top right side out. Distribute the gathers evenly across the top edge of the garment by pushing the fabric along the elastic.
Tie the shoulder straps at the desired length and trim the ends as needed.
If you find that the garment’s fit needs adjusting, either push the gathers toward the center of the front and back of the garment to bring the straps in and enlarge the underarms; or spread the gathers out if you’d like the straps set wider and a snugger fit under the arms.


Hi- thats a lovely pattern you made for us there 🙂 What is the fabric you show at the DIY ? Kind regards Ellen
According to the directions: “For the sake of clarity our instructional photos use Robert Kaufman’s Architextures in Tangerine Hatches, a fabric with a clear right and wrong side (instead of the Tana Lawn).”
Thank you for the directions for this sweet little top. I am excited to make a few of these as soon as possible. It is a pleasure to read such clear directions along with the beautiful photos.
This is gorgeous, and totally doable for a near-beginner sewer like me! Making one today… Thank you!
Hi Ellen-
The fabric is Robert Kaufman Architextures, Tangerine Hatches and can be found here:
https://www.purlsoho.com/purl/products/item/9364-Robert-Kaufman-Botanics-Architextures
Thanks so much for writing in!
Molly
I am excited to make this! I will be fabric hunting very, very soon….
Just made one tonight and there will definitely be more!
I love your patterns, this one included. I would so love to see you offer a link to a PDF of your patterns so I can save it on my iPad and use it as I sew. I would love that on all your patterns, actually! Thanks for reading!
Sally, I like to save patterns as PDFs too. I copy and paste the pattern into the Pages app on my iPad, then there’s a function within Pages to convert the document into a PDF. (Pages is available to buy from the App Store.) Hope that helps 🙂
Pages is free from the app store
Thank you for sharing. I think I like it in broderie Anglaise.
Regards,
Juffrouw Mier
Such a sweet top ~ I know a couple of little girls that will just love them!
Thanks for the tutorial!
This is adorable! Could you possibly give information to make this shirt into a dress (length and yardage required)? Looking for sizes 2, 3 and 4.
Also, would love to make this for 5 month old – any pattern info/tips to alter for smaller size would be much appreciated.
The tops and fabric are adorable! Perfect for summer days. I have seven granddaughters (and two grandsons) and love sewing for them!
Hi Sally-
Thanks for getting in touch with this concern. Unfortunately right now it's not feasible for us to reformat our free patterns to PDF form. (Our paid patterns are all avaialble as a PDF download.) But we do understand that it can make printing or referencing them a bit difficult. We recommend that you copy and paste the pattern into a Word or Text doc and from there convert it into a PDF. On a Mac (which is what I use) you can do that in the Print dialogue box.
I'm sorry this isn't ideal but I just wanted to let you know that we do hear you and hope to have an easier system in the future!
Thanks!
Molly
These look just like toddler skirts that I make, except with straps! Very cute and easy!
What adorable tops! I enjoy your blog and all the creative ideas.Thank you so much for these free instructions. I couldn't tell from the pictures if you finished off the ends of the straps in any way to prevent fraying.
Hello C –
Thank you for writing in. I am so glad you like the pattern!
To adjust the pattern for a dress I recommend measuring from the child's underarm to the desired length and adding 3 inches. My rough estimate would be 20 inches for size 2, 21 1/2 inches for size 3, and 23 inches for size 4-5.
For each of these sizes 3/4 yard of a 54-inch wide fabric will be enough.
To adjust the pattern smaller, first measure the child's chest circumference. The width of the two Body pieces should be cut 1 inch smaller than this measurement. You can determine the length of the Body pieces using the same directions above (measure from underarm to desired length and add 3 inches). The elastic should be cut 1 inch longer than the chest measurement. The straps should be cut and prepared in the same manner described in the pattern.
My rough estimate of measurements for a 5-month-old is a 17-inch chest circumference, with 2 Body pieces cut to 16 by 10 inches, and the elastic cut to 18 inches.
I hope this helps!
-Corinne
Hello June –
Thank you for writing in!
I did not finish the ends of the straps and have found that because the Liberty fabric is so fine the fraying has been minimal, even after much wash and wear.
If you would like to finish the ends of the straps on your garment, in the Prepare the Straps section, trim the Strap piece into four equal-length pieces after you have pressed the folds but before you have sewn the long open side closed. You can now finish one short end of each of these pieces with a fold-over finish: Open the folds of the strap at one end and fold over the short edge 1/4 inch towards the wrong side. Press flat. Refold the strap and press. Sew closed along the long open side with an edge stitch. Repeat with the 3 remaining pieces.
Thanks!
-Corinne
do you have projects for toddler boys?
Just a quick note to Sally: Use the "Print Friendly" option (which can be found at printfriendly.com) to convert any post you read to a PDF that you can save to your computer. You may delete any part of the post you don't want before you save. Just save the "Print Friendly" bookmarklet from the previously mentioned site into your bookmarks, click on it when you have a page you want to save, and it will convert it for you to save. Hope this helps, and happy sewing! 🙂
Hi Anne-
Currently we only have two garment patterns for toddler boys:
https://www.purlsoho.com/create/the-purl-bee/2014/2/10/corinnes-thread-purl-soho-kids-robe.html
https://www.purlsoho.com/create/the-purl-bee/2013/7/4/mollys-sketchbook-toddler-t-shirt.html
We do have many knitting patterns as well as sewn toys, blankets, bibs, and accessories that are unisex.
Here is our Children's Sewing Projects Gallery: https://www.purlsoho.com/create/childrens-sewing-projects/
And here is the same for knitting: https://www.purlsoho.com/create/childrens-knitting-projects/
The issue is that the sewists among us only have daughters but we will certainly try to think of some more toddler boys projects going forward. Thanks for bringing this to our attention!
Molly
Beautiful pattern! I'm a newbie sewer and this project looks perfect. The only thing is I don't own a bias tape maker. Could you possibly tell me if I can do that step without using one? Thanks so much!
Hi Gina –
I'm glad you like the pattern! It is a perfect beginner project.
You do not need a bias tape maker to make the straps. To make them without it, first trim the Strap piece into four equal-length pieces (this will make the folding and pressing much more manageable). Fold one piece in half lengthwise and press to create a crease. Open up the fold. Now, fold the two long raw edges in towards the wrong side to meet the center crease. Press these folds. Refold lengthwise, encasing the raw edges and press again. Sew the strip closed along the long open side with an edgestitcch. Repeat with the three remaining pieces.
I hope this helps!
-Corinne
Hi,
Something confuses me about the pattern instructions: why do you make one seam at 1/4 inch seam allowance and then another at 1/2 inch seam allowance? I have the fabric and trying to go through the steps first in my head. Maybe it will become clear to me as I do it, but maybe you can help me out. Thanks so much!
Hi Susan –
Thanks for writing in – This is a great question!
I think you are referring to the side seams, correct? These two seams are the steps to create the French seam that will completely encase the raw edges of the fabric. You need the second seam allowance to be slightly larger than the first so that the raw edge does not stick out from the seam line. Please note that the first seam line is made with the wrong sides of the fabrics together, while the second is made with the right sides together.
I hope this helps! Please let me know if you have any other questions as you're working!
-Corinne
Love this project.
Can you please share the link for the Mabelle fabric? I searched for it and could not find it at the Purl Soho shop.
Thanks
Hello Thalita –
I’m so glad you like the project! Thank you for writing in!
You would usually be able to find the fabric here: https://www.purlsoho.com/purl/products/item/1695-Liberty-of-London-Tana-Lawn-Classics
But, it looks like we are currently out of stock. Please feel free to email customerservice AT purlsoho DOT com and we can let you know when it is available.
-Corinne
So excited to have just finished this in Liberty Tana Lawn Poppy Danjo print! It is one of my very first true articles of clothing I’ve ever sewn, and it came out great!
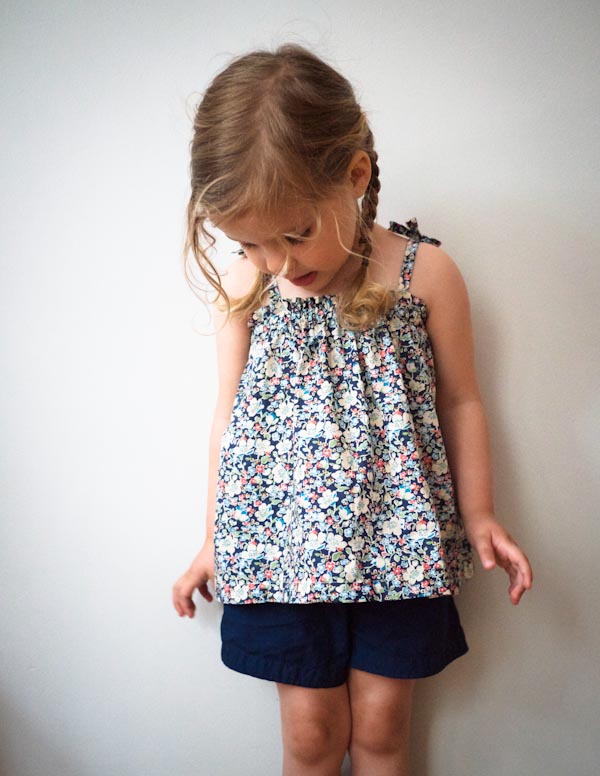
These are so cute! Cannot wait to make them for when it is warmer. I really like how you paired them with the navy shorts which look like they are loose and comfy (and not too short!). Did you make those as well? If so, do you have a favorite pattern?
Hi Sarah –
I am so glad you like the pattern! The shorts are store bought, but the pattern could easily be adapted from our City Gym Shorts pattern available here:
https://www.purlsoho.com/create/2014/07/24/corinnes-thread-city-gym-shorts-for-all-ages/
If you don’t feel like doing the drafting work yourself, stay tuned! This may serve as motivation for a new shorts pattern this summer!
-Corinne
Did anyone else find this a little … Short? I made this in the 2yo size and maybe I just hemmed too deep but for it supposing to start as 13 inches long … Mine was barely 9 inches long totally hemmed. Did I screw up somewhere?
Hi Alinna –
I’m sorry your top turned out too short!
It sounds like your hems may have been too deep, as you suggest. The finished length for the size 2 (with a 13-inch cut length) is supposed to come to a little over 10 inches (this accommodates 1 inch for the bottom hem and a little under 2 inches for the top hem). Do you think this additional 1 inch would make the shirt long enough, or do you feel this would still be too short? I would love your input!
Thanks,
Corinne
I am attempting to make this top for my daughter and I made a length of bias tape which came out great, but it doesn’t appear to be long enough for four straps. When cutting the strip to make the straps the pattern says “Cut one 1 5/8-inch strip from selvage to selvage”. What does “from selvage to selvage” mean? I am having trouble determining the length needed for the strip for a 3 year old.
Hi Liz –
Thanks for writing in. This is a great question!
Cutting a fabric from “selvage to selvage” means cutting a straight line that runs the entire width of the fabric on the cross-grain, perpendicular to the selvages. This strip will be the same length as the width of the fabric. Though we use a bias tape maker to help make the tiny folds in the strip, it is not cut on the bias. However, a bias-cut strip will certainly work!
For this project, we worked in Liberty of London’s Tana Lawn which is 54 inches wide, so the 1 5/8- inch strip for the straps is 54 inches long. This gets cut down into four 13 1/2-inch pieces. These can be trimmed down as needed depending on size. For a 3-year-old, the straps can be cut down to approximately 10 inches long.
I hope this helps!
Please let me know if you have any other questions as you put your Top together!
-Corinne
I see from posts here that Purl Bee might post a shorts pattern that could be made with the top..that would be GREAT! I will check your City Gym Shorts pattern, as was recommended within the posts, but I need to adapt them to a 5 month old and a 2 year old. Hopefully, it will be easy to do! Love all of your patterns with accompanying tutorials!
Hi Cynthia –
You’re right! Our City Gym Shorts pattern would look great with this top and is available for free! The pattern starts at age 2, so you’ll only need to make adjustments for the smallest size.
Please let me know if I can help at all as you make the adjustments.
Happy Sewing!
-Corinne
Perhaps you could assemble a sewing dictionary for newbies. I sew a lot for fun and work, yet the description of the elastic casing/top hem was missing something. After reading the comments here, it’s clear the top hem uses a total of 2 inches. I just finished based on the photos. Thank you for a fast, easy, and cute top.
Hi Nicole –
Thank you for writing in!
Have you seen our collection of Tutorials and Sewing Terms? It is by no means exhaustive, but there is tons of great information there and we are adding to it all the time.
I hope this helps!
-Corinne
So very cute & I have just the granddaughters to wear them. Great for hot & humid weather like we have this year. Thank you for the top pattern & the great instructions!
I really wish you’d come up with some more projects suitable for boys. I open every email you send hoping that I might be able to make it for my one year old son but again and again it’s a dress, romper, top, etc that could only be worn by a girl. What about a cute pair of shorts, a cheerful sun hat, or even a little pair of canvas shoes? Boys wear clothes too, y’know!
Hi Lil –
Thanks for your comment. We style many of our projects for girls (mostly because that’s who we have available to model!), however many of our patterns can be adapted for boys with a simple shift in fabric!
You could try our Toddler T-Shirt, or City Gym Shorts in more masculine colors. Or, our Kids Robe which has a boy version with a waist tie.
However, I hear your request and we will definitely keep it in mind as we develop projects in the future!
-Corinne
Thank you so much for the tip about converting patterns to PDF form on the MacBook Air which I’m currently learning about, on a very steep learning curve. I think this little summer top is delightful, so simple, cool and pretty. I’ve saved the PDF file to show my little great-grand-daughter the beautiful photos and I’m sure she’ll want to have a top or two like this lovely little model. I especially like the longer-style shorts that match the top fabric, and think capris and slacks in matching cool fabric would look lovely, too ….( just trying to retain a modicum of modesty for my little girl while still being cool in summer heat).
I have some lovely fabric in my stash so I will definitely be making my granddaughters one each. Thank you for this.
Gorgeous – I have 5 granddaughters – going to be busy
Help! I cannot seem to print the pattern. I was previously able to print the baby sunbonnet pattern with no problem, and can’t figure out what I’m doing wrong. I have downloaded the PDF file, and when I bring it up to print, it’s blank–but it does have all the other sewing info.
Thanks!
Hi Nancy –
I’m sorry this pattern is giving you trouble!
Can you explain to me a little bit more what’s missing from the PDF? Our Kid’s Gathered Summer Top does not have any pattern pieces (all of the dimensions for the Front, Back and Straps are given in the Cut section of the pattern), so a PDF of this pattern should include the text and how-to photos, but will not have any other additional pattern pieces.
You can create a PDF of the pattern by clicking on the “Print” icon on the webpage. If you’re on a desktop version of the site, you will find this icon in the right column just below the date and tags. If you’re on a mobile version of the site, you will find it below the pattern and above the comments.
Follow the easy on-screen instructions to delete whichever parts of the pattern you don’t want to print or save.
I hope this helps! Please let me know if you continue to have trouble.
-Corinne
This is adorable! Please consider a similar pattern for adults. It would be amazing to have a batch of these in time for another scorching summer.
Hello Melanie –
This is a great idea! We will certainly keep this in mind as we plan our projects for this summer season!
Meanwhile, check out our full collection of sewn garments here. I think the Linen Tunic with Gathered Shoulders might be another great option for you!
-Corinne
Just made one last night with Liberty of London Tana Lawn Classics Eloise, Periwinkle for my 30 months daughter. She wore it today. Absolutely love it!
Do I understand the instructions correctly to say turn the top down 3/4 inch and the again 11/8 inch? I’m a visual person so I wanted to be sure. And is there a reason for the double turn?
Your patterns and tutorials are always so reliable and cute! One of my favorite sites. And I wish your store wasn’t so far away.
Hi Dolly,
Thanks for the question! Yes, you press down 3/4″and then fold again 1-1/8″. This ensures a clean edge so when you stitch there will be no raw edge showing though. Hope this helps!
-Adam
If I wanted to make one of these for myself- how long of elastic do I cut? My underarm / across above the bust measurement is 33″ Thank you for replying– Melissa
Hi Melissa,
Thank you for writing us! You usually aim for 1″ less finished length when cutting elastic. So, for your bust size you’ll want to cut 33″ of elastic and sew together overlapping a 1/2″. Hope this helps!
Adam
Hi there, thanks for the beautiful pattern and instructions. I am trying to plan a halter top version with only two straps around the neck vs the tie at shoulder. I am thinking to maybe adjust the elastic to fit a little more snug and then make the two front straps longer? Thanks for any ideas you may have! Best wishes!
Hi Tiffany,
Thanks for the question! Cut the elastic to your bust measurement and then overlap and sew it together 1/2″ each end. This makes the elastic 1″ tighter so it can stretch around your chest. If you’d like to turn this project into a halter top, you can elongate the front straps and eliminate sewing them to the back of the garment. Best of luck and happy sewing!
Adam
Love the halter top! So cute and your tutorial was fabulously photographed and written! I tried to figure out the fabric/elastic cut measurements for 6,12, and 18 month olds, but failed. If you ever publish a chart on infant sizes, please email me.
Thanks for sharing your pattern.
thank you for a nice easy to follow pattern that also looks good.
Hi! These are so cute. I am thinking about making one for my friend’s daughter. Do you think that Nani-iro double gauze fabric will work?
Hi Yoko,
Thanks for writing in! I think this top would be just lovely in Nani Iro prints, and double gauze makes wonderful airy summer garments! You can see the prints we currently have available here!
Happy sewing!
Julianna
Just made this for my almost 3 year old and it is ADORABLE. Super easy to make and really clear instructions. I ended up placing the back straps a little closer together as they would fall off her shoulders after playing in it for a while. Also looks really cute tucked into bubble shorts (wish you guys had a free bubble short pattern)! FYI the plastic part of the bias tape maker has a bit for folding it in half for easier pressing, you pull it through under where the number 18 is and then down the bottom narrow bit where the plastic meets the metal part, sorry if that doesn’t make sense.
Hi! How can i get the pattern? I realy like it. Thank you so much
Hi Lhen,
Thanks for writing in! The pattern is available on this page located under the PATTERN title below the MATERIALS section!
Warmly,
Gianna
This is so cute and simple!! But the pattern link no longer seems to be available–at least I can’ find it anywhere on this page… help?
Hi Julia,
Thank you for your question! The pattern is available on this page located under the PATTERN title below the MATERIALS & NOTES section.
Happy making,
Gavriella