Patchwork Easter Eggs
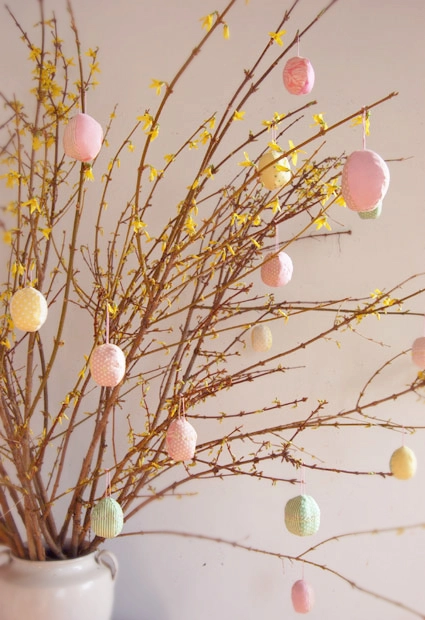
These beautiful little eggs not only celebrate Easter, but they also welcome the early blooming bushes of spring. The Patchwork Eggs perfectly adorn these forsythia branches
They’re as fun to make and decorate as real eggs are. We’ve only scratched the surface of possibilities. Bring out your whole craft bag of embroidery floss, trimmings, buttons, silk flowers, beads, and on and on. We figured out the basic structures so you can have all the fun! Happy Easter! –Molly
PS: If knitted eggs are your cup of tea, check out Whitney’s Knitted Easter Eggs.
Designed by Purl Soho designer, Molly Schnick. Click here to see even more of Molly’s work!
Materials
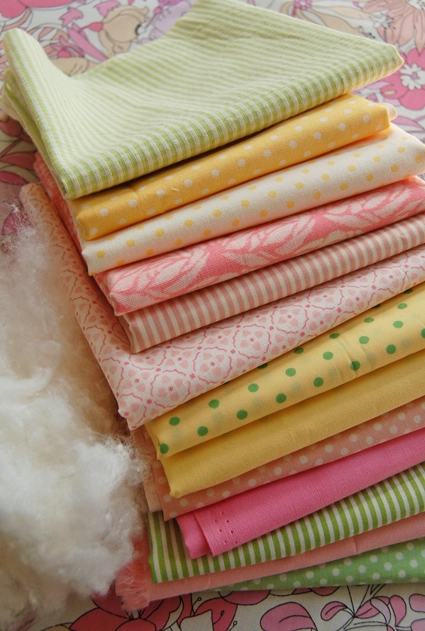
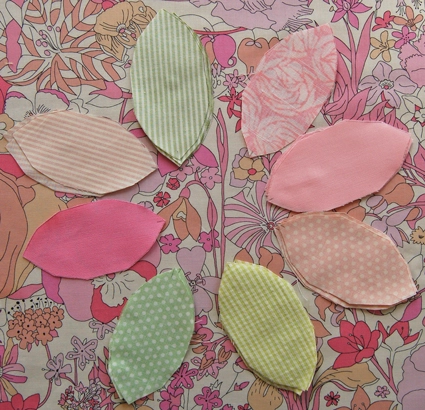
- Several quarter yards of light to medium weight fabric in a springtime palette. I used, from top to bottom: Moda Swell Seersucker Green Apple Check, Mary Engelbreit’s Friends and Flowers Buttercup Dots, Friends and Flowers Cream Buttercup Dots, Olympus Soleil Pink Rose, Yuwa Live Life Pink Stripes, Moda Swell in Bubble Gum Trellis, Robert Kaufman Pimatex Basics Buttercup Dot, P and B Color Spectrum in Souffle, Yuwa Live Life Pink Dots, Kona Cotton Carnation, Yuwa Live Life Lime Stripes, Kona Cotton in Pink, and Yuwa Live Life Green Dots.
- One bag of Stuffing.
- 2 balls of Valdani Embroidery Thread. Sun and Peach would look beautiful.
- One ball of thin yarn (you could use the leftovers from your knitted eggs!) I used Rowan 4 ply cotton in Orchid.
- One piece of template plastic.
I made 15 eggs and had lots of fabric left over. The finished eggs are 2 1/2″ X 1 3/4″ big.
(The background is the ultra pretty new Liberty of London print Pink Sixty.)
Pattern
Cutting
Download the egg template here and print it.
Iron all your fabric.
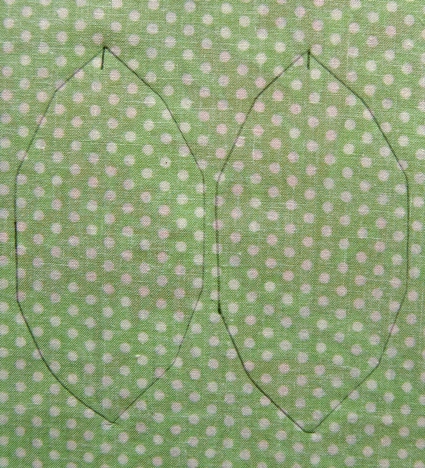
Cut out the template and trace it onto a piece of template plastic. Make sure that you mark the top of the template cut out the template from the plastic.
Place the template on the wrong side of one of the fabrics and trace it with a pencil. Repeat about six to eight times, depending on how much of the particular fabric you want in your eggs. Draw a little mark at the top of the shape, this will help you orient them later.
Do this to all your fabric. I cut six template shapes from each of the fabrics so I would have enough to play around with. (four template shapes will make one finished egg.)
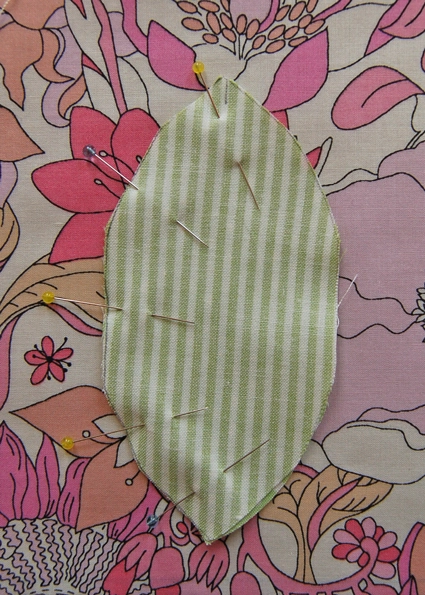
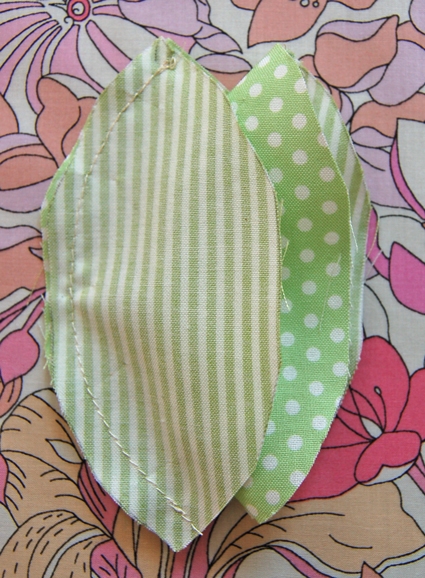
Pin the shapes together two at a time, right sides together. Make sure the top marks line up.
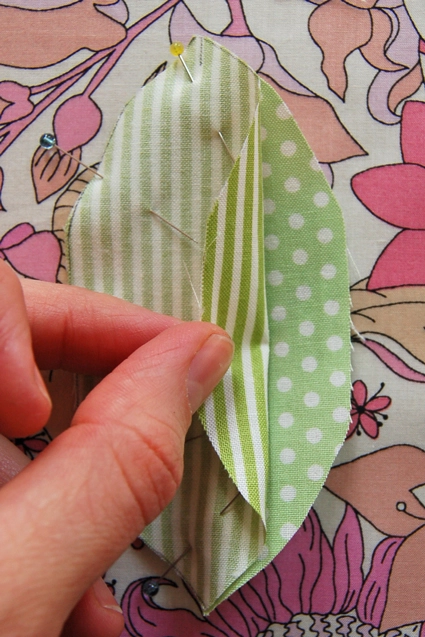
This particular egg is going to be alternating pieces of green stripes and green dots. In order to make an egg like this make sure to pin the initial pieces like so: The group on the left is a green stripe pinned to a green dot, pinned on the left side. The one on the right is a green dot pinned to a green stripe, pinned on the right side. All four pieces have their marks at the top.
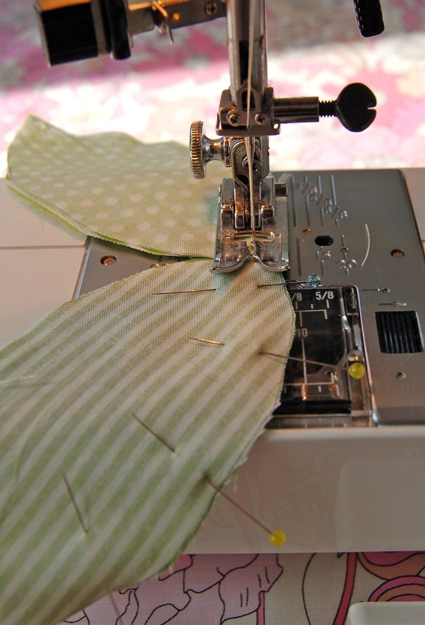
Chain piece the pinned shapes together with a 1/4″ seam. Backstitch at the beginning and end of each seam.
Pinning
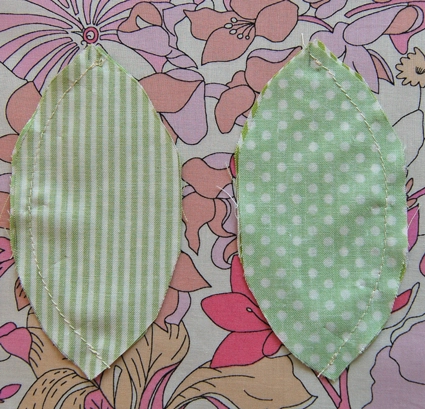
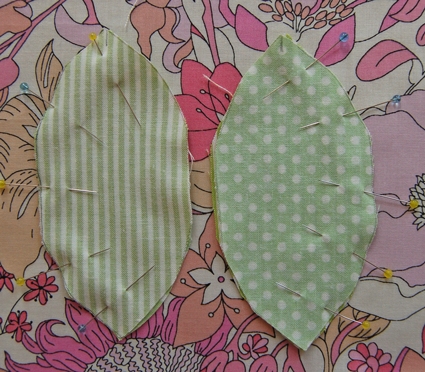
Place two sewn together pieces with their unsewn sides facing. Make sure both pieces have their top marks at their tops. The egg above will be alternating green stripes and green dots, as shown in the Initial Pinning and Sewing section.
Turn the right hand piece so the right side of the fabric is on the outside.
Nestle the right hand piece into the left hand piece. The right sides of the fabric will be touching.
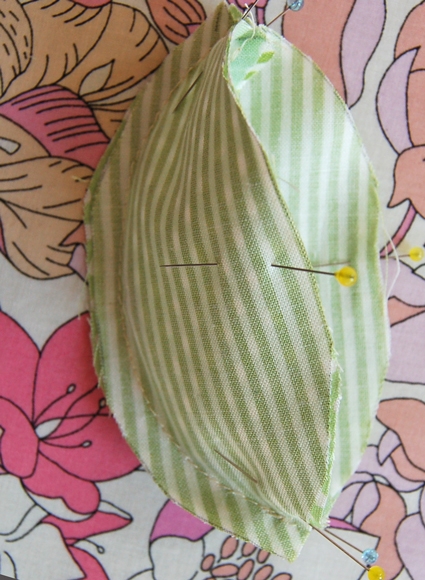
Pin this boat like shape together along it’s raw edges. Make sure the middle seams match up perfectly.
Sewing

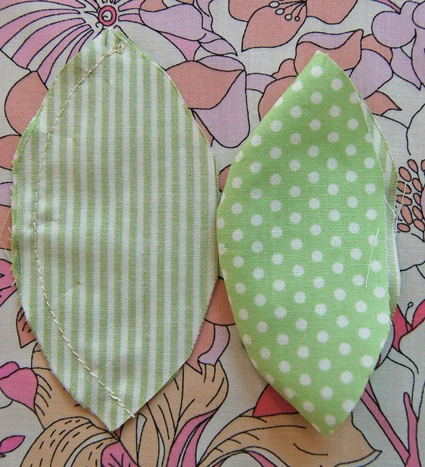
Starting at the top of the egg sew a 1/4″ seam all the way around the egg, leaving a 1″ hole. Backstitch at the beginning and end of the seam.
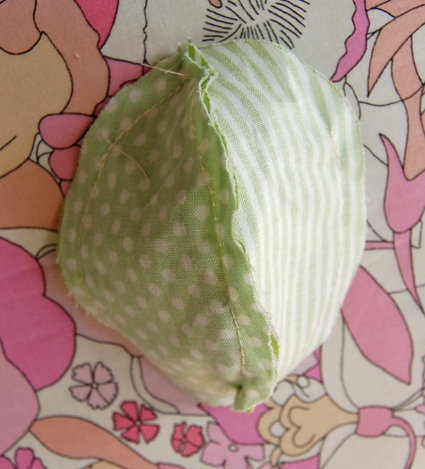
Turn the egg shape right side out through the one inch opening. You will have a little deflated football shape.
Stuffing and Closing
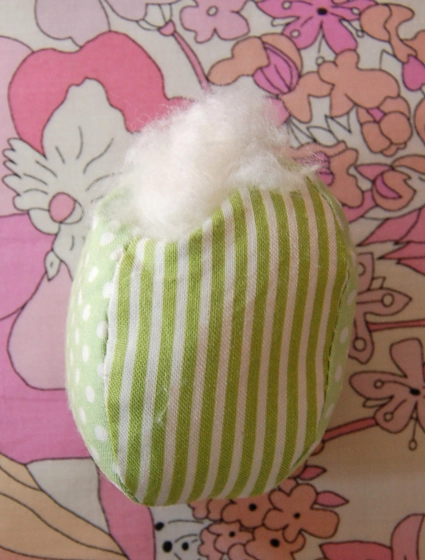
Stuff the egg tightly- Keep adding stuffing even when you think it’s totally full.
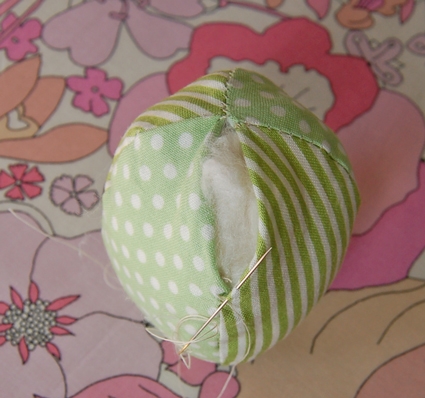
Using a slip stitch close the opening. Here is a demonstration of the slips stitch.
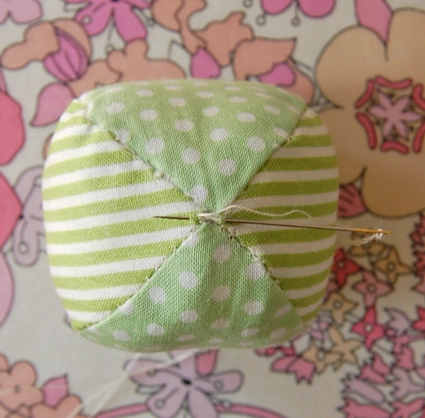
Once the seam is closed take a few small tacking stitches at the top of the egg, tie a knot with your thread, and hide the thread’s end inside the stuffing
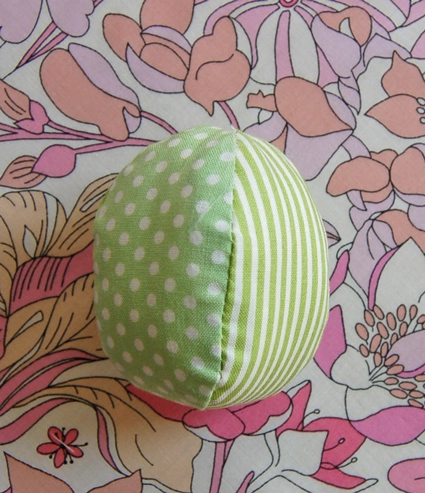
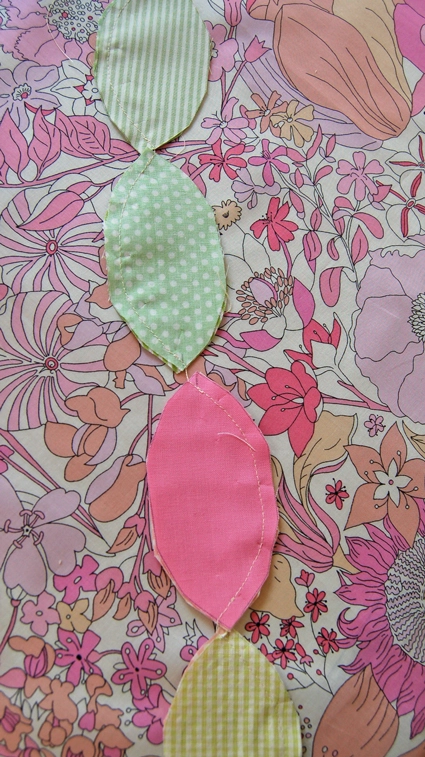
Here’s a closed egg and below are all of it’s friends, ready to be finished:

The Loop

Thread a sharp embroidery needle with a 6″ length of yarn. Put the needle through a few threads on opposite sides of the top of the egg. Pull the yarn half way through.
Tie a simple overhand knot 2″ away from the egg, forming a loop. Snip the excess yarn.
Embellishments
At this point you can pretty much do whatever you like to your eggs (draw on them, bead them, etc). I think they look very pretty plain but I decided to add some embroidery on a select few.
When embroidering on something stuffed you can just hide the beginning and end of the thread in the stuffing!
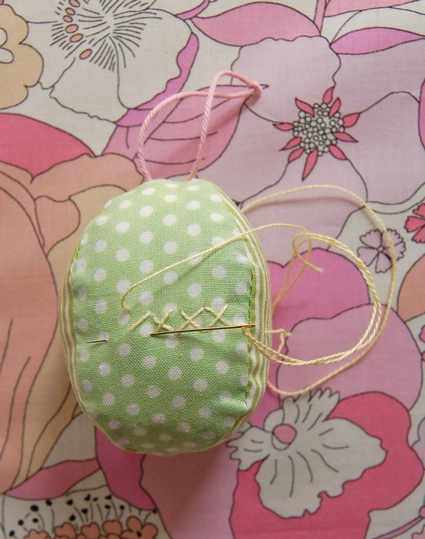
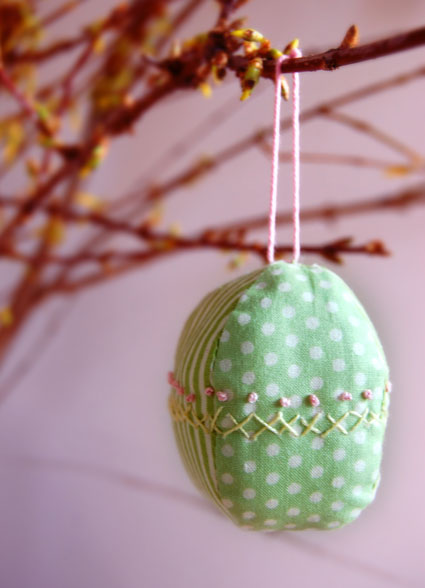
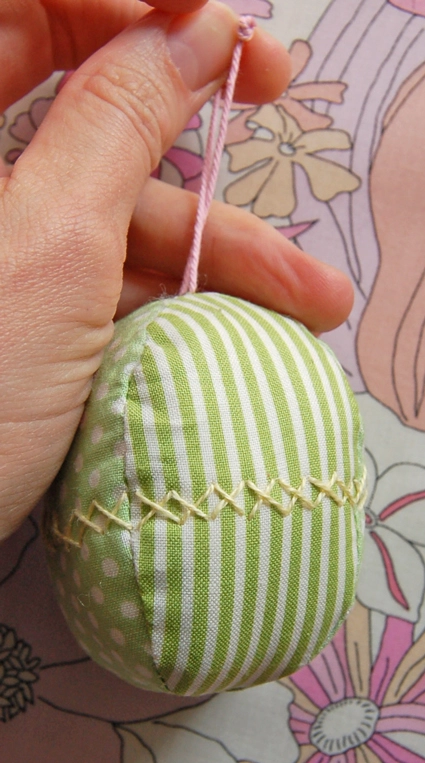
I cross stitched across the middle of this egg.
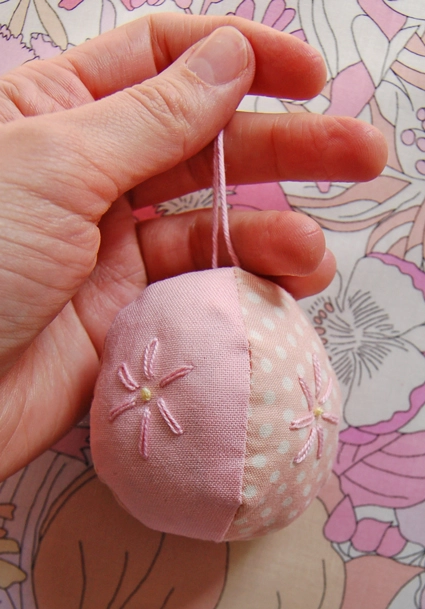
And embroidered a simple flower on each side of the pink egg below.
If you need an embroidery refresher click here.
Happy Easter!


They are beautiful and great. This is just great Easter activity accompanied by lots of fun. It’s creativity at its best. Thanks, I will try my hand on it this Easter. I will also share with my readers at my site with a link to your site. Thanks for sharing.
Hello ! Borrowed your pic for my blog. I hope It's okey!
Happy easter !
Hi Jessy-
Thanks for letting us know. It's quite alright to use our photos as long as you link back to the specific story. Would you mind changing the link you have to this one when you get a chance:
http://purlbee.squarespace.com/patchwork-easter-eggs/
Thank you!
Hello 🙂 the link for the egg template seems to be broken, could you possibly pass along a fresh one? Thank you
Hi Kailey,
Thanks for reaching out and bringing this to our attention! I will pass this along to our team and we will get the template back up and running asap!
Warmly,
Gianna
Thank you! Just what I needed for some easy table decorations. Also going to make some as bean bags for Easter games.