Cross Stitch
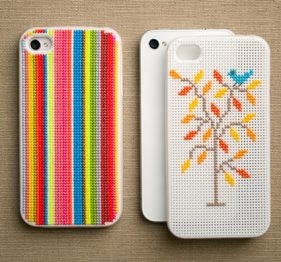
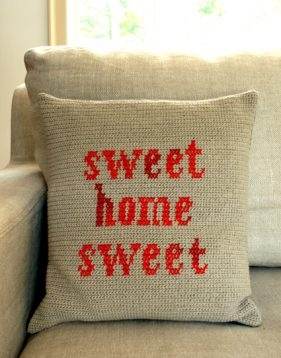
Cross-stitch is a form of counted thread embroidery in which stitched x’s come together to form an image or design. It has a traditional, as well as a modern graphic appeal that makes it suitable for everything from our cross stitched iPhone cases to our sweet home sweet pillow!
Cross-Stitches are made over the intersections of the warp and weft threads in a fabric. Fabrics specifically intended for cross-stitching have a count, which is the number of stitches per inch. The higher the count, the smaller the stitches will be.
Here’s how to get started on your own cross stitch project . . .
Anchor the Thread
To start, bring your threaded needle through the fabric from back to front, leaving a short tail in the back of the fabric. You will work the first several stitched over the tail to secure your floss.
Make a Single Cross-Stitch

Each stitch is worked over a square created by the intersecting threads on the fabric, the four corners of the square are holes for your floss to pass through. To form the stitch bring your needle up from the back at hole 1 and down from the front at hole 2, creating a diagonal line from the bottom left to the top right.

Next, bring your needle up from the back at hole 3, and down from the front at hole 4. You’ve created a diagonal line from the bottom right to the top left. This is a single cross-stitch, which is primarily used for creating vertical lines of stitches in patterns.
Make a Row of Cross-Stitches

A row of cross-stitches is stitched in two parts, the bottom half of the crosses all the way across the row from left to right, then the top half of the crosses from right to left. Working from the bottom left to the top right, bring your needle up from the back at 1, down from the front at 2, up from the back at 3, and down from the front at 4.

Then, working from bottom right to top left, bring your needle up from the back at 5, down from the front at 6, up from the back at 7, and down from the front. at 8. This method allows you to fill in large areas of stitches far faster than stitching each “X” individually.
When you come to the end of your stitches weave in your tail on the back side of your work by neatly slipping it under a few strands of thread.


just simply amazing