Crocheted Balls
They may not be able to walk, talk or parallel park, but one thing babies are very good at is playing with balls! Like cavemen inventing the wheel, babies love to marvel at the physics and possibilities of a thing that rolls. It makes them giggle, which makes us giggle, which makes everybody happy!
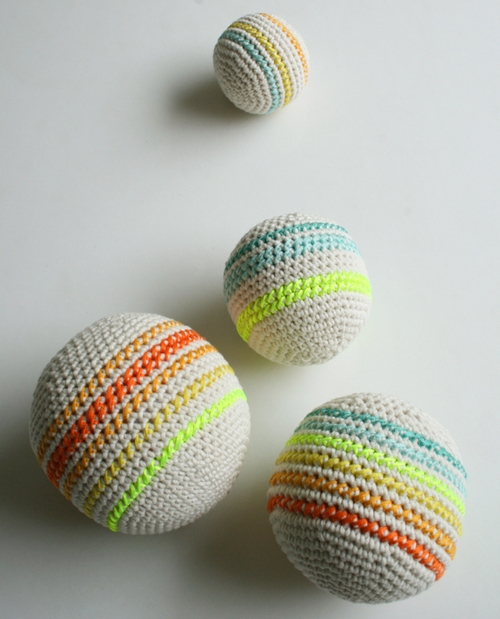
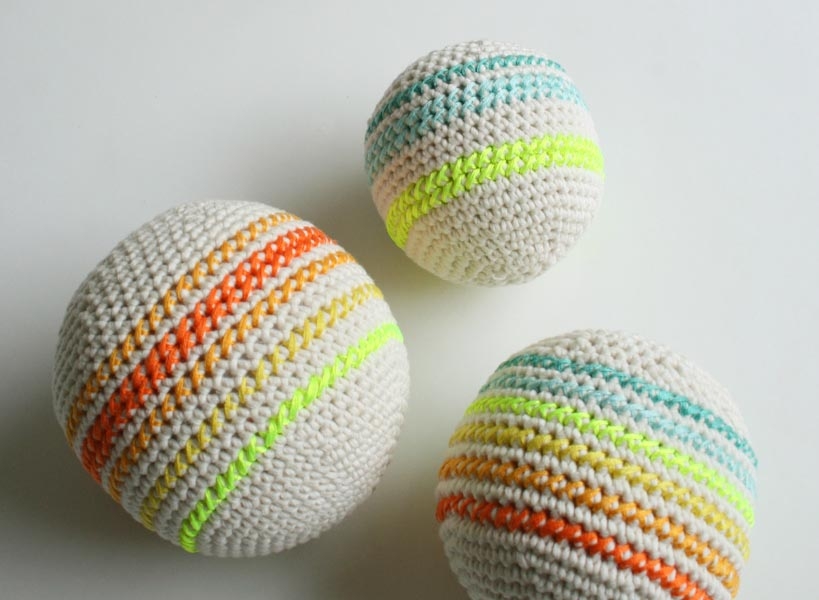
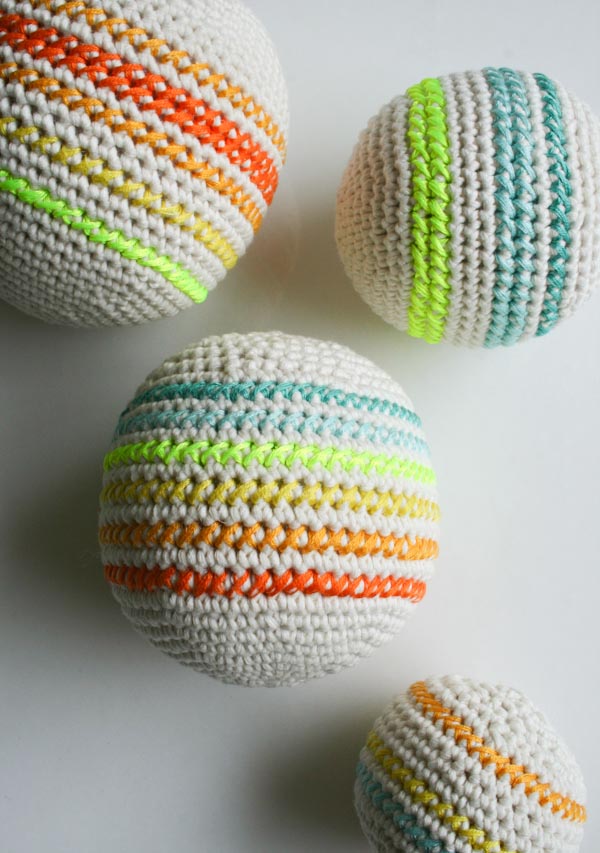
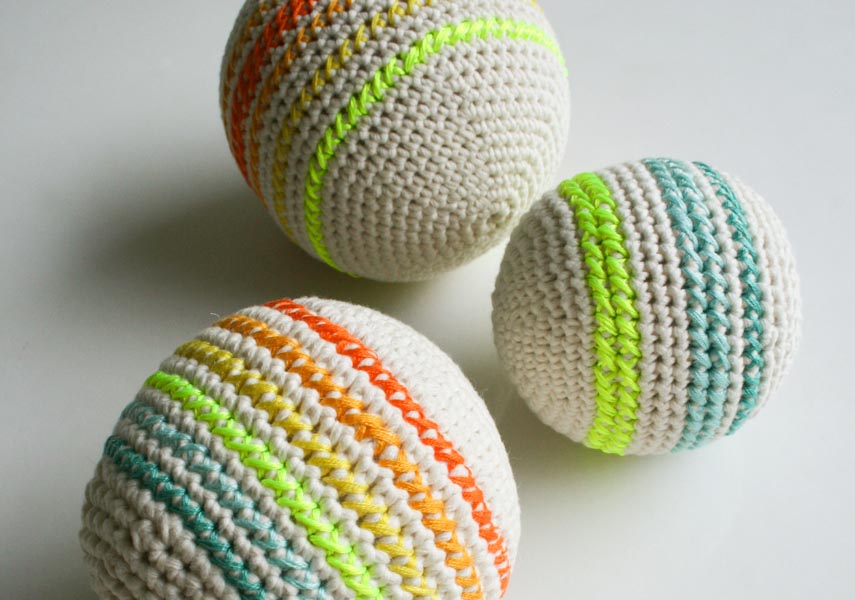
These soft and squishy Crocheted Balls are just right for little explorers. A simple crocheted sphere serves as a canvas for colorful cross-stitched stripes. Don’t worry if you’ve never cross stitched before, because not only do we explain it all, but it’s also really easy!
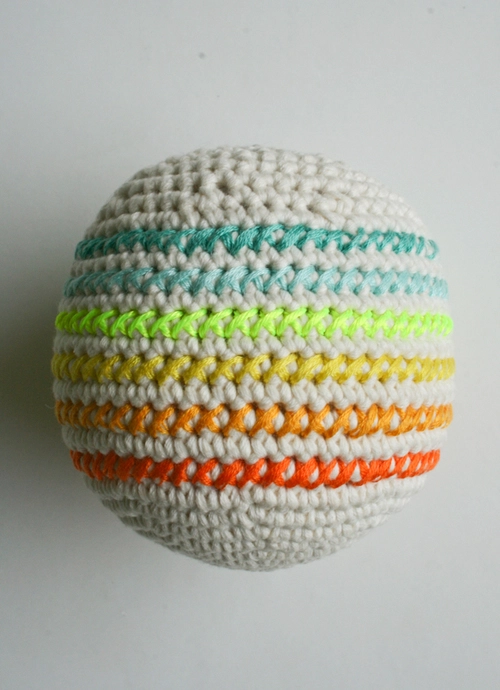
A set of all four Crocheted Balls makes a wow-I-love-these present for baby showers, birthday bashes and just cuz. Get rolling! -Whitney
Materials
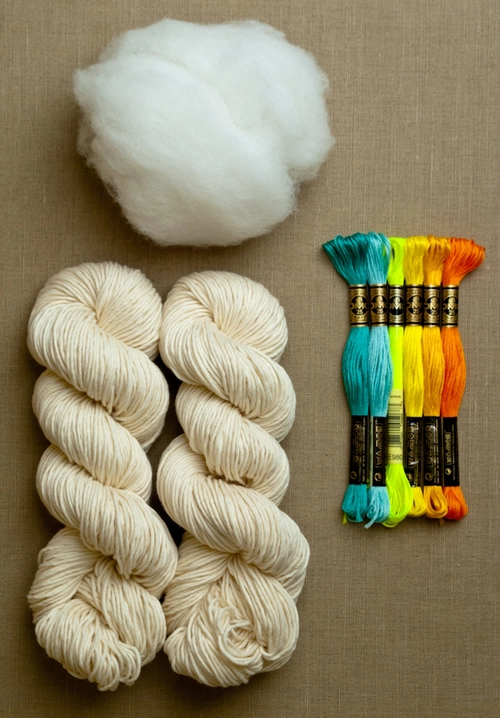
- 2 skeins of Blue Sky’s Skinny Cotton, 100% organically grown cotton. Each skein is 150 yards/ 65 grams; approximately 75-100 yards per ball. We used the color Birch. (Please Note: Skinny Cotton is no longer available but our Cotton Pure makes an excellent substitution! One skein is sufficient for two to three Balls. Order a second skein to make the full four!)
- 6 skeins of DMC Embroidery Floss in the colors 958, 964, E980, 307, 972 and 740
- A bag of Poly-fil Stuffing
- A size D (3.25 mm) crochet hook
- A removable stitch marker (or safety pin)
GAUGE
5 1/2 single crochets = 1 inch
SIZES
Extra Small (Small, Medium, Large)
Finished Circumference: 7¾ (9¾, 11¼, 12½) inches
Pattern
Extra Small Ball
Round 1: With the Main Yarn (the Skinny Cotton), chain (ch) 1 into an adjustable loop, make 8 single crochets (sc) into the loop. (8 stitches)
NOTE: Mark the first stitch of the next round with a removable stitch marker. Be sure to reposition the marker at the beginning of each round to mark the new first stitch.
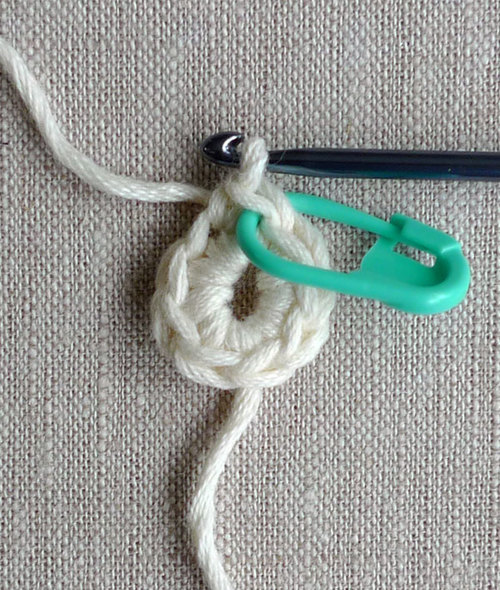
Round 2: Make 2 sc into each stitch. (16 stitches)
Round 3: Make 1 sc into each stitch.
Round 4: *Make 1 sc into next stitch, make 2 sc into next stitch, repeat from * to end of round. (24 stitches)
Round 5: *Make 1 sc into next 2 stitches, make 2 sc into next stitch, repeat from * to end of round. (32 stitches)
Round 6: *Make 1 sc into next 3 stitches, make 2 sc into next stitch, repeat from * to end of round. (40 stitches)
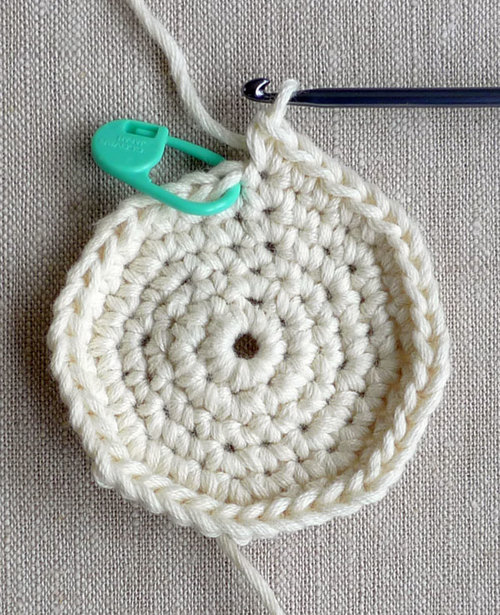
Make 1 sc into each stitch for 8 rounds.
NOTE: Mark the leg of the first stitch of the next round with a piece of scrap yarn.
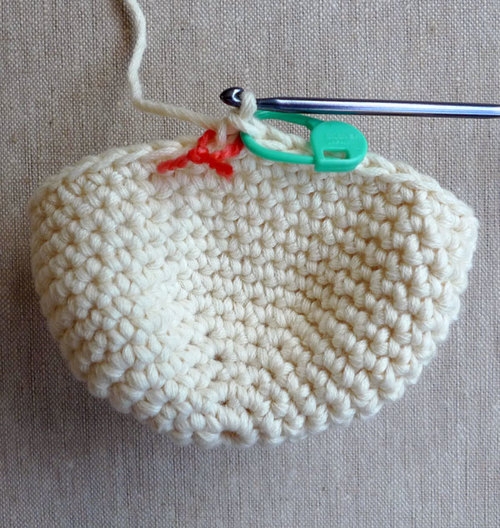
**Next Round: *Make 1 sc into next 3 stitches, make 1 single crochet decrease (sc dec), repeat from * to end of round. (32 stitches)
Next Round: *Make 1 sc into next 2 stitches, make 1 sc dec, repeat from * to end of round. (24 stitches)
Stuff the ball firmly.
Next Round: Make 1 sc into each stitch.
Next Round: *Make 1 sc into next stitch, make 1 sc dec, repeat from * to end of round. (16 stitches)
Top off the stuffing.
Next Round: Make 8 sc dec. (8 stitches)
Cut the yarn and sew the top closed.
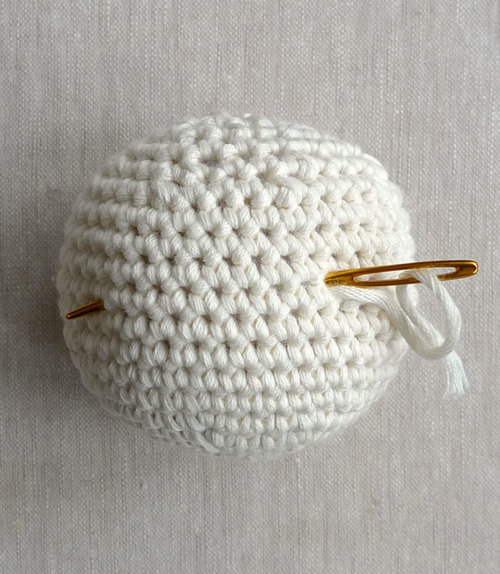
To weave in the ends, thread a tail onto the tapestry needle and insert the needle through the ball, starting from where the tail originates and exiting anywhere.
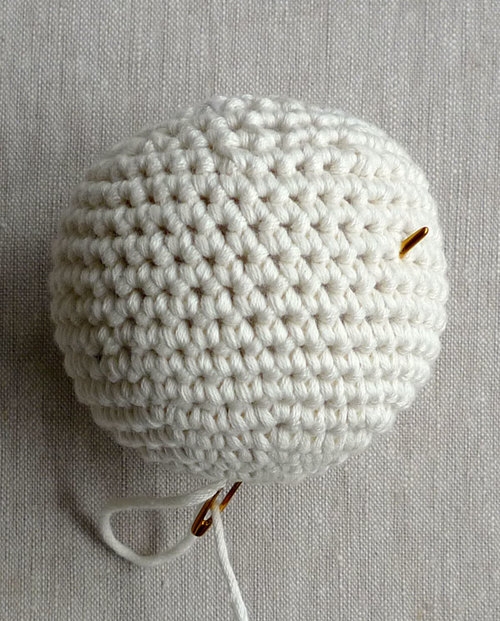
Repeat, inserting the needle back into the ball at the last exit point, and exiting somewhere else.
S Ball
Work Rounds 1-6 of Extra Small Ball pattern (above).
Round 7: Make 1 sc into each stitch.
Round 8: *Make 1 sc into next 4 stitches, make 2 sc into next stitch, repeat from * to end of round. (48 stitches)
Make 1 sc into each stitch for 10 rounds.
NOTE: Mark the leg of the first stitch of the next round with a piece of scrap yarn.
++Next Round: *Make 1 sc into next 4 stitches, make 1 sc dec, repeat from * to end of round. (40 stitches)
Next Round: Make 1 sc into each stitch.
Work from ** of Extra Small Ball pattern.
Medium Ball
Work Rounds 1-8 of Small Ball pattern (above).
Round 9: *Make 1 sc into next 5 stitches, make 2 sc into next stitch, repeat from * to end of round. (56 stitches)
Make 1 sc into each stitch for 12 rounds.
NOTE: Mark the leg of the first stitch of the next round with a piece of scrap yarn.
^^Next Round: *Make 1 sc into next 5 stitches, make 1 sc dec, repeat from * to end of round. (48 stitches)
Work from ++ of Small Ball pattern.
Large Ball
Work Rounds 1-9 of Medium Ball pattern (above).
Round 10: Make 1 sc into each stitch.
Round 11: *Make 1 sc into next 6 stitches, make 2 sc into next stitch, repeat from * to end of round. (64 stitches)
Round 12: *Make 1 sc into next 7 stitches, make 2 sc into next stitch, repeat from * to end of round. (72 stitches)
Make 1 sc into each stitch for 16 rounds. NOTE: Mark the leg of the first stitch of the 13th round with a piece of scrap yarn.
Next Round: *Make 1 sc into next 7 stitches, make 1 sc dec, repeat from * to end of round. (64 stitches)
Next Round: *Make 1 sc into next 6 stitches, make 1 sc dec, repeat from * to end of round. (56 stitches)
Next Round: Make 1 sc into each stitch.
Work from ^^ of Medium Ball pattern.
Cross Stitching
Note: These photos show the cross stitching on the Small Ball.
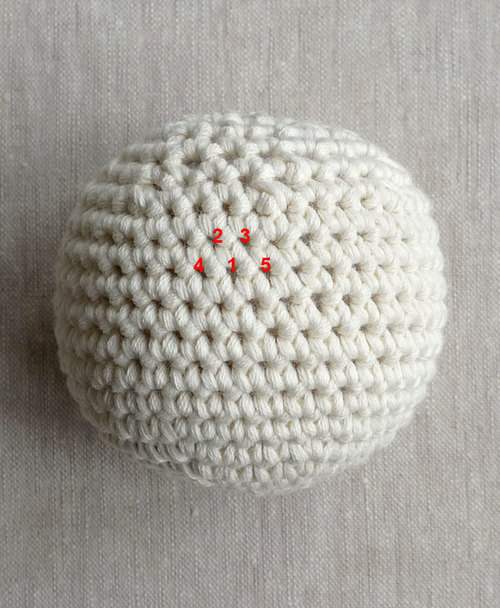
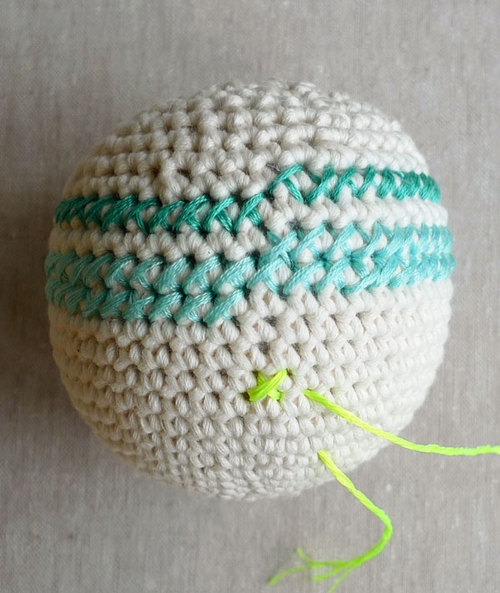
The crocheted fabric forms the grid on which you will cross stitch. The corners of each “square” are located on either side of a single crochet, horizontally, and over one round of single crochet, vertically. This photo illustrates the corners of the cross stitch grid and the order in which the stitches will be formed.
To begin, thread a tapestry needle with a yard and a half of embroidery floss. Insert the needle anywhere into the ball, exiting right below the stitch marked with scrap yarn. This exit point is the bottom right corner of the first cross stitch square.
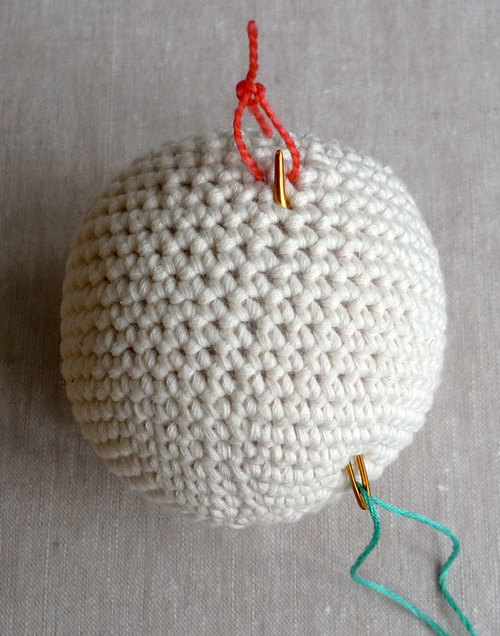
Pull the yarn through, leaving a 3-inch tail.
Insert the needle up one round and over one hole to the left (into the top left corner of the cross stitch square), exiting one hole to the right (the top right corner).
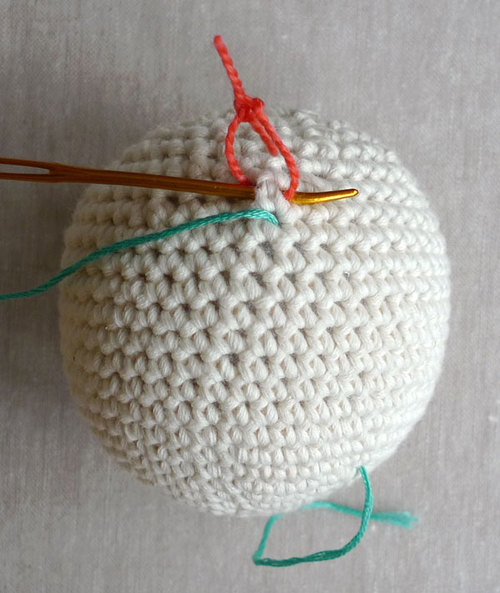
Insert the needle down one round and over one hole to the left (the bottom left corner), exiting two holes to the right (the bottom right corner of the next cross stitch).
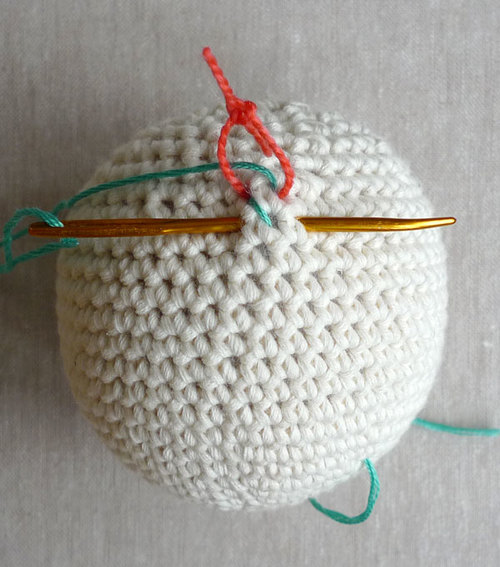
Remove the scrap yarn.
*Insert the needle into top left corner, exiting top right corner.
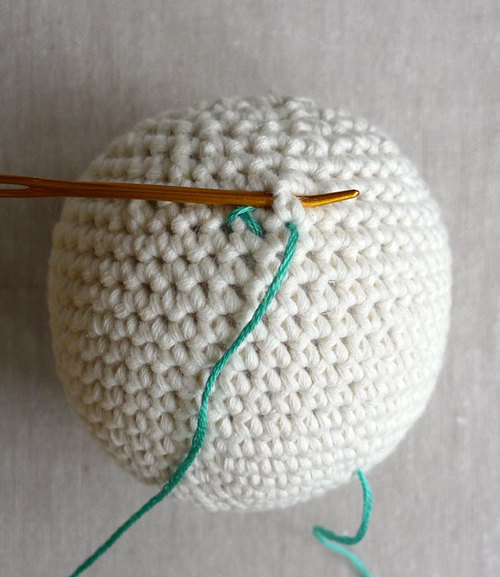
Insert the needle into bottom left corner, exiting two holes to the right (the bottom right corner of the next cross stitch).
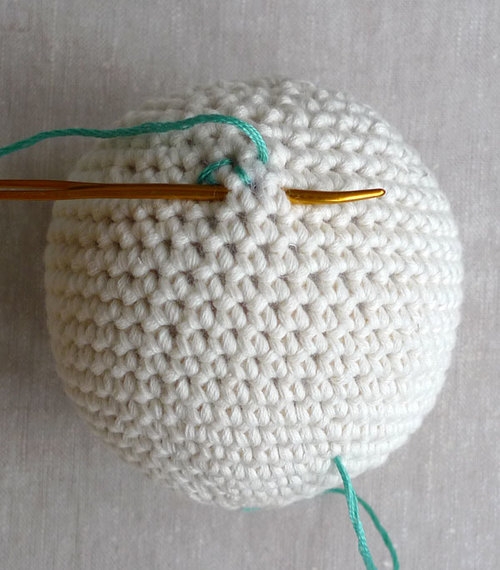
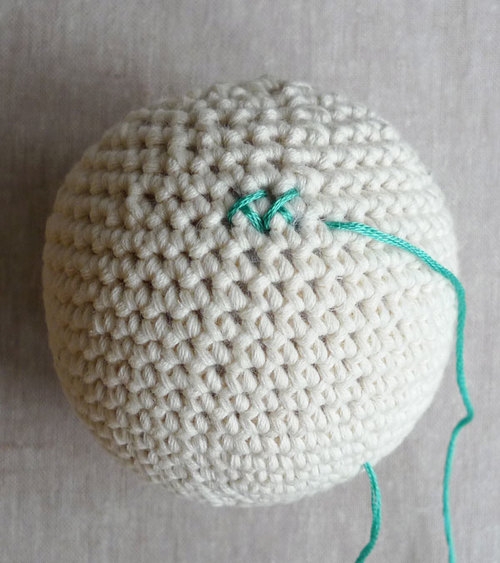
Repeat from * to the end of the stripe (see Where to End and Begin Stripes, below).
Adding New Thread
When a few inches of floss remains, insert the needle into the next place it needs to go and exit through the ball.
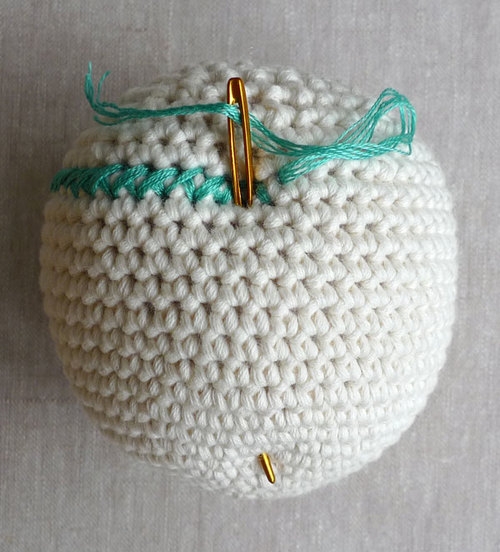
Re-insert the needle through the same hole and exit through the ball somewhere else.
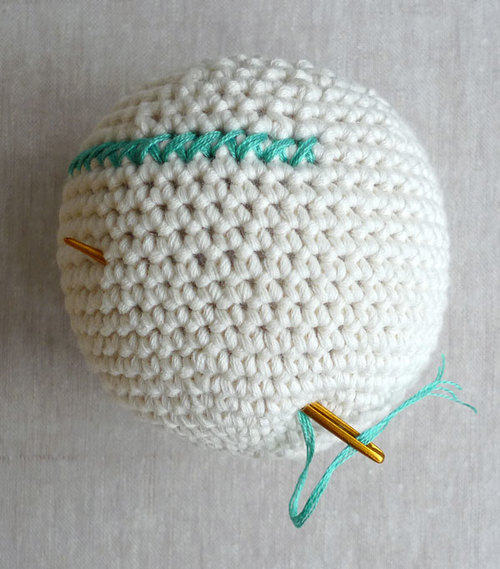
Trim the tail. Start a new thread the same way you started the first one.
Where to End and Begin Stripes
End a single round stripe when the top right corner of the last cross stitch meets the bottom left corner of the first cross stitch.
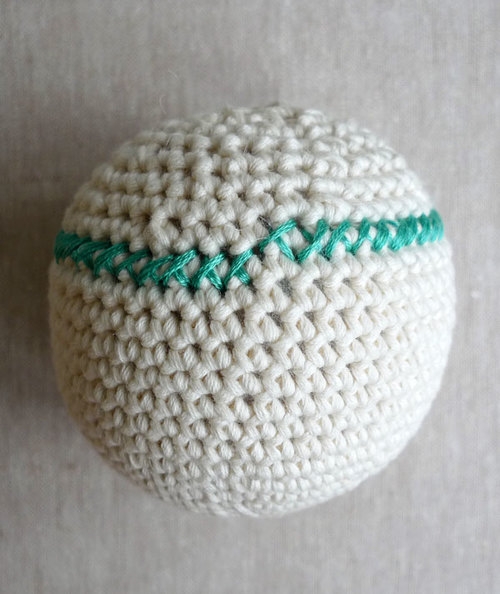
If there is a two-round stripe, end with the last stitch you can make before having a vertical column of 3 cross stitches.
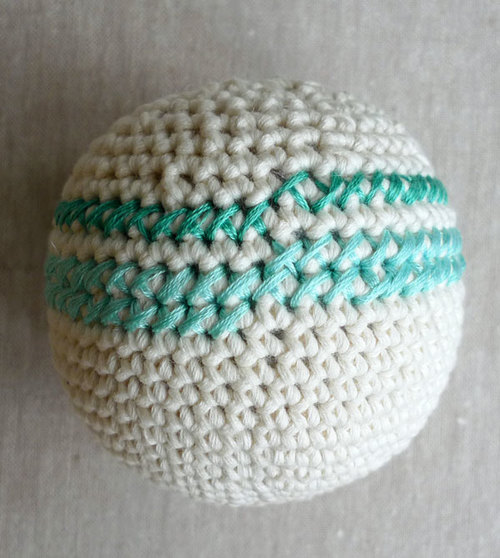
If there is one round of single crochet between stripes, the new color’s top left corner meets the last color’s bottom right corner.
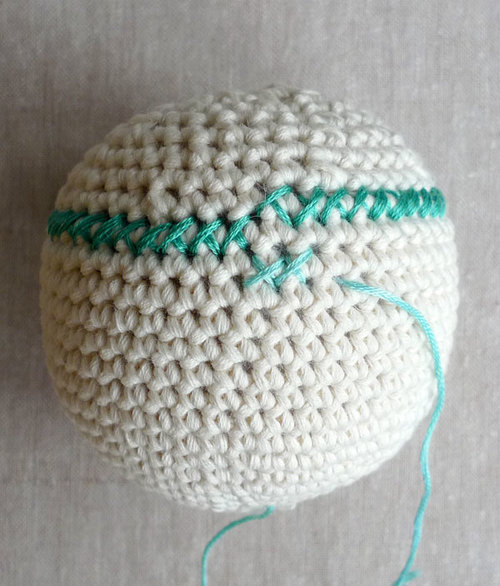
If there is more than one round of single crochet between stripes, make the first cross stitch of the new color so that it lines up below the first cross stitch of the last color.
Stripes
Floss
DMC #958 – Aqua
DMC #964 – Light Blue
DMC #E980 – Neon Yellow
DMC #307 – Yellow
DMC #972 – Light Orange
DMC #740 – Dark Orange
Extra Small Ball
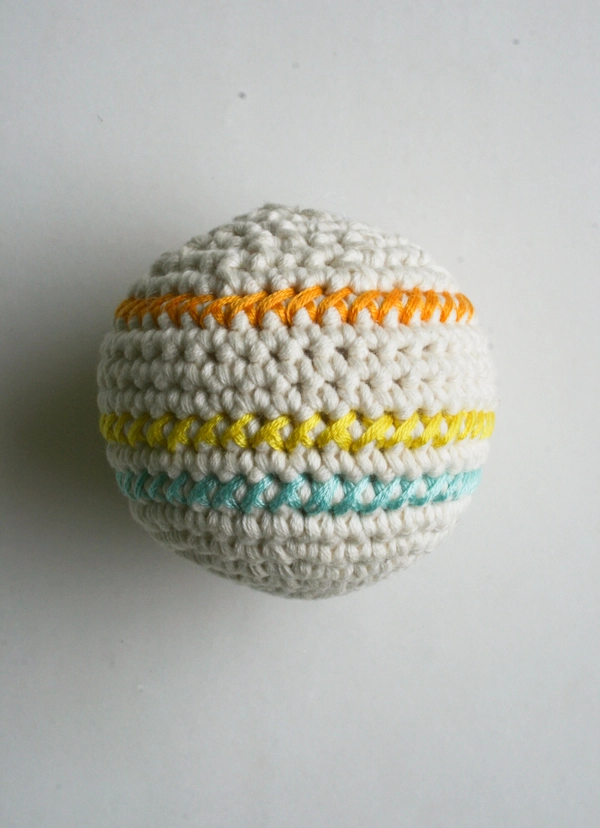
Starting below the stitch marked with scrap yarn…
Cross stitch 1 round of Light Orange.
Skip 3 rounds of single crochet.
Cross stitch 1 round of Yellow.
Skip 1 round of single crochet.
Cross stitch 1 round of Light Blue.
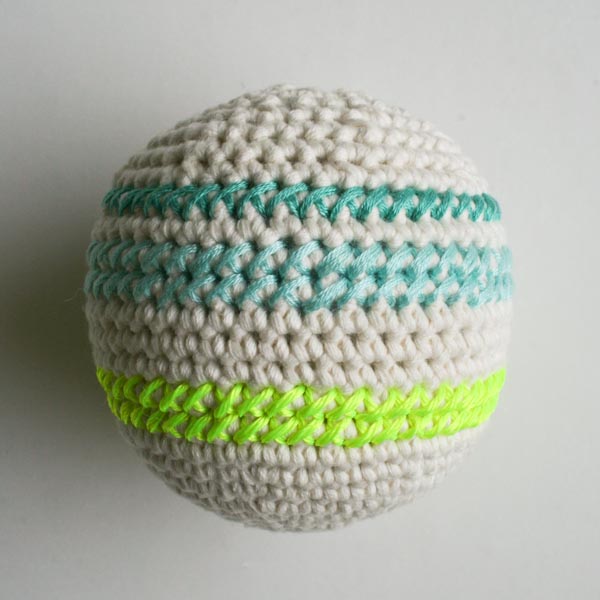
Small Ball
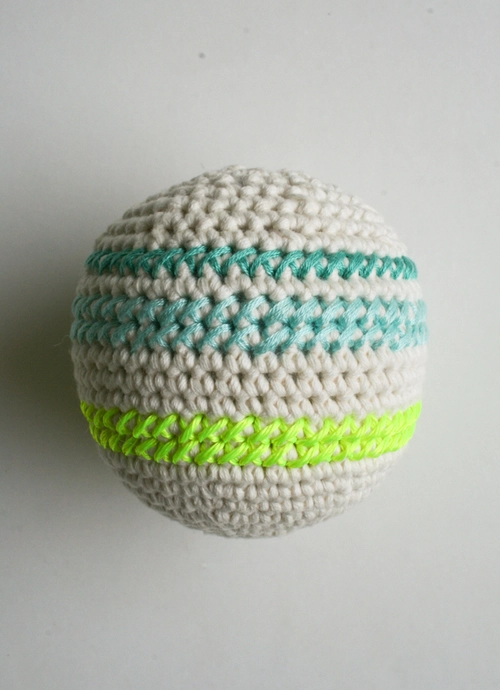
Starting below the stitch marked with scrap yarn…
Cross stitch 1 round of Aqua.
Skip 1 round of single crochet.
Cross stitch 2 rounds of Light Blue.
Skip 3 rounds of single crochet.
Cross stitch 2 rounds of Neon Yellow.
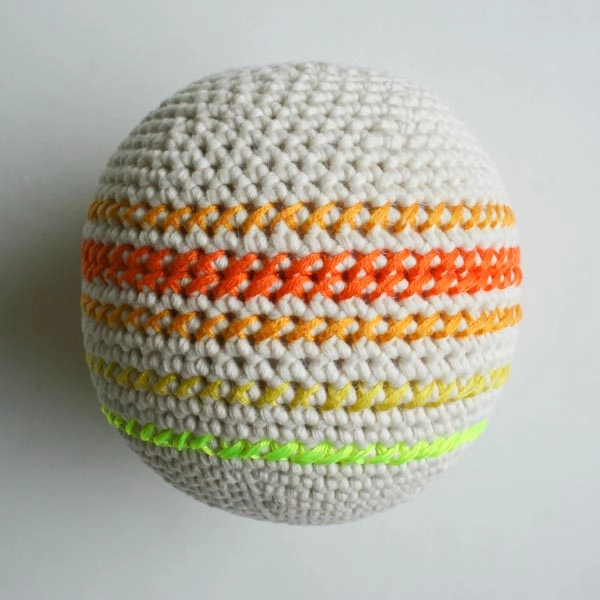
Medium Ball
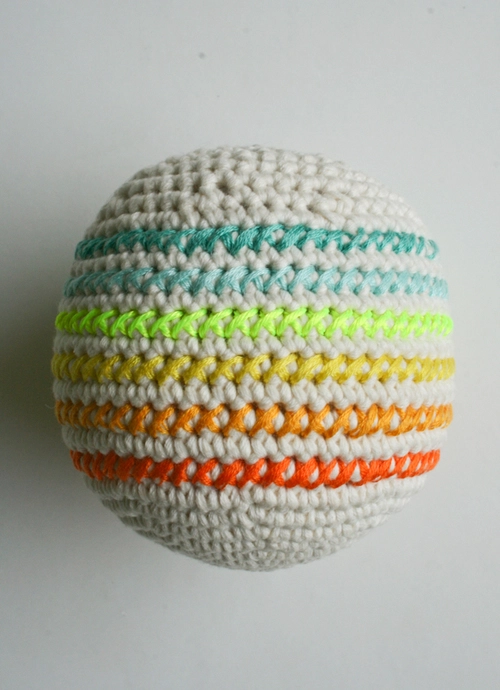
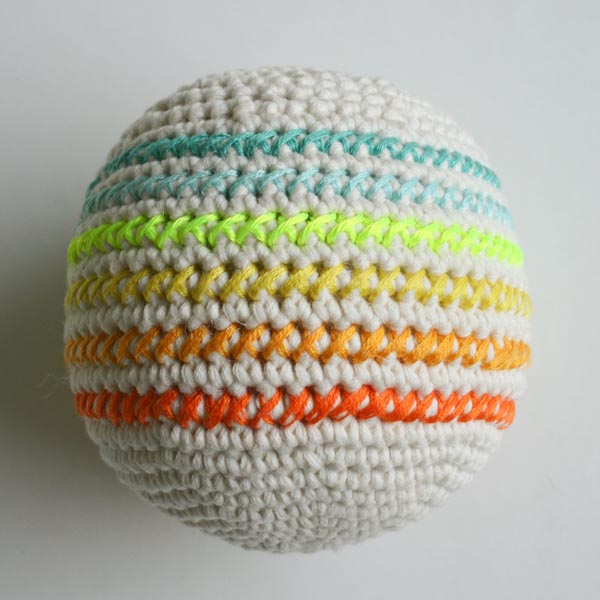
Starting below the stitch marked with scrap yarn…
Cross stitch 1 round of Aqua.
Skip 1 round of single crochet.
Cross stitch 1 round of Light Blue.
Skip 1 round of single crochet.
Cross stitch 1 round of Neon Yellow.
Skip 1 round of single crochet.
Cross stitch 1 round of Yellow.
Skip 1 round of single crochet.
Cross stitch 1 round of Light Orange.
Skip 1 round of single crochet.
Cross stitch 1 round of Dark Orange.
Large Ball
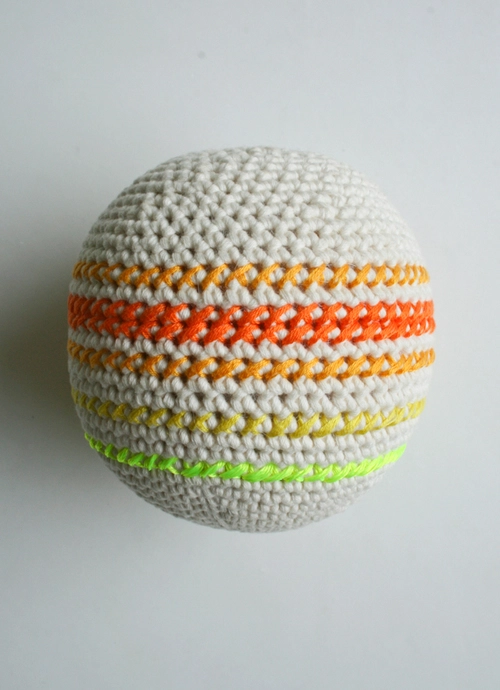
Starting below the stitch marked with scrap yarn…
Cross stitch 1 round of Light Orange.
Skip 1 round of single crochet.
Cross stitch 2 rounds of Dark Orange.
Skip 1 round of single crochet.
Cross stitch 1 round of Light Orange
Skip 2 rounds of single crochet.
Cross stitch 1 round of Yellow.
Skip 2 rounds of single crochet.
Cross stitch 1 round of Neon Yellow.





These are adorable- and so worth brushing up my crochet skills for!
Thank you for sharing yet another awesome tutorial!
-Mauri
How creative! Can't wait to try these.
Will the balls be washable?
How would you recommend washing these? (Asking for my drooly baby!)
I love these! I am an avid crocheter but I am curious why you didn't just crochet a round or two in each color?
These are just the most perfect shapes! Do you have an old hackey-sack tutorial?
thanks for celebrating crochet! It's making a huge comeback and I would LOVE to see much more on the PurlBee!!
cant wait to try these im going to do mine with different colors though
So glad to see more crochet patterns on your site! Thanks for sharing
Hi Jane and Lily,
These balls are hand washable. I would soak them in a sinkful of warm, soapy water, rinse and squeeze them, then put them out to dry in a nice sunny spot!
Thanks for asking!
Whitney
Hi Jana,
You definitely could just crochet the stripes, but I love the look of the cross stitch on the crocheted fabric. I first tried this technique with my Sweet Home Sweet Pillow (http://purlbee.squarespace.com/the-purl-bee/2011/7/24/whits-knits-sweet-home-sweet-pillow.html) and was totally smitten by both the visual effect and the concept!
And, about the hackey-sack, no we don't have a tutorial for that, but this small ball might be a great substitute!
Thanks so much for your questions. Please let us know if you have any more!
Whitney
These are so cute. Someone much cleverer than I could probably figure out how to cross-stitch to make them looke like a softball or baseball.
Such a lovely tutorial – you always do the best job with pictures. I've chosen this as one of my 5 favorite tutorials I found this week. Thanks as always for sharing your expertise.
Tricia
wonderful! thank you! I made some too:
http://zauberflink.blogspot.de/2013/08/hakelballe.html
Lena
Preciosas!!!!!!!!
Thanks for such a great idea! I saw this and immediately decided to teach myself how to crochet (I'm a knitter).
One question – I'm having a hard time figuring out how you "sew up" the circle at the end. I've made two small balls and ended up continuing to make decreases to get the circle smaller. Can you point me in the right direction??
Hi Cookin Itup,
You shouldn't have to continue the decreases to finish the top (although if that's working for you, that's fine too!). I threaded the tail onto a tapestry needle and sewed around the top in a circle twice, pulling the tail tight to close the top gap. It may take a little experimenting to get a neat finish, but it does work!
Thanks so much for asking and please let us know if you have any other questions!
Whitney
These are addorable, I really like them!
This is a great idea. I am from Australia so get mixed up with some terms and s
izing. I am an ameteur crocheter.
How do I make an adjustable loop to commence with
Thank You Yvonne
Hi Yvonne,
You can find our Adjustable Loop Tutorial right here: https://www.purlsoho.com/create/crochet-tutorials/adjustable-loop.html And all of our Crochet Tutorials here: https://www.purlsoho.com/create/crochet-terms-tutorials/ .
I hope this puts you on the right track. Please let us know if you have any other questions and thanks for this one!
Whitney
hiya.
Really loving this project. I am a newbie to crochet and decided to take the plunge but finding that I keep creating holes. My stitches are evenly spaced but not as tight as what yours are. Do you have an idea of how I can stop this from happening?
Hi Ash,
Is it maybe because you are using too big a crochet hook for your yarn (and natural "tension", which is just a word for crocheting a little tight or a little loose)? If you do happen to be a bit of a loose crocheter, then you would need to try a smaller hook.
By the way, the increase section (the last part you work, i.e. the "top" of the ball") does have small holes at the increases, but it doesn't sound like that's what you're talking about…
Please let us know if you have any more questions; thanks for this one; and good luck!
Whitney
My ball dosent really form it's turns into a big circle
Hi Cece,
The form should be quite circular until you work the middle rounds of single crochets without increasing or decreasing. At that point, your circle should start to curl up into more of a ball shape.
Please let us know if you're still having problems and we'll try to work it out! Thanks for your question and good luck!
Whitney
I need to make a ball about twice the size of the medium ball size… 21-22″ in circumference. Is there an easy way to double that pattern?
Hi Wendy,
Basically, each increase round you should add a stitch to the number of stitches between increases. The real variable is how many plain rounds to crochet between increase rounds. As the ball gets bigger you may have to do two and then three plain rounds between increase rounds in order to keep a spherical shape. You may also have to experiment with how many plain rounds to do before you start decreasing.
And, just to finish up, the second half of the ball is the same as the first, only with decreases instead of increases, so keep track of what you do for the increase half so you can reverse it!
Thanks for asking and good luck!
Whitney
I love the idea. As soon as I can get my head around the numbers I’m going to give it a go! Just one question: how do I make 1 sc into 4 stitches etc? Many thanks
Hi Beccy,
Making 1sc (i.e. 1 single crochet) into the next 4 stitches means that you make make 4 single crochets, each one into a stitch from the previous round. In plain English, it means that you’re working without increasing or decreasing.
I hope this clarifies things for you! Please let us know if you have any other questions and thanks for this one!
Whitney
I lead a group of women in doing humanitarian service projects. May I have your permission to share this pattern with them so that we can make balls for underprivileged children?
Hi Vickie-
Sure! As long as you aren’t selling the crocheted balls it isn’t a problem. Good luck with your good works!
Best-
Molly
I was wondering if you’ve thought of slip stitching at the end of your row. For example you complete round two and then join with a slip stitch instead of just continuing around. Using a slip stitch would make the rows even and when you do the cross stitching your row wouldn’t drop down. If that makes sense. Do you think that would work?
Hello Alexandra,
Yes, that would totally work! There would still be a visible join in the main body of the yarn, which is avoided now by making the rows build on each other spirally.
Happy Crocheting!
Alyson
This tutorial is so easy to follow. Thank you! I am making a bunch of the large balls for baby gifts, I just added one thing: I filled a plastic Easter egg with rice, crazy glued it shut and placed it in the stuffing so it rattles. I was thinking of doing some with sand and some with jingle bells too!
I made one of the very small balls today for a very small guy who was delighted with it. Since the beginning side of the ball, on mine, looks so much nicer than the ending/decreasing side of the ball, I was wondering if anyone has tried crocheting two half spheres and then sewing them together. Or even crocheting them together. I guess then they’d have a ridge around the middle. Thank you for the easy to follow pattern!
Hi Karen,
Thank you for the comment! That would create a ridge in the middle of the ball but it could be a nice aesthetic detail. It would definitely be an interesting experiment! If you decide to try it I’d love how to know if it works out well!
Good Luck!
Jake
Hi! I tried my idea. It’s pretty cute. Even with the ridge. It looks like it is intentional design! I crocheted the halves together. (no embroidery on this ball) I think I might like your pattern better but this looks good, too! Thanks for the creative inspiration! I’m going to make some more. It’s play!
What can you fill these with. I’ve tried to fill it with rice but falls out threw the stitches when I move the ball
Hi Sassy,
I filled mine with Poly-Fil stuffing, which you can find right here:
https://www.purlsoho.com/purl/products/item/3022-Fairfield-Poly-Fil
But if you’re thinking you’d like more of a beanbag feeling, I’d try some dried beans!
Thanks for your question and please let us know if you have any others!
Whitney
Just out of curiosity, I want to increase the large ball to make a much bigger one. How to I know when to make a sc crochet round and when to make an increase round to keep going? I just finished up the 7sc, 2 sc increase. But I want to keep going. I’m not and expert at this yet. So I’m curious! Thanks.
Hi, AmMarieN!
Thank you for writing in! Basically, for each increase round you should add a stitch to the number of stitches between increases. The tricky part is deciding how many plain rounds to crochet between increase rounds. As the ball gets bigger you may have to do two and then three plain rounds between increase rounds in order to keep a spherical shape. You may also have to experiment with how many plain rounds to do before you start decreasing.
And, also, the second half of the ball is the same as the first, only with decreases instead of increases, so keep track of what you do for the increase half so you can reverse it.
Please let us know if you have any further questions!
Best,
Kumeko
Lovely! Curious if I could use your Cotton Pure yarn as an alternative? I have a bunch leftover from making wash cloths! Thanks!
Brook
Hi Brook,
Thanks for writing in! What a great idea! You certainly can use Cotton Pure here in place of the Skinny Cotton. Both yarns have a similar gauge so you can follow the pattern as written!
Happy crocheting!
Cassy
Looks really cool. I think I’m going to do the small ones for my 6 cats. They love catching,batting and chasing balls. Thanks for sharing.
Just want to say that I love this tutorial, but—as a nurse-midwife 🙂 — I must take issue with the size chart. I think these balls are in centimeters, not inches. My gauge cannot be that off!
Hi Susan,
Thanks for reaching out! If your balls are coming out larger than ours, I would recommend double checking your gauge! The balls should be crocheted quite firmly, and at a gauge of 5.5 stitches per inch, they should turn out to the size listed. For instance, the extra small ball should be 7.75 inches, and is 40 stitches around at its largest point, which divided by 5.5 stitches per inch turns out to 7.27 inches. After stuffing, it should turn out just right!
I hope that helps, and happy crocheting!
Julianna
My mistake. I was thinking diameter, but your instructions do clearly indicate circumference as the measurement. My apologies.
Susan