Understanding Ease + Selecting Your Size
This tutorial is part of our Beyond Basics series of tutorials. These posts explore the more technical and challenging aspects of knitting, bridging the gap between beginner and intermediate skills. To broaden your knitting horizons, check out these other super helpful tutorials…
What Is Ease?
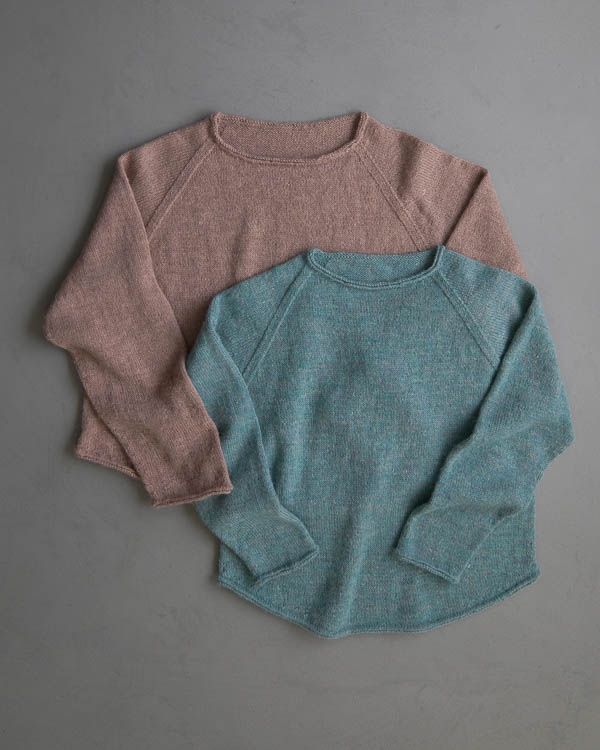
Ease is the way we explain how a garment fits. When we talk about the ease of commercially made garments, we usually use words like oversized, loose, relaxed, tight, and fitted. In the world of hand-made clothing, we have our own jargon: positive ease, zero ease, and negative ease.
Positive Ease
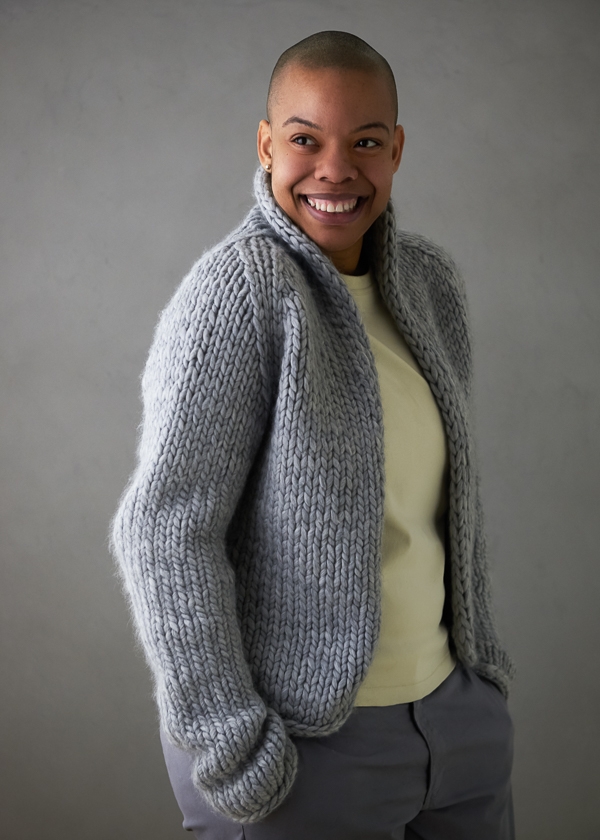
Most sweaters we encounter, whether we knit them ourselves or buy them at a shop, have positive ease. What this means is that the finished dimensions of the garment are larger than the measurements of the person who wears it. Positive ease provides us with a little extra fabric, the space to move in our clothing, and even a little room to grow! How much room depends on the amount of ease. A classic fit is usually two to four inches of ease, while some designs might suggest a lot more for a very relaxed fit. Note that, almost always, ease recommendations are based on the chest circumference of both the garment and the wearer.
Zero Ease
If you’re looking for a form-fitting sweater, zero ease is your friend! With finished measurements that are equal to the wearer’s body, these knits hug your shape. This might not suit all knitters or all garments, but zero ease has its time and place. A silky knit tee, a summer cardigan, or a cute cropped sweater are examples of garments where zero ease might be just right.
Negative Ease
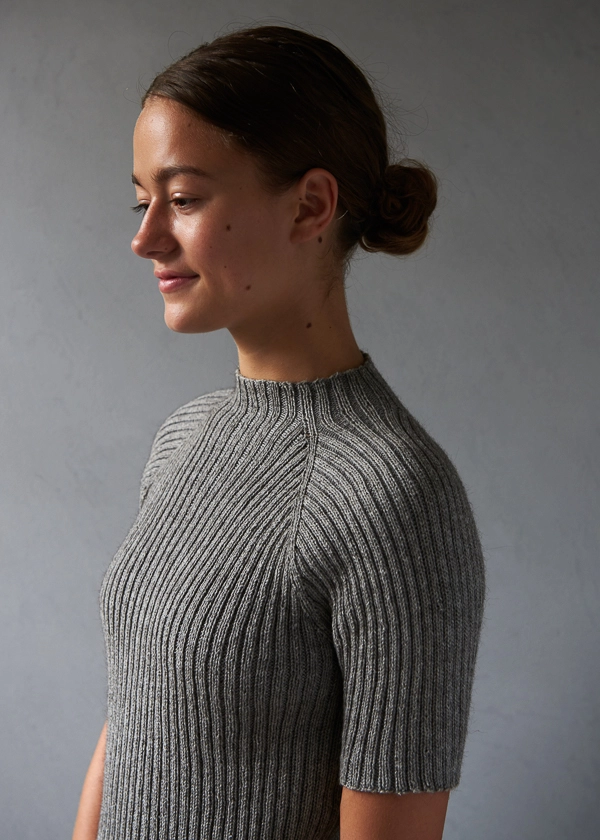
A garment has negative ease when it is meant to stretch when you put it on. A common example is a ribbed sweater, which is smaller off the body than on the body. Like sweaters with zero ease, negative-ease sweaters are form-fitting. Think about your favorite hat that is snug and warm around your head no matter how many times you take it on or off. That’s the magic of negative ease!
Choosing Your Size
By the time a pattern is in your hands, chances are a lot of decisions have already been made about the ease and sizing. Designers often factor ease into their patterns according to how they would like the garment to fit, and they will explain the ease in the pattern sizing. Here’s an example of how that might look…
- Sizes: 38 (42, 46, 50) (54, 58, 62, 66)
- To fit actual chest circumference of approximately 32–34 (36–38, 40–42, 44–46) (48–50, 52–54, 56–58, 60–62) inches with 4–6 inches of ease
- Finished Chest Circumference: 38 (42, 46, 50)(54, 58, 62, 66) inches
And here’s how you interpret that information…
First things first is to know the chest circumference of the person who will wear the sweater. You always take this measurement around the largest part of a person’s chest. Next, you look for the range of “actual chest circumference” measurements that match the wearer’s actual chest circumference. For example, a person with a 45-inch chest would fall in the 44- to 46-inch range, i.e. the fourth size: 50.
To understand why a 45-inch chest wears a 50-inch sweater, think ease! The ease in this example is between 4 and 6 inches, so for a 45-inch chest, the finished sweater will be 50 inches to allow for 5 inches of positive ease.
As you may already know, the beauty of knitting is that you get to decide for yourself how your garment will fit, regardless of the designer’s intentions. A person with a 49-inch chest looking for a closer fit might also choose to knit the fourth size, but the ease would be just 1 inch.
Another Approach
Having trouble imagining how a sweater will fit? A great tip is to find a sweater in your closet that is about the same yarn-weight as the one you’re about to knit and that fits how you want your new sweater to fit. Lay it flat, measure across the chest, double that number for the circumference, then knit the size that has the same final chest circumference as your sweater. This approach bypasses questions of actual measurements and ease, but we tend to use this method to double check the pattern’s recommendations rather than as our sole guide. More data is always better!
Gauge
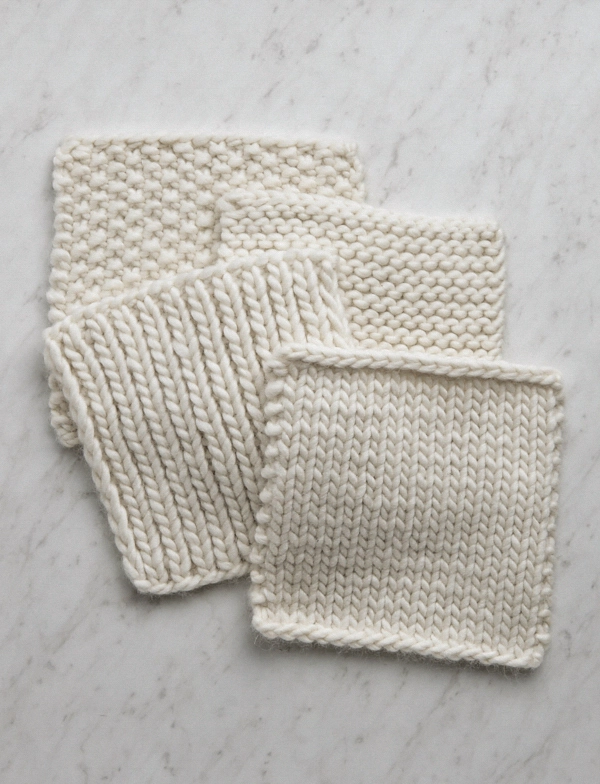
And finally, all of this preparation is for naught if you fail to carefully consider gauge. Nothing is worse than trying on a just-finished sweater to find it doesn’t fit anything like you’d imagined. If you forget to swatch and check your gauge, what should have been a cozy cardigan can easily become uncomfortably snug or entirely too enormous. Let’s explore how just a slight variance in gauge can go very wrong…
A knitter has a 50-inch chest and wants a sweater with zero ease. This sweater pattern has 250 stitches at the chest and the following specifications…
- Gauge: 5 stitches per inch
- Finished Chest Circumference: 50 inches (250 stitches divided by 5 stitches per inch = 50 inches)
What would happen if the knitter’s gauge is just a little too tight? Let’s say just a quarter of a stitch more per inch…
- Gauge: 5.25 stitches per inch
- Finished Chest Circumference: 47.6 inches (250 stitches divided by 5.25 stitches per inch = 47.6 inches)
And what if the knitter’s gauge is too loose, giving them half a stitch less per inch?
- Gauge: 4.5 stitches per inch
- Finished Chest Circumference: 55.5 inches (250 stitches divided by 4.5 stitches per inch = 55.5 inches)
Now, what if the knitter’s gauge is too loose for the pattern, but they like the hand and density of their swatch? How about making a smaller size? The question then becomes what number of stitches around the chest would give the knitter a 50-inch circumference at this new gauge?
- Gauge: 4.5 stitches per inch
- Number of Stitches at Chest: 225 stitches (4.5 stitches per inch x 50 inches, i.e. desired finished chest circumference = 225 stitches)
You would then find the size whose number of chest stitches is closest to 225 and follow that size. Note that, if there are length measurements in the pattern, consider following your actual size’s instruction for that length. For example, if you fit a size 50 but are following instructions for a size 45, when the pattern says to knit for a certain number of inches to the underarms, you may want to follow the size 50’s instruction. Confused about gauge? Our All About Gauge Tutorial has lots of answers!




I have been needing an explanation like this for adjusting patterns to fit to size–thank you so much!
Hi Ashley,
Thanks for reaching out! I am so glad to hear that you find this new tutorial helpful! Please feel free to reach out if you have any questions or comments moving forward!
Warmly,
Gianna
This is VERY helpful. Now I understand and my future sweaters thank you!
This is very helpful, I sort of understood about gauge but this explains it so beautifully and makes it seem so simple. I also understand why the swatch is so important now. I get impatient to start a new project but waiting for a short time can stop you wasting hours of work when the garment doesn’t fit.
Thank you for all the helpful info on your site.
Hi Elaine,
Thanks for reaching out! I am so glad to hear that you enjoyed and found this tutorial helpful! I know it can be so exciting to start a new project but checking your gauge is so important and will insure your finished piece fits! If you haven’t already, I would recommend checking out our other tutorial All About Gauge! It is another excellent resource to use!
Warmly,
Gianna
I’m still struggling with advice about the right way to measure the chest. You—and most pattern-makers— say that you should measure around the fullest part. But Kim McBrien-Evans and Patty Lyons say that the upper-chest measurement, I.e., right under the armpits and not over the boobs, is the one you should use to pick the pattern size. I say this because absolutely every single sweater I make comes out too big for me, despite the fact that it matches the schematic. I would follow the suggestion to measure a favorite sweater and use that number as a guide, but I don’t have a sweater that fits LOL.
Any thoughts about this? I’ve made about 10 sweaters since the pandemic started, and though I love and wear them, they all look like something I might have borrowed from my husband.
Since posting the above, I’ve done a bit more investigation. It seems that Kim and Patty’s recommendation for using the high-chest instead of the full-chest measurement is targeted to pullovers with set-in sleeves, which have to be tailored more to the shoulders than do other types of pullovers, Sorry if I’m confusing anyone. Learning to make a garment that fits my body is taking me a long time.
Hi Liz,
Thanks for reaching out! There are definitely several ways to measure your chest when trying to select your size, and this also depends on the pattern! It is possible that different companies select their sizing in different ways, so for another brand’s pattern you may find you get a better fit by measuring the upper chest while maybe with our patterns you find you get a better fit by measuring around the fullest part of your chest.
Ease is also something to keep in mind! With all of our patterns ease is included so it is something you have to keep in mind when selecting a size. For example our Peaks Pullover offers sizes 33¼ (36, 38¾, 41¼, 44, 46¾, 49¼), to fit actual chest circumference 30–31 (33–34, 35–36, 38–39, 41–42, 43–44, 46–47) inches, with approximately 2–3 inches of ease. So let’s say your chest measures 32″ (measured around the fullest part since that is what we use for our sizing), and if you would like a more fitted garment I would suggest selecting the 1st size: 33¼, since it fits an actual chest circumference of 30–31″ with with approximately 2–3 inches of ease!
I hope this helps, and please let me know if you have any more questions!
Warmly,
Gianna
Hi, this is a great article, butI’m still a little confused as to chest circumference. Is it the measurement under the breast, or including the including the breasts? And, will adding darts make a difference in the fit/look of the garment? Should I even bother with darts? I would really lie a garment that looks good (even great) on me for a change. Thanks
Hi Paulette,
Thanks for reaching out! We label it “Chest Circumference” since many of our pattern are unisex, so if you have breasts then you will want to include them in the chest measurement! Darts can work, but it totally depends on the garment and the pattern you are working on, and adding in darts to a pattern that doesn’t include them already can make things a bit tricky.
I hope this helps and please let me know if you have any more questions!
Warmly,
Gianna
I’m not understanding the sizing at all. How does this equate to a actually sizes (8/10/12/14/etc.)
Hi Dana,
Thanks for reaching out! Is there a specific pattern you are working on so I can assist you with the sizing?
Warmly,
Gianna
I have a question: why in some patterns are the grading (different sizes) indicated in two different parentheses? Is it just to facilitate the visualization or is there any other purpose for that?
Hi Felipe,
Thanks for reaching out! The measurements in the parentheses corresponds directly to the size you will follow in the pattern! If you have a specific pattern in mind and you would like assistance selecting a size I am happy to help!
Warmly,
Gianna
On the incline decline pattern :
Chest : 39 inch
Hips : 41 inch
Since it is on the bias , will it stretch? And should I go to size 42 or the next size
Thank you
Hi Celine,
Thanks for reaching out! This sweater will stretch a bit, it also has quite a bit of wiggle room since it is a cardigan and not a pullover! I think you should be good to go with the size 42, the chest measurements are 34-38 inches with approximately 4–8 inches of ease so the finished chest circumference for that size is 42 inches! But ultimately it depends on the overall look you want. If you would like it a bit of a closer fit then size 42 is perfect, if you would like it a bit roomier then the 47 would be the way to go.
I hope this helps, please let me know if you have any more questions!
Gianna
Thanks for this article. Are there any plans (or any update on the plan) to provide full-bust adjustments for patterns? Particularly given the number of stockinette-based designs, it would be wonderful to have more guidance on that. When I was in your shop a couple years ago, a woman there mentioned that it had come up, but if you’ve posted any updates since, I somehow missed them.
Hi Christi,
Thank you so much for writing to us. We really appreciate that bodies come in all shapes and sizes and share your concern that patterns should be as inclusive as possible. We’re currently in the midst of expanding the size range of all our sweater patterns and are happy to report that many of them now fit chest sizes up to 62-64 inches. We’re steadily working to make sure this is true of all our patterns, and a few patterns we’ve updated are the Classic Crewneck Cardigan and the Twisted Rib Pullover. Please be on the lookout for new updates, and thank you so much for adding your voice to this issue. We’re grateful for your feedback!
Have a great day!
Cat
I am struggling with the number of rows I’m getting in the swatches I’ve knit for the Ridgeline Wrap. My 32 rows are 5 inches instead of 4. I’ve used the suggested size 6 needles and tried size 5. I like the hand of the 6 much better. Will it matter in this pattern with the short rows?
Hi Shelly,
Thanks for reaching out! Have you blocked your swatches? Our pattern gauge is always measured from the post-blocked fabric unless otherwise stated. If you haven’t yet I would suggest blocking and then re-measure the gauge to see if it’s closer to the gauge of the pattern! For more information, I would suggest checking out our wonderful tutorial All About Gauge!
Happy knitting!
Gianna
I have a similar issue, I can never get the gauge to match both the number of row and stitches per swatch. I approached Techknitter and she suggested to start with knitting a bigger (6”) swatch to get make it easier to measure, then trying using 2 different needle sizes (blocked, of course!) to see if I could get closer to gauge.
Hi Erin,
That’s a great tip! We always recommend knitting a 6 x 6 inch swatch so that you can get the most accurate measurement of both row and stitch gauge. On smaller swatches, the edge stitches often have uneven tension, leading to inaccurate measurements. Let us know if this helps, or if you have any other questions!
All the best,
Lili
Looking at the Daily Pullover. Upper chest is 43″ and full bust is 44″. I’m looking at doing the 49 1/4″. Does that give me enough ease? Thanks!
Can’t wait to try this in Linen Quill with the CadyJax KAL.
Hi Diane,
Thanks for writing in! I think that should be a perfect size!
Please let us know how this turns out, happy knitting!
Gianna
How do you apply this to hats.
Hi Guadalupe,
Thanks for writing in. To select your size for a hat, it’s important to keep in mind that hats are almost always designed with negative ease! This is so that they can fit snugly on your head! Therefore, you’ll want to choose a size that has a finished circumference that’s a few inches smaller than your head circumference. Hope this helps!
All the best,
Lili
I want to use a pattern for a friend who is small with a large chest. She wants it with zero ease which is what the pattern calls for. It’s also a cardigan with cables. Would I use the smaller pattern and increase as I knit up toward the top? How would I know where or how often to increase?
Love your tutorial!
Hi Susan,
Thanks for reaching out! It would be helpful for us to see the pattern you are working on, if you can please send the information above along with some clear photos of the pattern details to our team at customerservice@purlsoho.com they can help you further from there!
Happy knitting!
Gianna
I read and re-read the understanding ease/size part of the website. I still don’t understand. I am looking to buy yarn to make the Lightweight Raglan Pullover. I see the beginning of the sizing to say – 32 (36, 40, 44, 48) (52, 56, 60, 64)
To fit actual chest circumference of 28–31 (32– 35, 36–39, 40–43, 44–47) (48–51, 52–55, 56–59, 60–63) inches, with 1–4 inches of ease.
I measure 37 inches. I see 36 or 40 for sizing. If I chose 40 for example, it looks like the second set of numbers to correspond were 36-39. Can you help me figure this out? So confused.
Hi Nora,
Thanks for writing in! That is an excellent question, if your chest measures 37 inches, I would suggest making the size 40! Since that size will fit an actual chest size of 36–39 inches with 1-4 inches of ease!
I hope this helps!
Gianna
My gauge is supposed to be 28 stitches by 33 rows. My sample came out 24 stitches and 31 rows (on size US 4 needles) would it be better to size the pattern down or size the needles down at that point? or even try and knit tighter for the project (I tried to keep it a little looser as I am trying to loosen up my knitting). Any advice would be helpful!
Hi Kenzie,
Thanks for writing in! If your gauge is coming up with fewer stitches than needed to achieve the gauge of the pattern you will want to first and foremost try to get the correct gauge rather than knit a different size. In this case, you will want to go down in needle size and actually will want to knit tighter rather than looser to get the right gauge! For more information, I would suggest checking out our lovely All About Gauge tutorial!
I hope this helps, happy knitting!
Gianna
Hi, thank you for sharing this info about sizing. I’m still nervous because I selected a size that was much too large for my first sweater. I’m planning to make Julie Hoover’s Sayer top next. Which measurement most closely aligns with a women’s 10 or medium? Thank you for your help!
Hi Rae,
Thanks for reaching out. We do not base our sizes on standard clothing sizes, since they are unfortunately anything but standardized! The best way to figure out what size to make is by taking your own measurements and comparing them to the measurements of the pattern. If you found that the previous pattern you made was too loose, you can always select a size that has less positive ease, since it sounds like you’re looking for a garment with a tighter fit!
All the best,
Lili
Thank you for this helpful article. I’d quit making sweaters over the years as the sizing was always so “off” in the end. I’m inspired to try again…. One more question regarding sleeve length. I have shorter arms. Is there a method to determine how to adjust sleeve length as well?
Margaret
Hi Margaret!
Thank you for writing in! We’re so glad to hear you’re feeling inspired to try sweater knitting again. To adjust sleeve length, you can work fewer rows between shaping rounds for a shorter sleeve. Most patterns have an increase round (bottom up sweaters) or a decrease round (top down sweaters) worked every number of rows, so to make a shorter sleeve, you would work fewer even knitting rows between increase or decrease rows, therefore accelerating the slope of the sleeve for a shorter length!
I hope this helps, and happy sweater knitting!
All the best,
Margaret
Hello Purl Soho team
I have a pattern I’m looking at for my first sweater, aaaaah! There are finished bust circumference measurements only, and the pattern specifies that it is designed to ‘fit with 6.25–10“ positive ease’. That seems a lot, so I’m immediately inclined to adjust down.
Do I subtract the ease from the finished bust measurements? If so, should I hit the middle ground and subtract around 8 inches? I imagine I’d have to establish my gauge first before making that call.
Thank you!
Hi Gina!
Thank you for writing in, and congratulations on starting your first sweater! That is so exciting. When determining which size to make, I would suggest measuring your bust circumference to use as a reference against the pattern’s sizes. Most patterns will list the actual chest circumference, as well as each garment size with the ease included for each chest circumference. However, to calculate your perfect size, you can add the lower ease number to your bust measurement for your smallest size, and the highest ease number to your bust measurement for your largest size, and pick a size from the pattern that suits your desired fit! (Because your pattern lists ease as positive ease, you will be adding these numbers to your bust measurement, but if your pattern stated negative ease, you would subtract the ease numbers from your actual bust measurement.) For example, if you have a bust measurement of 40″, you could knit a sweater size with a finished chest circumference of 46.25″-50″ (including ease). If you prefer a tighter fit, you can choose the size closest to 46.25″ in the pattern, but if you prefer a larger fit, you can choose the size closest to 50″ in the pattern!
I hope this helps you narrow down which size to cast on, and happy knitting!
All the best,
Margaret
What about measuring for hips? I’m a classic pear-shape, with hips that are larger than my bust. I’d like to knit your adult pullover but it’s a pretty straight fit from hips to bust. Would it work to cast on enough stitches to fit my hips with enough ease (it’s knit bottom up), and gradually decrease so it’s not gigantic around my bust? Or would that ruin the line of the pattern? If you think that would work, any guidelines for how often/where to decrease?
Hi Anne,
Thanks for reaching out. Your idea is perfect and exactly what I would recommend! For a sweater with more room around the hips than the chest, you can cast on more stitches and gradually decrease as you knit the body until you’re back to the original number of stitches indicated for your size. In terms of placing the decrease stitches, I’d recommend working 2 at each side of the body (so 4 total per decrease round) every couple of rounds. This will make a neat “seam” on either side of the sweater!
All the best,
Lili
Please recommend the amount of ease required on children’s knitted garments. Thank you.
Hi Elise,
Thanks for writing in! The amount of ease really depends on the pattern itself. Some patterns are designed to be more close-fitting, while others are designed to be looser. If you have a pattern in mind, I’d recommend taking a look at the schematics or measurements to see how the designer recommends that it fits!
All the best,
Lili
Everything you said makes perfect sense . Im still having trouble though. I have a pattern that says “hown in size 44 in with approximately 6 in of ease”. Does that mean that the size 44 already includes 6 in of ease? Or, does it mean that I need to size up the size 44 to a size 60 to get the ease?
Hi Kathy,
Thanks for writing in! That means that if your chest circumference is 38 inches, then size 44 will fit with 6 inches of ease. Let me know if that makes more sense!
All the best,
Lili
Hello,
My pattern says “shown in size 44″ with approximately 6 inches of ease.” Does this mean they knit the 44 +6 so a 50 , or
R that the ease is already included in the size 44 pattern.
I knit the 4 but it seems to not be like the picture I think I need to rip it out and do it with another size.
Hi Kathy,
This means that the sample shown is 44″ and the model or person wearing it has a 38″ bust circumference! This equals exactly 6″ of positive ease. I hope this helps!
Warmly,
Gavriella