Sewing on Single Fold Binding

Binding is the last step in making a quilt. Whether you use premade bias tape or make your own, here is how to sew it on!

Trim the ends of the bias strip to at a 90-degree angle.
Open one side of the bias tape. Lay the quilt right side up. Starting along one of the straight sides of the blanket (not in a corner) and with the bias tape wrong side up, pin the open edge of the tape to the raw edge of the quilt.

When you get to a corner, fold the binding strip on top of itself to make a triangle at the corner as shown above. This little triangle will be essential for making mitered corners in the next steps.

Pin the binding around all 4 sides of the quilt in this manner, leaving a tail at the end of the strip un-pinned as shown above.
Starting two inches from one end of the bias, sew the binding to the quilt with a ¼-inch seam allowance, stopping your seams ¼ inch before each corner and then starting the next seam ¼ inch after the corner.
Continue to sew around all 4 sides until you reach the point where the beginning of the binding overlaps the end of the binding. You should have about a 4-inch gap.
To sew down the ends, fold the extra length of both ends over so that the creases of each end meet in the middle of the gap as shown above. Press flat.
Sew the two ends of the binding together at this pressed crease and trim the seam allowance to ¼ inch. Press to one side and sew across the gap with a ¼-inch seam allowance.

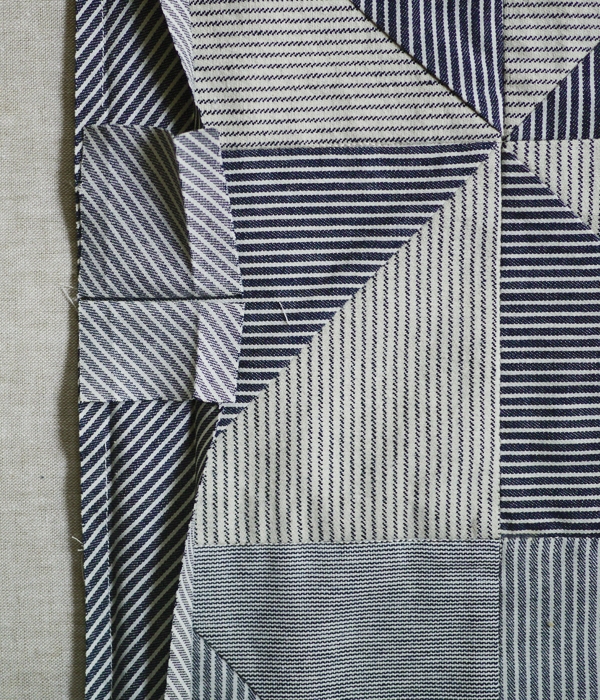
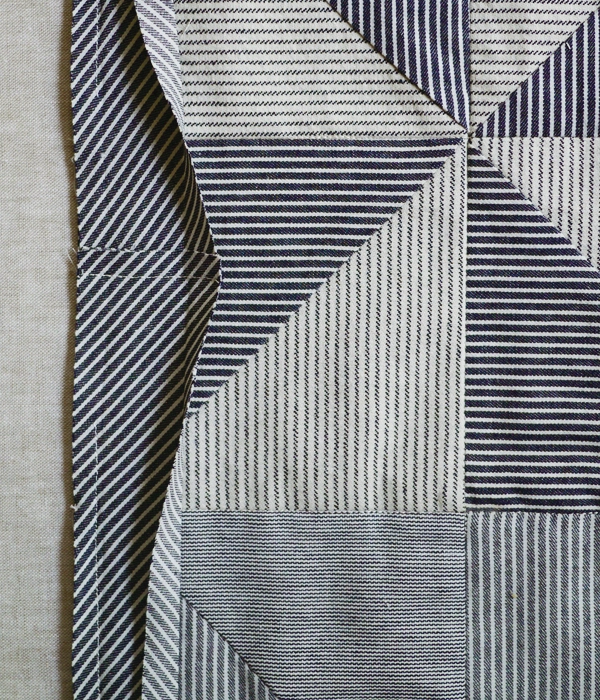
Now flip the quilt so that the back side is facing up. Fold the binding over the raw edge of the quilt and using pins or binding clips, secure the binding around all four sides.
When you reach the corners, miter them as shown above. They should fold easily into place.
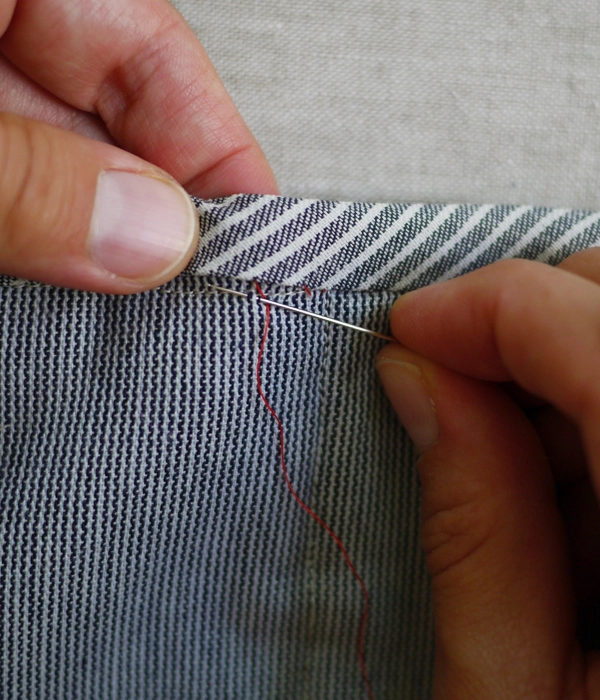
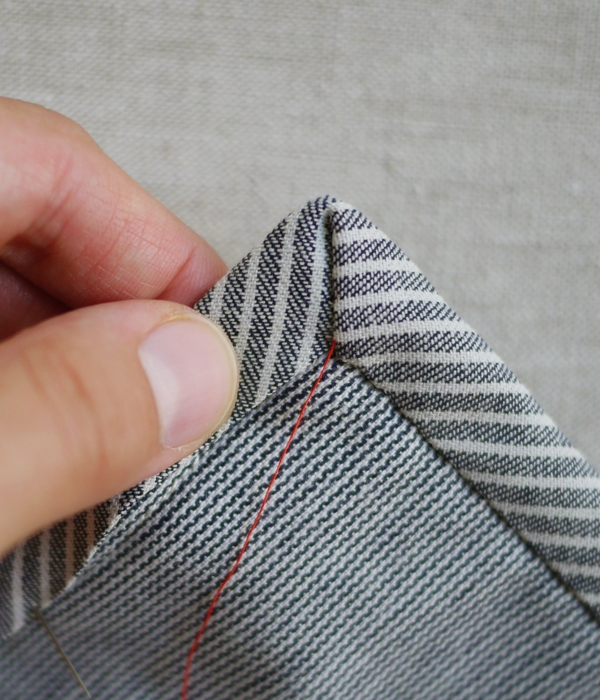
Sew the binding to the back of the quilt using a slip stitch. (Here I use red thread to make the stitch clearer, but you will want to use a thread color that blends with your fabric.)
First, thread a needle and tie a knot at the end of the thread.

Insert the needle through the bottom crease of the binding (leaving the knot tucked under the fold); pick up about ¼-inch of fabric, as shown above.
Then take a tiny stitch from the quilt-back directly below the spot where the needle exited the binding.
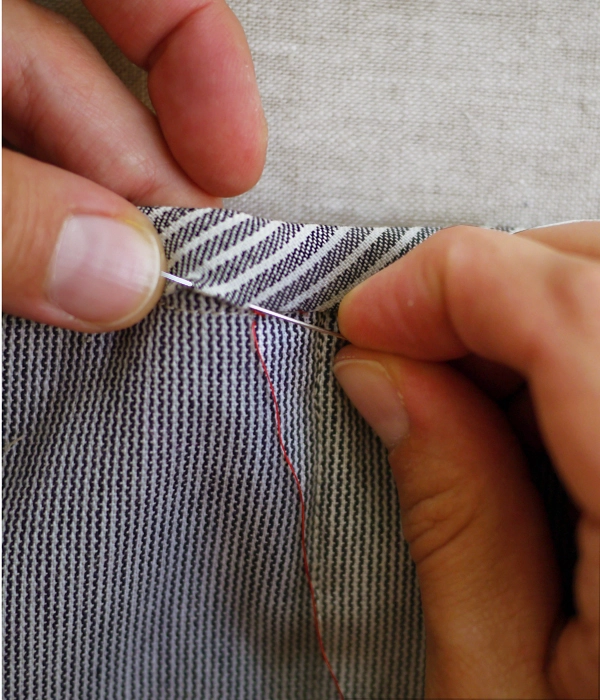
Travel back through the binding, inserting the needle directly above the spot where you exited the backing.
Continue in this manner along all four sides.
Sew each corner into place with a few tacking stitches.
Once you have sewn around all four sides, you’re done. Turn your quilt over and admire all your hard work!


When I started my binding I had not seen your instructions yet….I goofed!! Now I will try to remove my stitches and hope I can salvage an inch or so on the beginning end and the ending end, then fold, press and sew both ends together with a slight space in between each end….How will I know if it will all come together right…I’m so afraid once it’s been trimmed at the quarter inch line…I won’t have anything to work with if this doesn’t turn out….Help!!
Hi Patricia,
Thanks for writing in and I’m so glad you found our tutorial. It is true that when you cut the fabric to a 1/4″ you can’t go back, but in my experience it is best to think twice and cut once. I think it’s a good idea to pin everything into place as it would be sewn and make sure that everything is correct and in line. This way you’ll know how the binding will turn out. Best of luck!
-Adam
Love these tutorials. I have had difficulties attaching biais to a tight curve. I ended up using tiny gathering stitches (like you do for fitting a sleeve) to absorb fullness. Your woo blanket model is curved. Any tips?
Hi Helen,
Thanks for writing in! Attaching bias to rounded corners can be quite a challenge. I will say that the best way to so it is to ease it on in a similar way to fitting sleeves. I would say to be sure to use plenty of pins and go slowly being sure not to stretch the bias tape and you should be good!
Happy sewing!
Cassy