Reading A Knitting Pattern
This tutorial is part of our Beyond Basics series of tutorials. These posts explore the more technical and challenging aspects of knitting, bridging the gap between beginner and intermediate skills. To broaden your knitting horizons, check out these other super helpful tutorials…
You’ve mastered the basics of knitting and are finally casting on, knitting, purling, and binding off with confidence. The next step? Knitting your first project from a pattern! At first glance a knitting pattern, with all its abbreviations and symbols, might look like a complicated math problem, but it’s not really! Let’s dispel the mystery…
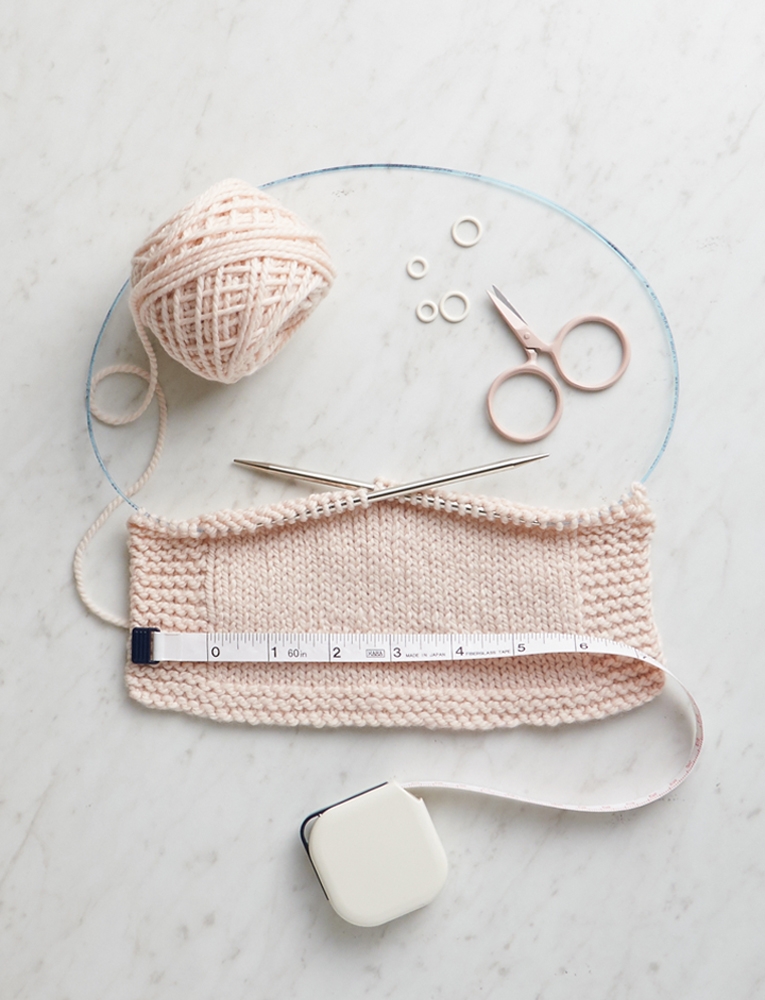
Materials + Gauge
Just like gathering ingredients before cooking a meal, you’ll want to make sure you have everything you need before you cast on, starting with the yarn! In the United States this recommendation is typically listed as the number of skeins or yards required. However, international designers often recommend the amount of yarn you’ll need by weight in grams. If the pattern offers a range of sizes, you’ll want to be sure you follow the recommendation for the size you intend to make (see the Sizes section, below, for more information about that!).
An important note here is that a pattern’s yardages and needle sizes are just recommendations, and you may need more or less yarn or a different needle size, depending on the accuracy of your gauge and how you knit to achieve it. Our All About Gauge Tutorial explains everything you need to know about finding the perfect needle size for your pattern’s particular gauge.
Sizes
If you’re knitting something with a range of sizes, like a hat or garment, the pattern includes instructions for the full range of sizes, rather than for just each individual size. Instructions for the smallest size will always appear first, followed by a set of parentheses inside which is each subsequent size. For example, if your pattern has sizes Small, Medium, and Large, instructions will look something like…
2 (3, 4) skeins of Purl Soho’s Worsted Twist
… and you ‘ll know that for a size Small you’ll need 2 skeins, 3 skeins for a Medium, and 4 for a Large. This applies to every instruction in the pattern: the number of stitches to cast on, the finished measurements, everything!
Knitters often find it helpful to circle or highlight their size’s instructions before beginning. Sometimes there might be a zero or a hyphen for a particular size’s instruction. This simply means that this instruction doesn’t apply to the size you are making and you can move on to the next instructions.
Abbreviations + Terms
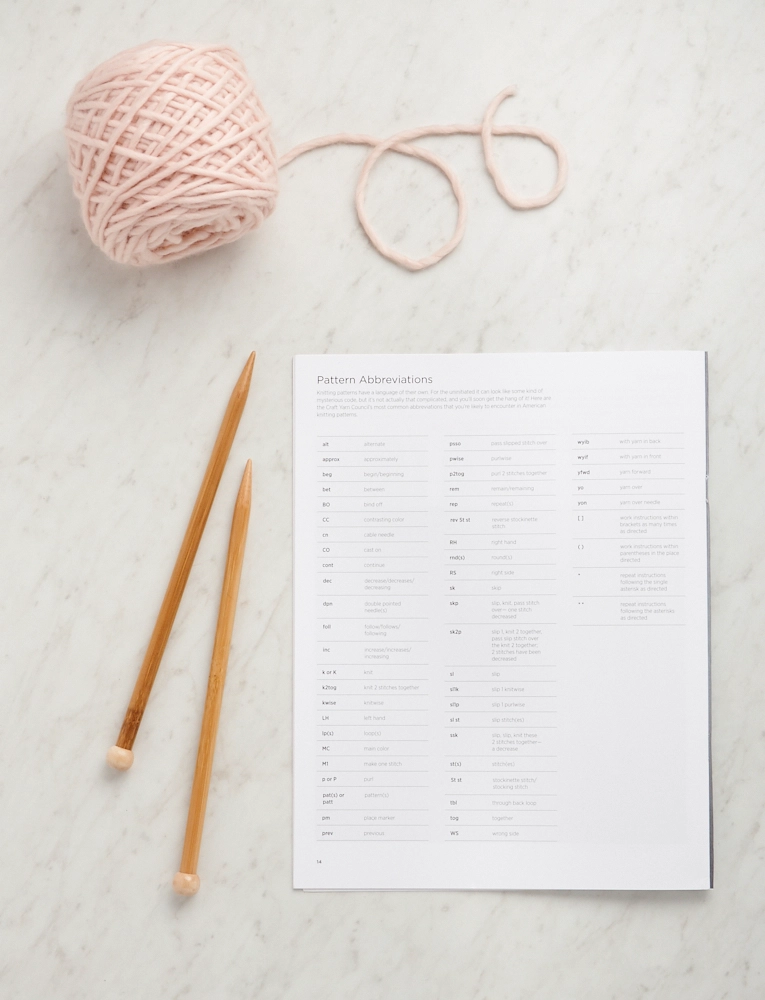
Designers and knitters have a whole dictionary of agreed-upon abbreviations and terms that, in the end, make writing and reading patterns easier. Some abbreviations are straightforward, like using ‘k’ for knit and ‘p’ for purl, but others, like ‘k2tog tbl’, can really get your head in a twist. Our Knitting Abbreviations + Terms page is a treasure trove of information, with all of the most common knitting abbreviations in one place, as well as links to tutorials to help you learn the trickier ones!
Patterns that use particularly unusual or specific techniques will include a section titled something like Notes or Special Instructions. It helps to review these explanations before casting on. Designers are knitters, too, and they do their best to provide you with helpful tips to set you up for success!
Asterisks, Brackets + Parentheses
Knitting employs a lot of the same methods as algebra formulas for shortening lengthy instructions, but that doesn’t mean you’ll need a calculator! Asterisks, brackets, and parentheses break up a row of knitting into bite-sized pieces and indicate how many times a particular sequence should be repeated.
Asterisks
Asterisks indicate the beginning of a stitch sequence. Patterns often ask you to return to an asterisk in order to repeat the sequence until an indicated place in the pattern (often to the end of the row, round, or next marker, and sometimes to a certain number of stitches before that point) . For example…
Row 1: K2tog, *p1, k1, repeat from * to end of row.
…means to knit two together, purl one stitch, knit one stitch, then to return to the asterisk and p1, k1 over and over until the end of the row, ending with a k1.
And to make it one step more complicated…
Row 1: K2tog, *p1, k1, repeat from * to last 3 stitches, p1, k2tog.
For this row, you would knit two together, then purl 1, knit 1 over and over until there are 3 stitches on the right needle (ending with a knit stitch!), then you would purl 1, then knit 2 together to finish the row.
Brackets
Brackets function a lot like asterisks, indicating a section of knitting to repeat. In many patterns, and definitely in Purl Soho patterns, brackets are used when you repeat a sequence of stitches a specific number of times (as opposed to asterisks, which repeat until a certain point). For example…
Row 1: [Slip 1, p1] 3 times, knit to end of row.
… means to slip 1, purl 1, slip 1, purl 1, slip 1, purl 1, then knit to the end of the row.
We also use brackets to indicate the number of stitches you should have at the end of a row or round, especially if the count has changed because of increases or decreases. For example…
Round 1: *K4, k2tog, repeat from * to end of round. [20, (28, 36, 44) stitches remain]
Note that the stitch counts are in parentheses to indicate four different sizes!
Parentheses
In addition to indicating different sizes, parentheses also specify a sequence of stitches to repeat inside of a larger repeat. Huh? Here’s an example…
[(p1, k1) 2 times, k2tog] 3 times
This means to purl 1, knit 1 two times (p1, k1, p1, k1), then to knit 2 together, and then to repeat that whole thing two more times. So the entire instruction is..
(p1, k1, p1, k1), knit 2 together
(p1, k1, p1, k1), knit 2 together
(p1, k1, p1, k1), knit 2 together
As patterns get more complicated, asterisks, parentheses, and brackets may be used all together in much longer sequences. See if you can figure this out…
Row 1: [(K1, p2, k1) 2 times, k1, *p1, k2, repeat from * to 1 stitch before next marker, slip 1, slip marker] 4 times.
Let’s start at the beginning. To (k1, p2, k1) 2 times, you k1, p2, k1, then do it again: k1, p2, k1. Next is a “k1.” It’s not inside parentheses and doesn’t follow an asterisk, so you just knit 1. The next part reads *p1, k2, repeat from * to 1 stitch before next marker. This means to repeat the stitch pattern following the asterisk until you reach one stitch before the next stitch marker. Let’s say it takes two repeats to reach 1 stitch before the next marker, so you p1, k2, p1, k2. With the 1 stitch left before the marker, you slip 1, then slip the marker. But you’re not done yet!
The sequence you just completed is contained within brackets, and, as the final part of the instructions indicates, this bracketed section has to be completed four times total. So, you return to the beginning and repeat the entire sequence three more times, and then you’re done!
Here’s a breakdown of the entire row written out in long form…
K1, p2, k1, k1, p2, k1, k1, p1, k2, p1, k2, slip 1, slip marker
K1, p2, k1, k1, p2, k1, k1, p1, k2, p1, k2, slip 1, slip marker
K1, p2, k1, k1, p2, k1, k1, p1, k2, p1, k2, slip 1, slip marker
K1, p2, k1, k1, p2, k1, k1, p1, k2, p1, k2, slip 1, slip marker
See how it’s simpler than it looks? Well, if not yet, you will! Hopefully this exercise has illuminated a few things about knitting patterns for you. Note that many beginners write out parts of their patterns in long form until they get used to reading them, but as symbols become more familiar, knitters learn to appreciate how they shorten long-winded sequences into repeatable combinations of simple stitches. We hope you’re well on the path to becoming one of those knitters!


Thanks…enhanced my understanding.
Very helpful! I’m French so this article is great for me 😀 thank you
I’m doing the twisted rib hat pattern and I can’t get the set up row to come out right. It seems to me that the numbers don’t add up. Are there revisions to this pattern? If so could you send them to me. Thanks for your time
Hi Chiquieta,
Thanks for reaching out! The pattern should be accurate and we haven’t made any revisions, but I am happy to help! What seems to be the problem you are encountering?
Warmly,
Gianna
Hi there –
In the photo there is a print out of Pattern Abbreviations, is this print out available on your site? It would be so helpful.
Thank you –
Annie
Hi Annie,
Thanks for reaching out! The photo in the pattern is included in our lear to knit patterns and not as a separate PDF. However, we do have a page on our site with all of the abbreviations that you can easily print out: Knitting Abbreviations + Terms!
I hope this helps, happy knitting!
Gianna
What does it mean when there is a hyphen or dash in the instructions, such as k80(85, -, -, 105)?
Hi Jodi,
Thanks for reaching out! When you see a dash (-) appear in place of your size in the pattern that simply means you will omit that instruction and move on to the next set of instructions in the pattern!
I hope this helps, happy knitting!
Gianna
So, so, SO incredibly helpful. Thank you all to pieces.
Thank you very much. Answered my question quite nicely.
Can you assist with the following
Yfwd ( sl 1, K1, psso) twice
Hi Jacqueline!
Thank you for your question. While I’m not sure the pattern for context of this instruction, “Yfwd ( sl 1, K1, psso) twice” means that you will move the yarn in front of your needles, slip one stitch, knit the next stitch, and pass the slipped stitch over the knit stitch on your right needle. Then, you will repeat that process again by slipping the next stitch on your left needle, knitting the following stitch, and passing the slipped stitch over the knit stitch on your right needle. If you would like to see how to slip a stitch over another one, we demonstrate this in our Basic Bind Off tutorial!
I hope this helps, and happy knitting!
All the best,
Margaret
Hello Margaret, thank you for your reply. This confirms that when I was placing Yfwd twice is actually incorrect. Do the Yfwd only once.
Thanks for all of the helpful information.I am looking for help with just a small partof the instructions to knit a ladies vest.Is there an EMail address that I may use to contact you for help in exlaining it to me…have no “knitters” in my circle to ask for help. Would appreciate help.Thank you. Marian
Hi Marian,
Thanks for reaching out. The best way to contact us would either be by posting your question here, or by sending an email to customerservice@purlsoho.com. We can help you out further once we know your question!
All the best,
Lili
This was so helpful, however, I have a question. The pattern I am working says
“Repeat rows 3 and 4 8 (10) times more. 38 (42) sts.”
I understand the repeat part, and that the parenthesis represent the number of stitches for the size of the pattern, but what does that last part mean, 38/42 stitches? What should be left on my needles at that point?
Hi Katie,
Thanks for writing in! The stitch count in parentheses also applies to the larger size of the pattern. If you’re making the smaller size, then you should have 38 stitches at this point, and if you’re making the larger size, then you should have 42 stitches. Hope this helps clarify things!
All the best,
Lili
Hi there what does slip one mean? Is it a kind of stitch?
Hi Elaine,
Thanks for reaching out! To slip a stitch, all you need to do is transfer the stitch from the left needle to the right needle (without knitting or purling it). There are a few specifications that you’ll often see accompanying instructions to slip a stitch, which I’ll detail below:
Purlwise means to insert your needle into the stitch as if you were going to purl it, but instead of purling, just transfer it to the other needle.
Knitwise means to insert your needle into the stitch as if you were going to knit it, but instead of knitting, just transfer it to the other needle.
With yarn in front (wyif) means to hold your working yarn in front of the work (like you would when purling) while you slip the stitch.
With yarn in back (wyib) means to hold your working yarn in back of the work (like you would when knitting) while you slip the stitch.
I hope this helps, and please let me know if you have any other questions!
All the best,
Lili
I have a question regarding a pattern. I don’t see where to post a question.
Hi Cherise,
Thanks for reaching out! You’re welcome to ask a question by posting in the comment section like this. You can also reach out to us by email at customerservice@purlsoho.com.
All the best,
Lili
My baby sweater pattern finishes the sleeves with “Work 2 rows in st st with spare yarn. (This will be unpicked when sts are sewn into place.)” .
Then to make up work, it says, “Join shoulder and sleeve seams. Sew sleeve top into armhole, st by st with back stitch on right side of work, unpicking spare yarn as st are sewn into place.”
What could this possibly mean? Unpicking spare yarn? Anybody? Can you help?
Hi Carol,
Thanks for reaching out! I believe that this pattern means that the scrap yarn is being used as a placeholder to keep the live stitches from unraveling while you work on another part of the sweater. When you’re sewing the sleeve top into the armhole, you can carefully undo and remove (“unpick”) the scrap yarn so that it’s no longer in the sweater. The live stitches should be able to be secured through the sewing process!
All the best,
Lili
I am ok following a pattern until I start the shaping when line by line instructions are not given. E.g. Continuing pattern k2tog at beginning of each row and castoff 2 at the end of each row. I am completely stuck! How do I know at what part of the pattern I start each row?
Hi Ann,
Thanks for reaching out, and that’s a very reasonable thing to get confused with! When I follow patterns like this, I like to write out each row individually and make note of exactly what things I need to do when. After having converted the instructions to row-by-row instructions before beginning them, I can start knitting with confidence!
All the best,
Lili