Embroidery: Two-Color Techniques
One of my all time favorite craft books is The Constance Howard Book of Stitches. I find it a never ending inspiration. All of the pictures in the book are in black and white but they show the most creative embroidery stitches and opened me up to the idea of two (or more) color embroidery, which is something I’d never really thought of before.
If you want to experiment with two color embroidery you can follow along with the charts below. Here are some tips on reading the charts:
- All stitches are worked from the right side of the fabric.
- The odd numbers represent a needle exit point and the even numbers represent the entry point.
- The red numbers represent the first thread color and the brown numbers indicate the second thread color.
If all of this doesn’t make much sense try following along with the first stitch below, Basic Weaving, where I explain the steps in full detail. If you need a refresher course on basic embroidery click here.
Basketweaving
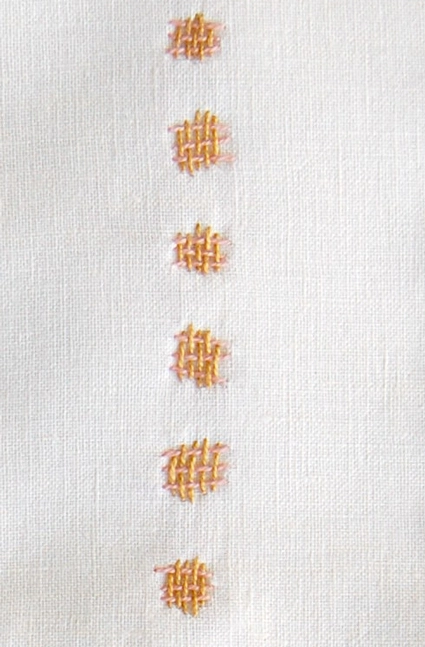
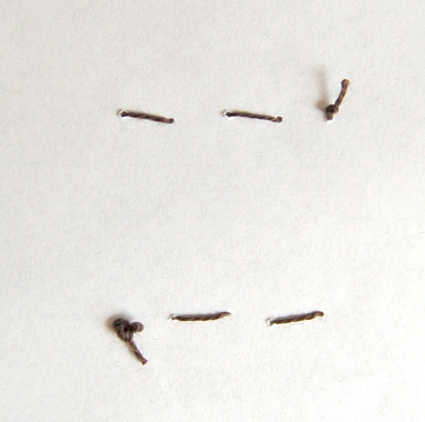
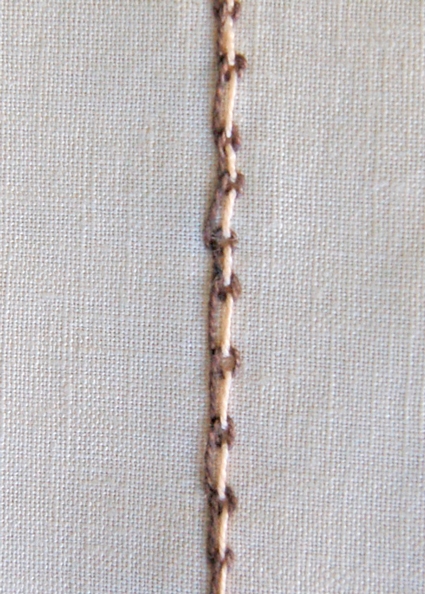
The idea behind the Basic Weaving stitch is very versatile and can be used in endless variations. It’s unexpected and retro looking. A cute idea for this stitch would be to use it to fill in a larger area (where you might normally use satin stitch.)
The above example uses stitches of more uneven length than the below tutorial but it’s all the same idea. Feel free to try any variations you can think of!
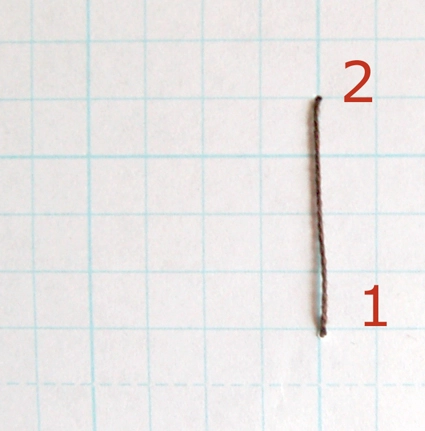
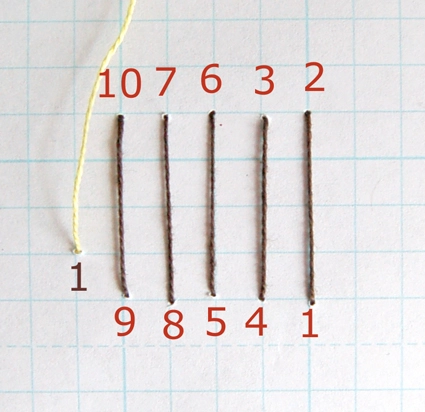
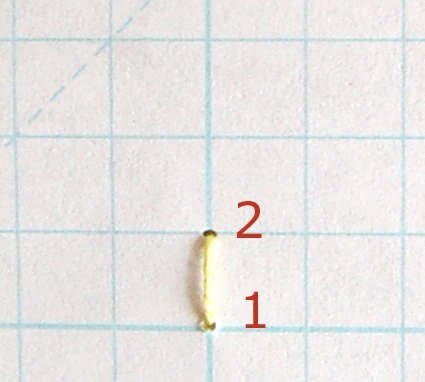
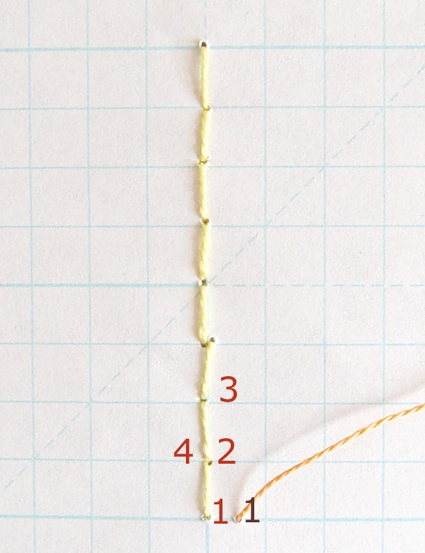
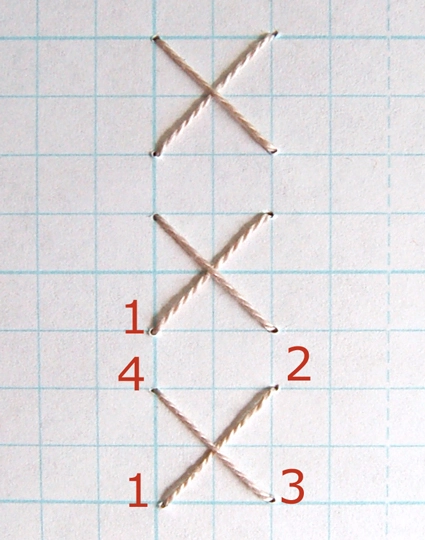
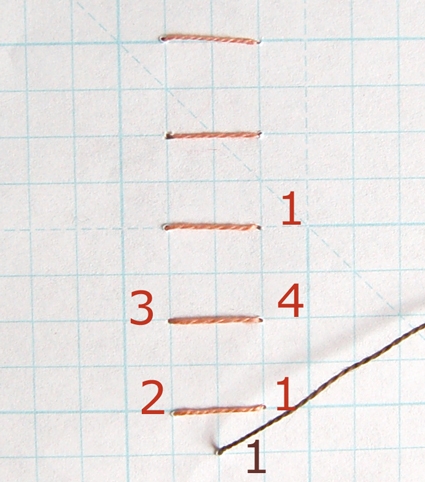
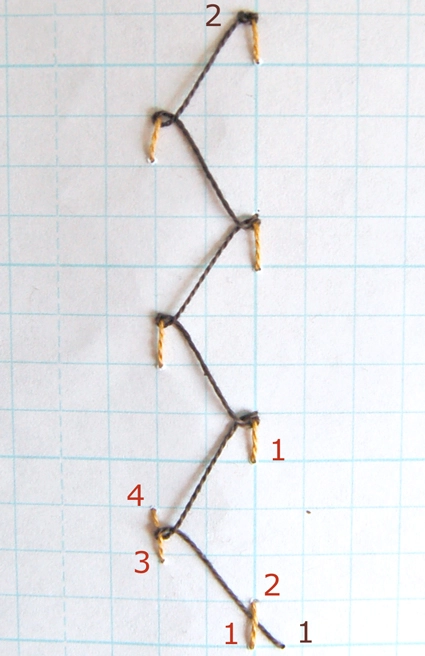
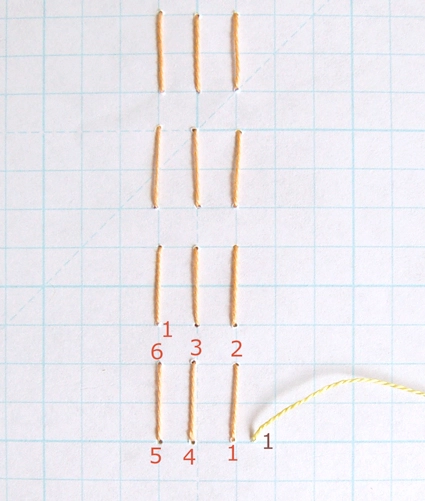
Start by making a vertical stitch as shown above. You can tie a small knot in the back to start. The number “1” is the needle’s exit point and the “2” is the entry point (as seen from the right side of the fabric).

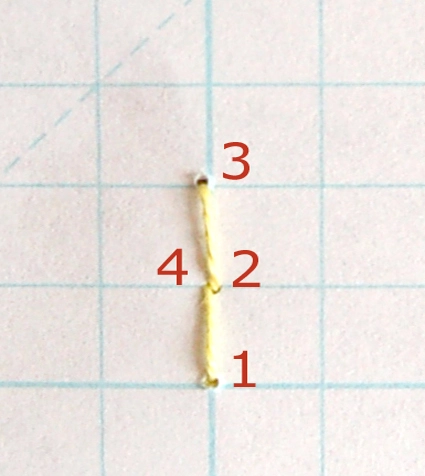
After you enter at point #2 come back up to the left and exit at point #3. Go back in at point #4.
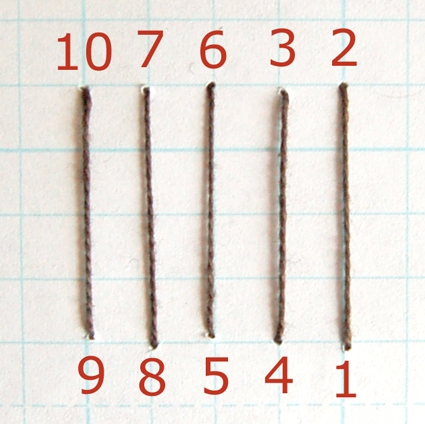
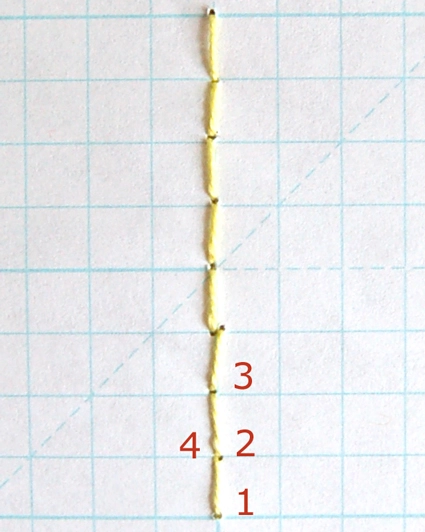
Proceed in this way until there are 5 vertical stitches.
The back should look like this- neat with no diagonal lines. This will make the back less bulky. I always try (but don’t always succeed!) to have the back of my embroidery look as tidy as the front.
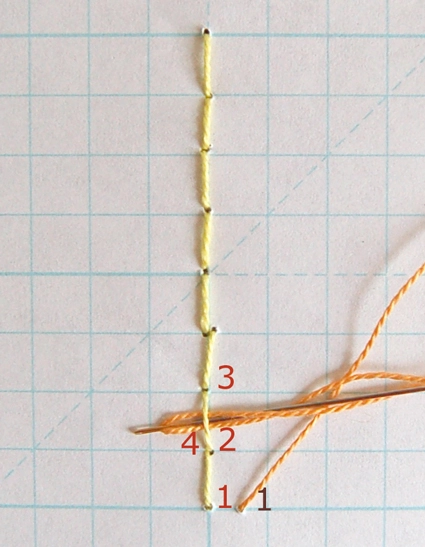
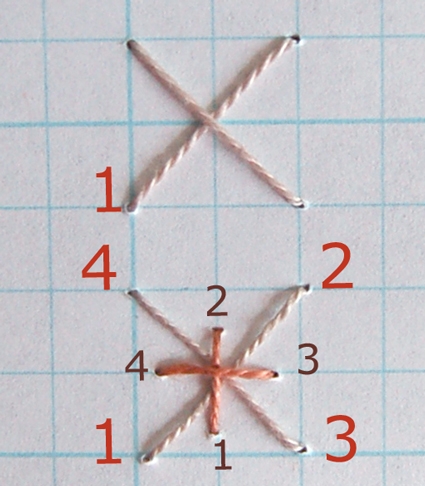
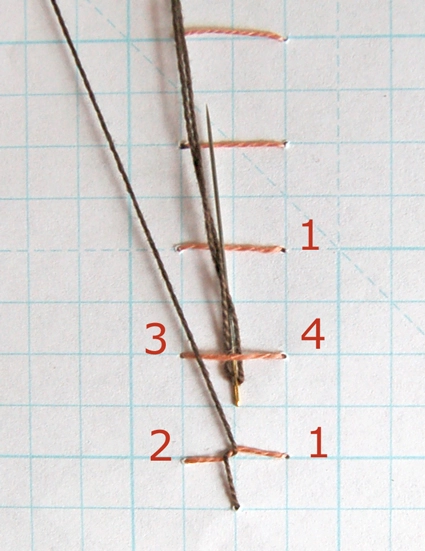
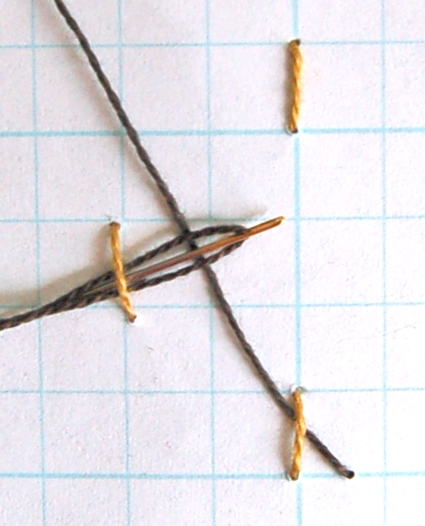
Using second thread color exit the fabric on the bottom left side of the vertical stitches, at the brown #1 point.
Remember, the second thread color’s exit and entry points will be represented by the brown numbers.
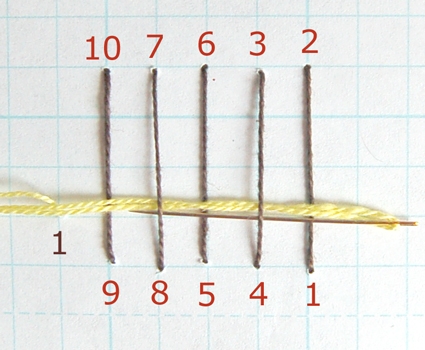
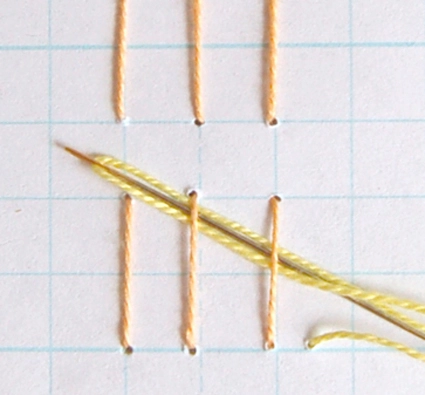
Weave the second thread color through the vertical stitches: over the first stitch, under the second, over the third etc.
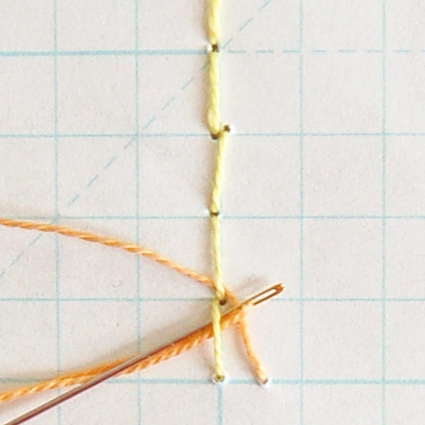
I find it easiest to weave though stitches leading with the EYE end of the needle, not the pointy end. That way you won’t split
the thread on any of the vertical stitches.
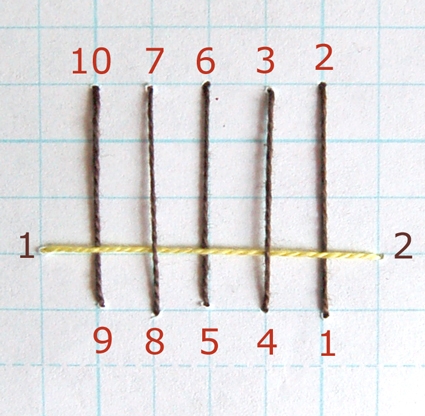

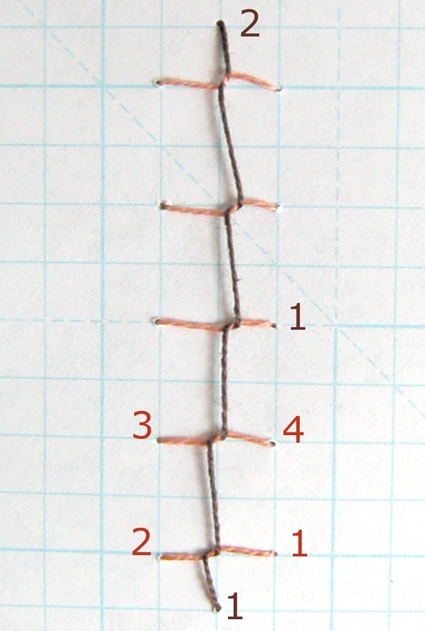
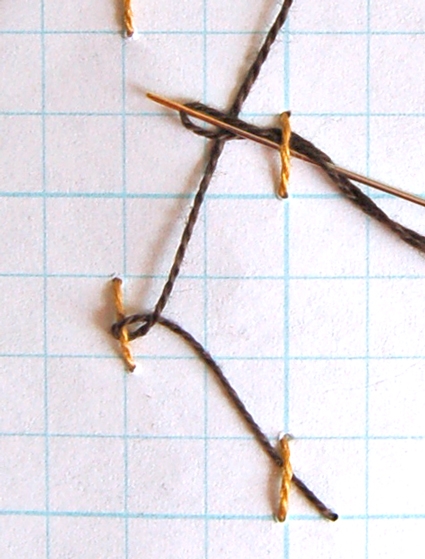
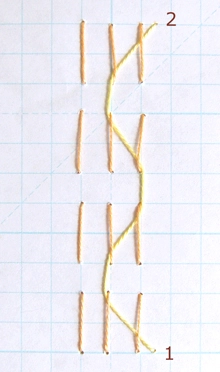
After weaving the thread enter the fabric (or paper in this case!) at brown point #2. Next come out at brown point #3 and weave through the vertical stitches the opposite way: UNDER the first stitch and OVER the second etc… then enter the fabric at brown point #4. Exit at brown point #5. Weave OVER/UNDER and then finally enter at brown point #6 and you’ll be done!
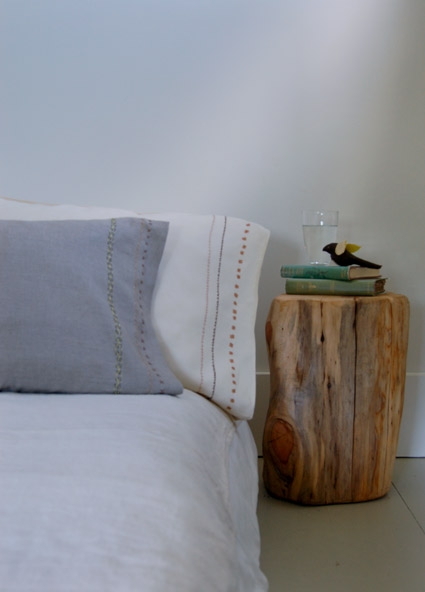
If making a long line of these stitches, as in the pillow case project pictured above, I find it easiest to first do all of the first color stitches all the way down the row, then add the second color to all of them. It goes lot faster this way!
Pekinese
The Pekinese Stitch is a sweet and simple embellishment that starts with a basic back stitch. This stitch would be a darling way to trim the hem of a little girls dress.
Start with a line of back stitching. (Note that entry points #2 and #4 go into the same point.)
Come up with the second thread color at the bottom of the back stitch line (brown point #1).
Thread the second thread through the second back stitch. Lead with the eye of the needle (as opposed to the sharp end) to avoid splitting the backstitch threads.
And then double back and thread the needle through the first backstitch.

Repeat this until the end of the back stitches and enter back into the fabric at brown point #2.
Asterisk
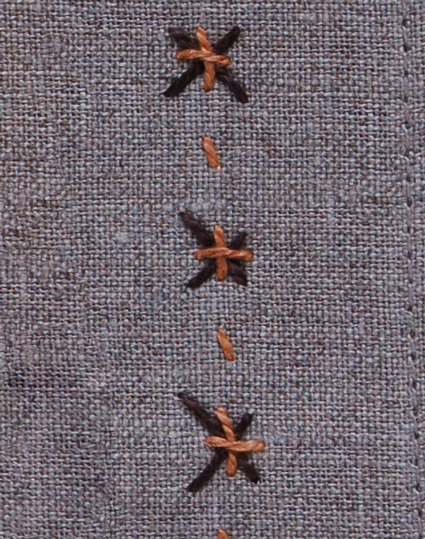
This cute stitch reminds me of snowflakes. It would look great as a boarder on a winter sweater!
Start with a basic cross stitch. If you want a more in depth explanation of cross stitch click here.

Add the second color thread as shown above and repeat to the end of the row.
Wrapped Ribs
I totally made up the name of this stitch. If anyone out there knows it’s “proper” name please let me know! This is a really unexpected stitch. I love it’s uneven quality and it’s so quick you could use it to go all around the border of something big, like a sheet or a baby blanket.
Start with a vertical row of horizontal stitches and then introduce the second thread color at the bottom of the row in the middle.
Wrap the second color of thread as shown above all the way up the horizontal stitches.
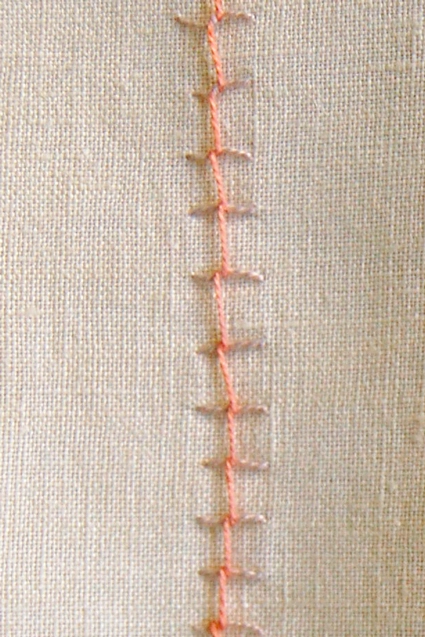
Threaded Herringbone

This loopy cursive-like stitch is both quick and simple. It would be an elegant trim on a set of napkins.
Start by doing a staggered vertical running stitch with the first thread color. Then introduce the second color at the bottom right of the first line of stitching.
Zig zag across the first running stitches looping them with the second color, as shown above, all the way up the row.
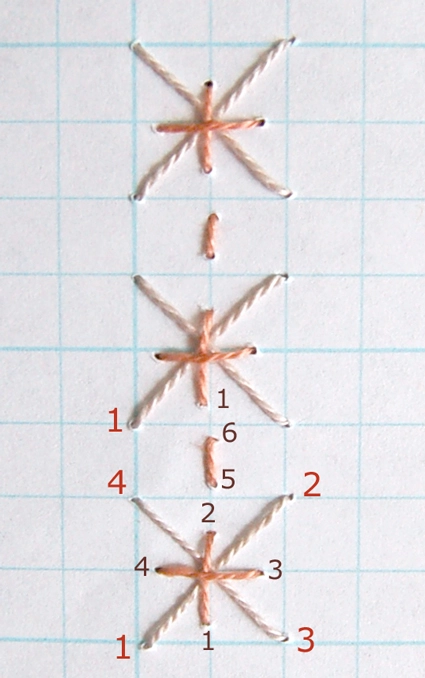
Double Threaded Hourglass

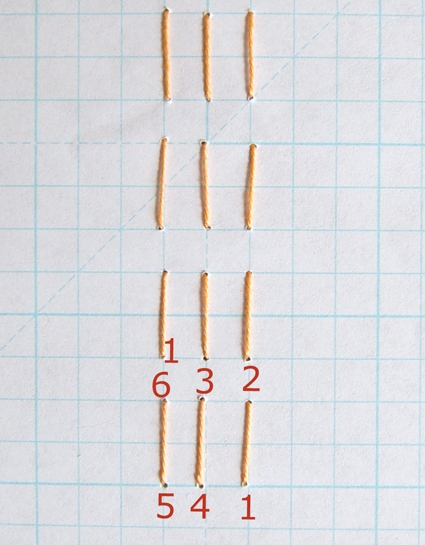
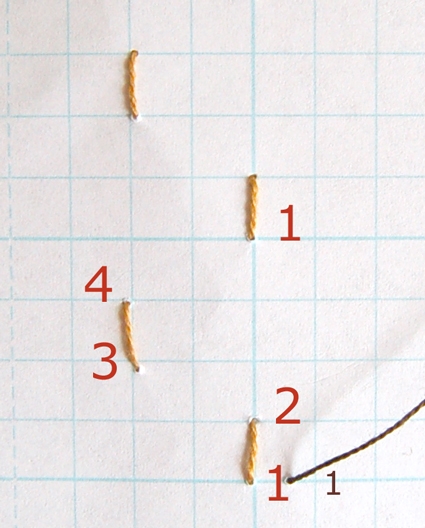
Stitch sets of three vertical running stitches on top of each other. Note that you start the second triplet directly above the last stitch (indicated by the second red #1.)
Introduce the second thread color at brown point #1.

Thread the second thread color through the first line of stitches as shown above.
Curve the second thread all the way up the first line of stitches.
Introduce another piece of the second thread color to the left side of the stitching and thread it all the way up the line of stitching , mirroring the curves of the right side.


I read this post well years ago, and being that this is go to place for me…well just wanted to say what a lovely tutorial. I love how everything is not so rigid in the stitches; which is what craft and thread should look like – soft and flowing. thanks
I like to say thank you! The use of the grid really helps. I guess i am that step by step person. Your tutorials are great i can follow them with any problems. thank you so much.
Koula
Hi!:
Thank you so much!. These are great ideas!. I am looking forward to doing a set of napkins. Do you suggest any of the above stitches or any colors combination in particular?. I always love your “touch”. I really appreciate it since I am a begginer and I am having a kick out of it.
Hi Carmen-
That’s so nice! If I were making napkins I would do either Pekinese or Threaded Herringbone!
Thanks for the great question!
Molly
Do you ever put more than one color thread on the needle at a time? I am experimenting with that on my current project and am digging the results. I have not found much evidence of this technique and, being new the game, I can’t tell if it is an established practice or has been shunned for some reason.
Hi Kay,
Thanks for writing in! I actually think that sounds like a really great idea! The only thing to worry about is making sure that you are using a needle and fabric suitable for the resulting thickness of embroidery floss, but there are plenty of patterns and techniques that require using two or more plies of floss, so there’s no reason the plies can’t be different colors. The resulting marled effect should be quite modern and beautiful, so please do carry on experimenting!
Best,
Julianna
Very helpful and detailed guide about two color embroidery. Thanks
Images are not visible
Hi Eli,
Thanks for letting us know, and we’re sorry that the photos are missing from this post! We’ll get them back up on the webpage as soon as possible. Thanks again for bringing this to our attention!
All the best,
Margaret