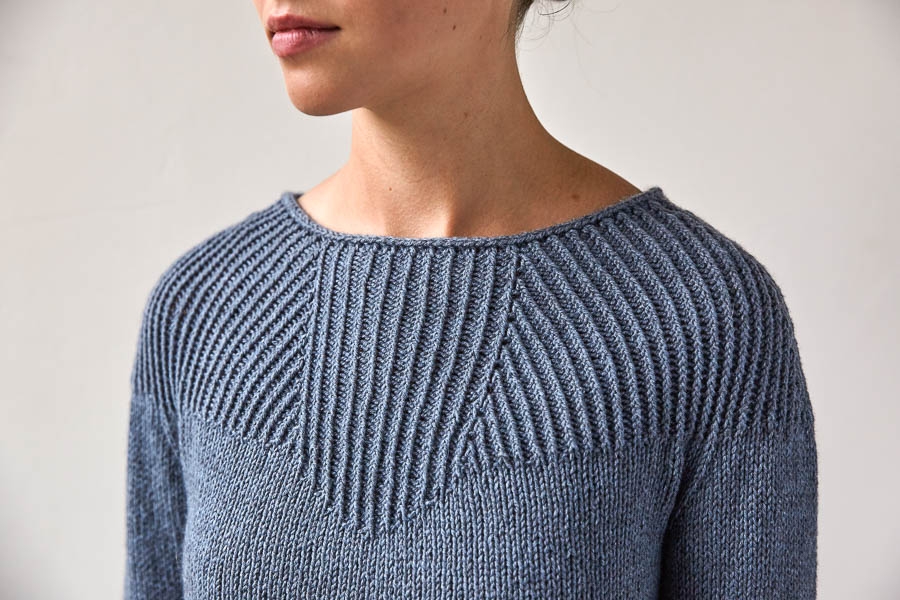

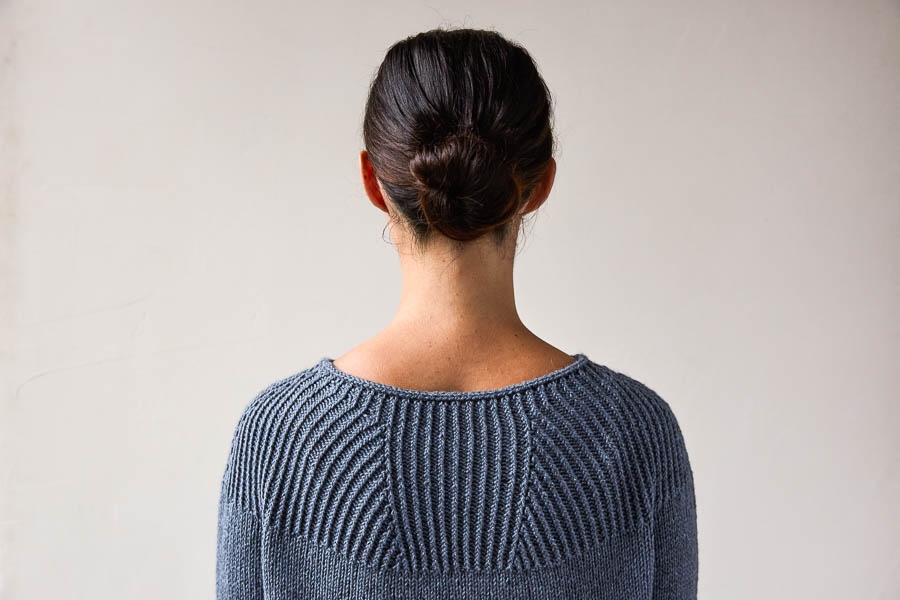
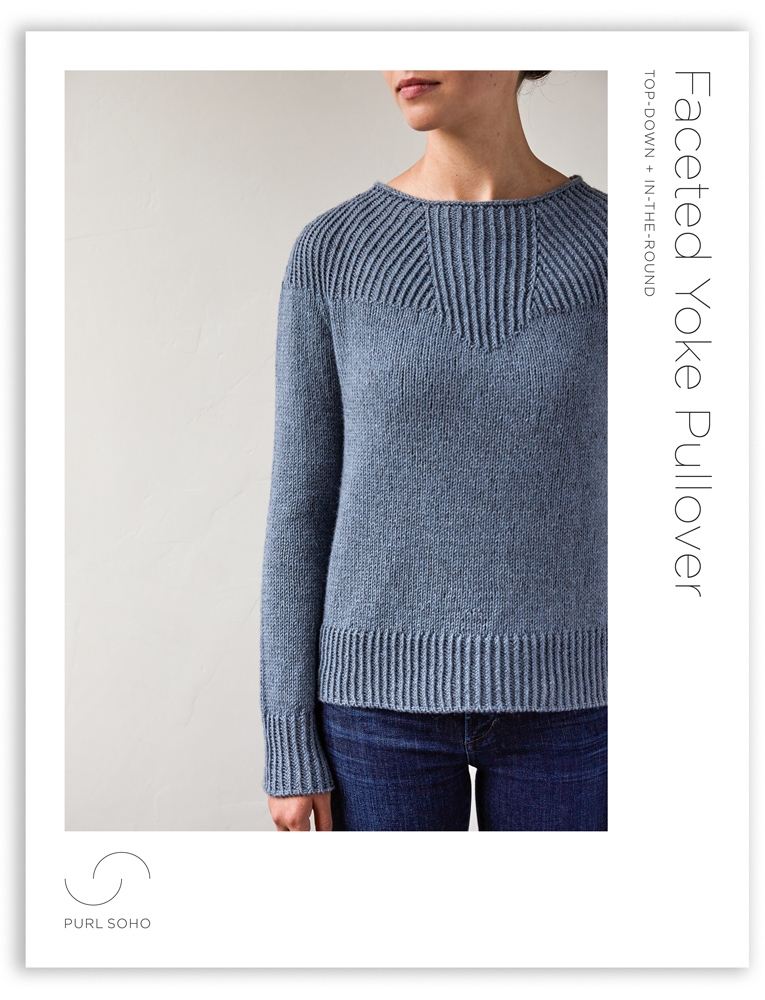
Faceted Yoke Pullover
Like a tranquil current diverted in its path, our Faceted Yoke Pullover deftly blends drama with fluid ease, and like nature’s own designs, it is both distinctive and timeless, robust and refined.
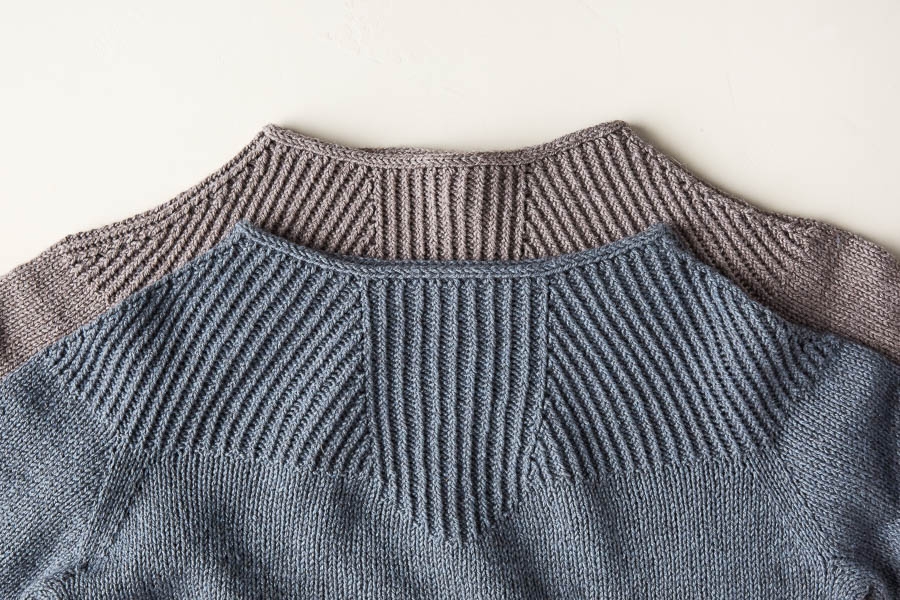
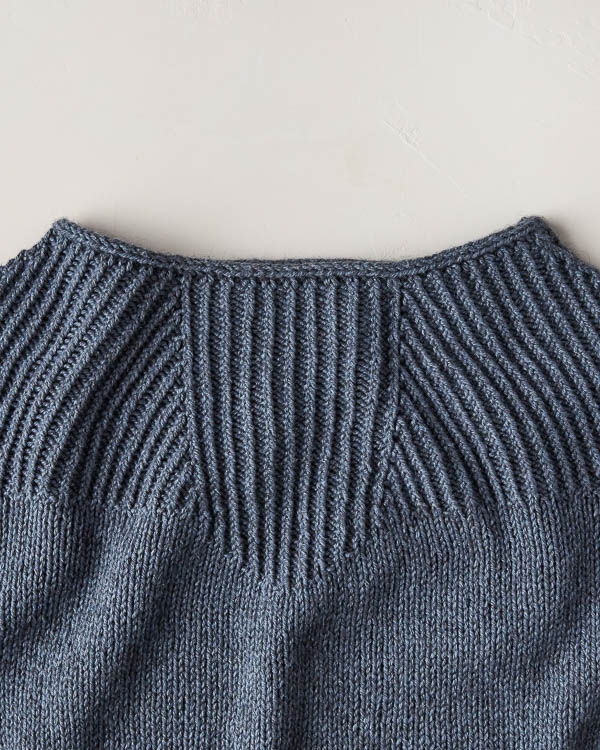
This top-down knit begins with an I-Cord Cast On, a very polished place to start. We love how it provides a smart edge along the neckline, all in one step. Don’t worry, we explain everything in our new I-Cord Cast On Tutorial!
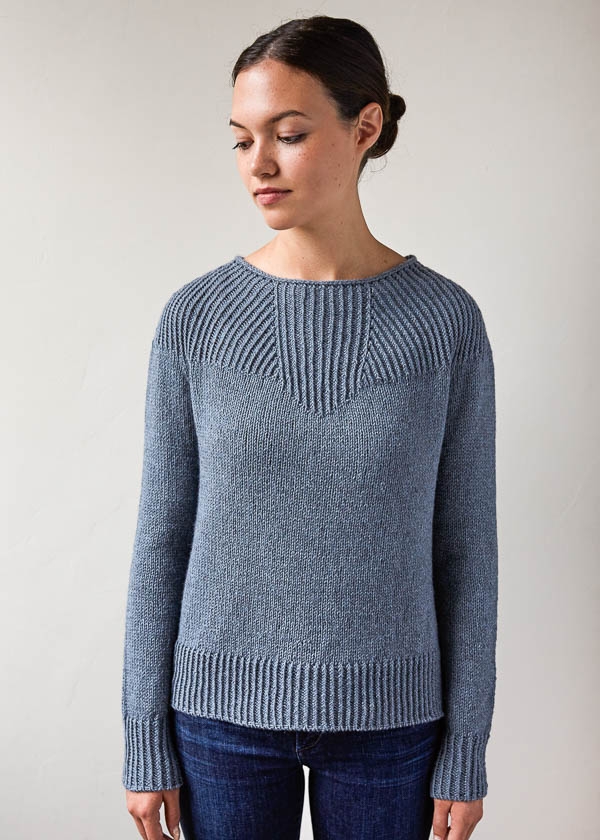
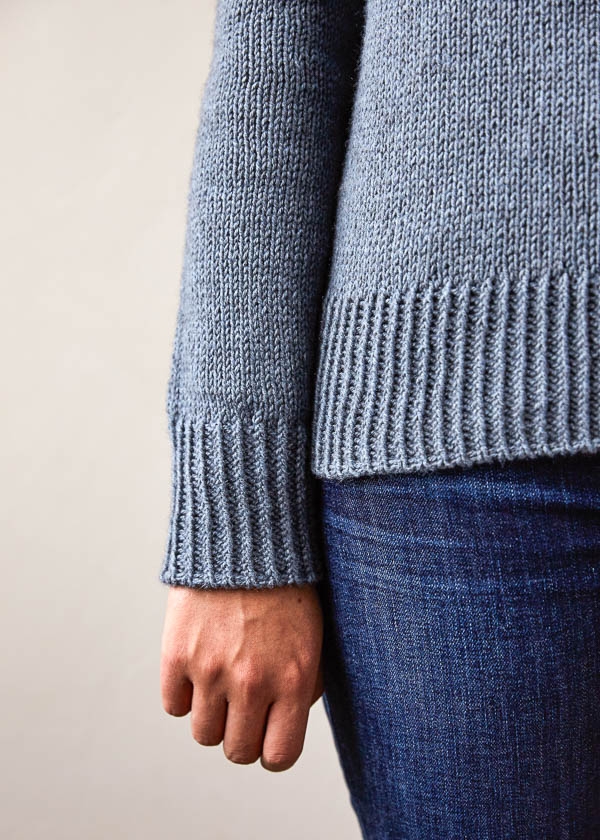
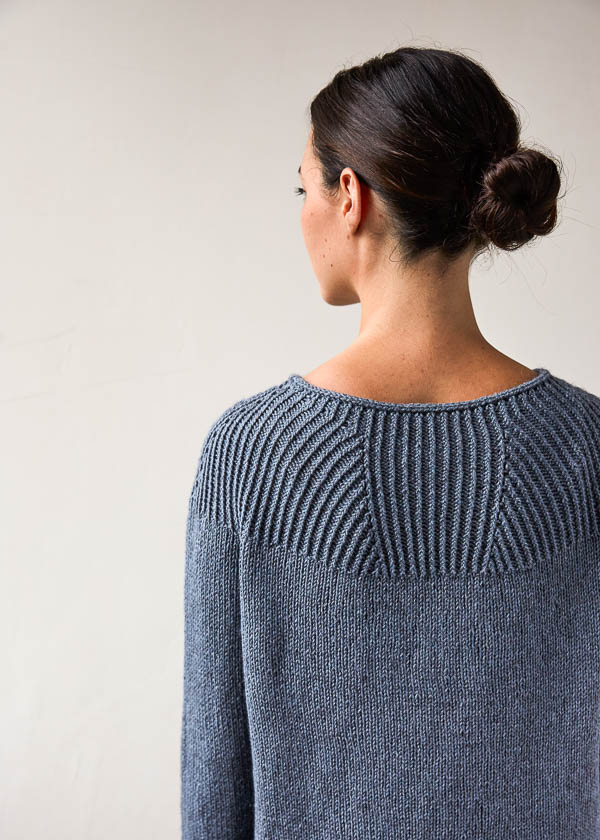
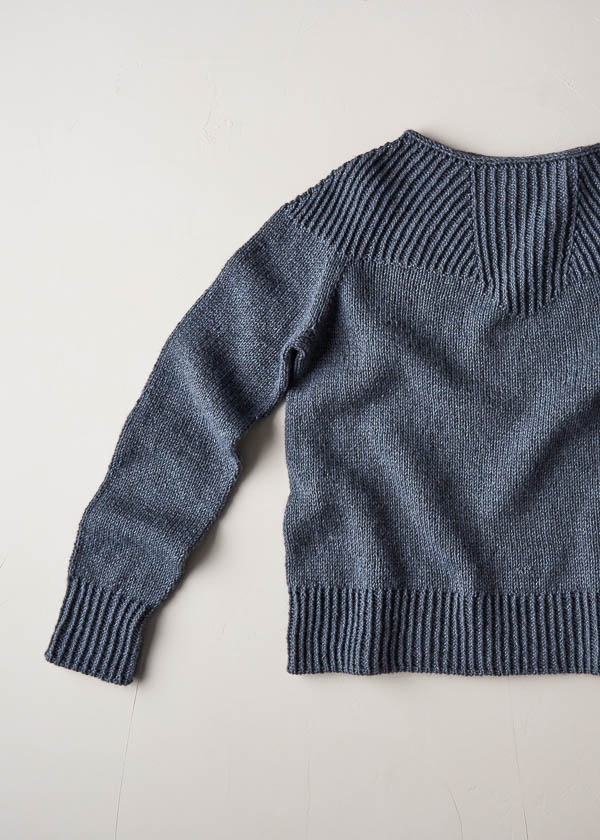
From there, increases spread out along either side of a central panel in beautiful ripples of twisted rib, which give way to a placid surface of stockinette stitch down the body. More twisted rib at the bottom hem and cuffs, with a neat, tubular bind-off, finishes it all with a thoughtful ta-da!
For crisp stitch definition and a wonderfully cozy feel, we used our gorgeous Understory, a light worsted baby alpaca-yak-silk blend. And our Faceted Yoke Pullover is the perfect canvas for the three new colors that just joined the collection: Ash Blue (shown here), Blue Bayou, and Earth Black. With deep earthy tones, textural depth, and tensile strength, Understory and our Faceted Yoke Pullover are as beautiful as nature intended!
UPDATE: NOW IN KNITTING YARN!
FEBRUARY 2024

Both soft and structured, delicate and strong, the captivating play of lines of our Faceted Yoke Pullover is crisp and clear in beautiful Knitting Yarn. And its 100% merino wool softness and warmth will make this sweater an enduring favorite!
Designed for Purl Soho by Mary Anne Benedetto.
Share your progress and connect with the community by tagging your pics with #PurlSoho, #PurlSohoBusyHands, #PurlSohoFacetedYokePullover, and #PurlSohoUnderstory. We can’t wait to see what you make!
MATERIALS
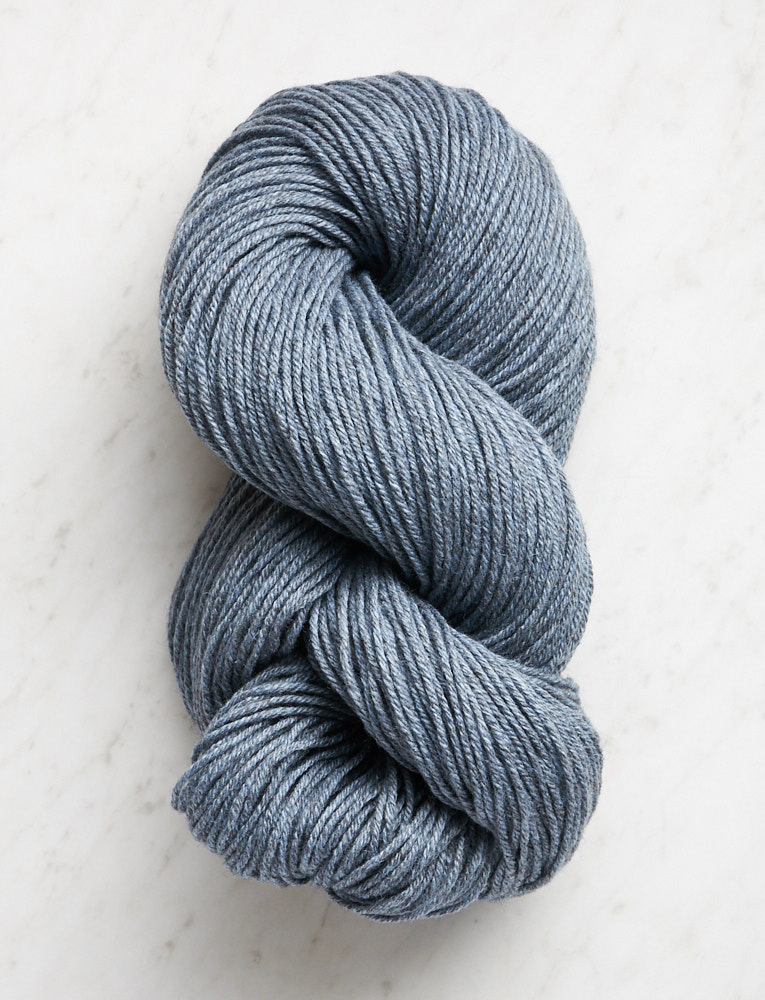
- 4 (5, 5, 6) (6, 7, 7, 8) skeins of Purl Soho’s Understory, 50% baby alpaca, 25% baby yak, and 25% silk. Each skein is 250 yards/ 100 grams; approximately 985 (1080, 1230, 1340) (1500, 1620, 1730, 1860) yards required. We used Ash Blue and Silver Berry. (NOTE: We no longer offer Understory, but choose from one of our other light worsted/dk weight yarns.)
- US 6 (4 mm), 16-inch circular needles
- US 6, 32-inch circular needles
- Set of US 6 double pointed needles
- Spare 32-inch circular needles, US 6 or one or two sizes smaller
- Stitch holders or scrap yarn
- Stitch markers (including one unique marker for end of round)
- A Faceted Yoke Pullover PDF
GAUGE
21 stitches and 31 rows = 4 inches in stockinette stitch
25 stitches and 32 rows = 4 inches in 1×1 Twisted Rib
SIZES
NOTE For help picking a size, please check out our Understanding Ease + Selecting Size Tutorial!
37 (40¾, 44½, 48½) (52¼, 56, 59¾, 63½)
To fit actual chest circumference of 31–34 (35–38, 39–42, 43–46) (46–49, 50–53, 54-57, 58-61) inches, with approximately 3-6 inches of ease
- Finished Chest Circumference: 37 (40¾, 44½, 48½) (52¼, 56, 59¾, 63½) inches
- Finished Length From Back Neck To Bottom Edge: 20¾ (21¼, 22¾, 23¼) (24¾, 25¼, 25½, 26¼) inches
- Finished Length From Underarm To Bottom Edge: 13¼ (13¼, 14¼, 14¼) (15¼, 15¼, 15¼, 15¼) inches
- Finished Sleeve Length From Cuff To Underarm: 18 inches
SAMPLE: The sweaters pictured here are size 37 inches modeled with 5 inches of ease.
PATTERN
The Faceted Yoke Pullover is available as a PDF download only.


Well…the first time I tried this pattern, months ago, after getting to the short rows, I was so confused that I stopped and went on to other projects. I’ve been knitting for a long time. I’ve done Aran, intarsia and Fair Isle. Why can’t I figure out this pattern? First, the number of stitches don’t add up. The “yoke shaping” gives directions for short rows using 27 stitches in my case. Then “continue yoke” asks for markers between the stitches that add up to 128…the total number of stitches I have cast on. That’s the first confusion. I also find your videos don’t answer my questions. Should I just give up? I started again, determined to succeed and I’m already discouraged. GRRRR!
Hi Susan,
I’m happy to help! The yoke shaping in this pattern is a little tricky at the start. For short row 1 you will be working the twisted rib: p1 tbl and k1 tbl, 27 times for a total of 54 stitches. After short row 1 is complete, turn your work to the wrong side and work short row 2. We have a great tutorial for short rows which also includes picking up the wraps here if you need it. After the short rows are complete the initial beginning of the round is not at the center back, but is rather over the right shoulder, so the short rows are not centered over this marker. In the next set up row you will place several new markers, and work a complete row, all the way back to the beginning of the round. I hope this helps! Please let us know if you have any more questions.
Best
Jessica
If I order the yarn for this yoke pullover do I still have to buy the pattern?
Hi Pippa
Thanks for writing in! You can purchase our Faceted Yoke Pullover as a download only, for $9.80. Thanks for you interest!
Best
Jessica
I have a problem with the part ”Increase yoke”
I am knitting size 40
Increase round 2: Shouldn’t the mounted purl stitch be in between the two stockinette stitches?
If I always mount before the marker, that is what is happening.
2 stockinette stitches next to two purl stitches
Please help!
Viveca W
Hi Viveca,
I’m sorry the yoke is giving you a little bit of trouble but I think I can help. Not all of the increases are preformed before the markers. Here is the first increase round: [Make 1 left (m1L), work to next marker, make 1 right (m1R), slip marker (sm), work
to next marker,*** sm] 4 times.
***Here is where I think a mistake was made. This is where you would increase after slipping the marker to the right needle. After that, you should find that the increases will all happen between two knit stitches.
I hope this helps – let me know if you need any additional help with this!
Oscar
I have a question at the decrease section immediately following the yoke section, where one breaks from the rib pattern and begins knitting most stitches. I am very unclear whether at this point I should continue to knit through the back loop, or if somewhere ahead the stitches will become untwisted and stockinette will be done normally, knitting tfl. Please let me know before I get too far into the body! I’m at the “shape raglans” section and still knitting tbl. The word “stockinette” isn’t even mentioned until right before the body/sleeve separation. I love this pattern, but agree with other posts that notes locating where in the garment we’re working would go a long way to mitigate confusion. I’m one of those knitters who likes to understand why I’m doing what I’m doing so as to better understand the construction. Thank you!
Hi Susan,
Thanks for reaching out! You will only work through the back loop if the pattern states K1 tbl, p1 tbl or “work in pattern”, so in the decrease rounds following the yoke section you will begin to work in stockinette unless it specifically tells you otherwise! So when you see k without tbl that will mean you knit normally!
I hope this clears things up!
Warmly,
Gianna
I like this pattern except that I would like the neckline to be higher. Would that a difficult change to make? And, How would I do it?
Hi Carol,
Thanks for reaching out! At this time we don’t have instructions to adjust the neckline, but thank you for expressing your interest! I will be sure to pass this along to the rest of the team!
Warmly,
Gianna
May I make a suggestion about joining yarns in the round? This is a pattern that requires joining yarns invisibly while knitting in the round. Felted splice or wet splice did not work for Understory. Other methods proved to look bulky and uneven. Magic knot is what I used by joining at the sides.
Please include in the instructions the best method for joining the recommended yarn for patterns that are knit in the round.
Hi Chung,
Thank you so much for your suggestion! Were you referring to the very beginning when you’re called to join in the round for the neckband or something more specific later on? I’ll be sure to pass on your note about including this to our design team in the meantime and wanted to be sure you knew that yarns like Understory aren’t able to be wet spliced since it contains inelastic materials like silk and alpaca. We recommend something that felts more easily like merino wool if trying that in the future!
All the best,
Zha Zha
Hello, photos really help me understand instructions. Do you have a way to show me the very first join in round in the neckband? I don’t want to start off wrong and I’m just not getting the written instructions.
Thanks, Laurene
Hi Laurene,
Thanks for writing in. You’ll probably find our video tutorial on the I-Cord Cast On very helpful! The neckband also uses the Kitchener Stitch, which fortunately we have a tutorial for as well. I hope these more detailed instructions help you get a better sense of how to create the beginning of the neckband!
All the best,
Lili
Hi, I bought this pattern and yarn about 6 years ago and couldn’t work out how to knit it. Since then, I have had more knitting practice and decided to give it another go. I watched the suggested videos and understood each component, but cannot see how it all fits together. “Join in round as follows: Place I-Cord Cast On’s 4 on-hold stitches and 4 stitches from Provisional Cast On onto separate double pointed needles, thread 10-inch tail on tapestry needle and join with Kitchener, being sure to not twist Neckband.” This deals with 8 stitches……where are the rest of the cast on stitches in this?? This pattern makes no sense to me and is making me really frustrated! I wish the instructions were specific to this jumper, and listed in a step by step manner rather than referring to “see notes” which a very general. I cannot visualise how the join is meant to happen. Ready to give up again. A video clip of this would be really helpful, or even a few photos showing step by step for each bit of the pattern
Also, in this pattern, are you meant to use scrap yarn for the provisional cast on?
Hi Maria,
I am so sorry that the instructions for the yoke section are frustrating, but I’m here to help! After crocheting your chain in scrap yarn and making your i-cord cast on, you will be placing on a double pointed needle the 4 stitches that were just placed on hold, and on a separate DPN, place the 4 provisional stitches that you picked up from the scrap yarn at the start your i-cord (these are at the other end of your needles and are the very first stitches that you worked).
You will then begin kitchener stitching these 8 stitches together so that they seamlessly join to create a large i-cord band that will function as the neck hole. At the 6:05 minute mark of our I-Cord Cast On tutorial, there is a mention of picking up the 4 stitches from the provisional cast on that I think would help in visualizing the neckband. Once the 8 stitches are seamed together, the rest of the stitches that were cast on are already on circular needles and ready to be knit in the round for the yoke.
I hope this helps, and please let me know if you have any questions!
All the best,
Carly
Hi! Can I replace the icord cast on with a rolled purl neck? I know it won’t be quite as classy but much easier for me ! Thanks
Hi Sarah,
Thanks for writing in. You can absolutely do a rolled purl neck for this pullover instead of an i-cord cast-on! That’s definitely a good way to reduce the trickiness of this design, and it will still look great.
All the best,
Lili
I am having difficulty understanding the “why” behind using the kitchener stitch to connect the provisional and cast-on stitches, to start knitting in the round. It simply did not look right and I took it out (actually the whole I-cord cast on). I will re-watch the videos and try once more, but it isn’t clear why this is needed. I had an odd gap between the two connected rows, after I did the kitchener stitch. Maybe I am doing something wrong?
Isn’t there an easier way to knit in the round? I may have to abandon this pattern.
Hi Ann!
Thank you for your question. The kitchener stitch helps to graft the two ends of the I-cord cast on edge together so that you can begin knitting in the round for the yoke of the sweater. You can absolutely skip this step and cast on with your favorite cast-on method instead, if you prefer. The I-cord cast on edge serves as a design element for this sweater, however you could always work an attached I-cord around the neckline later, too!
I hope this is helpful!
All the best,
Margaret
Should the m1P be made in the same direction as the earlier m1 stitches? So m1PL after markers and m1PR after markers?
Also, a couple comments say the first beginning of round is back right shoulder but with my markers in it really looks like it’s back left. Has it changed from earlier comments?
Hi Stefanie,
Thank you for writing in! You will make all the M1P stitches in the same fashion which can be found in the Notes section on page 2. With your left needle, pick up the horizontal strand between the last stitch on the right needle and the first stitch on the left needle from back to front, then purl into the front loop of the strand. [1 stitch increased]
Your BOR marker will be placed at the back right but we can see how this can be confusing at first. I found that the first set up round under the INCREASE YOKE section on page 3 really helps visualize where each of your stitches is allocated. I hope this helps!
Happy knitting,
Gavriella