


Quilted Zipper Pouches
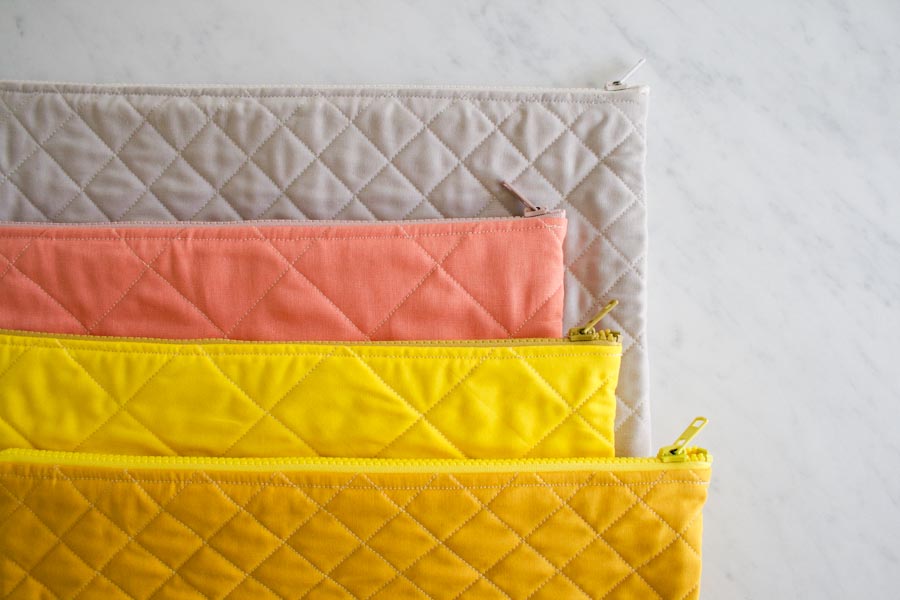
These Quilted Zipper Pouches are fun to make, chic to behold and handy to have around! The most surprising thing about these little sacks is that, despite their seeming so labor intensive, they are actually a pretty quick and easy sew!

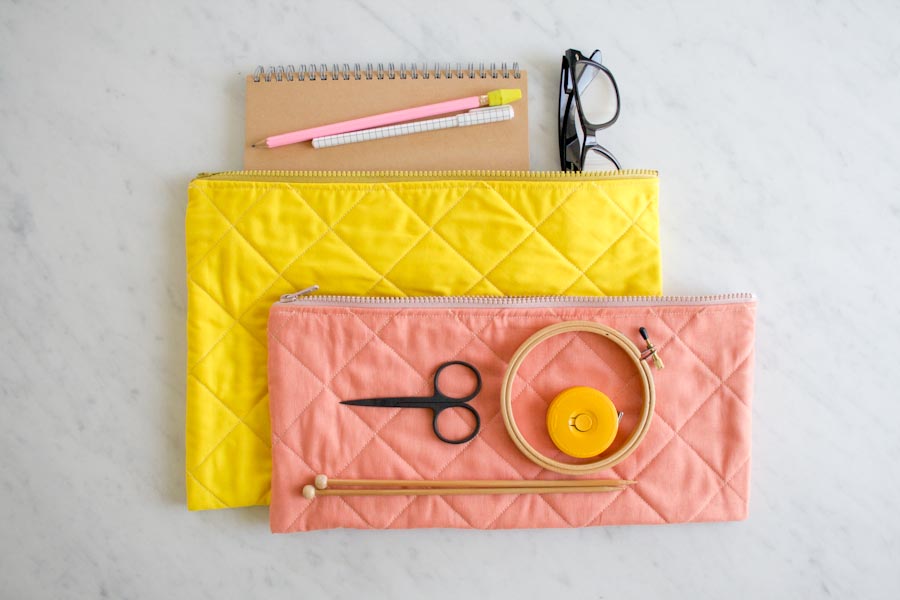
I used a bunch of skills here, like quilting, sewing in a zipper, and French seams, but on such a small scale, they’re totally do-able. It’s a good thing, too, because these pouches can be used for almost anything: a clutch, a makeup bag, a knitting needle case, even a snack carrier. Our Materials for Quilted Zipper Pouches kit comes with everything you need to make all four! –Molly

P.S. Don’t forget Mother’s Day, Father’s Day, and graduation season are all upon us. Quilted Zipper Pouches make wonderful gifts!
Materials

Our Materials for Quilted Zipper Pouches kit includes enough materials to make all four pouches:
- 1/2 yard of Robert Kaufman’s Essex in Mango
- 1/2 yard of Robert Kaufman’s Kona Cotton in Ash
- 1/2 yard of Robert Kaufman’s Kona Cotton in Citrus
- 1/2 yard of Robert Kaufman’s Kona Cotton in Grellow
- Quilter’s Dream’s Natural Request Dream Batting, 100% cotton, craft size
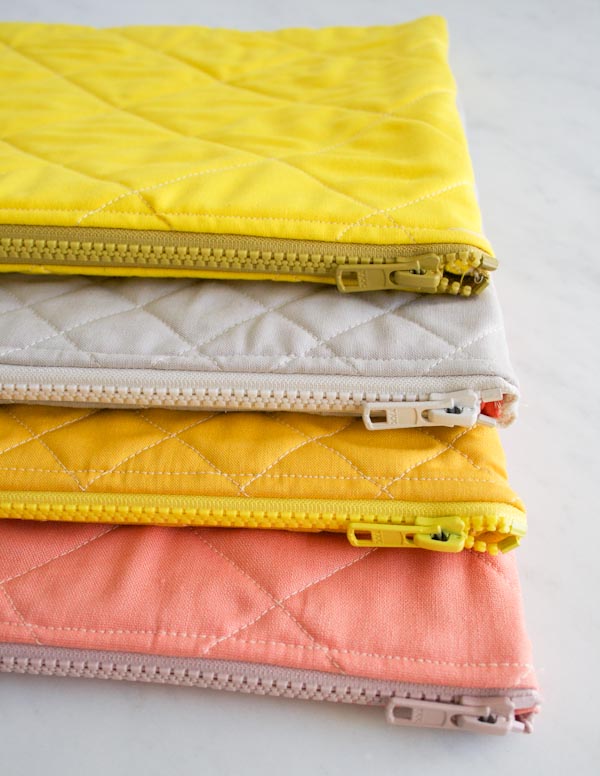
- Four of Purl Soho’s 14-inch Non-Separating Zippers in colors Dusty Rose, Yellow, Silky White and Goldenrod
- Two 274-yard spools of Gutermann’s 100% cotton thread in color 1040
You will also need a Hera Marker, a rotary cutter, a rotary cutting ruler with a 45° marking, curved arm safety pins, a zipper foot, a walking foot, and a standard presser foot for your machine.
Sizes
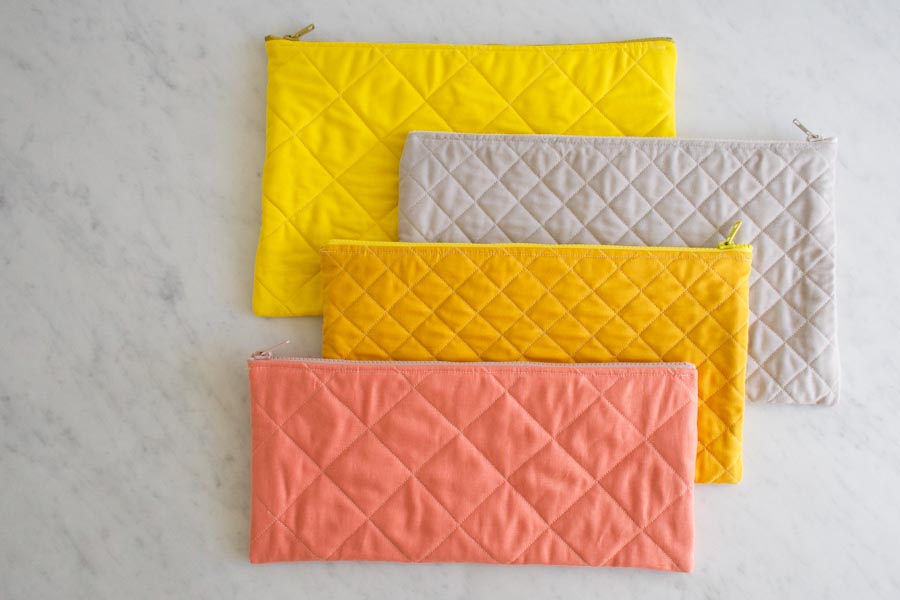
14 inches wide X 6 (7, 8, 9) inches tall
Pattern
Pick which materials you want to use for the outer fabric, lining and zipper of each pouch. Here is what we used…
14 X 6-inch size: Mango Essex for the outside, Ash Kona Cotton for the lining and the Dusty Rose zipper
14 X 7-inch size: Grellow Kona Cotton for the outside, Citrus Kona Cotton for the lining, and the Yellow zipper
14 X 8-inch size: Ash Kona Cotton for the outside, Mango Essex for the lining, and the Silky White zipper
14 X 9-inch size: Citrus Kona Cotton for the outside, Grellow Kona Cotton for the lining, and the Goldenrod zipper
Cut
Using a rotary cutter…
Cut the outer fabric into a 16 X 14 (16, 18, 20)-inch rectangle.
Cut the lining fabric into a 18 X 16 (18, 20, 22)-inch rectangle.
Cut the batting into a 17 X 15 (17, 19, 21)-inch rectangle.
Quilt
Using the Hera Marker and the ruler, mark the right side of the outer rectangle with 90° diamonds 1 or 2 inches apart from one another (your choice!). Cover the entire area of the rectangle.
To do this line up the 45° marking line of your rotary cutting ruler anywhere along the bottom edge of the rectangle. Using the Hera Marker, mark a diagonal line across the right side of the ruler.
Mark another line, parallel to the first, 1 or 2 inches to the right. Continue to mark parallel lines every inch or two across the right side of the oval. Then, using your first marked line as a guide, repeat for the left side of the oval.
Now place the 90° line on the ruler along one of the previously marked lines, and using the Hera Marker, mark a new line, 90° from the first. Just as you did in the previous step, mark the entire oval with diagonal lines going in this new direction, all 1 or 2 inches from one another.
If you have never done this,, please take a look at our Marking Diamonds for Quilting Tutorial.
Lay the lining rectangle wrong side up onto a smooth surface. Center the batting on top of that. Finally, center the marked outer fabric right side up on top of the other two layers. This is the quilt sandwich.
To baste the three layers together, place a curved arm safety pin through all three layers every few inches, starting from the center and moving outwards. Please check out our Pin Basting Tutorial, if you have never basted a quilting project before.

Attach the walking foot to your machine and quilt the three layers together by sewing along all of the marked lines until your piece is covered in 90° diamonds.
First, sew all of the lines going in one direction, starting in the center and moving out. Then quilt over all of the perpendicular lines in the same manner.
Attach the Zipper

Trim the lining and batting to match the outer rectangle. Zigzag stitch twice along the two 16-inch edges of the quilted rectangle to secure the threads.

With the quilted rectangle right side up and the zipper right side down, center and pin one of the zipper’s fabric edges to one of the zigzagged edges. Instead of aligning the edges perfectly, pin the zipper’s fabric edge 1/16 inch higher than the zigzagged edge.

The wrong side will look like this, with the zipper edge extending a bit beyond the zigzagged edge.

Using your zipper foot and a 1/4-inch seam allowance, stitch the zipper onto the quilted rectangle. Start the seam at the pull and end it at the zipper’s end (not at the end of the fabric strip). Backstitch at the beginning and end of this seam.

Fold up the second zigzagged edge and pin its right side to the right side of the zipper’s opposite fabric edge, again extending the zipper edge approximately 1/16 inch beyond the zigzagged edge. The wrong side of the quilted rectangle will be visible now, but you will be pinning the right sides together.
Sew this side of the zipper in the same manner, backstitching at the beginning and end and not sewing beyond the beginning and end of the zipper itself.

Turn the piece right sides out, zip it up, and press the fabric flat and away from the zipper.

Unzip the pouch so that the pull is all the way to the right. Pin the pressed fabric below the bottom zipper to the zipper fabric underneath.

Using your zipper foot, topstitch along this pinned edge, starting at the non-pull end of the zipper and backstitching at the beginning of the seam.

When you get to the zipper pull, backstitch again to end the seam.

Pin the second side of the zipper in the same manner and topstitch it as well. This time you will start at the zipper pull and end at the zipper end, backstitching at the beginning and end of the seam.
Sew Together with French Seams

With the right side facing out, close the zipper and press the rectangle flat. Pin the open sides together.

Using your machine’s presser foot, sew both of the pinned sides closed with a 1/8-inch seam allowance, backstitching at the beginning and end of the seam. Do not sew into the fabric ends of the zipper, but do make sure you catch both sides of the pouch with this seam.

Unzip the pouch halfway and turn the entire piece inside out. Poke out the corners and press the rectangle flat.
Pin the short sides flat, as shown above.

Sew these two pinned sides together with a 3/8-inch seam allowance, backstitching at the beginning and end of the seams. Again, do not sew into the fabric ends of the zipper.

Fold the fabric ends of the zipper downward and hand stitch them into the French seam allowance.

Turn the pouch right sides out, making sure to poke the corners out. Zip it closed, press it flat and you’re all done!


J’adore, tout simplement.
Simple, raffiné comme tout ce que vous faites!
A bientôt!
I usually prefer lined pouches without a seam showing, but I can see how these might be faster to sew.
The color combinations are beautiful–Molly: you have an eye for this.
Sometimes the colors seem almost “off” but the finished result is amazing. I see this time and time again in your projects.
Please keep the sewing/quilting projects coming! I’m a non-knitter but I love the sewing projects.
I was just wondering if the size of the fabric listed is correct. I’m not sure if I’m missing something, but I can’t see how to cut these prices out of 1/4 of a yard piece of fabric. That’s only 9″ and the smallest piece is still 14″. BTW, love all of your stuff!
Hi Jenny-
You are correct. It is actually 1/2 yards! We have corrected the materials list. Thanks for getting in touch about it!
Molly
Such a nice project! Just finished one of these lovely bags and I’m very pleased how simple it was. Especially thanks a lot for the detailed description of sewing the zipper!
love this pattern, been waiting to find something like this, I’m on my way, and I don’t think I will stop at just 1
A brilliant tutorial. Excellent photographs. Clear instructions. Thank you so much!!
I’ve always made little zip pouches with the lining loose and the zip fabric and seams all enclosed. I’m looking forward to quilting some fabric and making little pouches your way.
Also, your way, using pre-quilted fabric, would solve the challenge of fluffy edges to the seams – those little threads that escape, even when zig-zagged or serged.
The uses for this simple project are endless………satins, laces and gorgeous fabrics for ladies; tweeds, denim and pleather for men; printed fabrics for children. It’s one of the most versatile items for a quick, ‘happy challenge’.
I’ve made 5 of these already. Love them. Easy and fun to make, and such nice gifts to give. Thanks. Love all your creations. Thanks so much for sharing.
I am puzzled by the reference to “the oval”.
Hi Sarah-
Thanks so much for pointing out this confusing typo! I have fixed it now, and hopefully it makes more sense!
Please let us know if you have any more questions and thank you so much again for getting in touch to point this out!
Molly
These Quilted Zipper Pouches are beautiful.
I could like to try to make one.
So I see you say not to sew over the zipper end tails. I would love to have a better end on my zippers they always seem so wonky and I want them to be flat and straight.
Ok so I will try this. If you have any other videos or similar tutuorials I should look at to help me please advise. Much appreciate your sharing this with everyone. I have the same zippers on hand that you are using. Thanks Polly
I loved your little tutorial. I used it for the instructions of making a French seam. My only comment would be if the lining had been a different color or pattern as I found it quite confusing
, as it all looked the same to me. Thanks
Where can I purchase that brand of zipper?
Hi Judy-
We sell them! They are linked under the “Materials” section of this pattern, along with everything else you would need to make this project. And here is a direct link as well: https://www.purlsoho.com/non-separating-zippers-14-inches.html
Please let us know if you have any more questions!
Molly
Perfect! Thank you so much.
Hey Purl Soho
I was delighted when I received your newsletter to receive your offer for a free pattern for the sweet pouches. I’ve followed every instruction including reading through the pouches story which is fun – but I can’t see a link to actually download the free pattern you offered.
I possibly will end up purchasing a kit cos that makes it easy – I’ll be making it by hand by the way. Please help
Cheers
Dassana
Hi Dassana-
You can download this pattern by using our “print” button…
If you’re on a desktop version of the site, you will find a “print” icon in the right column just below the date and tags. If you’re on a mobile version of the site, you will find a “print” icon below the pattern and above the comments.
Follow the easy on-screen instructions to delete whichever parts of the pattern you don’t want to print or save. For example, you may decide to shorten the pattern by omitting certain images or the list of materials.
I hope this answers your question. Thanks for getting in touch!
Molly
What type of zipper foot is that?
It look so easy to use.
Hi Eileen-
Here is the official name of this foot…
Husqvarna Viking Zipper Foot E Snap On Presser Foot #412 3805 45
But it will only work on a Husqvarna Viking machine! Hope this helps!
Best-
Molly
I have never sewn anything on a machine with the pins still in. So the sewing machine needle won’t break over the straight pins? Does it have to do with the way they are laying?
Thanks!
Hi Carol,
You want to take the pins out as you are sewing, the pins just keep the fabric in place, as the foot gets closer to the pin and you take the pin out the fabric will not move because it is secured by the foot.
I hope this helps,
Melissa
Do you think I could follow this pattern but use oil cloth (or a similar waterproof type fabric ) for the inside? I’ve never quilted before and it’s my understanding oil cloth is quite thick.
Hi Emily,
Thanks for reaching out! You could certainly sew these pouches with oilcloth if you wish! Due to the quilting and the zipper, they will not be completely water tight, but they would be quite easy to wipe clean. Although some sewing machines may struggle with heavier weight fabrics, as long as you use a denim needle and go slowly it should be fine.
Best of luck, and please let us know how they turn out!
Julianna
Hi, I purchased this kit in Mineral Linen when I happened to be in Soho this summer….opening it now to make Christmas gifts, and it seems there is no lining included. It would be helpful to add a note about that on the product description. Fingers crossed that i already have some cute scraps lying around to use for the lining,
P.S. the mineral linen is tremendously beautiful. So pumped for this project!
Hi Alexandra,
Thanks for reaching out! We are so glad that the fabric is such a joy! For the Mineral Linen version of this pouch, we used the wrong side of the Mineral Linen as the lining. In the last picture on the project page, you can get a glimpse of what this looks like!
I hope that this clears things up!
Cassy
This is so well-constructed; I can’t wait to try it! If I want to put inside pockets (maybe just open, or with a snap closure), should I hand-stitch it in at the end? Or perhaps omit the quilting and sew in the pockets before sewing the lining to the outer fabric?
Hi Jill,
Thanks for reaching out! I think you could add a pocket either way, whichever you would prefer to do!
If you do, please let us know how this turns out!
Happy crafting!
Gianna
Why hand stitch the zipper end? I have never made one. Would appreciate your response.
Hi Pira!
Thank you for your question. We recommend hand stitching the end of the zipper so that it is still functional and will flex with the seams of the pouch when you fold it inside right!
I hope this helps, and happy sewing!
All the best,
Margaret