

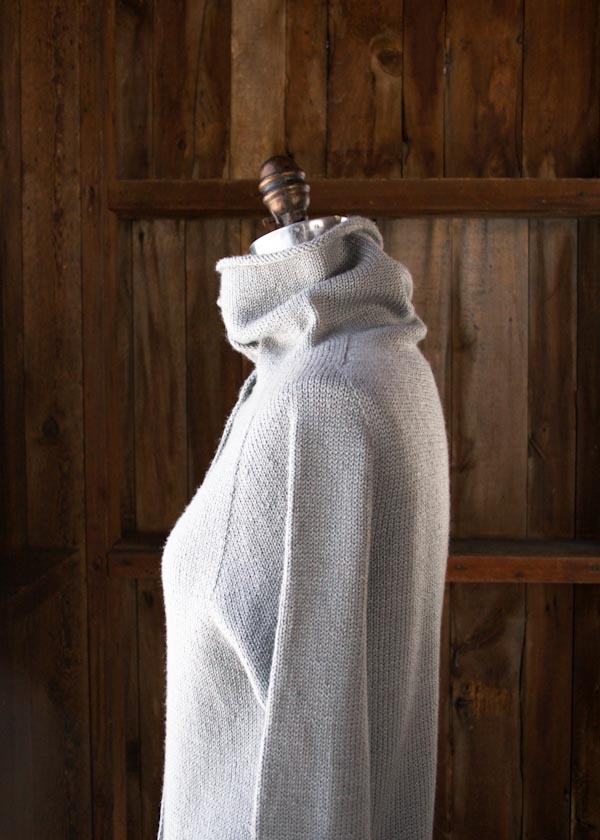
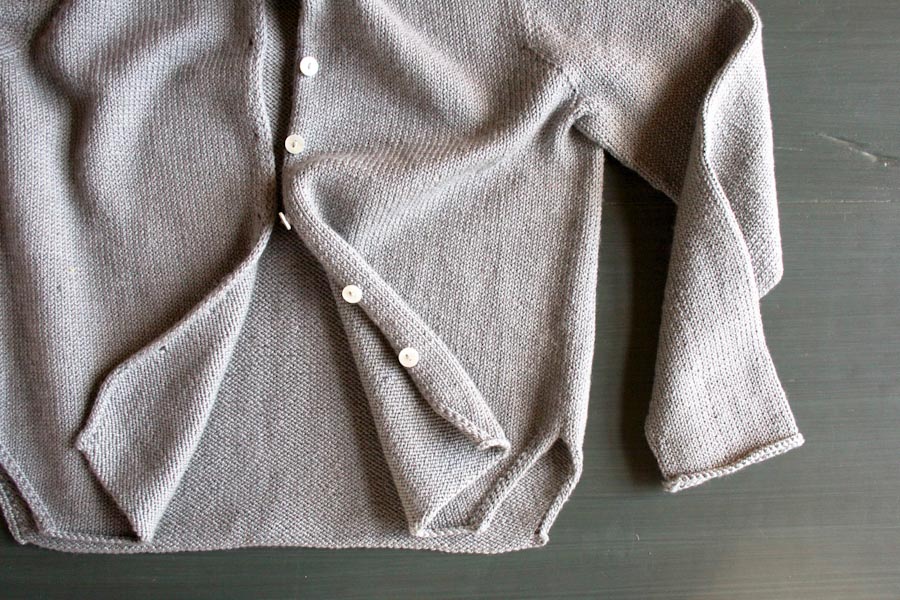

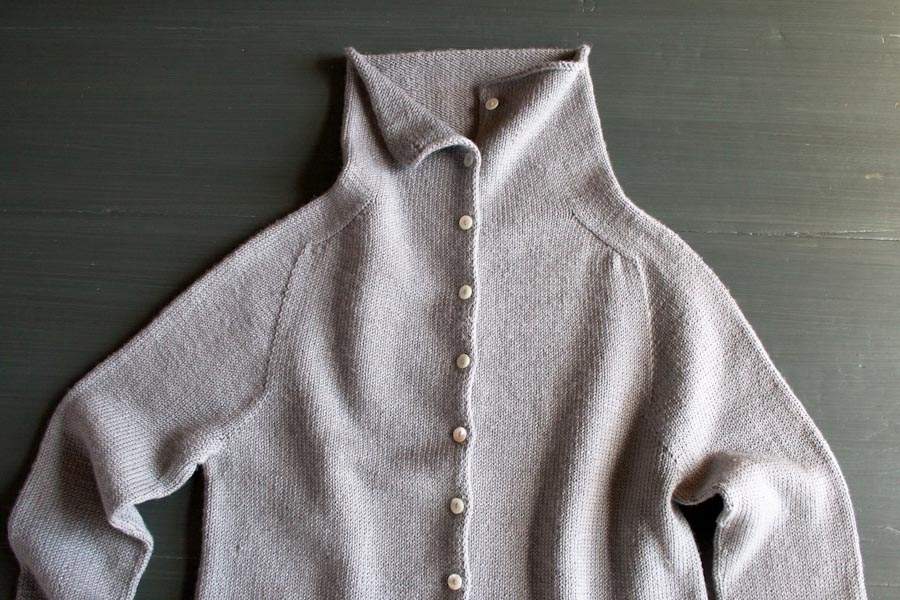
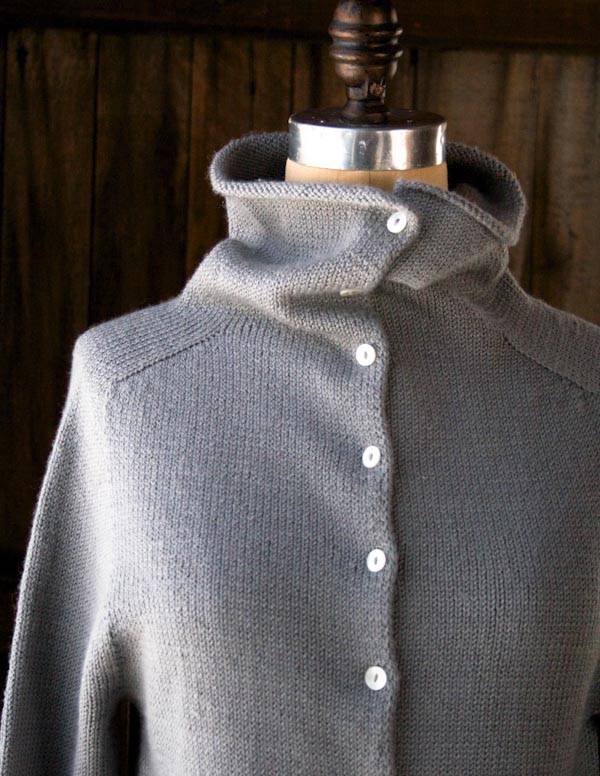
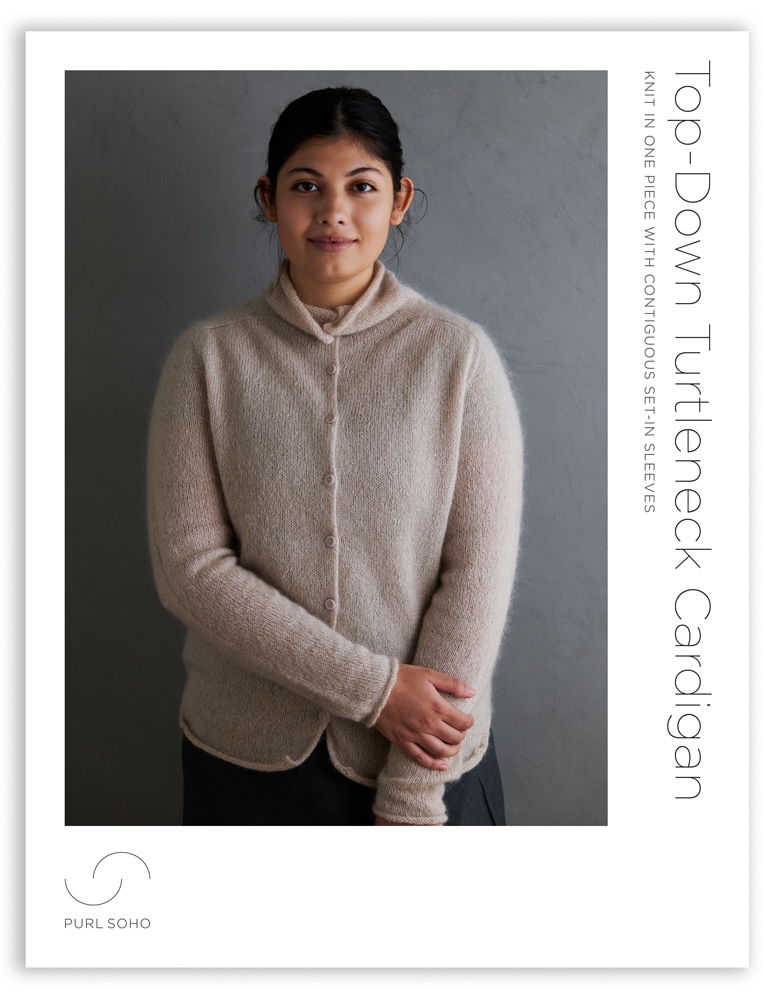
Top-Down Turtleneck Cardigan
This sweater started as a design challenge to turn our bottom-up, saddle shoulder Purl Soho Pullover into a top-down, contiguous sleeve Cardigan… in a different gauge.

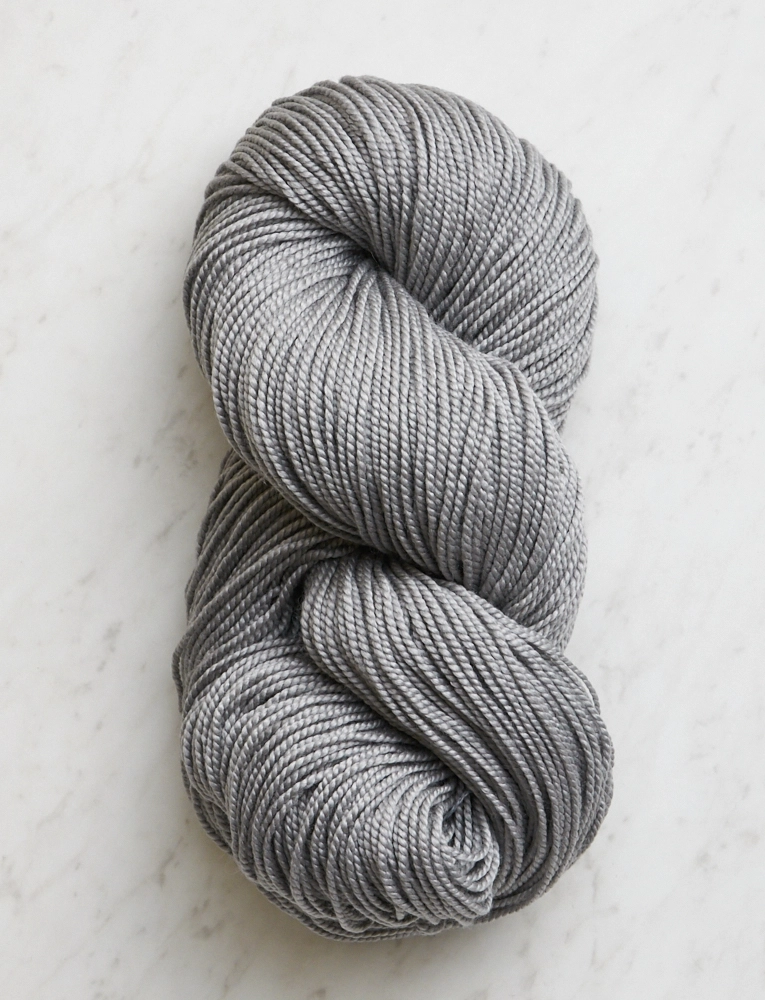
Instead of the original Pullover’s Worsted Twist, for this sweater I used Purl Soho’s lighter weight Mulberry Merino. Its lofty fine merino pairs beautifully with the strength and subtle luster of silk, making for the ideal three-season sweater!

Long story short… I did it. The Purl Soho Pullover now has a sister: the Top-Down Turtleneck Cardigan. Just as fun to knit, just as wearable, just as classic! -Laura
Update: New Yarns
October 15 2021

Because we love options, we knit up this classic pattern in two versions: one in our super light and cozy Brume, a blend of wool, mohair, and silk, and one in 100% undyed Andean highland Good Wool, a wonderfully natural choice. See the new versions here!
Designed by Purl Soho designer, Laura Ferguson.
Share your progress and connect with the community by tagging your pics with #PurlSoho, #PurlSohoBusyHands, #PurlSohoTopDownTurtleneckCardigan. We can’t wait to see what you make!
Materials
In addition to a Purl Soho Top-Down Turtleneck Cardigan Pattern Download, you’ll need…
- 5 (5, 6, 7, 8, 8) skeins of Purl Soho’s Mulberry Merino, 80% Extra Fine Merino Wool, 20% Mulberry Silk; approximately 1100 (1235, 1482, 1729, 1853, 1976) yards total. (NOTE: We no longer offer Mulberry Merino, but choose from one of our other sport weight yarns.)
- US 5 (3.75 mm), 16-inch circular needles
- US 5, 32-inch circular needles
- Set of US 5 double pointed needles
- 4 stitch markers
- Stitch holders or scrap yarn
- 9 (10, 10, 10, 11, 11) ½-inch buttons. We used Purl Soho’s Smooth, 2-Hole Medium Mother of Pearl Buttons in the color Ecru.
Gauge
25 stitches and 36 rows = 4 inches in stockinette stitch
Sizes
NOTE For help picking a size, please check out our Understanding Ease + Selecting Size Tutorial!
31 (35, 38¾, 42½, 46½, 51)
To fit actual chest circumference of 25-28 (29-32, 33-36, 37-40, 41-44, 45-48) inches, with 3-6 inches of ease.
- Finished Chest Circumference: 31 (35, 38¾, 42½, 46½, 51) inches, buttoned
- Finished Length from Shoulder to Bottom Edge: 21¾ (22½, 23½, 24¼, 25¾, 26¼) inches
- Finished Length from Underarm to Bottom Edge: 12¼ (12¼, 12¾, 12¾, 13¼, 13¼) inches
- Finished Length from Underarm to Cuff: 15 (15, 15½, 15½, 15¾, 15¾) inches
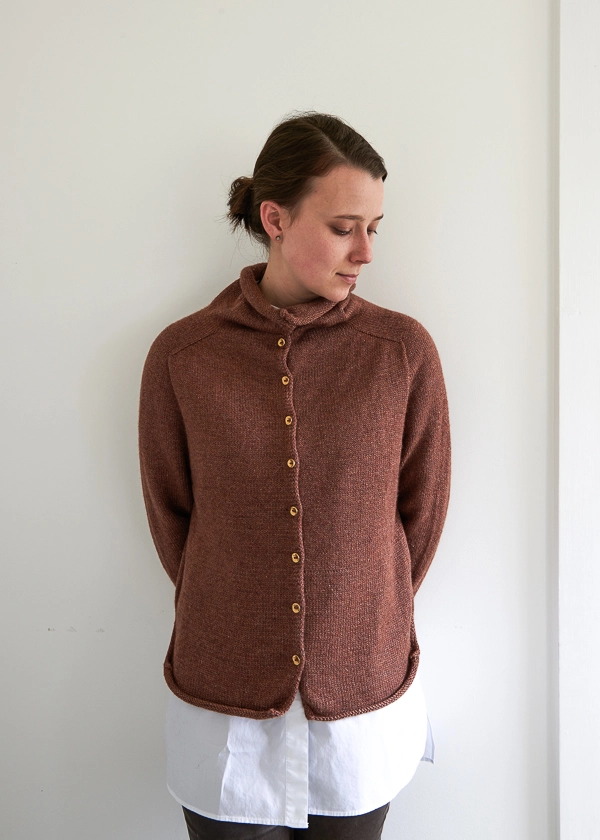
SAMPLE: The sweater pictured here is size 42½, modeled with 6½ inches of ease.
Pattern
The Top-Down Turtleneck Cardigan Pattern is available for purchase as as PDF download.
Update: New Color!
March 6, 2017
Recent glimpses of spring have added pep to my step, but so has our new palette of Mulberry Merino! Check out our latest story to see how the Top-Down Turtleneck Cardigan is just right for celebrating these new colors! -Laura


this would be a wonderful pattern to convert to steek. is there a lot of shaping in the front-center?
Hi Laura,
Thanks for reaching out! For this lovely pattern, there is not a lot of shaping in the front. However, the button holes are worked as you go so that would need to be taken into account if you were to knit it in the round and steek it. You would also have to add in a different type of button band than we use here but what a fun challenge that could be!
Best,
Cassy
My button band seems to be knitting up shorter than the body due to the slipped stitches. This causes a weird runching effect that I am sure was not the intention.
I looked online for tutorials, but couldn’t find anything. Help?
Hi Emily,
Thanks for writing in, and I’m sorry to hear that your sweater is not turning out quite right! Since the edge stitches are only slipped on every other row and either knitted or purled on the following row, they shouldn’t cause any gathering and the edge should lay flat, especially after blocking. It is hard to say exactly what might be going wrong without seeing work, so if you are still having difficulties, please feel free to send a picture to customerservice@purlsoho.com so we can try to troubleshoot this for you!
Best,
Julianna
I am looking for a top down sweater pattern, no cardigan. Could this be adapted? Your patterns and instructions are very good, so I thought I would inquire.
Hello Jill,
Thanks for reaching out! This is a great idea, you would need to knit the whole sweater in the round rather than flat. This means that you will need to translate all of the purl rows into knit rows. You would also eliminate all of the button holes.
Keep us posted on how it goes!
Warmly,
Marilla
Hi – For some reason I’m hopelessly confused by the the 4 short rows in this pattern. First, how come only 4 rows? And then, on the first wrap and turn, I purl back to the beginning. So shouldn’t the 2nd short row be knit again? Shouldn’t the shaping be on both sides? Help!!!! And many thanks – Willa
Hello Willa,
Thank you for reaching out! You will be knitting your short rows on both your purl and knit sides. The second row should read “Short Row 2 (wrong side): Purl to 15 stitches before next marker, wrp-t”
I hope this clears things up for you and let us know if you have any further questions!
Happy knitting,
Marilla
i love this cardigan, the size of the stitches etc but i’m thinking a regular round/jewel neck would make it even more versatile, is there a way to skip the “turtle” part and convert the pattern into a classic cardigan? thanks.
Hi Susan,
Great question! I think you could accomplish this quite easily by casting on the final number of collar stitches, which can be found at the very end of the collar instructions, and proceeding immediately to the yoke.
Best of luck, and please let us know how it turns out!
Julianna
I think there is a problem with the arithmetic. I am knitting the size 42.5. At the end of the shoulder saddle, I have 19 stitches. I then added 4 to each sleeve (in the section FOR SIZES (-38…). total is now 23.
Now I am in FOR ALL SIZES. for 42.5, I am told to increase every other row, 16x, which means a total of 32 sts each sleeve for a total of (…65,,, st). When I do the the arithmethetic:
19 + 4 = 23
23 + 32 = 55
not 65. So what do I do? I looked at the underarm increases, and it looks like I will have 67 sts at sleeve separation, not 77 (as stated).
It looks like I will get to a total of 83 sts with the additional sleeve cast-ons (not 93, as stated). At gauge, this is still 13.4″, which might be OK, but also might account for the tight sleeve/loose body I see on ravelry.
Hi Margaret,
Thanks for reaching out! I am happy to help! In the “SHAPE SLEEVE CAP” section for the size 42.5, you will go from 19 stitches for each sleeve to 31 stitches for each sleeve. You will work rows 1 and 2 and then work them an additional 2 times, adding a total of 12 stitches to each sleeve (19+12= 31 stitches). Then in the “For All Sizes” directions, you will work rows 1 and 2 and then work them an additional 16 times (17×2= 34 stitches). The 31 stitches that you end with on the first part of this section plus the 34 stitches that you add on the last part will equal 65 stitches.
I hope that this clears things up!
Cassy
Hello, I finished this project a few weeks ago. A good challenge and I’m extremely happy with the end result. I used Touch Yarns pure Merino. After blocking; perfect. Thank you for such a wonderful pattern.
I got my pattern last year when it was free on your website. it appears there is an error on p.2 COLLAR in the increase row following the set up row. the instructions give directions for 3 increases, but the end of the section says there are 4 stitches increased.
it seems to me there should be an increase just before the first marker is slipped as well as after.
is there an errata published for this?
Hi Nell,
Thanks for reaching out! This row should work out correctly with four increases! The repeat in this row, which reads, [knit to next marker, slip marker (sm), k1, m1L (see Notes), knit to one stitch before next marker, m1R (see Notes), k1, sm], includes two increases, a m1L and a m1r. You will be working this full repeat twice for a total of four increases.
I hope that clears things up!
Julianna
I too am confused by this row! am to understand that you increase 3 sts 4 times? and doesn’t that make the 2 sides lop sided? I am confused.
Hi Emily-Ann,
Thanks for reaching out! You will be working these increases at the markers you should have placed through the work in the previous Set-Up Round. They should be evenly distributed so the increases are made on either side! If your markers are in the correct places the increases will not be lop sided!
I hope this clears things up!
Warmly,
Gianna
Great pattern! How would it be if I knitted it in cotton, or does it have to be wool do you think?
Hi Anne,
Thanks for writing in. You can absolutely knit this cardigan with a cotton yarn! It would definitely have a different texture from wool, and it would not be as warm, but it would make a really nice garment for the spring or the fall. Cotton Pure, in particular, would be fantastic since it’s sportweight. Hope this helps!
All the best,
Lili
Hi! I am confused by the two sets of brackets. I purchased this pattern a while ago and bought the recommend material ‘Good Wool’. Based on chest measurement, I am making size 40.5-43.5. I think that should be second from the last number within the first set of brackets. Is this correct? What is the purpose of the two sets of brackets? Thank you!
Hi Christina,
Thanks so much for your question! The two sets of parentheses are just a way of organizing the pattern instructions that correspond with each of the cardigan sizes! And yes, the chest circumference 40.5 to 43.5 inches corresponds with size 46.5, which is the second to last number in the first set of parentheses, so you’re on the right track! I hope this helps!
All the best,
Cat
Thank you so much! I am really looking forward to this knit!